


How to Block Spam in Windows Mail in 6 Easy Steps
Let me introduce to you a fantastic Windows Mail spam blocker tool, compatible with all versions of Windows. Whether you're using Windows 10, Windows 11, or any other version, Clean Email is your go-to solution for keeping your inbox tidy and free from pesky junk mail.
Just give it a try - you have 1000 emails to clean for free and no credit card is required!
Here is how to block spam:
- Sign in to Clean Email with an email account you’re using in Windows Mail.
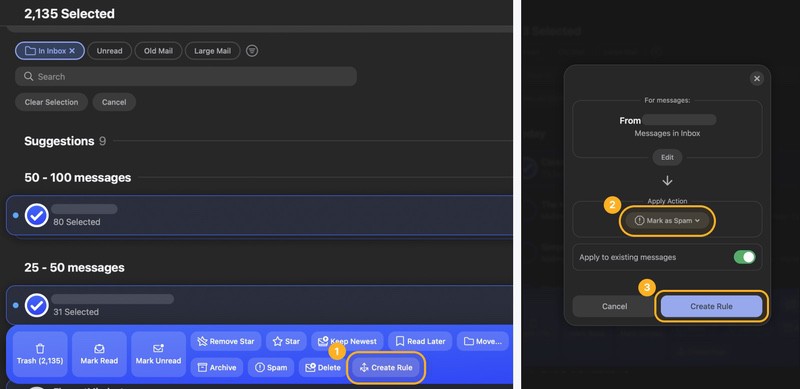
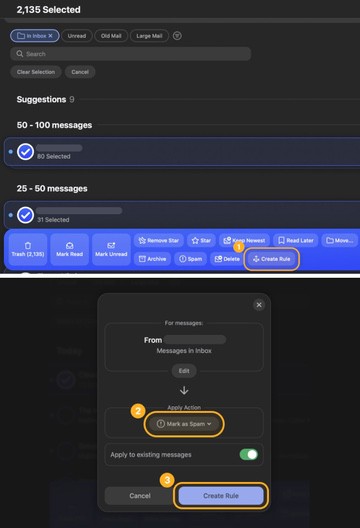
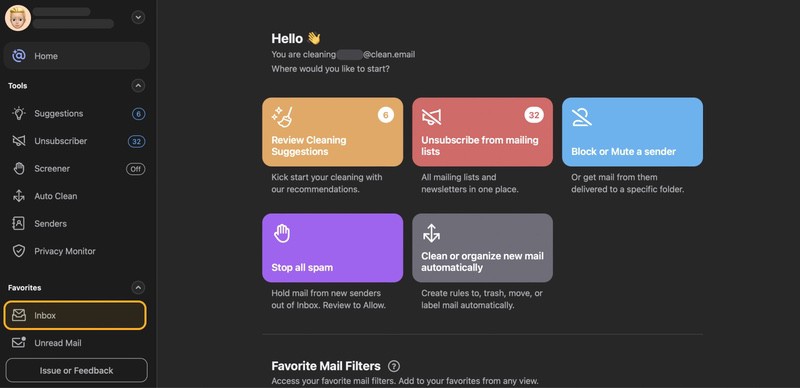
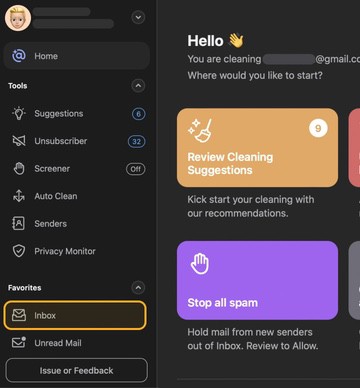
- Click Inbox or All Mail in the Menu on the left.
- Select all the message groups that are spam.
- Tap the Create Rule on the bottom.
- Then find the Apply Action section and choose Mark as Spam from the drop-down list.
- Click Create Rule.
Congratulations! Now, all your junk emails from Windows Mail are gone to the Spam folder. Moreover - all the new emails will be cleaned automatically by the Auto Clean feature you already have set up.
As you can see, it takes just six simple steps for Clean Email to accomplish something that might take hours to do when relying only on the native features present in Windows Mail. That’s why, Clean Email can be your Windows Spam Filter tool, being able to stop junk emails automatically.

Does the Windows Mail App Support Email Filters / Rules?
No, the Windows Mail app for Windows 10 doesn’t support email filters/rules. If you would like to take advantage of them to better organize your messages, then you can use a third-party email client like Clean Email.
💡 Note! Starting from the end of 2024, the Mail App on Windows 11 will be substituted with the new Outlook.
Users are urged to explore the New Outlook now, with the option to switch between the legacy Mail App and the New Outlook versions during this transition period.
Here is a video demonstrating effective techniques to manage spam and other messages in Outlook, helping you clean annoying emails.

Windows Mail Junk Settings
Follow these steps to move a single message to the Junk folder:
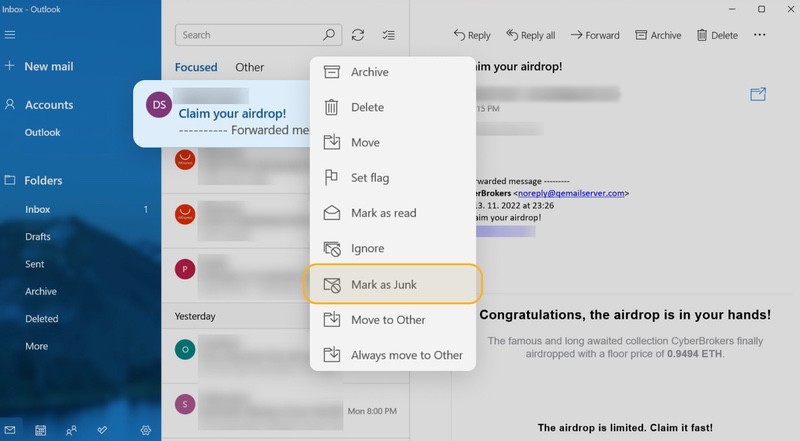
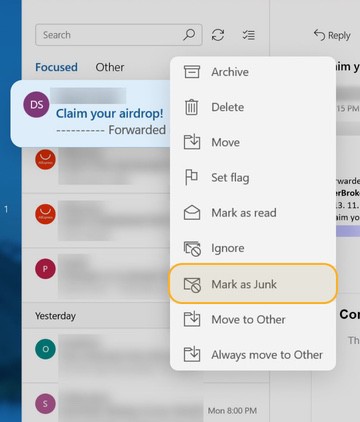
- Navigate to the folder where the message is located.
- Right-click the message.
- Select the Mark as Junk option.
If the message you want to junk is already opened, then you can simply click the three horizontal dots in the top-right corner and choose the Mark as Junk option.
How do you mark emails as junk in Windows 10 Mail (or Windows 11)?
To junk multiple messages at the same time, you can hold down the CTRL button and click on every message you want to select. Then, right-click any of the selected messages and select the Mark as Junk option.
💡 Note: We’ve also written a step-by-step guide on how to mark a message as spam in the Outlook desktop app on Windows.
By moving messages to the Junk folder, you inform the spam filter for Windows Mail that you want to prevent the same messages from reaching your inbox in the future. Unfortunately, the Windows Mail junk filter isn’t as reliable as it should be. Sometimes, the Windows Live junk mail filter is not working: here are reports about Windows Mail issues from users who received the same spam messages over and over again despite already reporting them more than once.
Outlook users solve the same problem by creating email filters, also referred to as inbox rules, but the Mail app doesn’t support them because it only has basic features like receiving and sending emails.
Another Microsoft junk mail issue is that moving all messages from multiple senders to the Junk Folder to update the Windows Mail spam filter can take a lot of time and effort because there’s no convenient way to select them.
For these and other reasons, the users of Windows 8, Windows 10, and Windows 11 should equip themselves with a third-party inbox cleaner like Clean Email. With its help, getting rid of unwanted messages and preventing them from ever again finding their way into your inbox becomes effortless.
Mark Messages as Spam in Windows Mail Using Clean Email
Clean Email provides a wealth of useful inbox and spam management features that Microsoft decided not to include in the Windows Mail application for the sake of keeping it simple enough for casual users to get started within no time. Hence, the Windows Live Mail spam blocker feature doesn't work well, it may be available through an external tool.
By default, Clean Email groups messages in the Inbox folder by:
- sender (name and email),
- email address,
- sender domain,
- subject,
- date,
- recipients,
- labels.
These extensive grouping options make it much easier to select each and every spam message you want to get rid of. You can even combine them with Clean Email’s Auto Clean feature to instantly create email rules based on them. Here’s how:
- Open your favorite web browser, go to https://app.clean.email, and sign in to the email account associated with the Windows Mail app.
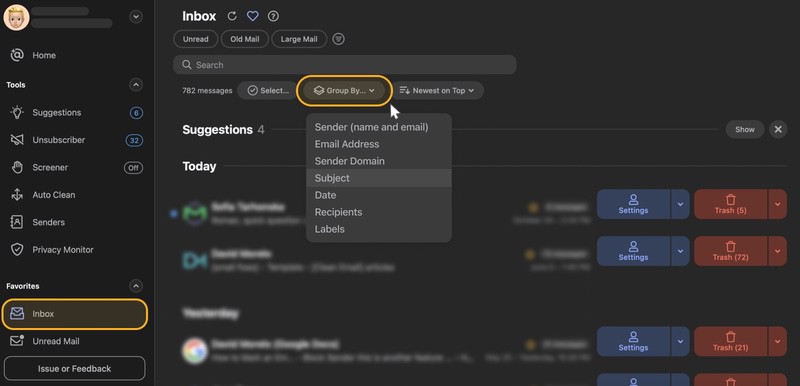
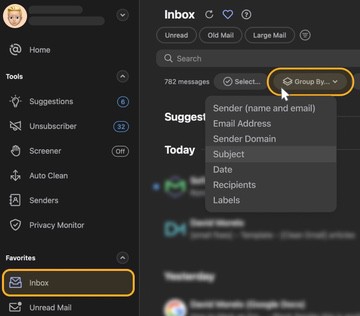
- Open the Inbox folder.
- (Optional) Use the Group By dropdown menu to change how messages are grouped.
- Tap the icon next to each message group you want to select.
- You can now:
- Click the Spam button to mark all selected messages as spam.
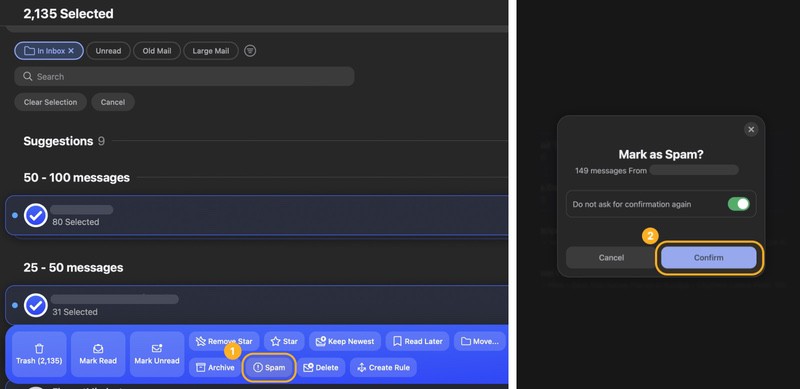
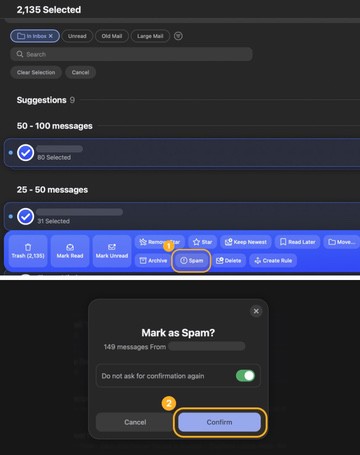
- Or click the Create Rule button to create a new Auto Clean rule based on the selected messages. With this rule, you can choose to Mark as Spam all future (and existing) similar emails automatically.
Clean Email significantly simplifies the process of blocking junk mail in Windows Live Mail, achieving results in just a few steps.
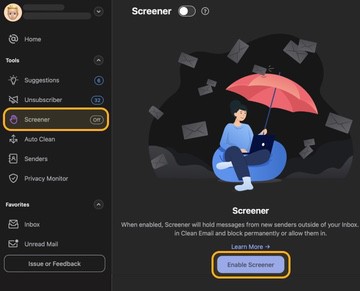
💡 Tip: Email spam can be relentless, and it’s completely understandable if you want to take a break from it. Clean Email makes this easy with its Screener feature, which can be enabled to hold messages from new senders outside of your inbox until you decide which of them you want to keep.

FAQ
When does Windows Mail delete spam messages?
Windows Mail automatically deletes messages that are marked as spam and moved to the Junk folder after 10 to 30 days.
What should I do if messages end up in the Junk folder by mistake?
If a message ends up in the Junk folder by mistake, you should move it to your Inbox or any other suitable folder to prevent it from becoming automatically deleted.


