


How to Auto Forward Emails in Outlook Without the Mess
Most of us have more than one email address, usually two to four. Work, personal, maybe one for shopping or newsletters… and juggling all of them can get messy. That’s where email forwarding comes in. It lets you move emails from one account to another so you don’t have to check multiple inboxes all day.
Learning how to forward Outlook emails to another email can really simplify your workflow, especially if you often switch between accounts.
But here’s the thing: auto-forwarding moves everything. Spam, promos, old junk: it all comes along for the ride.
This is where Clean Email can make life a lot easier. It doesn’t just forward emails—it filters, cleans, and organizes your inbox automatically, so only the stuff you care about lands where you want it.
Your privacy is fully protected with Clean Email. The service is fully GDPR and CCPA compliant, which are two of the world’s strictest data protection regulations. That means your personal information stays safe, you stay in control of your data, and there’s no risk of non‑compliance, even for business use.
Clean Email has been helping users for over 10 years and safely processes over 5 billion emails yearly, so you can organize and automate your inbox with complete confidence.
Here’s how it can help:
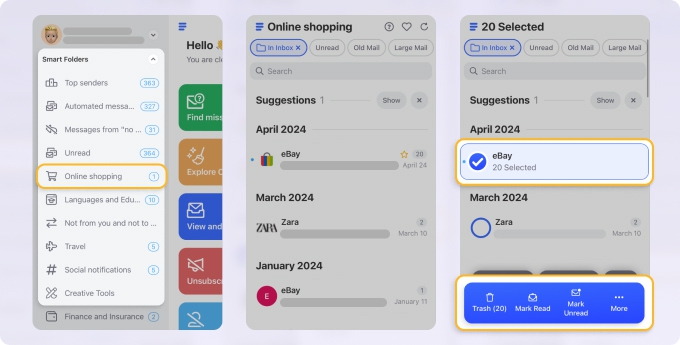
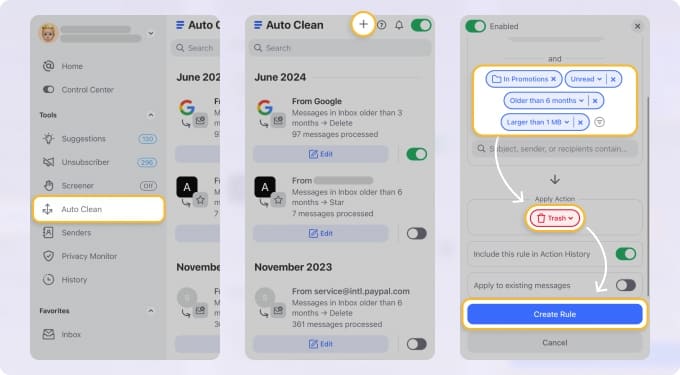
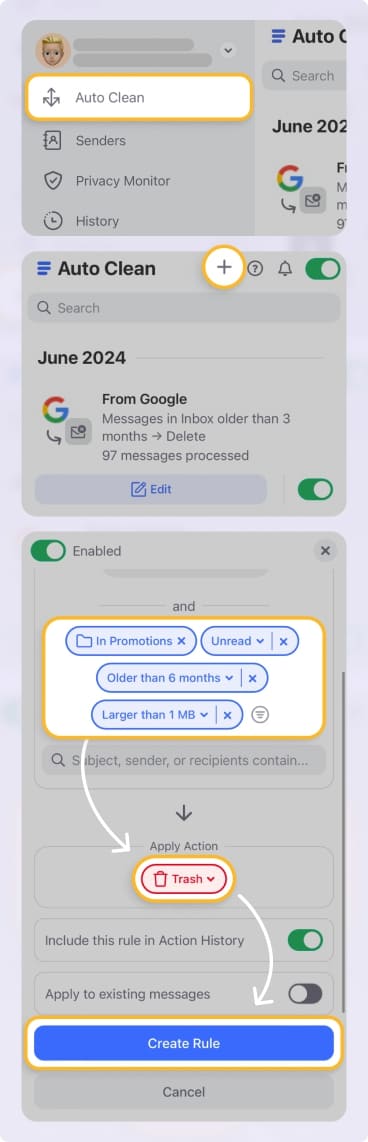
- Want to forward only the important emails? Outlook forwards everything by default. Clean Email’s Auto Clean can delete or archive newsletters and promos first, so only the emails you care about make it through. → Try it for Free
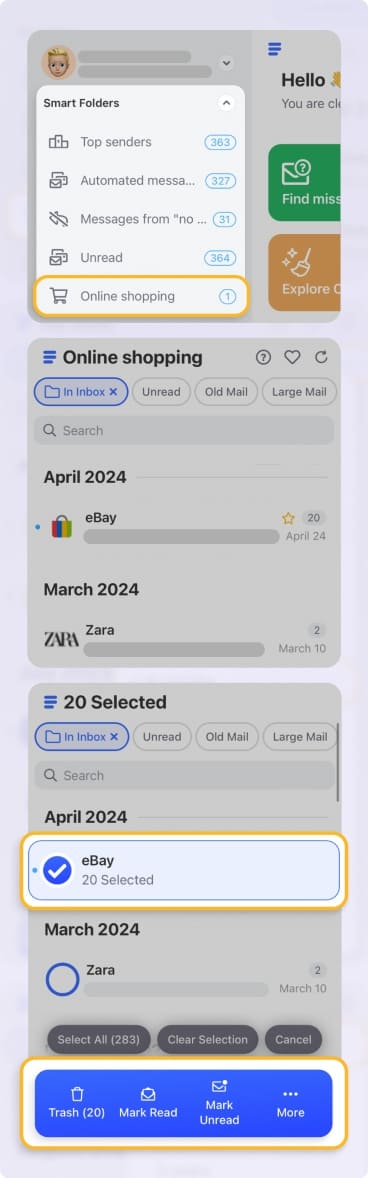
- Tired of your forwarded inbox getting messy? Old account emails can flood your main inbox with duplicates or outdated messages. Clean Email’s Smart Folders and Cleaning Suggestions help clear the clutter fast. → Try it for Free
- Wish forwarded emails could be organized automatically? Clean Email can label, move, or archive emails before they’re forwarded, so messages arrive already sorted. → Create rules to auto‑organize emails on the way in. → Try it for Free
- Want to clean it on the go? Waiting for coffee or a train is the perfect time to manage your inbox on your iPhone or Android. The Clean Email mobile app lets you quickly delete, archive, or sort emails in seconds—keeping your account tidy before forwarding happens. → Try it for Free on iOS or Android
Combining Outlook’s forwarding with Clean Email’s automation means less inbox chaos, less wasted time, and a cleaner email life.

How to Automatically Forward Emails in Outlook Web
- Go to Outlook.com and log in to your account.
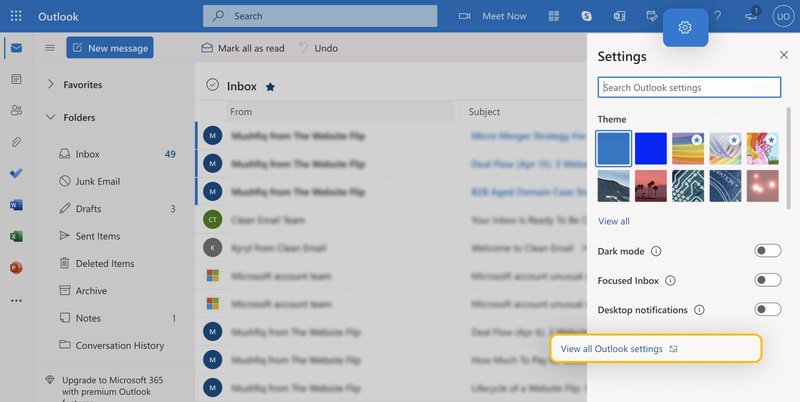
- Select the Settings icon from the toolbar.
- Click the View all Outlook settings option at the bottom of the newly appeared Settings pane.
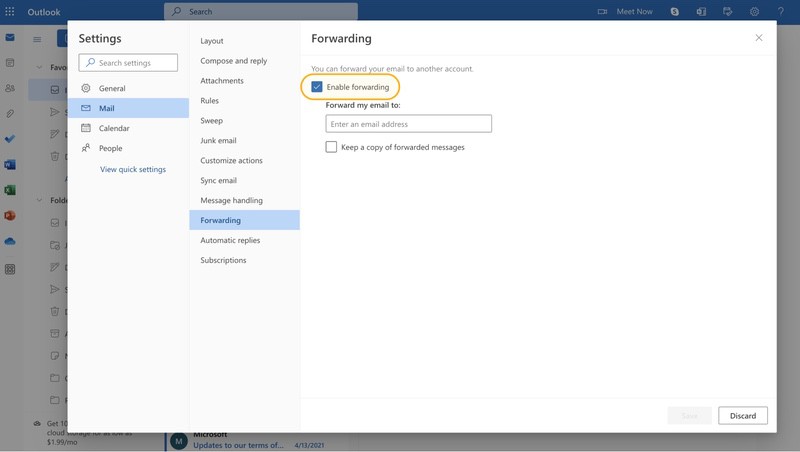
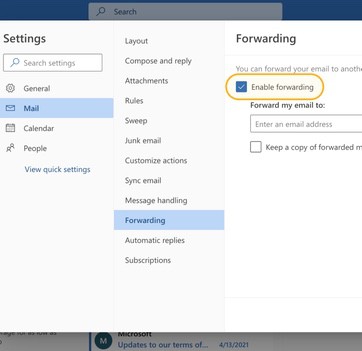
- Select Mail → Forwarding in the Settings dialog box.
- Select the Enable Forwarding check box.
- Enter the email address where you want the forwarded messages to be sent.
- Select the Keep a copy of forwarded messages check box if you want to keep copies of the forwarded messages in your Outlook account.
- Finally, click Save.

How to Automatically Forward Emails in Outlook Desktop
- Open the desktop application.
- Activate the Home tab. Next, click Rules (located under the Move section of the ribbon).
- Choose Manage Rules & Alerts and select New Rule.
- Now, the Rules Wizard dialog pops up.
- Under Start From a Blank Rule, select Apply Rule on Messages I Receive. Click Next.
- Choose which messages you want to forward. To forward all emails, leave everything blank and click Next.
- Select Forward to People or Public Outlook group. Enter the email address where you want to forward emails automatically.
- If there are any, select the email criteria you want to exclude from this rule.
- Name the newly created rule, and don’t forget to check the Turn On This Rule option. Finally, click Finish.
If you would at any point like to stop automatically forwarding emails, all you need to do is disable the rule you’ve just created from Rules → Manage Rules & Alerts.
How to Set Up Email Forwarding in Outlook Mobile
Unfortunately, there is no way to set up Outlook automatic forwarding directly from the mobile app. However, you do have a few options based on your needs.
- You can individually forward messages by selecting them and choosing Forward.
- You can access Outlook from your mobile web browser and go through the steps on how to set up Outlook email forwarding on the web.
💡 Note: If you have an iPhone, you can also check out our guide on how to forward emails from iPhone.
Why Use Outlook Automatic Forwarding?
Outlook automatic forwarding is a valuable feature for enhancing your email management efficiency. If you're managing multiple email accounts, automatic forwarding can channel all your communications to one preferred address, ensuring no critical emails are overlooked. It's also a helpful tool for balancing work and personal communications, segregating each type into its respective account for easier tracking.
Additionally, it can act as an insurance against accidental email deletion, as forwarded emails provide an extra layer of backup. By using automatic forwarding, you can simplify your digital communication process, reduce clutter, and focus on what's truly important.
Once you know how to auto forward emails in Outlook, you can program specific messages that end up in one email account to go to the preferred address you own. This keeps unnecessary messages out of your work or personal address so it’s in the correct place for you to keep up with.
💡 Note: Outlook gives users the option to forward messages both manually and automatically. The instructions diven in this article will outline how to automatically forward emails in the Outlook app. When it's necessary to manually forward a message, the following steps should be taken:
- In the Outlook web app, you can forward an individual email by opening it, clicking on the "..." icon at the top, selecting Forward, entering the recipient's email, and hitting Send.
- For the Outlook desktop application, simply open the desired message, click Forward on the toolbar, fill in the recipient's email address in the To field, and press Send.
Final Thoughts
Automatically forwarding emails in Outlook is a simple way to keep multiple inboxes under control and save yourself from constantly switching between accounts. Once it’s set up, your messages flow exactly where you need them, making email management a lot easier.
Pairing auto‑forwarding with smart inbox tools like Clean Email takes things a step further. By cleaning, organizing, and filtering messages before they’re forwarded, you can avoid clutter, reduce spam, and keep your main inbox focused on the emails that actually matter.
Whether you’re working on a laptop, tablet, or just a few spare minutes on your phone, this setup lets you spend less time on email and more time on what matters most.
Discover our practical guides on Outlook automation, designed to help you boost productivity and streamline email organization:
How to Auto Forward Emails in Outlook - FAQs
Why use Outlook automatic forwarding?
There are many examples of why it can be useful to automatically forward an email in Outlook. For example, your boss may ask you to forward all messages from a certain customer to their email address. Automatic forwarding can also be a highly effective backup tool, allowing you to easily duplicate all incoming email messages by sending them to another email address.
Can you forward several emails at once in Outlook?
In the Outlook desktop app, forwarding multiple emails at once as separate messages isn't natively supported. You can attach multiple emails to a new email message for forwarding. Similarly, the web version of Outlook also lacks this function.
How to automatically forward emails in Outlook app?
If you want to set up an Outlook rule to forward email in the Outlook web app, go to ‘Settings’ → ‘View all Settings’ → ‘Mail’ → ‘Forwarding’. There, create a new Outlook auto forward rule and click the ‘Save’ button to activate it. In the Outlook desktop app, you can automatically forward emails by creating a new Outlook auto forward rule under the ‘Home’ tab → ‘Rules’ → ‘Manage Rules & Alerts’. This rule can specify the conditions an email must meet to be forwarded to the designated email address.
How to forward Outlook to Gmail?
If you want to automatically forward emails from Outlook to Gmail, all you need to do is create a corresponding rule in the Outlook desktop application. To do that, select ‘Rules’ on the ‘Home’ tab, choose the ‘Manage Rules & Alerts’ option in the dropdown, and then click ‘New Rule’.
How to automatically forward emails in Outlook 365?
In Outlook 365 cloud-based service, automatic forwarding can be set up by going to 'Settings' → 'View all Outlook settings' → 'Mail' → 'Forwarding'. Here you can enter the email address you wish to forward emails to, and choose whether to keep a copy of forwarded messages in your primary account. Outlook 365 cloud-based service and Outlook.com share the same interface and functionality, which is why the steps to set up automatic email forwarding are identical in both.
How can I forward a folder of emails in Outlook?
In Outlook, forwarding a folder of emails isn't directly possible. What you can do is select all the emails in that folder (Ctrl + A for Windows, Command +A for Mac) and attach them to a new email for forwarding (hit 'Forward' in the 'Home' tab to create a new message with the selected emails). However, note that this will forward them as attachments in a single new email, and not as separate messages.


