


Don’t Let Your Outlook Inbox Turn into a Mess
With the constant influx of emails we receive daily, maintaining an organized inbox can be challenging. Implementing regular Outlook email management can prevent your inbox from becoming chaotic in just a few short days. Check out our brief video on how to create email rules in Outlook and continue reading for more in-depth information.

Many users manually clean their inboxes by marking spam messages and moving legitimate emails into appropriate folders. However, this method is not at all time efficient. Luckily, there is a solution that makes this process much easier — sorting Outlook incoming emails into specific folders automatically.
Microsoft lets users automate certain processes, like moving items into specific folders. These Outlook rules work in the background each time the triggering event occurs (like receiving a new message from a specified sender), and you never have to even lift a finger once you’ve programmed it.
💡 Note: Additionally, we'll explain how you can use the Clean Email app to make this process even simpler. It allows you to set up advanced rules to automatically organize incoming messages in just a few clicks.
What’s more, automation tasks rarely miss messages, whereas you may miss an email or two when you go through the process manually and select each message individually. This can prevent future frustrations when you can’t find a specific email thread or notice random messages in the wrong place.

How To Automatically Send Emails To a Folder In Outlook
By setting up Outlook to automatically sort your messages into folders, you can maintain a much tidier inbox. However, the process for doing this can differ depending on the platform you're using - whether that's Outlook on Windows or Mac, Outlook.com, or the mobile app.
For Desktop app users
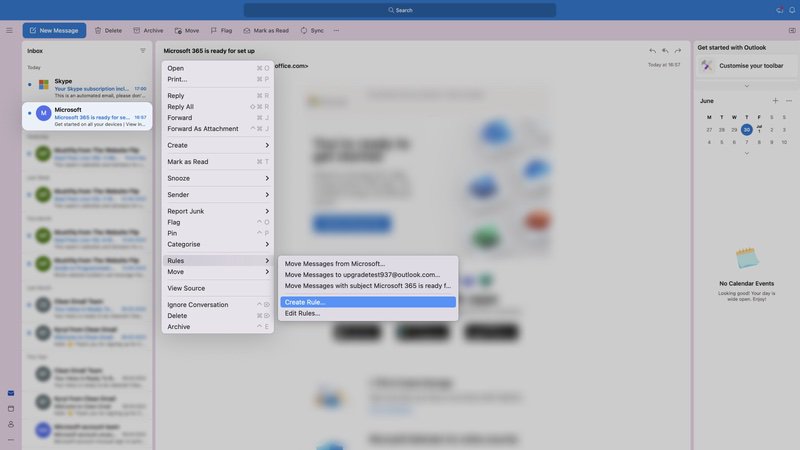
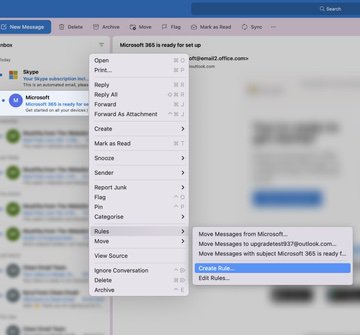
- To start, navigate to your inbox, then right-click on any message you've received. From the drop-down menu that appears, select Rules and then Create Rule.
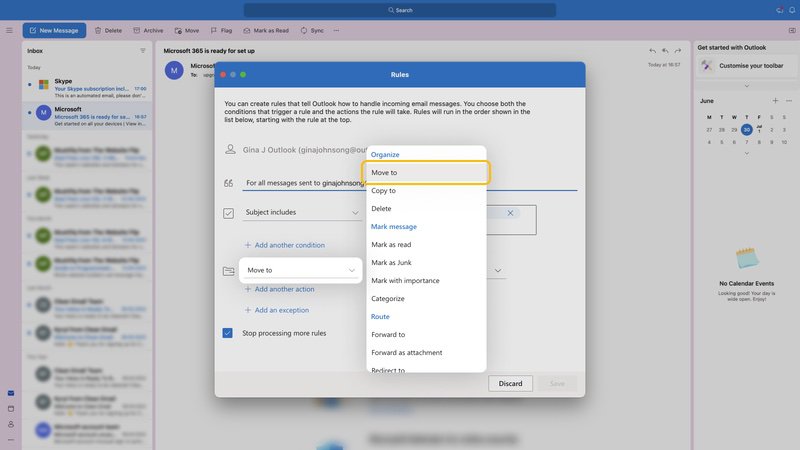
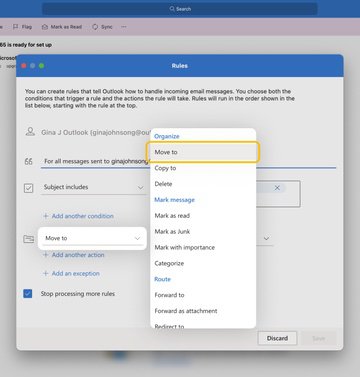
- Specify the conditions that activate a rule and define an action to be taken for such messages. Pick the ‘Move to’ action and either select an existing folder or create a new one for the rule.
- Finally, click 'Save' to establish the rule.
From now on, your email client will move emails to the correct folder following the rule you created.
To stop it from automatically moving your emails:
- Open the Home tab and click Rules → Manage Rules & Alerts.
- Delete or modify the rule.
- Click OK to confirm.
💡 Note: We also have a guide on how to automatically delete emails in Outlook and about using the AutoArchive feature from Microsoft.
For Web app users
There are two different web-based versions of Outlook — Office 365’s Outlook Web and Outlook.com. These steps will help you set up an automation for Office 365’s web version:
- Log in to your Microsoft 365 account and launch the Outlook app.
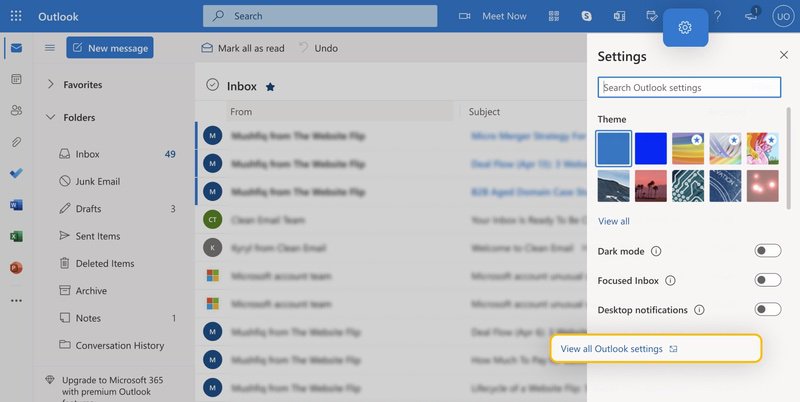
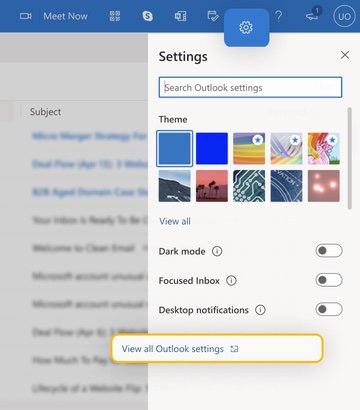
- Click the Settings gear icon.
- Select the View all Outlook Settings option.
- Navigate to Mail → Rules.
- Click Add New Rule.
- Configure the new rule to move messages from the desired sender to the desired folder.
Outlook.com now uses Sweep rules to handle incoming email messages. Here’s how to set those up:
- Log in to your account at Outlook.com.
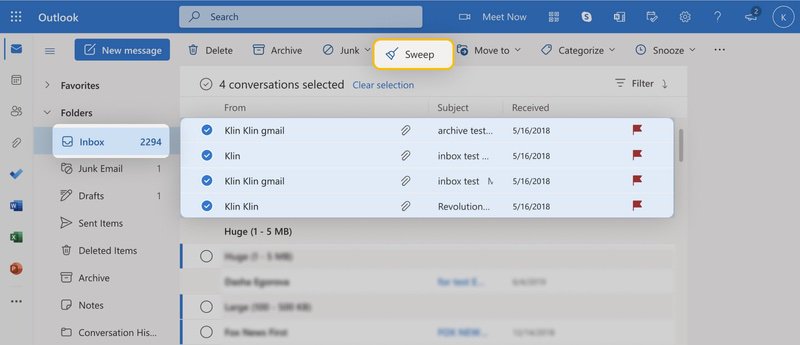
- Select a message or messages from your inbox.
- Click Sweep in the top menu bar.
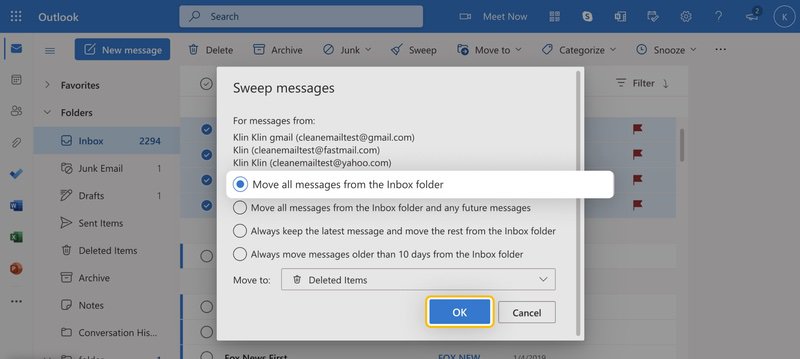
- Choose one of the four available actions and specify where to move the selected messages.
- Select OK to save.
For Mobile app users
Unfortunately, there is no way to set up a rule to automatically move emails to a folder directly from the mobile app. However, you do have two options based on your needs.
- You can access your inbox from your mobile web browser and go through the steps on how to set up email rules on Outlook web.
- You can use Clean Email to set up an Auto Clean rule that moves messages into a designated folder automatically.
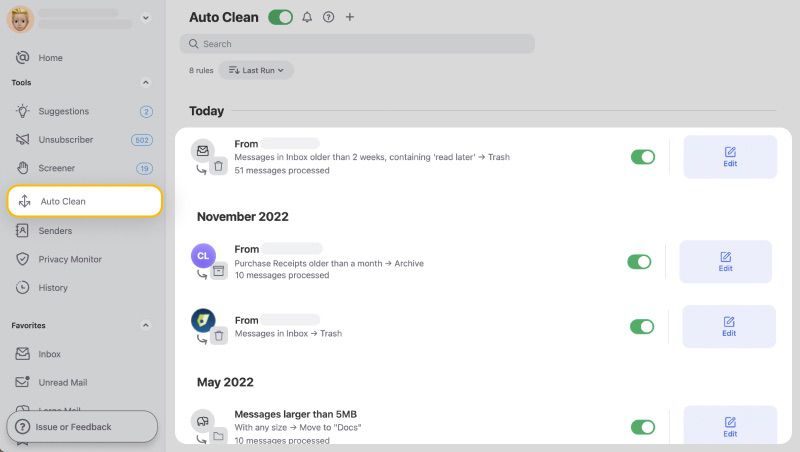
Automatically Move Emails to Folder in Outlook Using Clean Email
Managing multiple inbox rules across several different versions of Outlook can get confusing rather quickly. The good news is that third-party apps let you create email rules with a few clicks and manage them all from one centralized location. One such app is Clean Email, and we believe that all email users should know about it.
The Auto Clean feature works a lot like Microsoft’s rules, only better. For example, Auto Clean rules are highly customizable. You have the convenience of selecting multiple senders in any folder and applying a rule to all of them at once, which is a straightforward process. In contrast, Microsoft requires you to manually enter each sender's address individually when filling in the criteria for the rule, which can be a time-consuming task.
Also, if you enable Action History Summary in the Preferences, you'll receive an email with a regular summary update. This way, you will be up-to-date about all the Auto Clean actions the app performs to keep your mailbox clean. You will never miss an important message because it was affected by a rule, which is yet another thing Outlook doesn’t do.
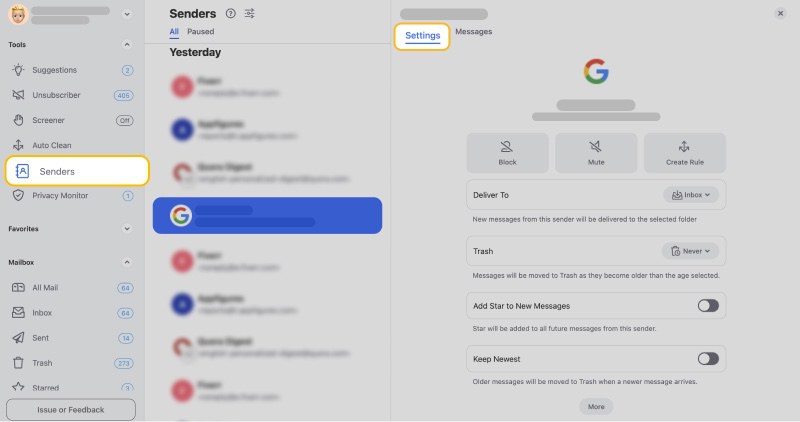
The Senders feature also lets you control the message delivery for each sender in your Inbox. You can block a sender, mute notifications for their incoming messages, or create an Auto Clean rule easily for each sender’s settings. This is a great alternative to Sweep rules as Sender Settings provide more useful quick actions while Sweep rules provide only 4 pre-set actions.
To set up an Auto Clean rule using Clean Email, simply follow these steps:
- Open the app and log into your account.
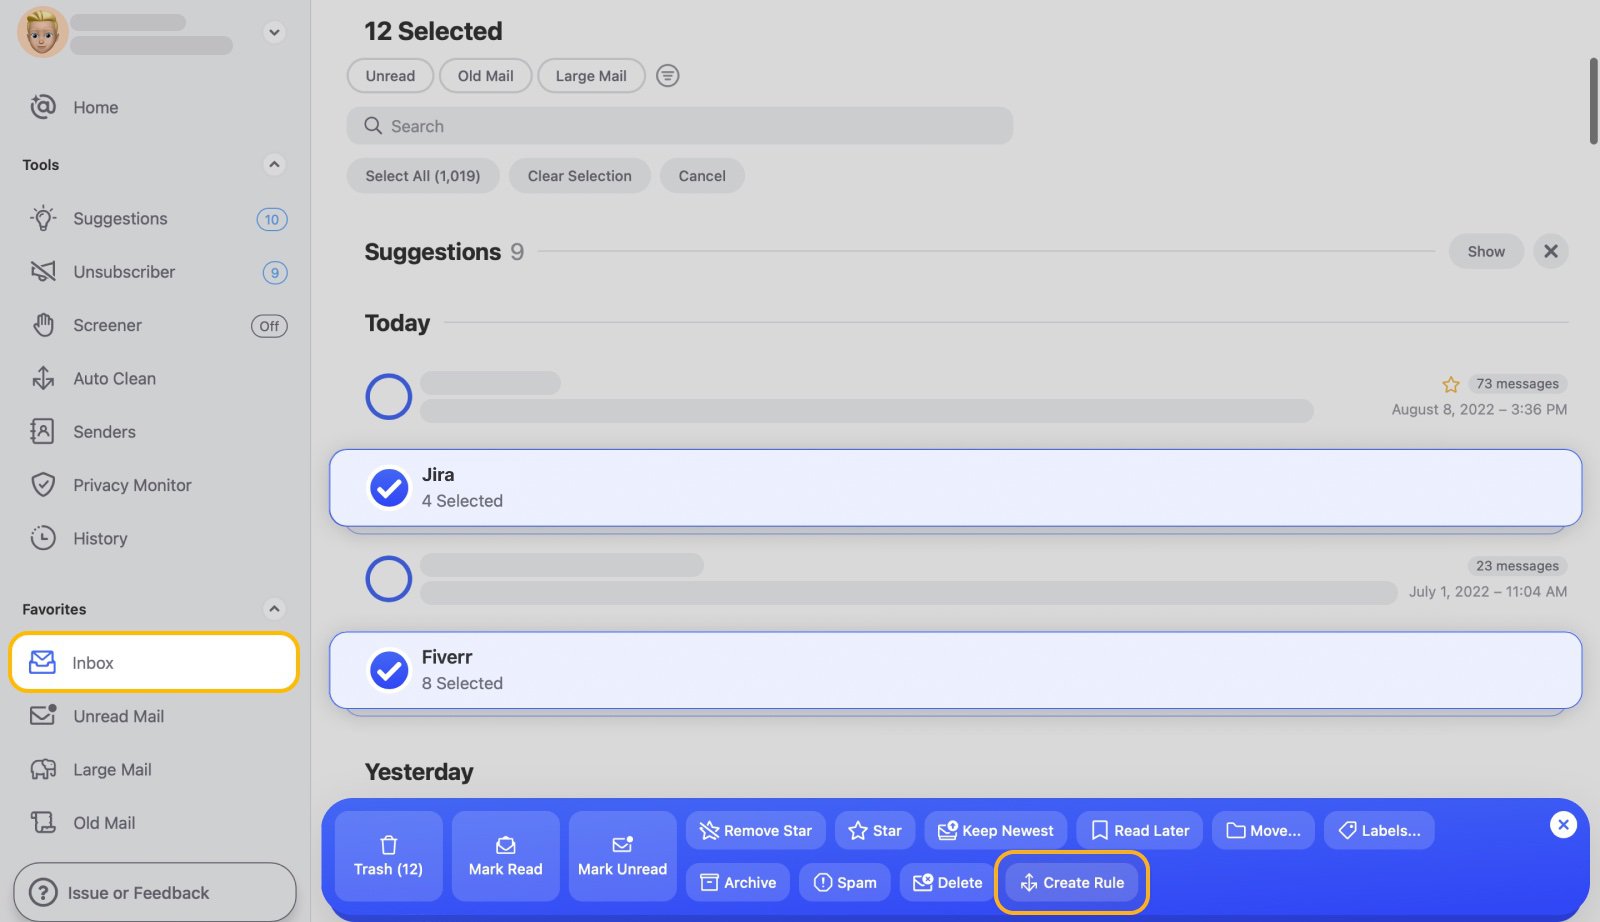
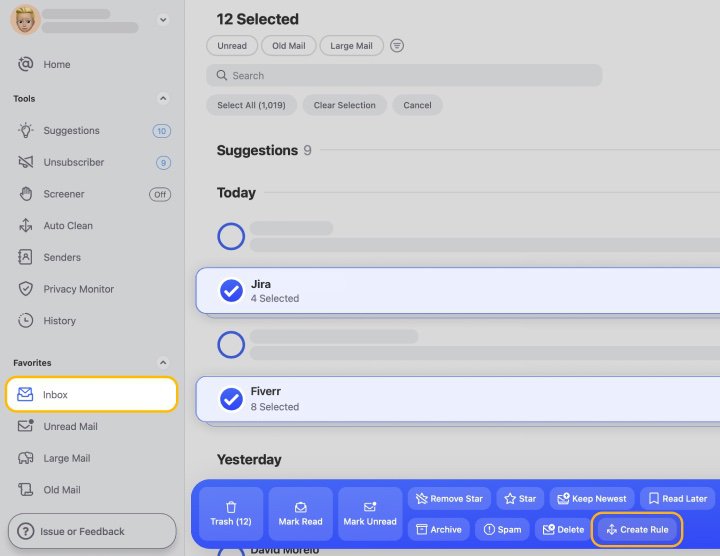
- Select any messages you want.
- Click the Create Rule button using the blue toolbar.
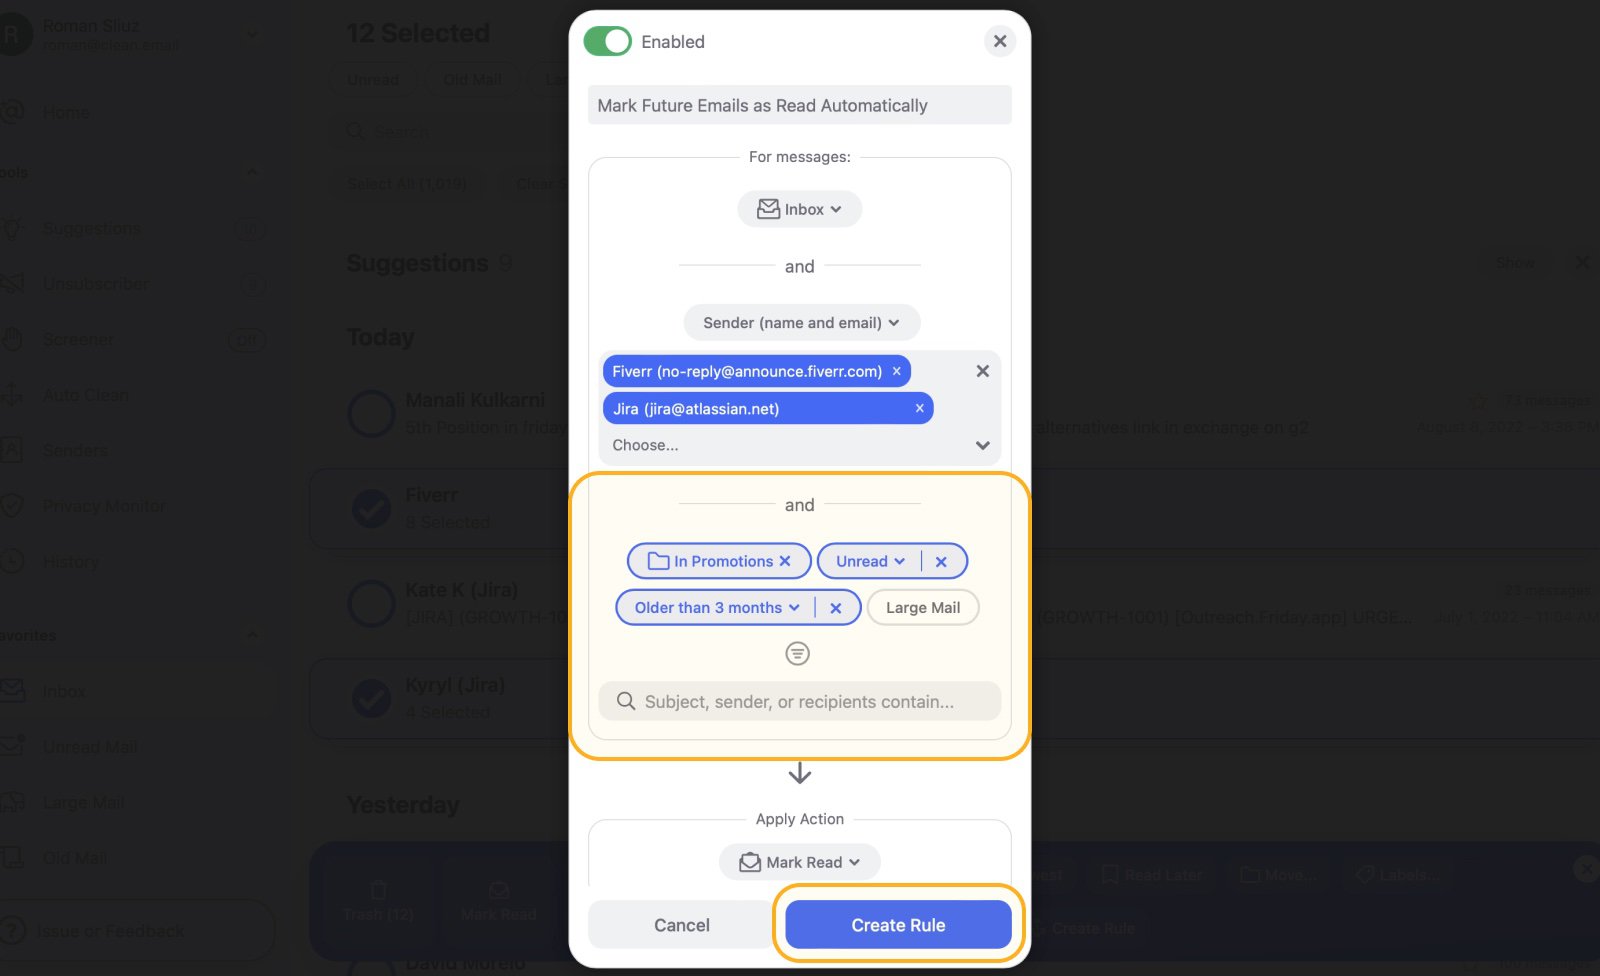
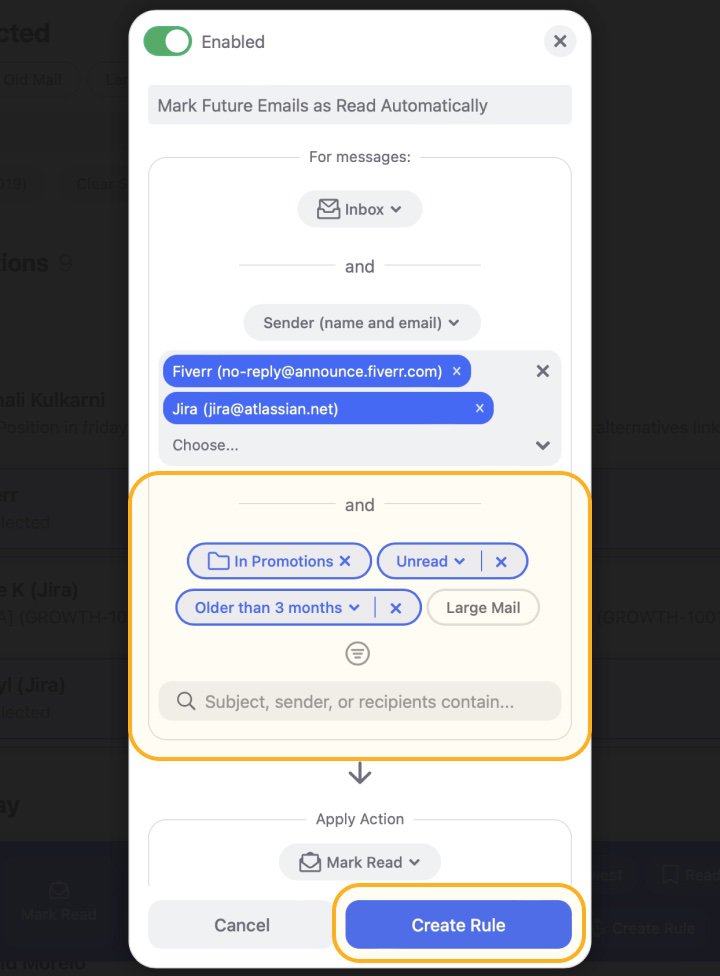
- Select Edit and customize your rule.
- Choose the rule criteria and select what action you wish to apply to new messages from any senders you specified.
- Click Create Rule again and the rule will be added to your Auto Clean dashboard.
Some other features built into Clean Email include:
- Cleaning Suggestions. This feature offers recommendations to help you optimize your mailbox. It can even suggest automation ideas for automatically sorting emails in Outlook based on other users' actions, as it learns which messages they frequently move into dedicated folders.
- Screener. This feature places emails from unrecognized senders into a quarantine folder outside of your inbox. From the Screener tab, you can review them first and decide whether to allow or block these new senders.
- Privacy Monitor. This feature actively searches the internet for known data breaches and security incidents. It alerts you if your information has ever been accidentally or maliciously leaked online. If a breach has occurred, Privacy Monitor provides advice on changing your account password, enabling multi-factor authentication, and using password managers, among other security measures.
- Unsubscriber. With this feature, emails sent as part of a mailing list are available in one place. With a simple click of a button, you can request to unsubscribe without having to search for the often elusive unsubscribe button or deal with time-consuming "why are you leaving us" questionnaires.
- And more!
Clean Email supports ‘outlook.com’ addresses (and other IMAP-based email providers). We also prioritize security and data privacy, so you won’t have to worry about us selling, sharing, or transferring any of your information. Best of all, you can try the app for free.
How to Automatically Move Emails to a Folder in Outlook - FAQs
How do I get emails to go directly to a folder in Outlook?
You can make emails go directly to a specific folder in Outlook by creating an inbox rule. You can do that directly from this email service or using a third-party inbox organizer app like Clean Email.
How do I move emails from one sender to a folder in the Outlook app?
If you are using the Outlook app on your mobile device, you have the option to move emails from one sender to a folder by utilizing a third-party inbox organizer app such as Clean Email. The Outlook mobile app does not provide the ability to select multiple messages simultaneously for moving. Additionally, it does not support the creation of automated rules directly from the mobile application.
How to automatically move emails to a folder in Outlook 365?
When you access your Outlook 365 account on the web, you can go to ‘Settings’ > ‘View all Outlook settings’, then choose ‘Mail’ → ‘Rules’ and ‘Create a new rule’. In the desktop app, create a rule by going to ‘File’ > ‘Manage Rules & Alerts’ > ‘New Rule’. Set the conditions and select the folder for the emails.
How to move all emails to a folder in Outlook?
To move all emails to a folder in the Outlook desktop app, select the emails you want to move, either individually or by pressing Ctrl + A to select all. Then, right-click on the selection, choose ‘Move’, and select the desired folder to move the emails to.


