


How Create an Email Group in Apple Mail
Email groups or distribution lists are helpful when you send messages to the same recipients regularly. They can save you time from adding email addresses one-by-one and also eliminate errors from selecting an incorrect contact.
💡 As examples, you might create an email group for work that includes coworkers or a project team, for school that includes classmates or club members, or for personal messages that includes family or community members.
📌 To use an email list in Apple Mail, you’ll create the group using the Contacts app on Mac, iPhone, and iPad.

How to make a group email list in Mac Mail
You can easily set up an email group in Contacts on Mac, add others to it, and edit the list as needed.
- Open the Contacts app on Mac.
- If necessary, show the sidebar with View → Show Lists in the menu bar and then select an account.
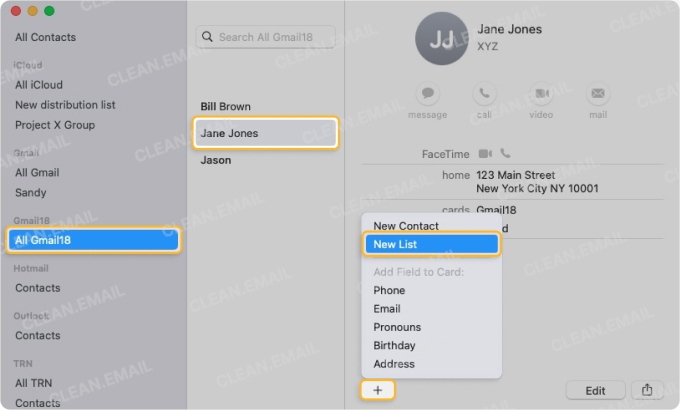
- Either click the plus sign at the bottom or File in the menu bar and pick New List.
- Enter a name for the list in the sidebar and press Return. Try to choose a meaningful name that corresponds to its purpose. For instance, “My Email Group” isn’t as recognizable as “Smith Project Team.”
- Locate a contact you want to add to the new list and drag their card to the list name in the sidebar. Continue for additional contacts.

💡 Tip: Another way to create a Mac Mail group email list is to select one or more contacts, choose File → New List From Selection, and enter a name for the list in the sidebar. You can still add other contacts to the list anytime.
If a contact has more than one email address, you can pick which one to use after you create the list.
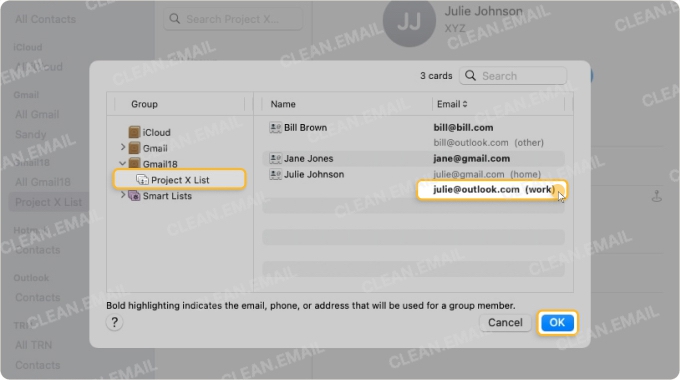
- Choose the list and select Edit → Edit Distribution List in the menu bar.
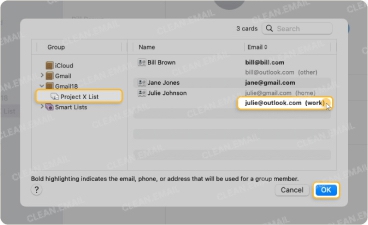
- In the pop-up window, select the list and pick the address for the contact in the Email column on the right. The email address that will be used displays in bold font.
- Click OK.
How to create an email group in Apple Mail on iPhone and iPad
Creating an email group on your iPhone or iPad is just as simple as it is on Mac.
- Open the Contacts app on iPhone or iPad.
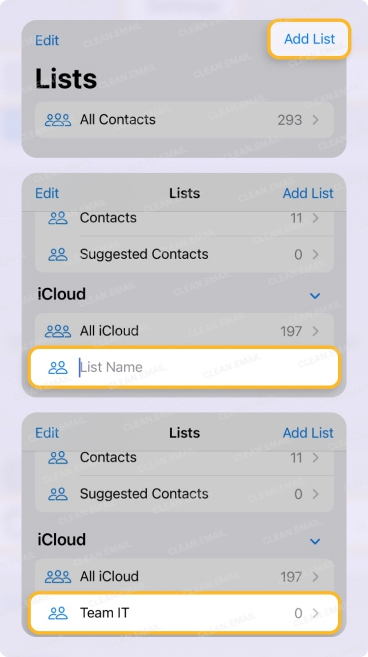
- On the main Lists screen on iPhone or Lists sidebar on iPad, tap Add List.
- Choose an account if prompted.
- Enter a name for the list and tap Done.
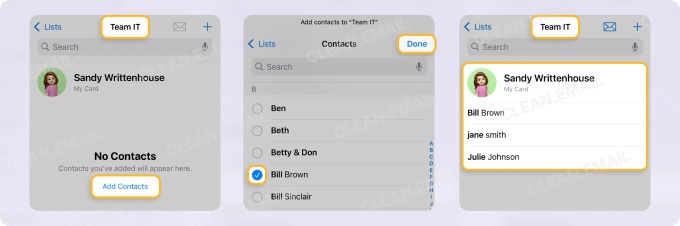
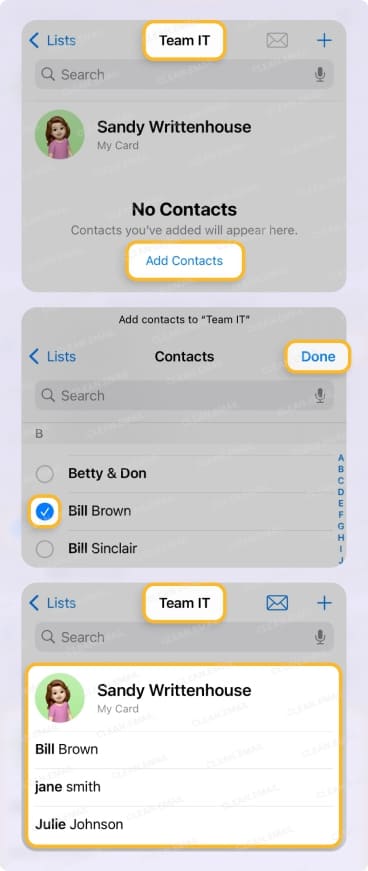
- Select the new list and pick Add Contacts.
- Mark the contacts you want to add, and tap Done when you finish.

To add more contacts later, select the list, tap the plus sign at the top, mark the contact(s), and tap Done.
💡 Related read: learn how to create a group email list in Gmail if it is your primary email client.
How to Edit a Group Email List
Along with adding more contacts to a list, you can make changes to an email group you create. You can rename the list, remove group members, or delete the list.
In Contacts on Mac, you can do the following:
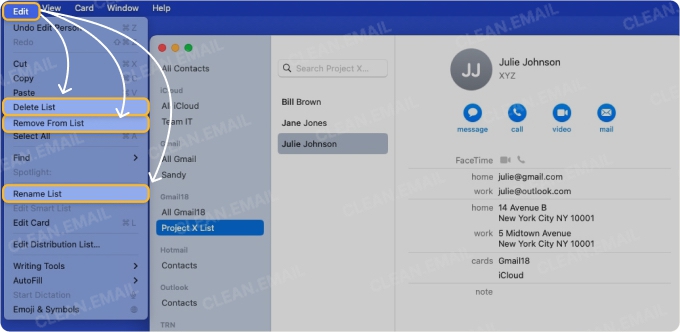
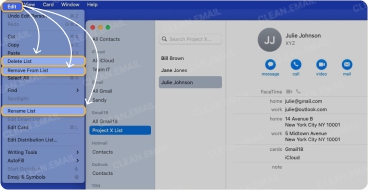
- Rename the list: Click the list name in the sidebar twice or select Edit → Rename List in the menu bar.
- Remove contacts from a list: Choose the contact and select Edit → Remove From List in the menu bar.
- Delete a list: Pick the list in the sidebar and select Edit → Delete List in the menu bar.
In Contacts on iPhone and iPad, you can do the following:
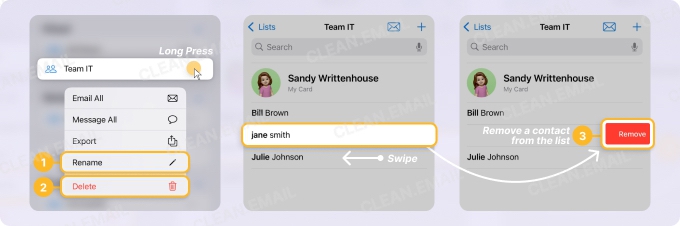
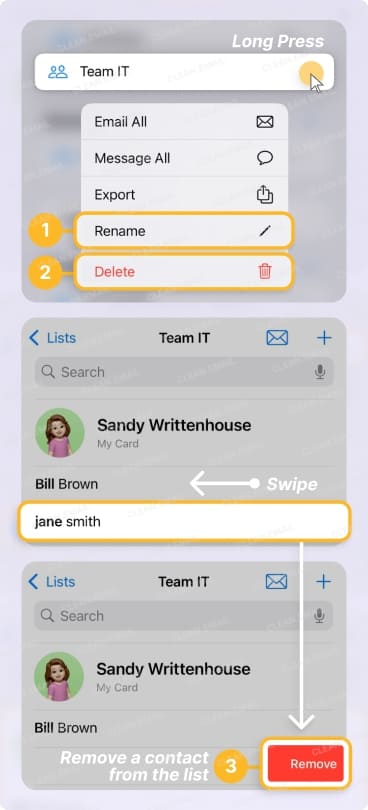
- Rename the list: Long-press the list and pick Rename.
- Remove contacts from a list: Swipe the contact’s name from right to left and pick Remove.
- Delete a list: Long-press the list and pick Delete.
Note that if you delete a list you create on Mac, iPhone, or iPad, it does not remove those contacts from your overarching contact list; it only deletes the list you set up.
How to Email the Group in Apple Mail
Once you set up your email list in the Contacts app, sending a message to the group is a breeze in Apple Mail on Mac, iPhone, and iPad.
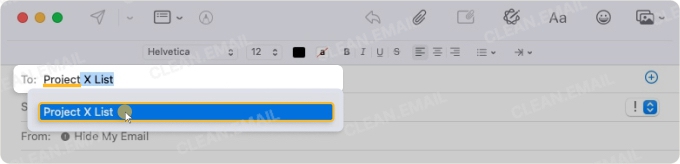
In Mail, compose a new message, start typing the list name in the To field, and select the list from the suggestions that appear.

You’ll notice that the email addresses of all contacts in the list then display in the To field. But on Mac, you can change this to only show the list name as you compose the message.
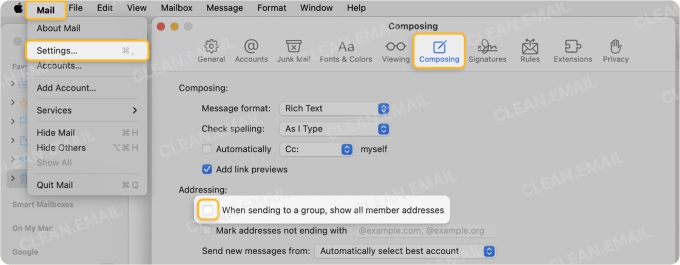
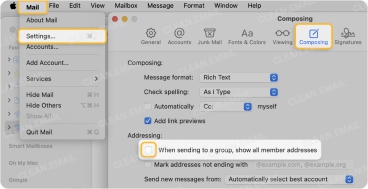
- With Mail open, select Mail → Settings in the menu bar.
- Go to the Composing tab in the pop-up window.
- Below Addressing, uncheck the box for When sending to a group, show all member addresses.
You’ll then see the list name rather than all addresses. If you want to display those addresses after all or remove a particular address from the email, click the arrow next to the list name in the To field and choose Expand Group.
How to Email the Group as Undisclosed Recipients
When you send an email to a group of people, those recipients can see the email addresses of all group members. While this might be fine in some cases, you may want to protect your recipients’ privacy or simply hide those addresses from others.
Send a group email in Mac Mail to undisclosed recipients
By using the Bcc field, which stands for Blind Carbon Copy, you can keep recipients’ email addresses private. Only addresses you decide to add to the To and Cc lines will be visible to your recipients.
- Open Mail and compose a new message.
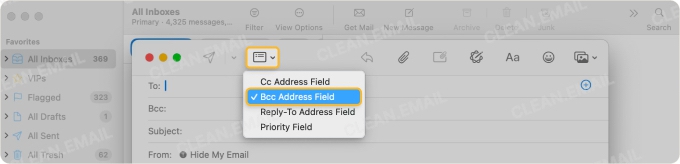
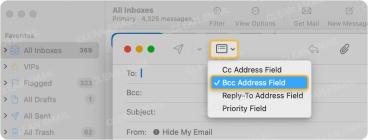
- If you don’t see the Bcc field at the top, open the Select visible header fields button (rectangle) in the toolbar and choose Bcc Address Field.
- Place your cursor in the Bcc field, start typing the list name, and select the list name from the suggestions.
- You can leave the To field blank or enter your own email address. If you leave it blank, it’ll display as “Undisclosed recipients” when received by your recipients.
- Complete and send the message.
Send a group email on iPhone and iPad to undisclosed recipients
Like on Mac, you can hide the addresses of your recipients by adding the email list to the Bcc field instead of the To field.
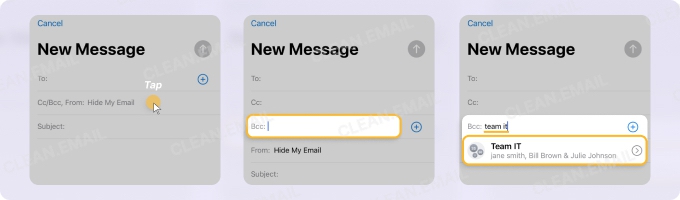
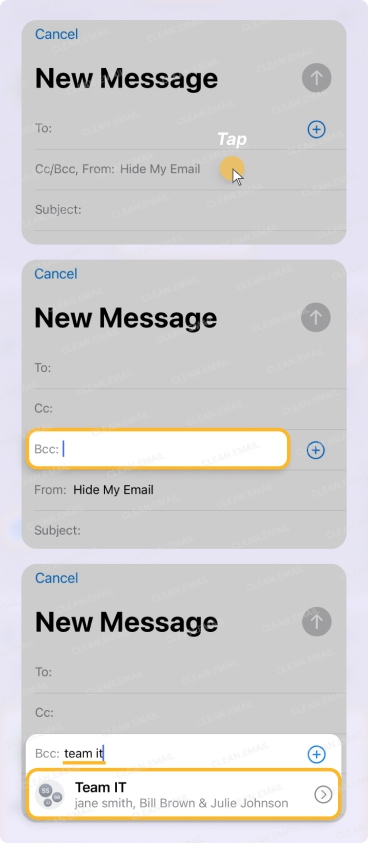
- Open Mail and compose a new message.
- Tap the Cc/Bcc field.
- Place your cursor in the Bcc field, start typing the list name, and select the list name from the suggestions.
- Leave the To field blank or enter your own email address.
- Complete and send the message.
Sync Contacts and Mail Via iCloud
When working with Contacts and Mail on Mac, iPhone, and iPad, you can sync the data across your devices using iCloud. This allows you to access contact lists and emails from any of these Apple devices when signed in with the same Apple ID.
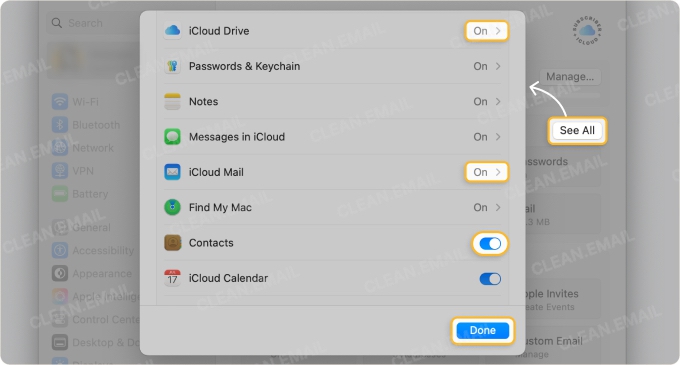
- On Mac, open the System Settings and on iPhone and iPad, open the Settings.
- Select your Apple Account → iCloud.
- Pick See All and confirm or turn on the toggles for Contacts, iCloud Mail, Mail, and iCloud Drive.
- Follow any subsequent prompts for enabling iCloud sync for these services.

For further information on syncing your devices, visit the Apple Support page for setting up iCloud Drive.
How Clean Email Helps Manage Replies
So, you’ve set up your email list and started sending messages to your group. Maybe you even created more than one list and sent multiple group emails. But have you considered how to handle the replies you receive from all of those recipients?
With Clean Email, you can manage those replies before they pile up: set rules that sort, flag, or archive messages as they arrive, group and sort responses by sender or subject, and unsubscribe from group emails you no longer want, with more tools to explore.
Clean Email is available on desktop and mobile for all IMAP service providers, with apps for macOS, mobile, and access via any web browser. You can enjoy all features regardless of device allowing you to organize messages on Mac or clean up email on iPhone with seamless syncing across the board.
Wrap-Up
Don’t underestimate the amount of time an email list can save you. Whether you add five contacts to the group or 20, you’ll never have to spend time entering email addresses or choosing contacts one-by-one again.


