


Add Email to iPhone: Set Up Mail on Your Device
Apple’s Mail app lets you set up mail on iPhone in just a few steps. You can set up virtually any email account on your device and manage multiple accounts in one place.
By the end of this tutorial, you'll not only be able to add email to iPhone, but also understand how to manage multiple accounts efficiently. Let's dive in!

How to Make a New Email on iPhone
Whether you purchased a new device or have never tried setting up email on iPhone, you can easily set up your inbox by following these steps:
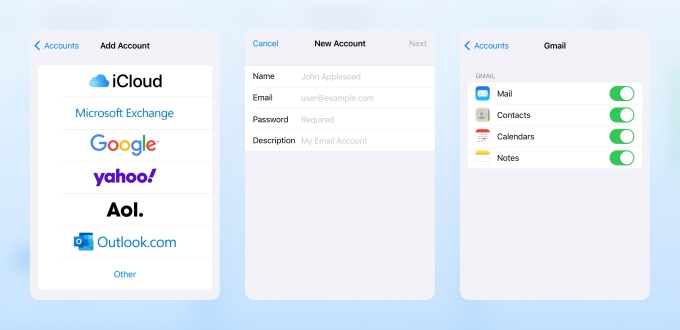
- Open the Mail app on your device.
- Once the app opens, select your provider from the list (i.e., Google, Yahoo, Outlook, iCloud).
- Follow the steps to log into your account.
- Once logged in, you will select which apps (including Mail) you want to link your account to. (You can change these settings later.)
- The Mail app will now display all your messages.
💡 Note: These instructions will add your mail account to Apple’s Mail app. However, there are many other email apps for iPhone that you can download and use.
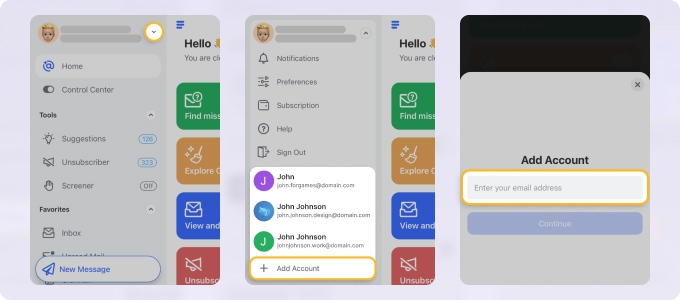
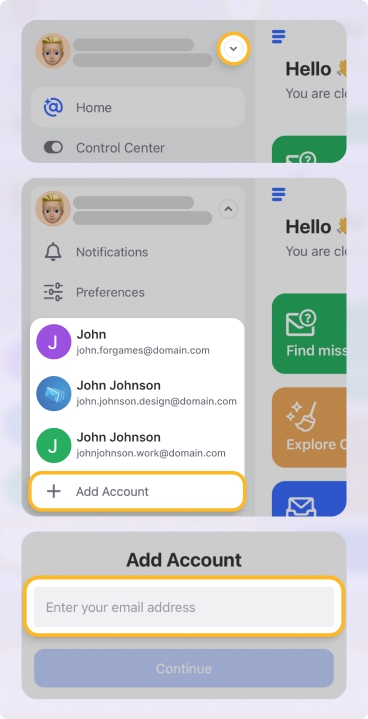
How to Add Another Email to iPhone
If you want to add a student or work mail address to your iPhone, you can add any number of accounts through this method:
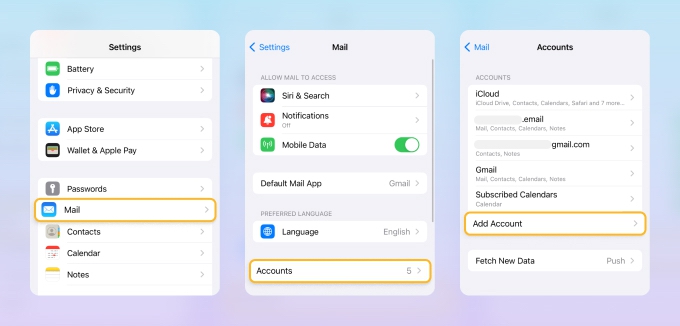
- Open the Settings app on your iPhone.
- Within the settings list, locate and tap Mail.
- Choose Accounts.
- Tap Add Account.
- Select the appropriate mail provider from the list.
- Follow the required steps to log in.
- Verify which other apps (if any) you want this mail account to connect with.
If you are looking for a way to achieve a similar goal within Google Workspace, you can add another email address to Gmail.
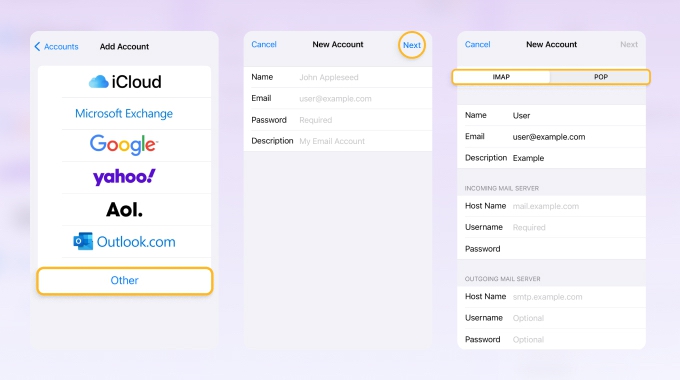
Add Email Account to iPhone Manually
The Apple Mail app is widely compatible with mail providers of all types. However, if you are using an account from a source other than iCloud, Google, Yahoo!, AOL, Outlook, or Microsoft Exchange, you will need to follow these additional steps when adding email to iPhone.
- Go to Settings → Mail → Accounts just like you would to set up mail on iPhone with any other client.
- Choose Add Account, but then select Other instead of the provided options.
- Enter the credentials it asks for (name, email, password, and description).
- Tap Next.
- Choose whether the account is IMAP or POP.
- Fill out the remaining information requested.
- Tap Next. Then, assuming you entered everything correctly, the account will be added to your Mail app.
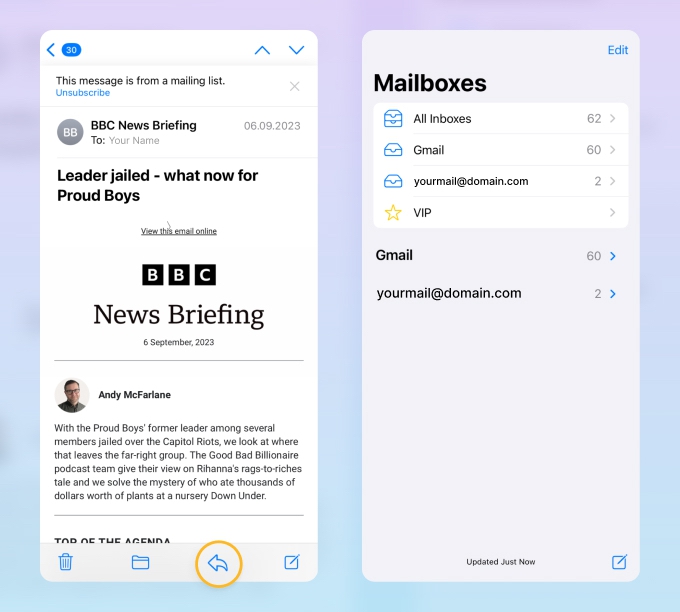
Managing Multiple Email Accounts on iPhone
Once you have set up email on iPhone, you will see messages from all accounts logged in on your device as long as All Inboxes is selected. You can also toggle between each inbox by selecting from the Mailboxes list.
To manage your multiple accounts, simply:
- Open the Mail app from your phone. The app will default to the view you last accessed before closing it.
- Go back (swipe or use the back arrow at the top left of the screen) until you reach the Mailboxes list.
- From here, you can toggle between accounts, change what mailbox views are available, or view All Inboxes.
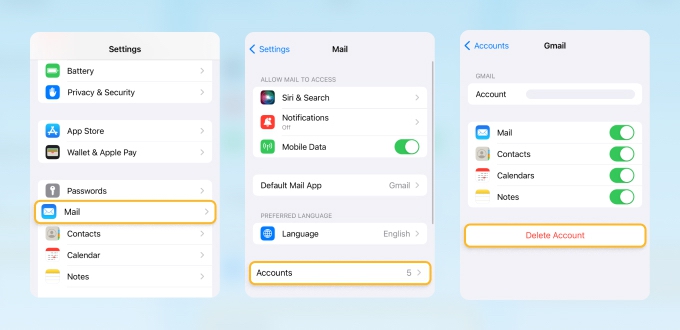
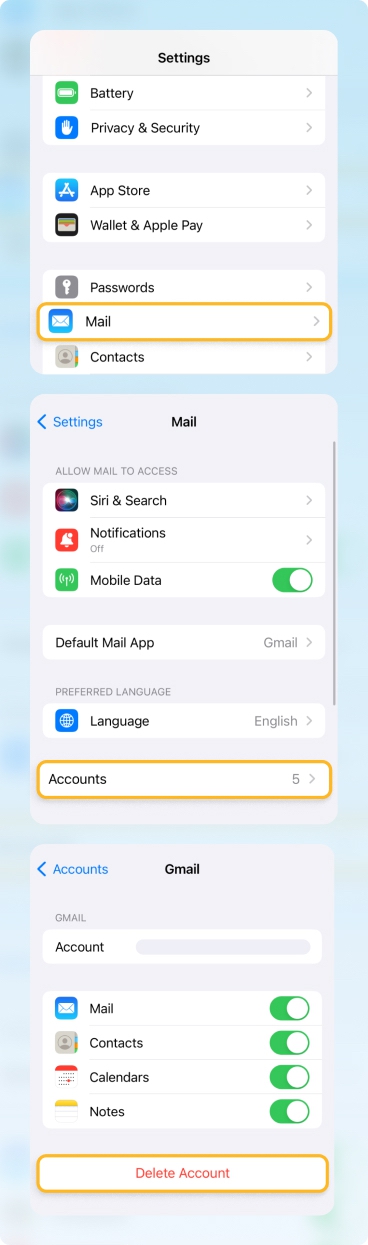
How to Remove Email From iPhone
You can remove mail accounts on iPhone at any time. Here’s how:
- Go to the Settings app.
- Tap Mail.
- Select Accounts.
- Tap on the mail account you wish to remove.
- Press Delete Account at the bottom of the screen.
- If you wish to delete more than one account, repeat these steps for all email accounts on iPhone you want removed.
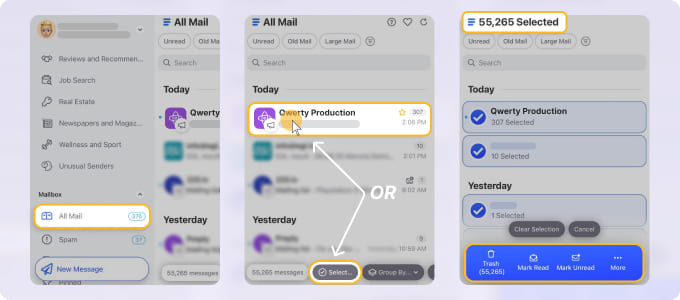
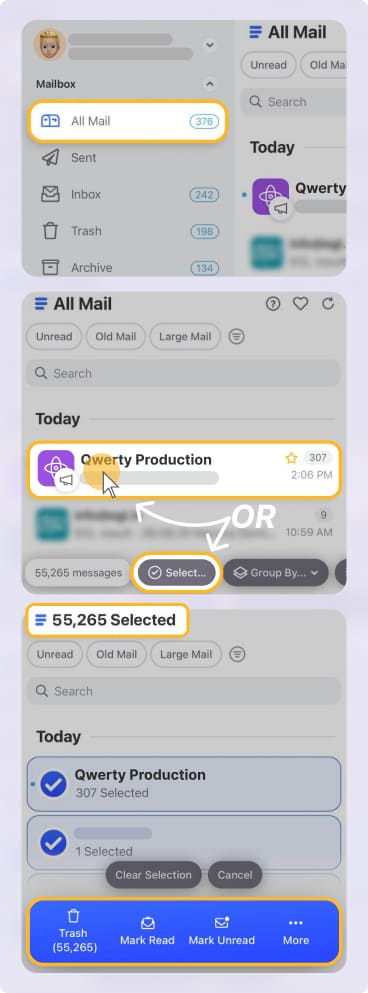
Elevate Your iPhone Email Experience with Clean Email
Once you add multiple accounts to your iPhone, managing incoming messages across them can become fragmented. Apple Mail combines inboxes into a single view, but its filtering and bulk management options are relatively basic, especially when handling large volumes of emails across multiple accounts.
Clean Email complements Apple Mail by focusing on bulk email management and advanced filtering. It groups similar emails automatically and allows you to review and clean entire categories at once instead of processing messages individually.
You can download Clean Email on your iPhone and, if needed, access the same accounts on Mac, other mobile devices, or through the web since the app works across platforms.
Wrap-Up
As you can see, setting up email on iPhone is easy as long as you have the correct steps and know your login credentials. Once you set up mail on your device, you can check messages and reply from anywhere in the world.
The more mailboxes you add to your iPhone, the more work you create for yourself regarding inbox management.


