


What Is Mail Merge?
Mail merge automates the creation of personalized documents using a single data source. Your Excel spreadsheet contains all recipients' details arranged in columns with clear headers. The feature automatically inserts data from the spreadsheet into the template document.
This process is a time-saver for a snail mail blast, mass email sending, or printing labels for bulk mailing. In the next section, you'll discover how to use mail merge from a contacts list saved in Excel.

How to Mail Merge From Excel to Word in 5 Steps
Below is the step-by-step guide on how to mail merge from Excel to Word, making every communication feel tailor-made:
1. Prepare your Excel spreadsheet
If you don’t have a recipient list yet, open a blank workbook in Excel to create one. If you already have one, ensure each column has specific headers.
(For example: "Names," Emails," and "Company")
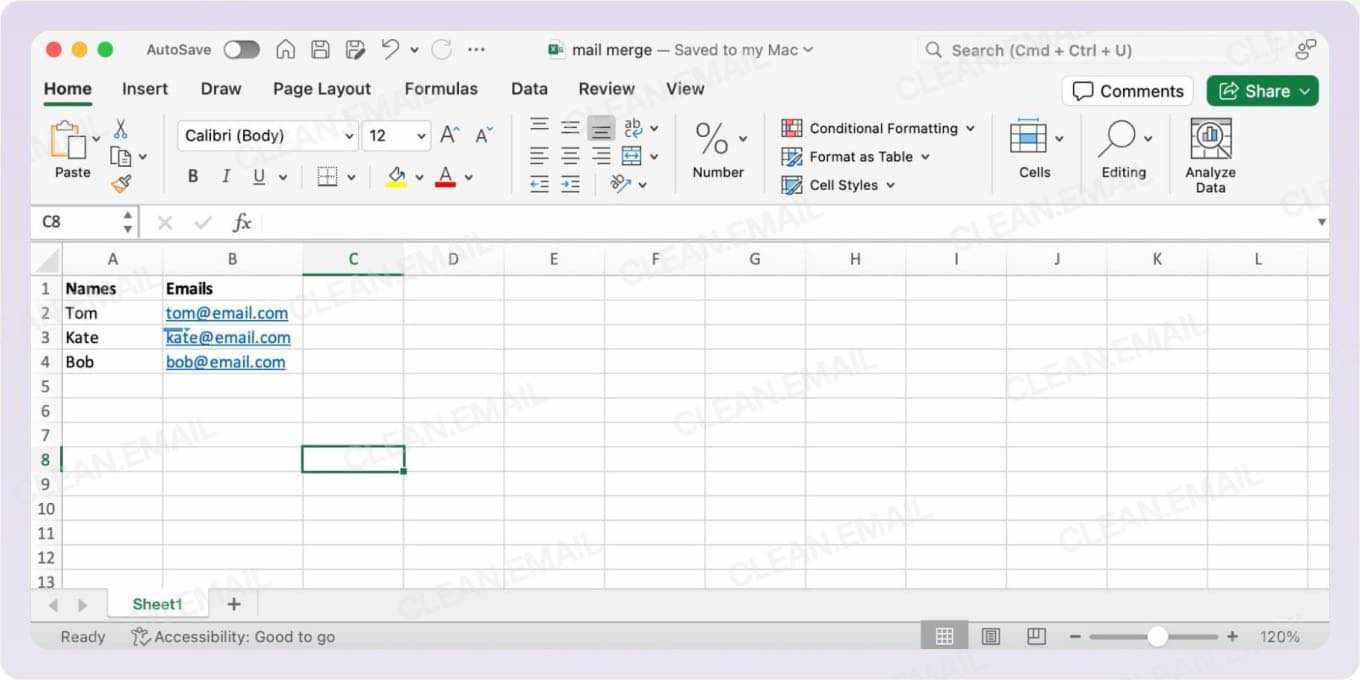

Keep all the details of a single contact in a single row. Avoid skipping rows or columns because MS Word treats them as errors.
💡 Tip: The mail merge feature only works with Excel documents on a local drive. Close your spreadsheet before linking it to Word, then save it in a memorable folder (for instance: Contacts_mail merge_[email campaign name].xlsx) so Word can find it later.
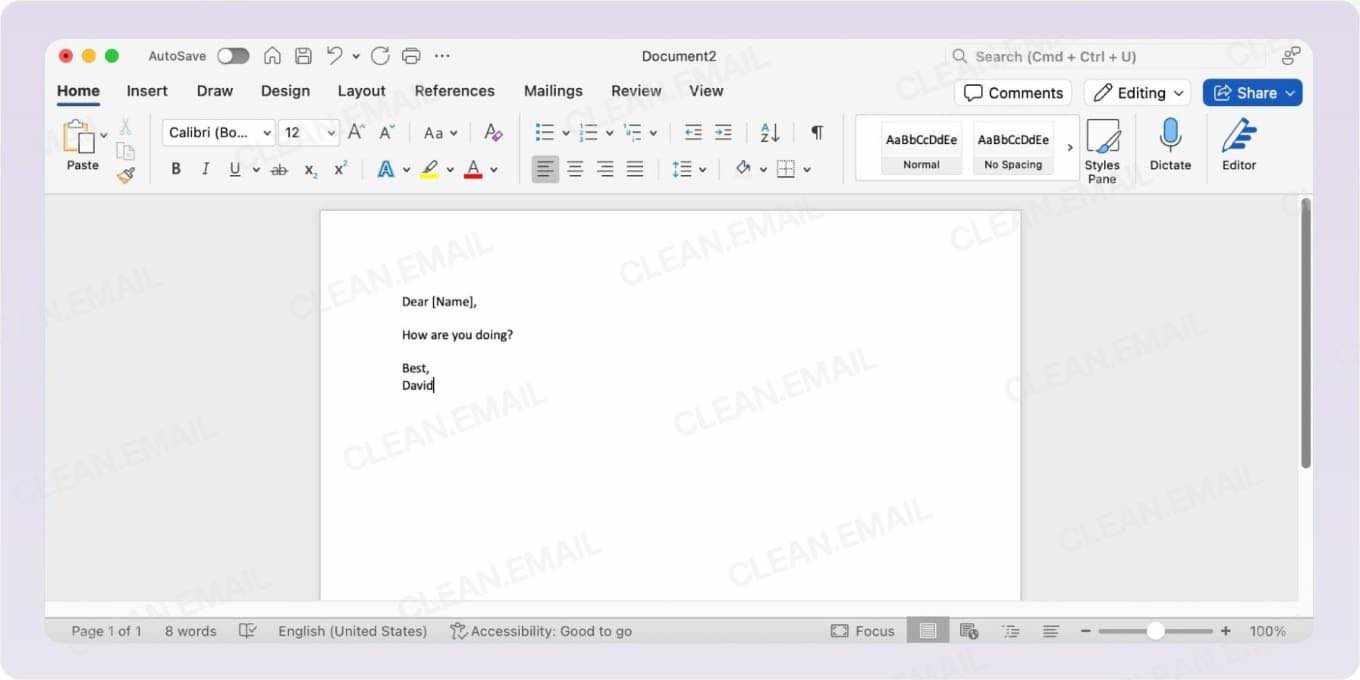
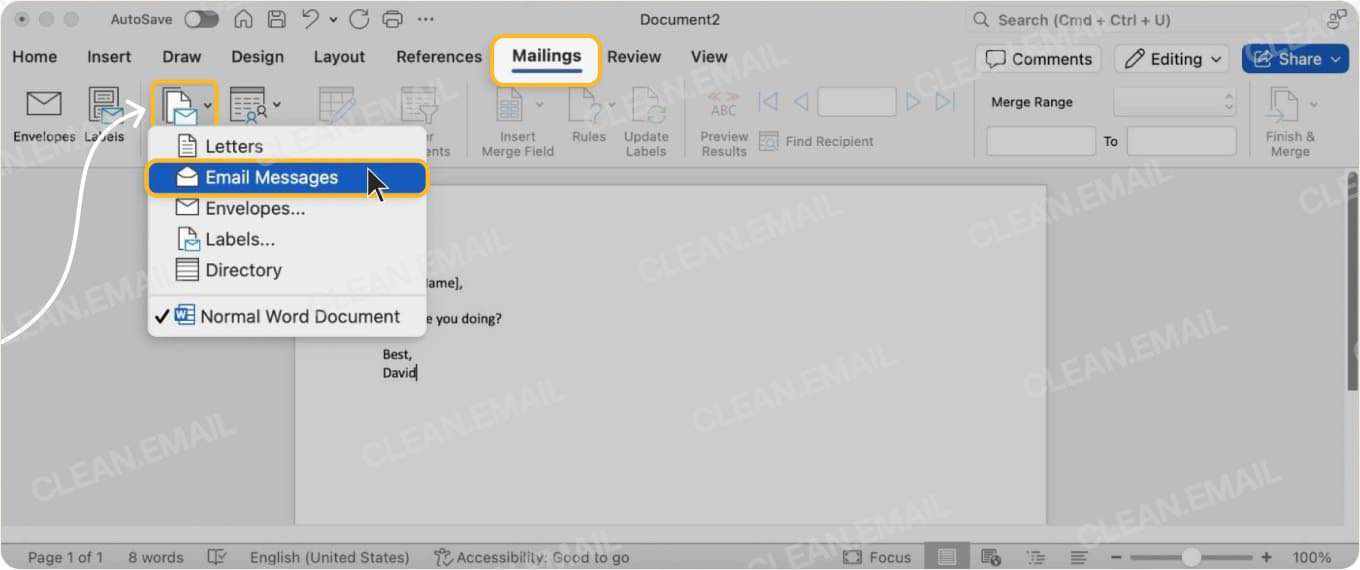
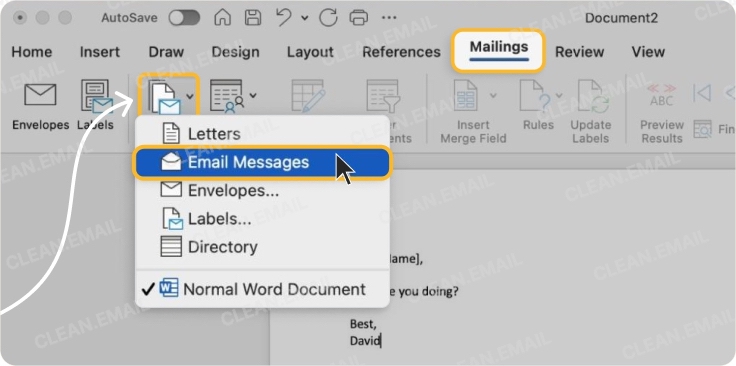
2. Set up your Word document
Open your MS Word document—your mail merge template. Or compose the body of your document if you have no existing template.
Then, click on the Mailings tab from the top menu and select your document—letters, E-mail messages, envelopes, or labels—then, save it.
💡 Tip: Keep your template intact by saving your mail merge document under a different filename. This makes it easier to create new mail merge documents in the future with slightly revised or overhauled body text.
3. Link the Excel file with your Word template
Click the Mailings tab again and tap Select Recipients. From the drop-down menu, choose Use an Existing List. In the field or box beside "File name," select Excel Files after hitting the drop-down arrow.
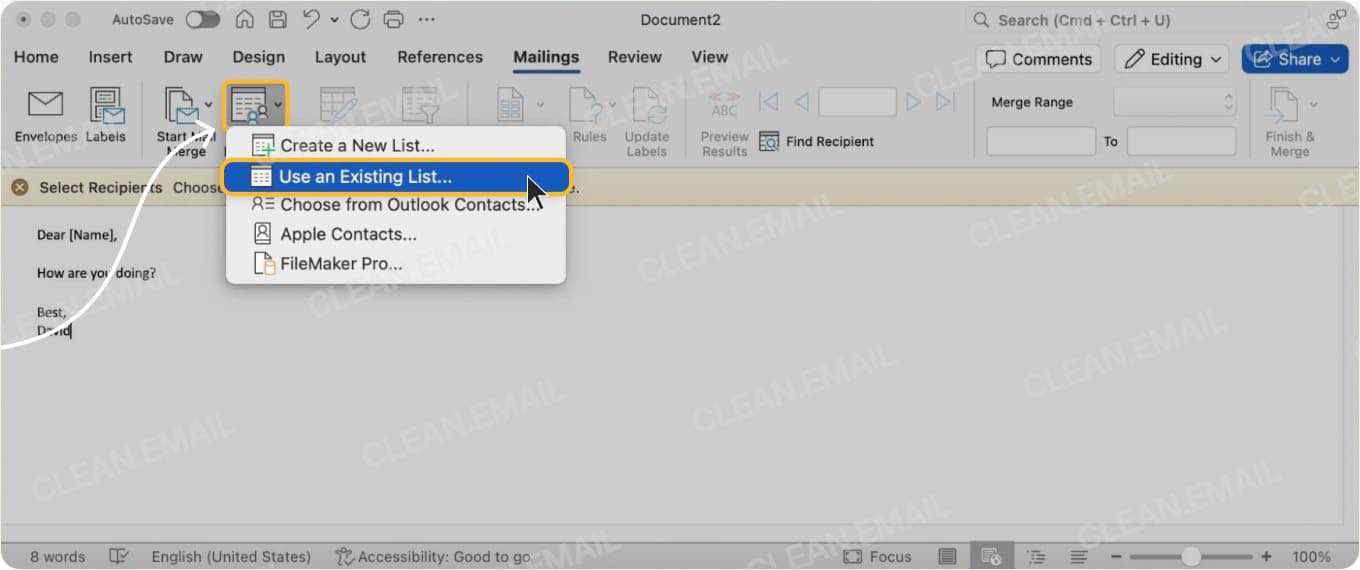
Then, locate and click on your chosen file, selecting the correct worksheet if your workbook has several tabs. Once you tap OK, Word recognizes your Excel columns as merge fields.
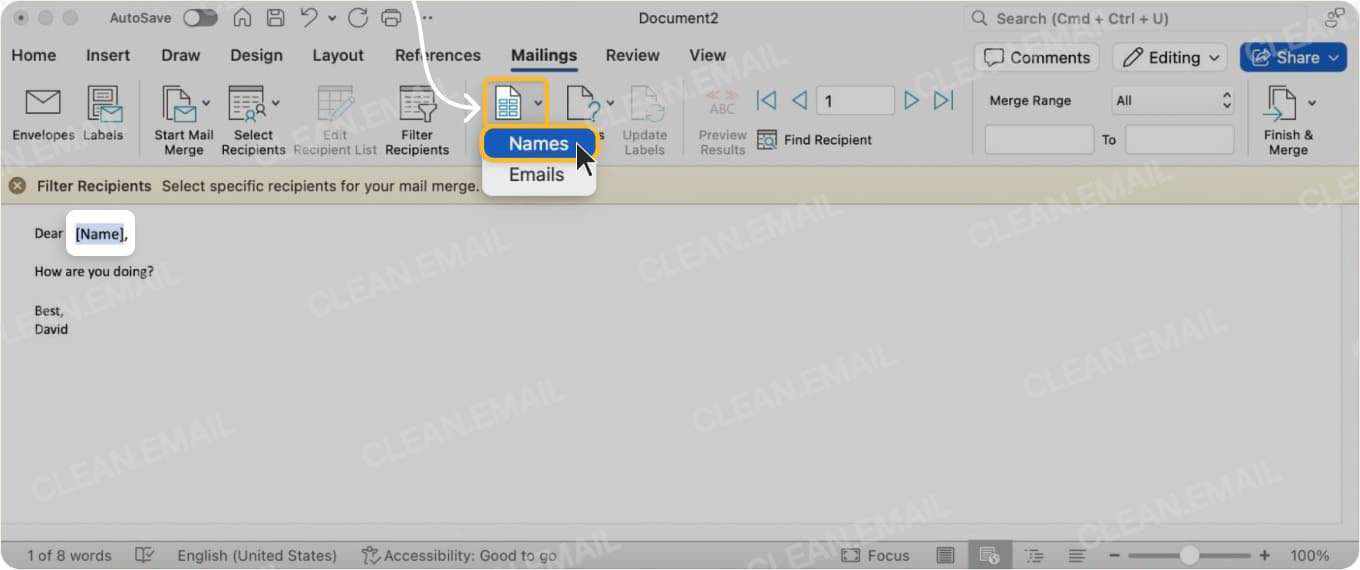
💡 Tip: You can click Edit Recipient List from the Mailings tab to include only specific people from the list. Clicking this button also allows you to specify the sequence of your letters (for instance, arrange surnames alphabetically in ascending order). Simply tap Sort from the Refine recipient list options.
4. Insert and format merge fields
Merge fields are the placeholders where your recipient's data appears. You can start with the address box before the salutation ("Dear [x]"). Position your cursor above the space for the greeting or salutation and click Address Block from the Mailings tab.
When the dialogue window opens, select your preferred address elements (format for the recipient's name and postal address). A preview window is available on the right side.
You can click Match Fields and follow the steps to include additional information in the address box. If that doesn't work, click Insert Merge Field to place merge fields one at a time.
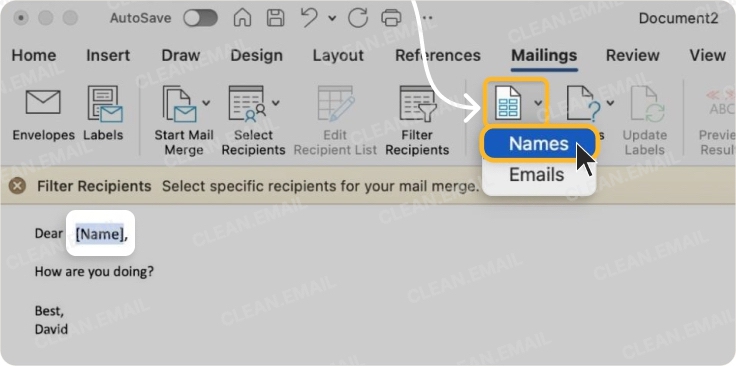
To automate the text for your salutation, click the Greeting line and select your preferred content and format from the dialogue box.
💡 Tip: You can position merge fields beside regular text—just keep your spacing and punctuation consistent. Doing a preview will help.
5. Preview and complete the merge
To check whether you have successfully done the steps in this section on how to do a mail merge in Word, tap Preview Results from the Preview Results tab.
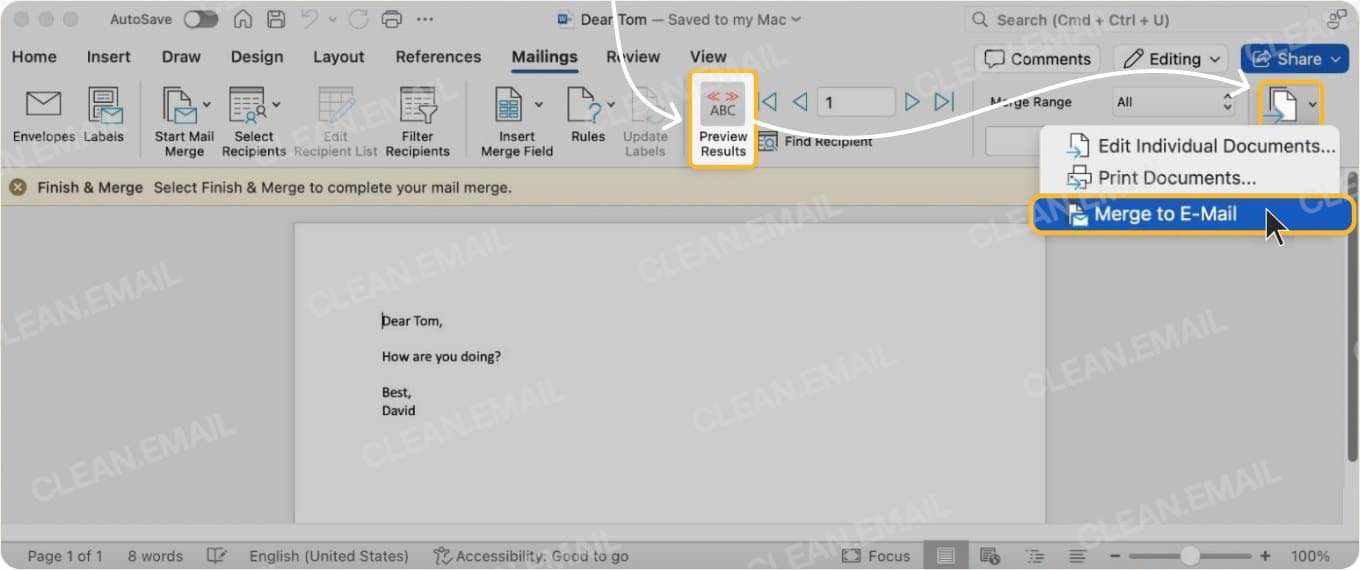
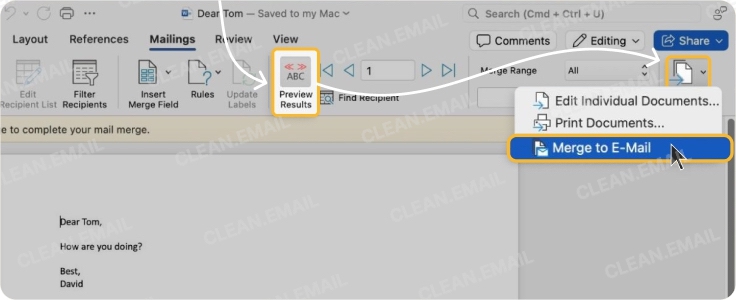
Use the left and right arrow keys to verify whether your recipient details appear correctly. Once you’re satisfied with the formatting of recipient data, click the Finish and Merge button.
You can print the letters or send them as an email by choosing the option from the drop-down menu. Or you can edit individual letters.
💡 Tip: To save your mail merge document as a separate file, select Edit Individual Documents from the Finish & Merge button and click All. You can rename the new file later.
How to Do a Mail Merge for Labels
Besides personalizing letters, mail merge is also the simplest way to create labels in bulk, whether for letter envelopes or packages. Here's how to mail merge labels from Excel using the mail merge wizard:
- Open a new Word document and click Start Mail Merge. Select the Step-by-Step Mail Merge Wizard and tap Labels. Follow the instructions for steps 1 to 6.
- Under Select Starting Document, choose Use the current document. If this option is grayed out, click Change document layout. Then, tap Label options.
- In the new dialogue box, select Default tray for Printer information. For Label information, check your label packaging to determine which vendor or brand, and product number to click.
- Similar to doing a mail merge for letters, select your recipient list among the options. Then, tap More items to start inserting merge fields. Once done, tap the Update all labels button to replicate the same format across the sheet.
- For the last step, you can choose Print or Edit individual labels before printing.
Alternative Platforms for Mail Merge
If your workflow revolves around email service providers, there’s good news for you. Mail merge is available on the most popular platforms, including the following:
How to mail merge in Outlook
Comes with built-in connectivity with Microsoft Word’s built-in mail merge function.
👍🏼 Pros: No app download required; seamless with Excel lists.
👎🏼 Cons: The maximum sending limit is higher only for new or "non-relationship" recipients.
How to mail merge in Gmail
Requires installing add-ons, such as GMass, Mailmeteor, and Yet Another Mail Merge. Gmail's mail merge feature is only available to Google Workspace and other paid subscribers, not for free account holders.
👍🏼 Pros: Ideal for small campaigns; add-ons mentioned above offer built-in tracking.
👎🏼 Cons: The maximum number of recipients per mail-merged message varies by account type. Check our Gmail email send limits guide.
How to mail merge in Google Docs
Add-ons (such as Mail Merge for Google Docs) allow you to generate mail-merged PDFs or letters directly from a Docs template.
👍🏼 Pros: Quick and collaborative; suitable for customizing forms and certificates.
👎🏼 Cons: Fewer options from the Template Gallery and limited automation.
How to mail merge in Canva
Installing apps like Bulk Create enables you to link data from Excel to personalize Canva documents.
👍🏼 Pros: Recommended for branded materials, such as labels, invitations, or certificates.
👎🏼 Cons: A maximum of 300 recipients only, and no tracking tools.
Using Clean Email to Manage Replies From Bulk Email Sending
Mastering mail merge empowers you to accomplish half the battle. The next challenge is managing replies to mass emails so nothing important slips through.
The Clean Email app is safe and secure, and offers automated features so you don’t have to sort every reply yourself:
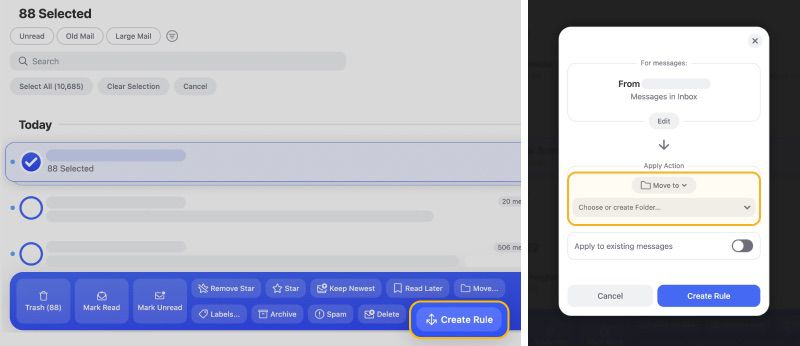
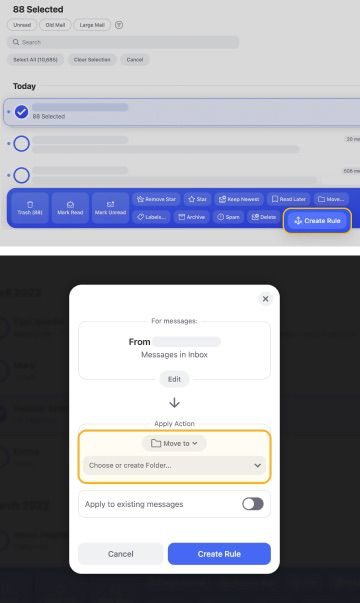
- Auto Clean rules let you automatically sort and clean your inbox, performing actions such as moving bounced messages or auto replies (such as out-of-office autoresponders) to a separate folder.
- Unsubscriber keeps your inbox lean by sending unsubscribe requests on your behalf.


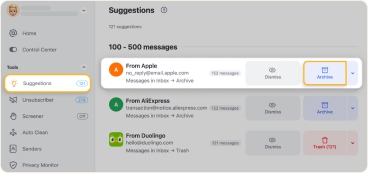
- The Cleaning Suggestionsfeature analyzes your common actions for emails, depending on data (such as sender address, subject lines, and message age) and recommends folders or filters to keep your inbox tidy.

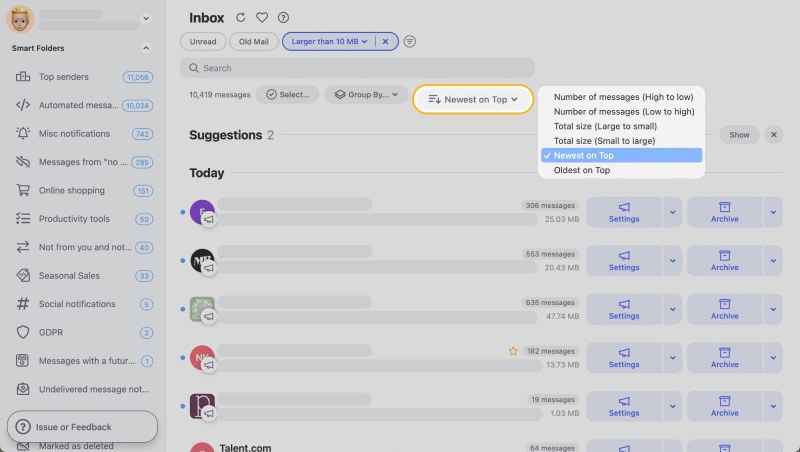
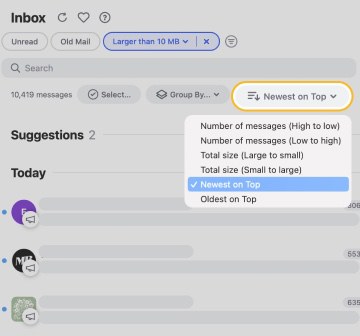
- Smart Folders and labels allow you to group related replies together for faster review.
📌 Clean Email is available on macOS, mobile, and the web, so you can manage incoming responses efficiently across all your devices.
Combining Mail Merge with Clean Email for Bulk Send Management
Amid stricter spam filters across email service providers, you can't afford to send out generic bulk emails. Mail merge aligns with current email and direct marketing practices that value personalization and audience consent.
To manage replies as effectively as sending mass emails, integrate Clean Email in your workflow after a big send. Its automated sorting and archiving capabilities help keep you focused on conversations that matter.


