


How to Set Up Swipe Left to Delete Email on iPhone
If you’re like most, you’ve explored the settings for Swipe Options in the Mail app on iPhone to use the Delete action. And like most, you didn’t find a Delete option and are wondering how to set iPhone email for swipe to delete, not archive.
Rather than in the Swipe Options, this is a somewhat hidden feature buried in the advanced settings for the particular email account. These steps apply to the most common account types including Gmail, Outlook, and Exchange.
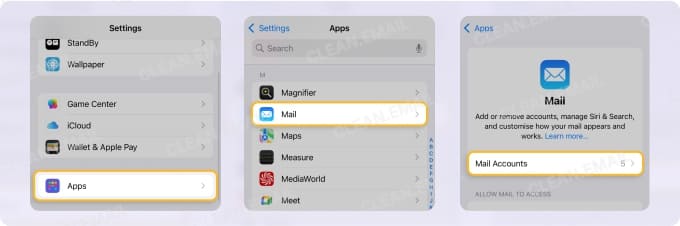
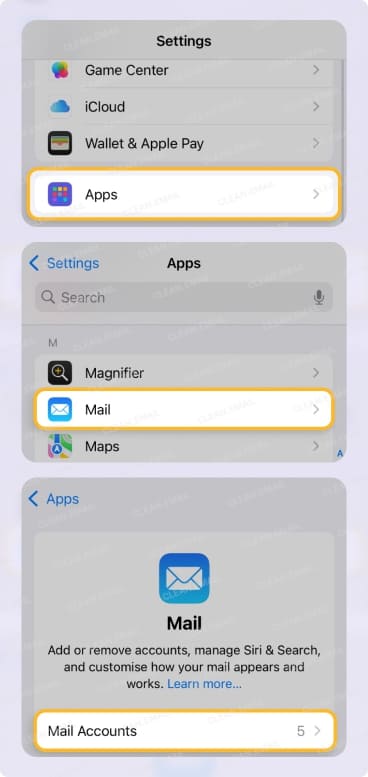
- Open the Settings and select Apps → Mail.
- Choose Mail Accounts.
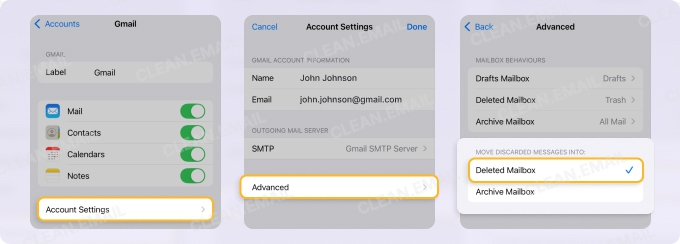
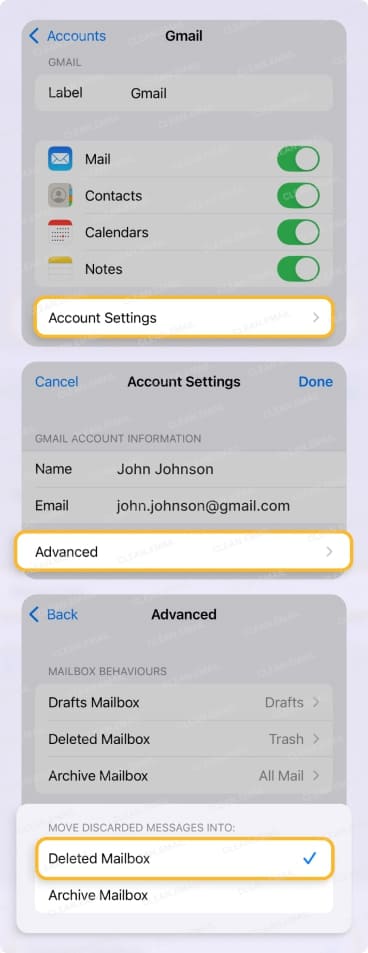
- Pick an account and tap Account Settings.
- Select Advanced (Settings).
- Choose Deleted Mailbox in the Move Discarded Messages Into section.
For an iCloud email account, follow Steps 1 and 2 above and pick Mailbox Behaviors to choose Deleted Mailbox.
You should then see the Delete option when you swipe left on an email. Note that if you’re using a Gmail account, you must swipe right instead and be sure to adjust the Swipe Options described below.

How to Change the Swipe Gestures in Mail on iPhone
The swipe gestures in Mail on iPhone are all-encompassing which means they apply to emails in your message list for all accounts.
- Open the Settings and select Apps → Mail.
- Choose Swipe Options in the Message List section.
- Tap Swipe Left and pick the action.
- Tap Swipe Right and pick the action.
- Use the Apps arrow on the top left to exit the Mail settings.
One thing to keep in mind when changing the swipe gestures is if you’re using a Gmail account. Because the Delete action currently appears when you swipe right instead of left, you must set the Swipe Right option to Archive. If you pick a different action, you won’t see the Delete option.
Gmail and Outlook Email Apps
If you use the Gmail or Outlook mobile app instead of or in addition to Apple Mail, you can change the iPhone email swipe to delete option in Gmail in just a few steps.
Gmail App Swipe to Delete
Open the Gmail app on your iPhone and follow these steps:
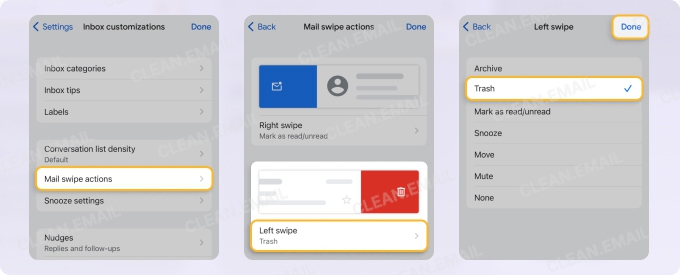
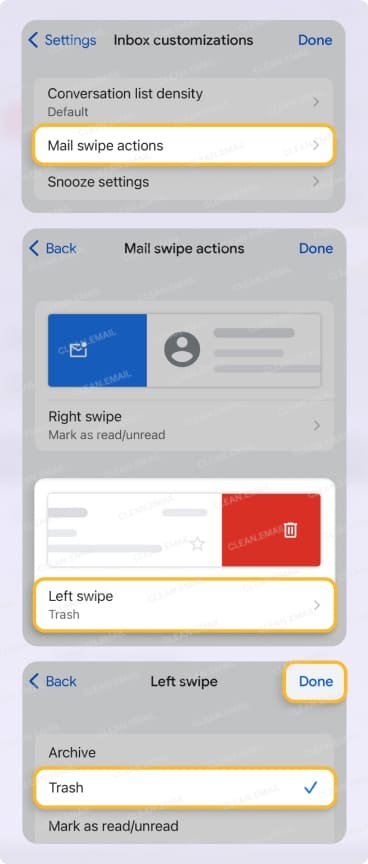
- Access the menu and select Settings.
- Choose Inbox customizations.
- Go to Mail swipe actions.
- Select Trash for the Right swipe or Left swipe setting.
- Tap Done.
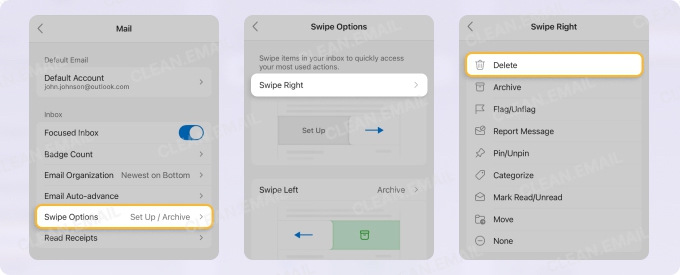
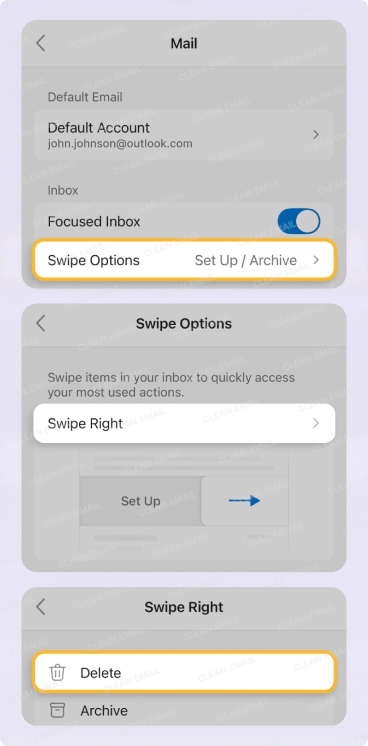
Outlook App Swipe to Delete
Open the Outlook app on your device and do the following:
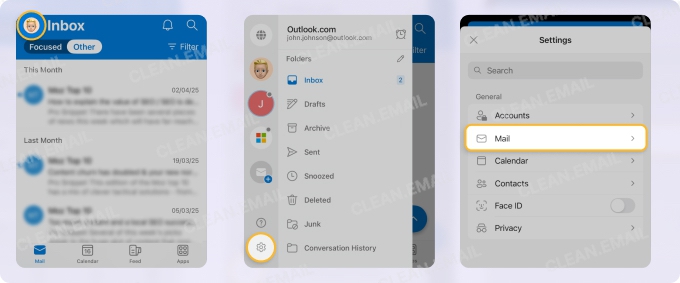
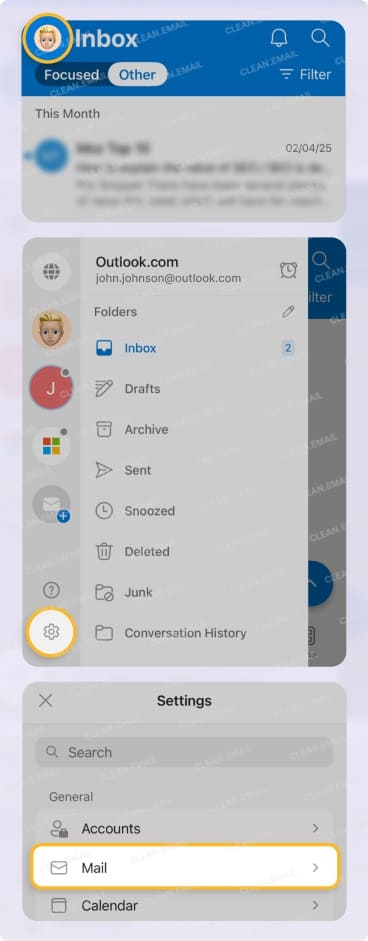
- Display the menu and select Settings.
- Pick Mail.
- Choose Swipe Options.
- Select Delete for the Swipe Right or Swipe Left setting.
Troubleshooting
If you’re certain that you should see the delete option when you swipe an email in Mail on iPhone, but it’s nowhere to be found, double-check the following:
📌 For all accounts: Confirm that you pick Deleted Mailbox in the Move Discarded Messages Into section.
📌 For iCloud accounts: Make sure you head to Mailbox Behaviors to choose Deleted Mailbox.
📌 For Gmail accounts: Verify that the Swipe Right gesture is set to Archive and that you are indeed swiping right, not left.
If none of the above appear to work, try closing and reopening the Mail app or restarting your iPhone.
Using Clean Email When Swipe Actions Aren’t Enough
Swipe gestures in iPhone Mail are useful for quick, one-off actions like deleting or archiving a single message. However, they are inherently limited. Each swipe can only trigger one predefined action, and customizing them often requires going through multiple settings.
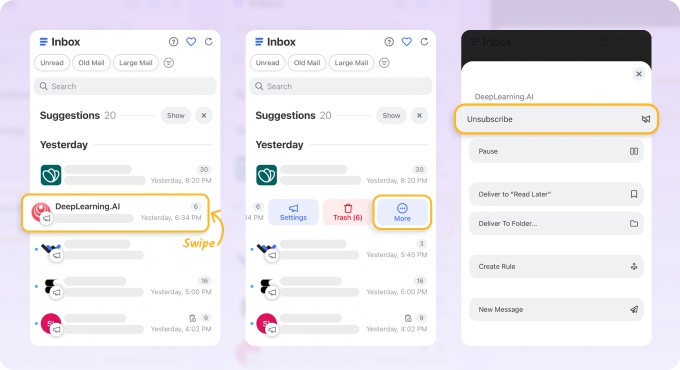
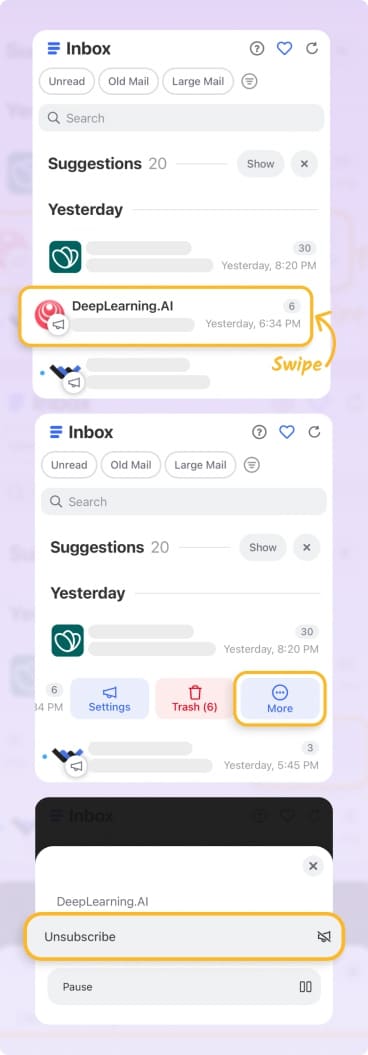
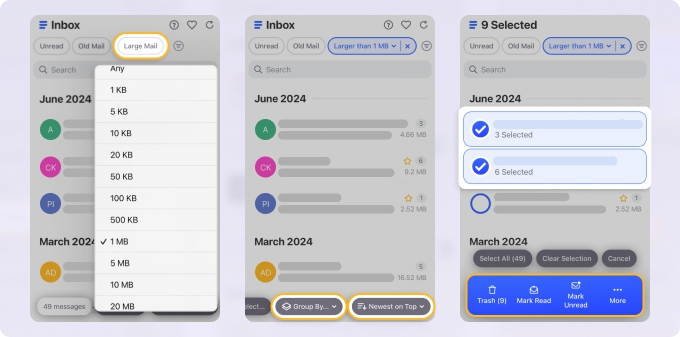
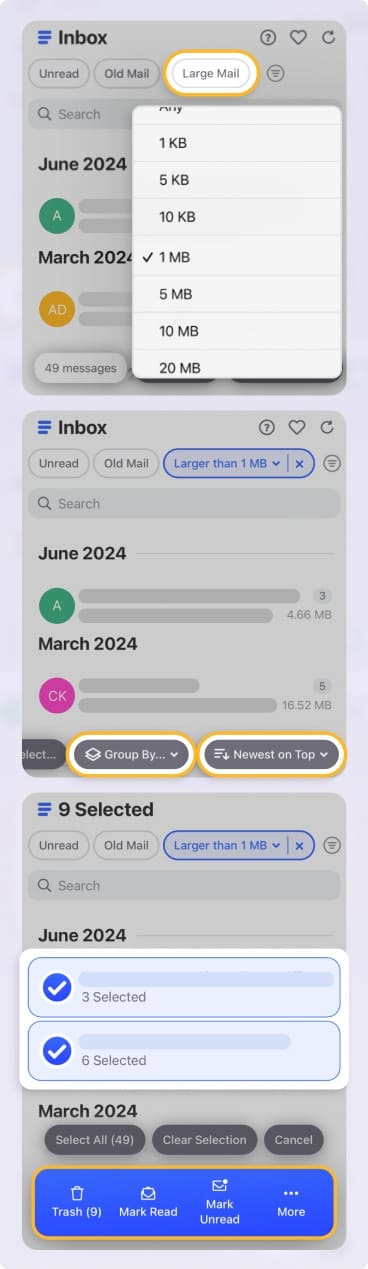
Clean Email approaches swipe differently. Instead of restricting you to a single action, a swipe reveals a panel with multiple options at once, where you can choose actions like send the email to Trash, permanently Delete it, or Unsubscribe from a mailing list.
At the same time, swipe actions are not practical for bulk cleanup. If you need to process dozens or hundreds of emails, swiping each one becomes inefficient. Clean Email addresses this with tools designed for volume:
- Select All to apply actions to entire groups of emails
- Cleaning Suggestions that highlight messages suitable for batch actions
- Advanced grouping and filtering to quickly isolate emails by sender, date, or size
In practice, swipe is effective for occasional actions, while Clean Email is better suited for managing larger volumes of email and applying actions more efficiently, with the same capabilities available on iOS, macOS, and the web.
Wrap-Up
With email so crucial to our everyday lives, it’s important to have the right tools to manage our messages. Hopefully this guide helps you change the iPhone email swipe to delete option to remove those unwanted emails.
Remember, you can also change the default email app (and web browser) on your devices. Keep this in mind if you can’t seem to get Mail to work effectively.


