


Prepare Your Inbox for a Smooth Migration
When moving to a new apartment or house, it's always a good idea to first get rid of as much of your old junk as possible, and it's the same with mail migration.
Transferring a messy inbox full of spam, outdated newsletters, and irrelevant messages from senders you no longer care about can unnecessarily slow down the migration process and clutter your new Gmail account. Plus, with Gmail’s storage limits in mind, starting fresh saves precious space.
You could prep manually, but an inbox organizer like Clean Email is more efficient. It lets you unsubscribe from unwanted lists (even when senders ignore unsubscribe requests), and act on automatically generated smart Cleaning Suggestions. The app also sorts your mail into Smart Folders that group messages like social notifications or undelivered mail, and offers the Screener feature to hold potential spam or cluttering messages from unknown senders until your migration is complete, with more to explore.
With your inbox now lean and organized, you’re set for a smooth transfer to Gmail—whether you’re coming from Spectrum, Comcast, or another provider.

Methods to Transfer Your Emails to Gmail
With your inbox prepped and ready, it’s time to explore the actual process of moving your messages to Gmail. Whether you’re leaving Spectrum, Comcast (Xfinity), Roadrunner, CenturyLink, ProtonMail, or Cox behind, there are several ways to make the switch.
Forwarding Emails: The Easiest Way to Migrate to Gmail
Email forwarding is the simplest way to transfer your Cox email to Gmail—or any other provider’s emails, for that matter. It works by automatically sending new incoming messages from your old account to your Gmail address as they arrive. Best of all, it can be done in no time without any setup required.
We’ll show you how to forward messages to Gmail with an example for Cox users. Since Cox has migrated all its mail services to Yahoo, the process uses Yahoo’s interface. Here’s a quick overview of how to transfer Cox messages to Gmail (you can check out our detailed Yahoo Mail forwarding guide for more information):
- Log in to your Yahoo inbox.
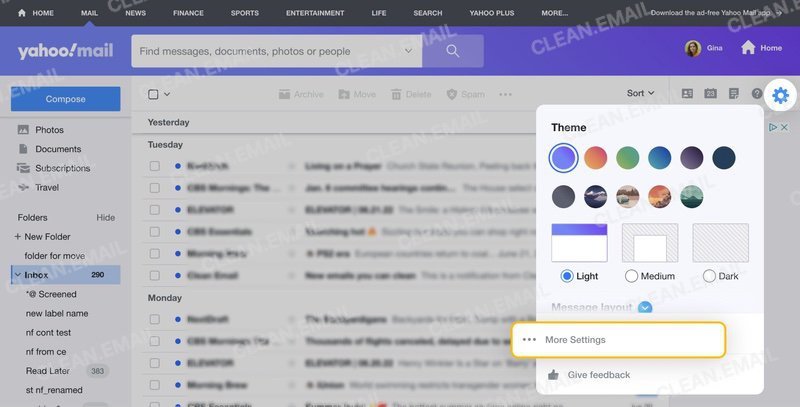
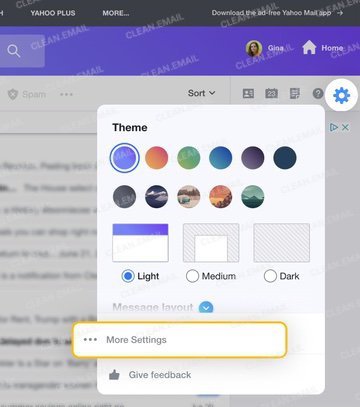
- Click the Settings icon located in the top-right corner.
- Choose More Settings from the dropdown menu.
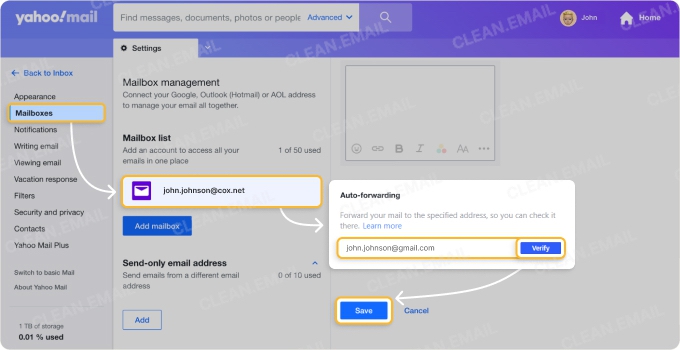
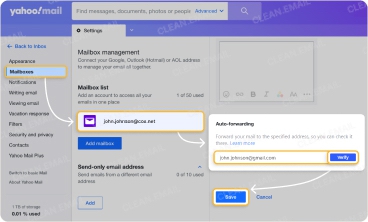
- Select Mailboxes from the left-side menu and click on your Yahoo email address.
- In the Auto-forwarding section, enter your Gmail address, click Verify, then go to your Gmail inbox to verify your forwarding address. After verification, return to Yahoo and click Save to complete the process.
📌 Note: As Xfinity accounts migrate to Yahoo Mail, how you manage Xfinity Email—including forwarding settings—may change depending on your account’s status.
⚠️ However, mail forwarding has its limitations. It doesn't move existing emails; it only redirects new incoming messages. Also, the original email folder structures and labels may not transfer. If these limitations seem like deal-breakers to you, then you should try the next method instead.
Gmail's Import Tool: A Native Migration Solution
If email forwarding feels too limited, Gmail offers a built-in import tool that allows you to directly import messages and contacts from popular providers, so you can, for instance, use it to transfer Spectrum emails to Gmail.
To successfully use this feature, your other mail accounts must have POP access enabled, and you may also need to know some key settings. Please locate your provider in the list below and visit the linked article for more information:
- Xfinity/Comcast Email Settings
- Roadrunner Email Settings
- Spectrum Email Settings
- CenturyLink Email Settings
- ProtonMail Email Settings
- Yahoo Mail Settings
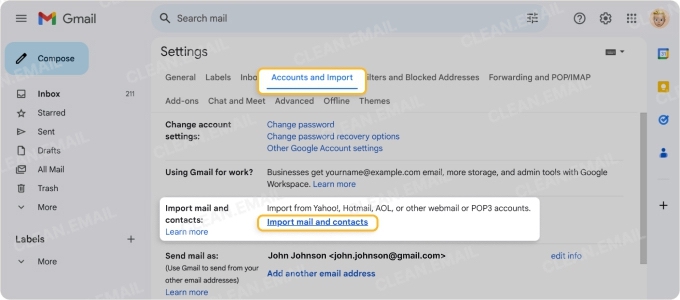
You can then follow these steps to use the Import mail and contacts feature in Gmail:
- Log in to your Gmail account and click the Settings icon in the top-right corner.
- Select See all settings, then navigate to the Accounts and Import tab.
- Click on Import mail and contacts and follow the prompts to enter your current email address and password.
- Choose the specific items you'd like to import, such as messages, contacts, or both, and begin the import process.
- Gmail will handle the rest, automatically importing the data over the next few hours or days, depending on the amount of data.
⚠️ Note that ProtonMail transfer email isn’t fully supported here since it lacks native POP access due to its secure nature.
📌 While importing mail and contacts effectively transfers your complete email history, it may still require some reorganization within Gmail so that everything aligns with your preferred structure.
Third-Party Migration Tools: The Most Comprehensive Solution
For those who are seeking a more robust way to transfer your CenturyLink email to Gmail or move messages from any provider, third-party inbox migration services offer an attractive option.
The biggest advantage of third-party tools like MailJerry is that they are able to preserve the existing folder structure, provide support for IMAP and Exchange accounts, and tackle common migration issues like duplicates.
Wondering how do I transfer my Comcast email to Gmail? Transferring messages from any IMAP-supporting provider to Gmail is straightforward with MailJerry:
- First, generate an app password for your existing email provider. Providers like Yahoo, Comcast, and ProtonMail require you to set up an app password for security purposes. Next, create an app password for Gmail.
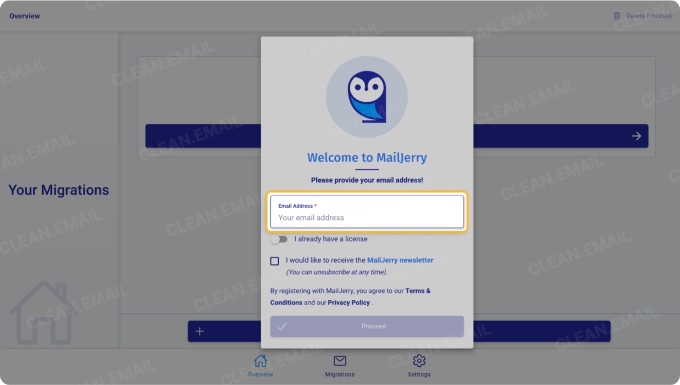
- Visit the MailJerry web app or download the desktop version.
- Click New Migration.
- Select your current provider and enter your login credentials (use your app password) under Existing Address.
- Select Gmail and enter your Gmail credentials (app password required) under New Address.
- Click Check Settings to validate your accounts.
- Confirm migration details and click Start Your Migration.
MailJerry will handle the rest. You can close your browser or turn off your device without interrupting the migration. Once complete, your emails and their original folder structure will be neatly organized in your Gmail inbox.
Keeping Your Gmail Inbox Organized After the Migration
Completing your mail migration—whether you’ve figured out how to transfer Roadrunner email to Gmail or moved from Cox—is really just the start of a new chapter. Now that your messages are in Gmail, keeping that inbox organized is key to enjoying the switch long-term.
My go-to solution for keeping my Gmail inbox clean with minimal effort is Clean Email’s Auto Clean tool, which makes it possible to create custom automated rules that run in the background when specific conditions are met.
💡 Say you always archive all online purchase receipts. Well, you can effortlessly create an Auto Clean rule to automatically identify and archive these messages based on sender or subject keywords like "receipt" or "order confirmation."
If you're looking to take your inbox organization even further, be sure to check out our complete guide on how to declutter your Gmail inbox for additional strategies and tips that will help you maintain mail zen long after completing your migration from Comcast/Xfinity, Spectrum, or any other provider.


