Definition
💡 An auto-fill email address is a feature in many web browsers and email clients. It suggests or assists with filling out the recipient's email address as you type them — based on previously stored contact information or addresses from past interactions.
Auto-fill is a handy feature that saves you time and reduces errors. It ensures frequently used email addresses are easily accessible without needing to be typed in full each time. It can remember email addresses from your contacts, recent emails, and sometimes even form submissions on websites.

How to Add an Email Address to Autocomplete in Gmail
Adding an email address to the autocomplete list in Gmail is straightforward and involves ensuring that the email address is saved in your contacts. Here’s how you can do it:
Method 1: Sending an email
- Go to Gmail and sign in with your Google account.
- Click on Compose to create a new email.
- In the To field, type the email address you want to add. If you frequently email this address, Gmail will automatically save it in your autocomplete list after sending the email.
- Type a brief subject and content in the body (or leave it blank), then click Send. This action ensures that Gmail remembers the email address for future use.
Method 2: Adding to contacts directly
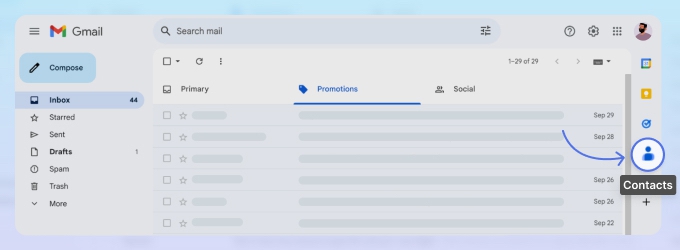
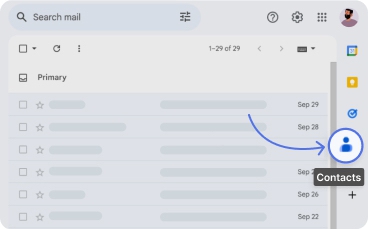
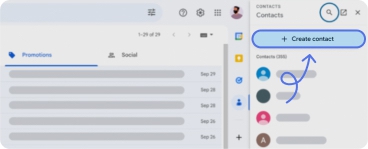
- Click the Contacts icon in the sidebar on the right side of your inbox.
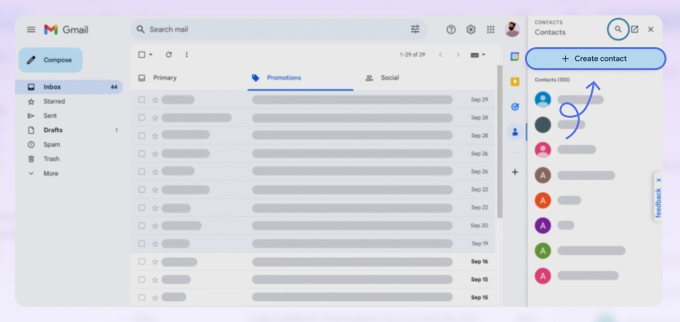
- Click on the Create contact button.
- Fill in the contact's name and email address. You can also add additional information if desired.
- Click on Save to add the contact to your list.
Verifying autocomplete
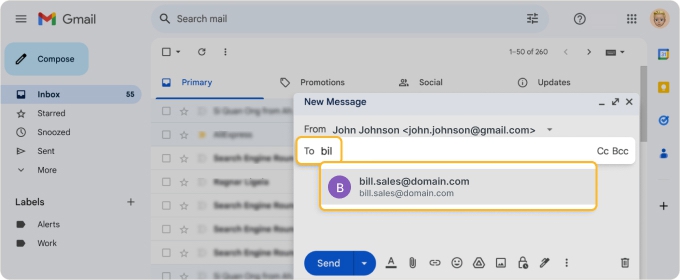
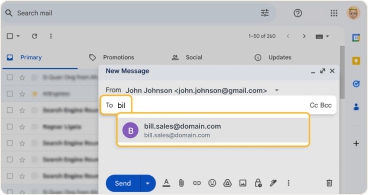
- Go back to Gmail and click on Compose.
- Test the autocomplete. Begin typing the email address or contact name in the To field.
- The email address should now appear in the autocomplete suggestions.
How to Auto-Fill Email Address in Outlook
To enable auto-fill email addresses in Outlook, follow these steps:
- Launch Microsoft Outlook on your computer.
- Click on the New Email button in the top left corner of the screen.
- In the To field, start typing the recipient's email address.
- Use previously entered addresses. As you type, Outlook will suggest previously entered email addresses that match your typing.
- Select from suggestions. Use the arrow keys or click on a suggestion to select it and autofill the rest of the email address.
- Review and update suggestions:
- To update the suggested email addresses, go to File → Options.
- In the Outlook Options window, select Mail from the left pane.
- Under Send messages, click Empty Auto-Complete List to clear previous suggestions.
- Click OK to save your changes.
Auto-fill Email Address on iPhone
To use the auto-fill feature on your iPhone, follow these steps:
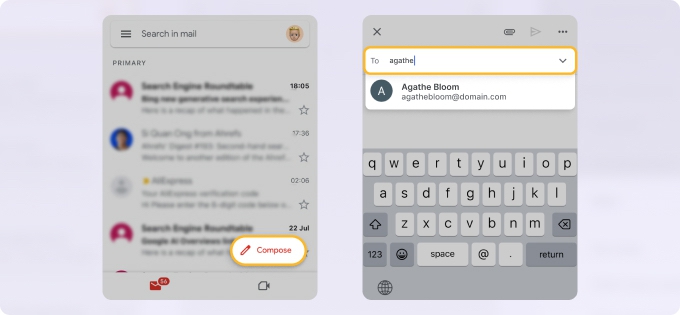
- When composing an email in the Mail app, start typing the recipient's name or address in the To field.
- As you type, your iPhone will suggest contacts from your address book to autofill the rest of the email address.
- Tap on a suggestion to select it.
How to Delete Unwanted Auto-Fill Email Addresses in Yahoo Email
Here's how you can delete unwanted auto-fill email addresses in Yahoo Mail:
Removing contacts from auto-complete list
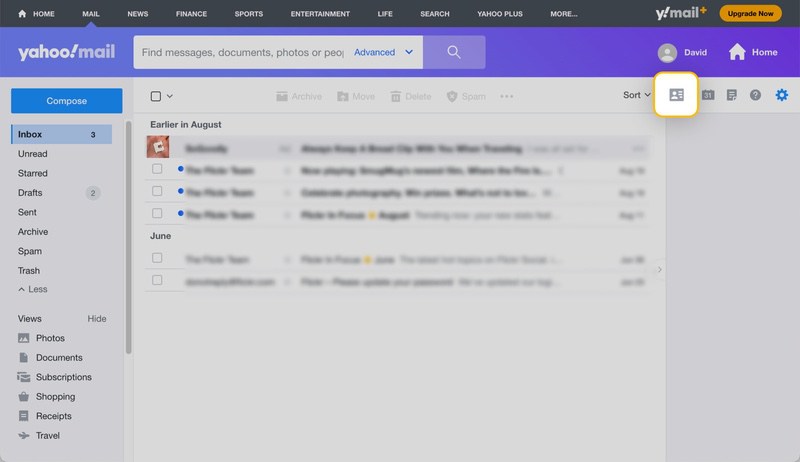
- Sign in with your Yahoo credentials.
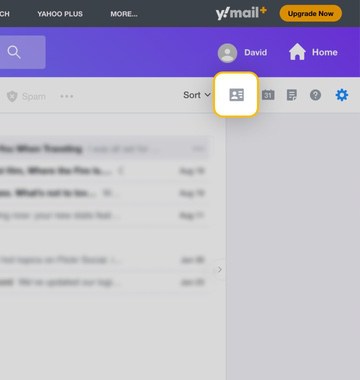
- Click on the Contacts icon located on the right side of the Yahoo Mail dashboard. It looks like an address book.
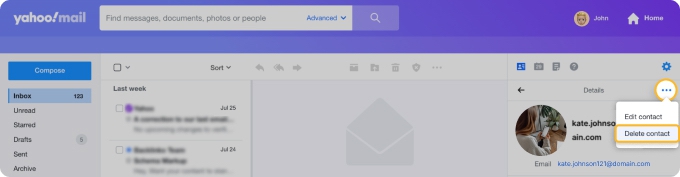
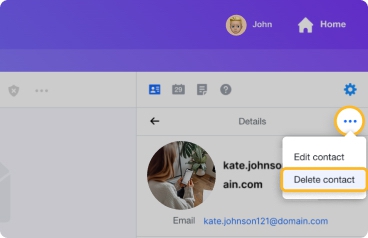
- Scroll through your contact list or use the search bar to find the unwanted email address. Click on the contact's name to open their details.
- On the contact details page, click on the three-dot menu (More options) in the upper-right corner. Select Delete from the drop-down menu. When prompted, confirm that you want to delete the contact.
Removing Suggested Email Addresses
Sometimes, Yahoo Mail suggests email addresses that aren't actually in your contacts but are remembered from previous emails. To remove these:
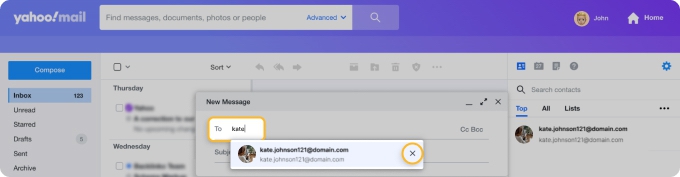
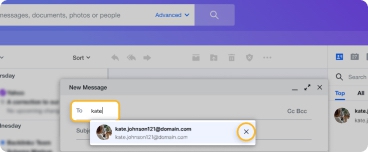
- Click on Compose to start a new email.
- Begin typing the unwanted email address in the To field. When the unwanted address appears in the drop-down suggestions, hover over it.
- An X should appear to the right of the suggested email address. Click the X to remove the email address from the suggestions list.
How to Delete an Auto-Populate Email Address in Gmail
Here's how to delete an auto-populate email address in Gmail:
Removing contacts from Gmail
- Log into Gmail.
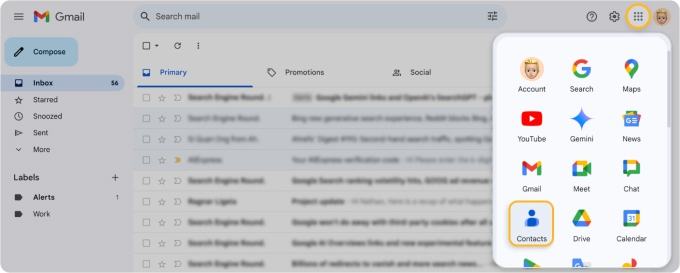
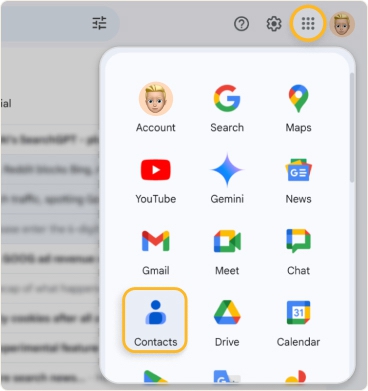
- Access Your contacts. Click on the Google Apps icon (a grid of dots) in the upper-right corner of the Gmail interface. Select Contacts from the list of apps.
- Use the search bar at the top to find the unwanted email address.
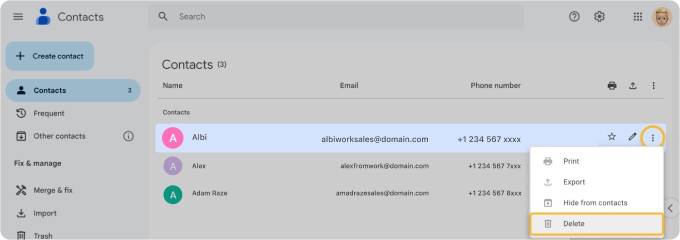
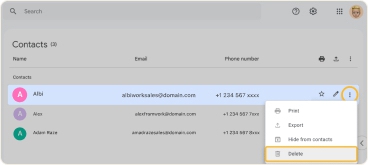
- Once you locate the contact, hover on their name.
- Click on the three-dot menu (more options) in the upper-right corner of the contact's details page.
- Select Delete from the drop-down menu.
- Confirm that you want to delete the contact when prompted.
Clearing recent contacts
Sometimes Gmail suggests email addresses that aren't saved as contacts but are remembered from previous interactions. To clear these:
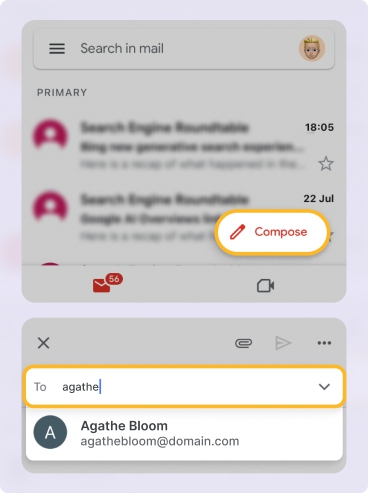
- Launch the Gmail app on your mobile device.
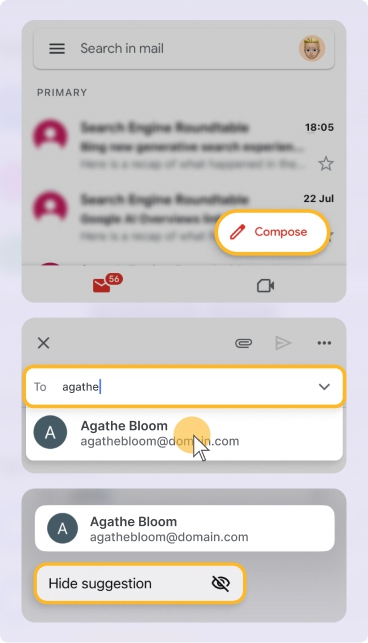
- Tap on the Compose button to start a new email.
- Begin typing the unwanted email address in the To field. When the unwanted address appears in the dropdown suggestions, long press on it.
- Tap Hide suggestion to remove it from the suggestions and then tap Hide again to confirm your choice.

Clearing all auto-fill data (browser)
If unwanted email addresses are being suggested by your browser's auto-fill feature, you can clear auto-fill data from the browser settings:
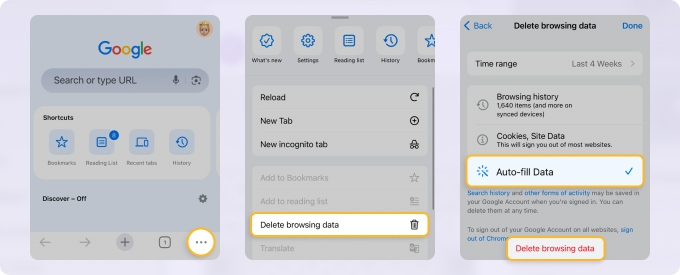
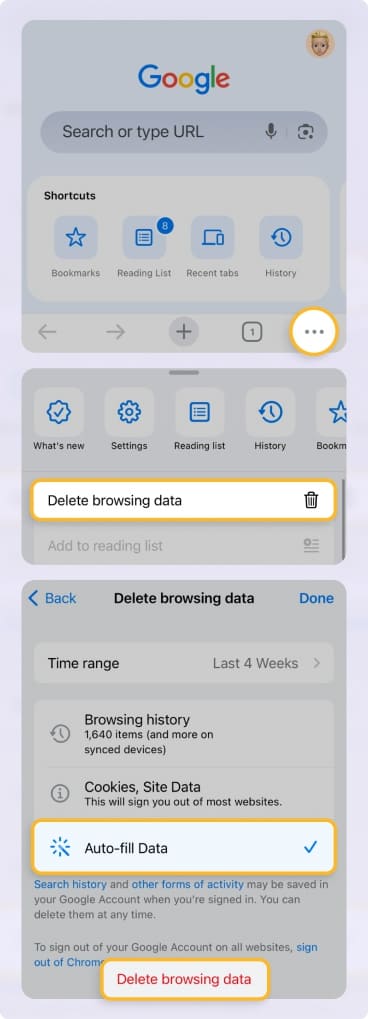
- Launch the Chrome browser on your mobile device.
- Tap the three-dot menu icon in the upper-right corner and tap Delete browsing data.
- Select the Auto-fill Data option. You can also select other data types if needed.
- Tap Delete browsing data to remove auto-fill entries, including email addresses, and then confirm your choice.
Hint: You can also access it from the Settings menu. After tapping the three dots, select Settings → Privacy and Security → Delete browsing data.
Removing suggested email addresses
Sometimes, Gmail suggests email addresses that aren't actually in your contacts but are remembered from previous emails. To remove these:
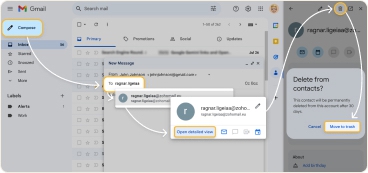
- Click on Compose to start a new email.
- Begin typing the unwanted email address in the To field.
- When the unwanted address appears in the drop-down suggestions, click it. Once it appears next to To, click it again, then hit Open detailed view.
- Click the pencil icon and save this suggestion as a contact, then hit Trash and select Move to trash to delete it from your contacts. After that, the suggestion will not appear again.