


Key Takeaways
- Adjust Gmail’s core settings for multiple inboxes, keyboard shortcuts, and importance markers.
- Set up a simple label system for inbox triage using Action Required, Waiting For, Read Later, and Reference.
- Create filters for automatic sorting of incoming emails. This includes domains, newsletters, CC emails, and repetitive keywords.
- Use Gmail’s built-in views to your advantage such as categories, summary cards, and purchases.
- Snooze emails you want to defer which returns the messages to the top of your inbox at a designated time.
- Take advantage of swipe actions for performing triage on your mobile device.
- Use Google Gemini in Gmail to process lengthy conversations, search using natural language, and receive reply and draft suggestions.
- Consider third-party tools like Clean Email to bypass Gmail limitations like bulk unsubscribe, rules for both new and existing emails, and reviewing messages from unknown senders.
Before You Start: Gmail Setup Limits
If you’re having trouble reaching it, you may be wondering does inbox zero work? Yes, it can work well with the right tools and a commitment.
There are a few Gmail features that should be set up ahead of time. This allows you to perform inbox triage as the first step for how to get your Gmail inbox to zero.
These features include multiple inboxes, your label architecture, and automated filters, and we’ll explain how to create and configure these in the subsequent sections.

Step 1: Configure Core Gmail Settings
Core Gmail settings that you must set up on the web give you a more efficient way to review and process incoming messages.
Multiple Inboxes
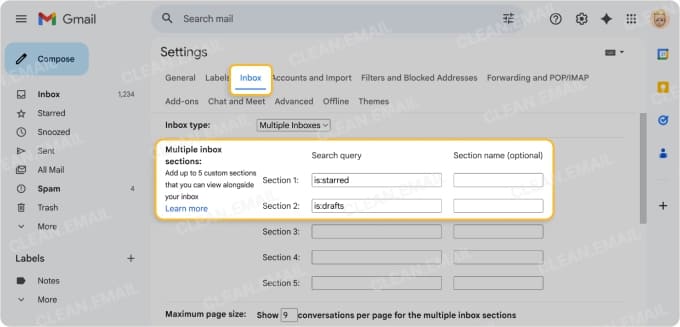
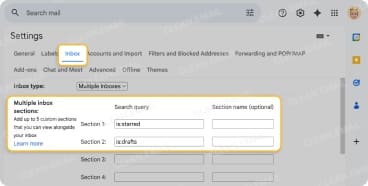
This feature lets you customize up to five inbox sections that can easily assist with your email triage. Solely available in the web application, you simply enter standard search operators and names to create the sections.
- Select Settings (gear icon) and click See all settings.
- Go to the Inbox tab and choose Multiple Inboxes in the Inbox Type drop-down box.
- Add the search query and name for each section you want to display. As examples, here are a few common queries:
- With a certain label: label:LabelName
- From a specific sender: from:sender@email.com
- In a particular status: is:unread
- Pick Save Changes at the bottom.
You’ll then see your screen refresh as you’re returned to your newly displayed inbox.
Keyboard Shortcuts
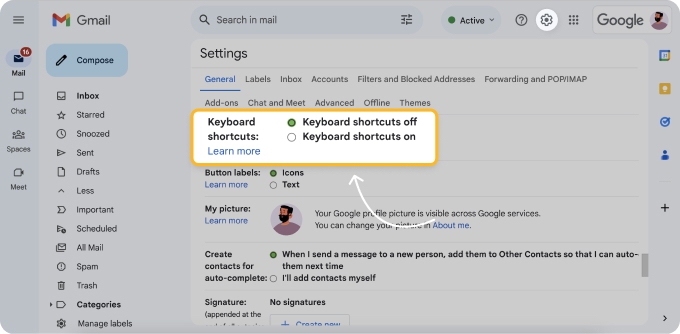
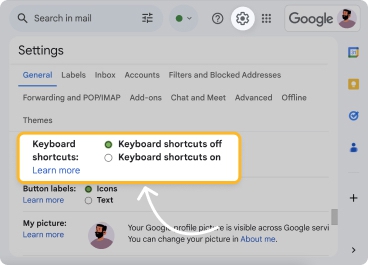
Another helpful feature in Gmail on your desktop lets you act on emails, navigate the web application, mark messages, and more. After you enable the keyboard shortcuts, you can customize them if you like.
- Select Settings and click See all settings.
- Go to the General tab.
- Scroll down to Keyboard Shortcuts and mark the Keyboard shortcuts on option.
- Pick Save Changes.
- Optional: To view or customize these, go to the Keyboard Shortcuts tab.
You can then try out one or two keyboard shortcuts that you plan to use often and confirm that they work as expected.
Importance Markers
To make messages stand out as important, for follow-up, or to address a question, you can use Gmail’s importance markers. These include stars and symbols that you can customize to suit your inbox triage needs.
- Select Settings and click See all settings.
- Go to the General tab.
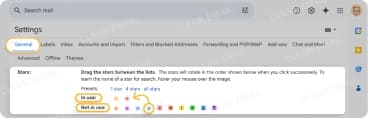
- Scroll down to Stars.
- Drag the stars or symbols you want from the Not in use section to the In use section or pick one of the Presets.
- Pick Save Changes.
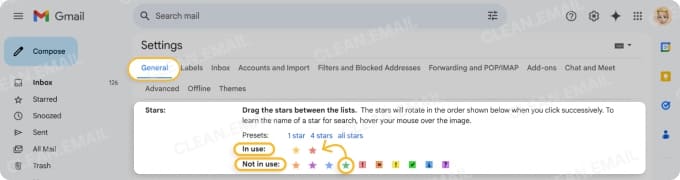
If you use more than one importance marker, you can cycle through to the one you want by repeatedly clicking the Star on an email until you reach the desired marker.
Step 2: Create a Simple Label System
In most cases, a successful label system is a simple one. Rather than creating dozens and dozens of labels, consider setting up only the following four labels to assist with your inbox zero processing stage – inbox triage.
- Action Required
- Waiting For
- Read Later
- Reference
To create, color, nest, and display your labels, do the following:
- Create: Click the plus sign next to Labels in the left-hand menu.
- Color: Click the three dots beside a label and move to Label color.
- Nest: Click the three dots beside a label and pick Add sublabel.
- Display (in the menu): Click the three dots beside a label and pick Show, Show if unread, or Hide.
You can also review your label list and remove, edit, show, or hide labels by selecting More → Manage labels in the left-hand menu.
Step 3: Build Gmail Filters for Automatic Sorting
To effortlessly handle emails before they reach your manual inbox triage queue, you can set up automatic filters in Gmail. By choosing conditions for matching messages and selecting the actions to perform on them, you can manage incoming emails without lifting a finger.
Here are just a few useful filter types:
- Specific domains
- Newsletters and mailing lists
- CC and/or FYI emails
- Repetitive subject-line keywords
To create a filter, follow the steps below. As an example, we’ll use the keyword “digest” that appears in the subject line for our daily and weekly summaries.
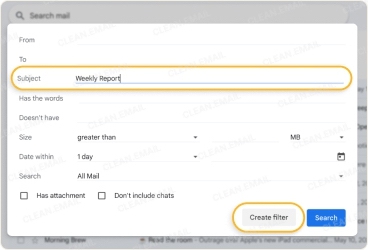
- Click the Show search options button (three lines) on the right of the Search box.
- Enter the criteria for the matching messages. For our example, we enter digest in the Subject field.
- Select Create filter.
- Mark each action that you want to apply to the matching messages. For our example, we mark Skip the inbox (Archive it).
- Select Create filter.

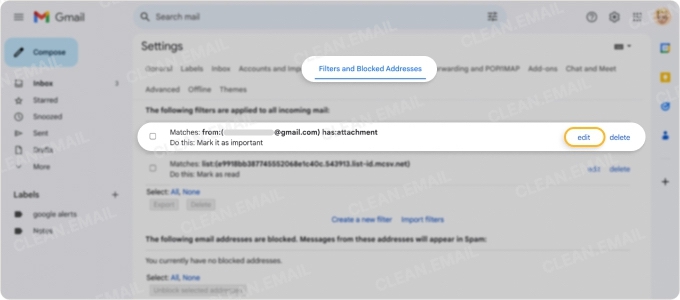
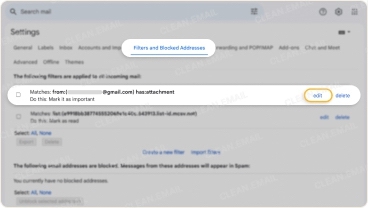
To edit or delete a filter, go to Settings → See all settings → Filters and Blocked Addresses.
Step 4: Use Gmail’s Built-In Special Views Before Adding Labels
Gmail provides convenient features for sifting specific types of messages for you. By using these views and tools, you can eliminate the need for extra labels or automatic filters. So, it’s essential to review and become familiar with them before creating excess labels.
Promotions, Social, Updates, and Forums: You normally see these as category tabs when using the Default inbox type, but they also display in the left-hand menu which is handy when using the Multiple Inbox type.
Purchases: This label also appears in the menu and lists all emails related to your purchases including confirmations, delivery updates, and refund statuses.
Summary Cards: These provide AI-generated summaries of emails including details, upcoming activities, delivery status, and task reminders. To use the tool, you must also enable conversation view and Gmail smart features.
To enable Summary Cards:
- Go to Settings → See all settings → General.
- Mark Conversation view on.
- Mark Smart features (for Gmail, Chat, and Meet).
- Pick Save Changes.
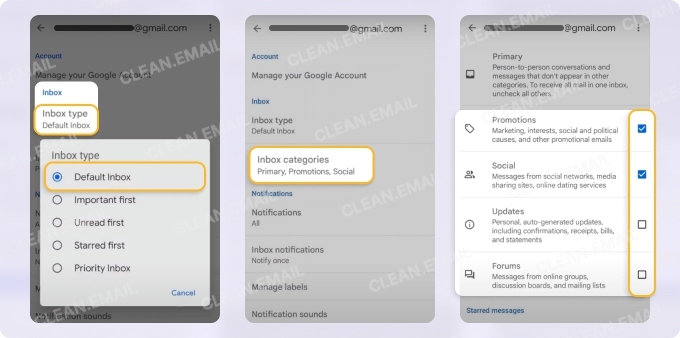
Mobile Inbox Category Controls: Because Multiple Inboxes isn’t available in the mobile app, you can use the Default inbox type and customize the Gmail Categories that display.
Select Categories on Android:
- Open the Gmail app on Android.
- Display the left-hand menu and pick Settings.
- Select your email address.
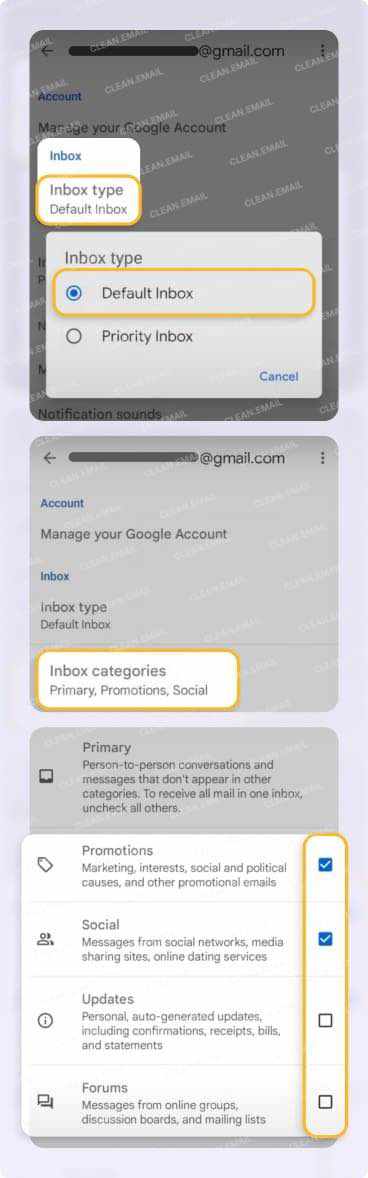
- Choose Inbox type and pick Default Inbox.
- Tap Inbox categories and mark the ones you want to display.
- Use the arrow on the top left to exit the settings.
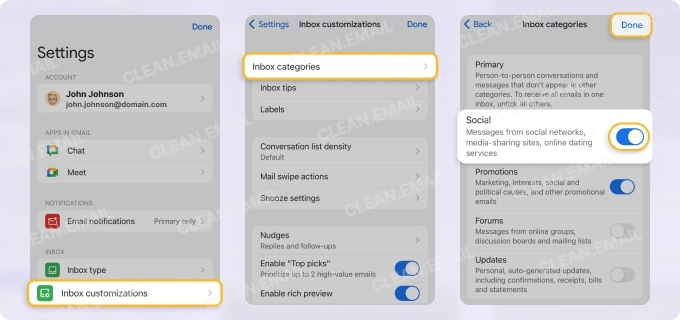
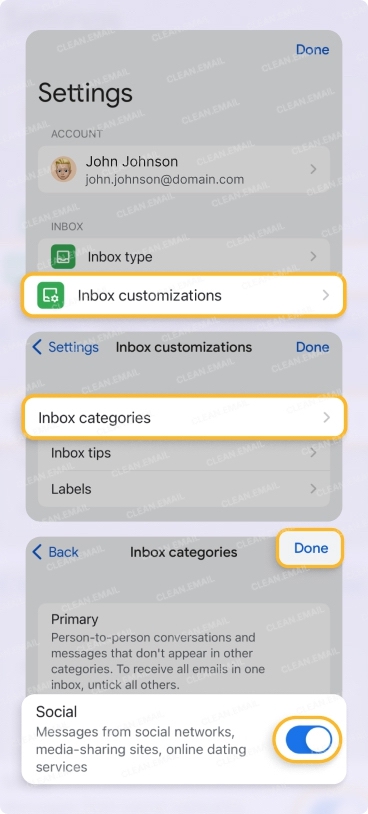
Select Categories on iPhone:
- Open the Gmail app on iPhone.
- Display the left-hand menu and pick Settings.
- Choose Inbox type, pick Default inbox, and tap Done.
- Return to the Settings.
- Select Inbox customizations → Inbox categories and mark the categories you want to display.
- Tap Done.
Step 5: Use Gmail Snooze as the Defer Action
As you know, performing inbox triage involves the Defer/Delay action (“Waiting For” label above) for those emails that can wait until later. So that you don’t forget about these messages, you can use Gmail’s Snooze feature.
The advantage to this rather than applying a label or importance marker is that the email pops back to the top of your inbox at a date and time of your choice. And with Gmail notifications enabled, you’ll receive an alert just like with any other new email.
For detailed usage instructions on the web and in the mobile apps, review our Gmail Snooze Feature guide.
Step 6: Configure Gmail Mobile Swipe Actions
As you’ve read so far, adjusting the settings for your Gmail inbox zero strategy is mostly done in the web application which makes sense for building the system. With this in mind, the mobile app is better suited for maintaining that system you build.
To continue your inbox zero journey and perform email triage on your mobile device, you can configure your Gmail swipe actions. This lets you handle new emails quickly.
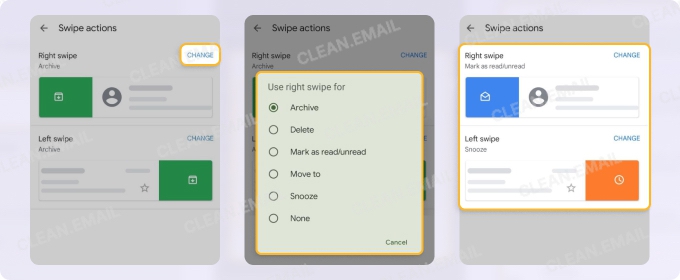
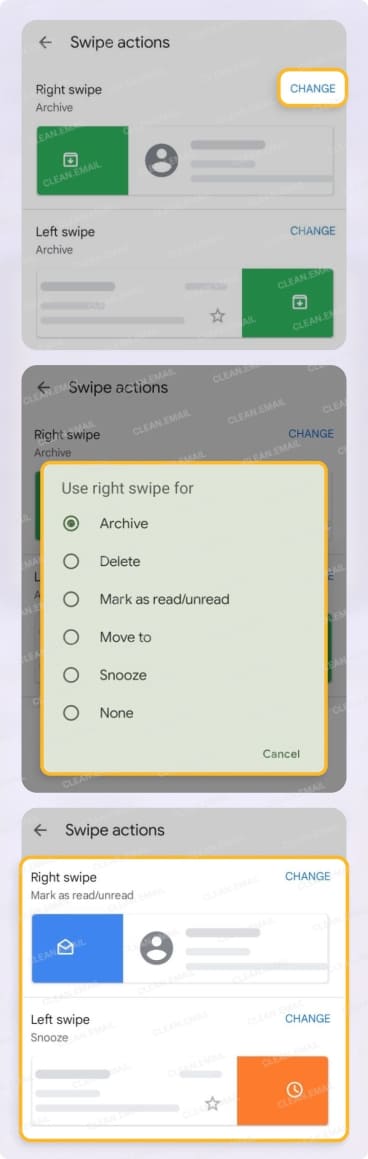
Recommended swipe actions:
- Archive for the main swipe action.
- Delete/Trash or Snooze for the secondary swipe action.
Set up swipe actions on Android:
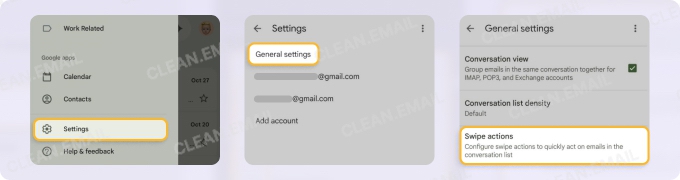
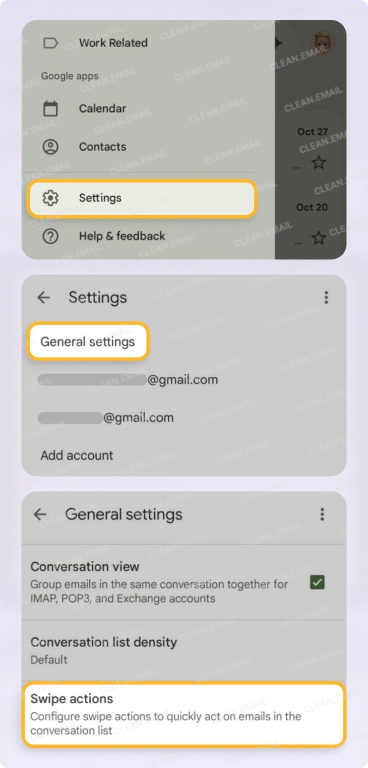
- Open the Gmail app on Android.
- Display the left-hand menu and pick Settings.
- Select General settings.
- Choose Swipe actions.
- Pick Change for the Right Swipe and Left Swipe and select the action for each.
- Use the arrow on the top left to exit the settings.
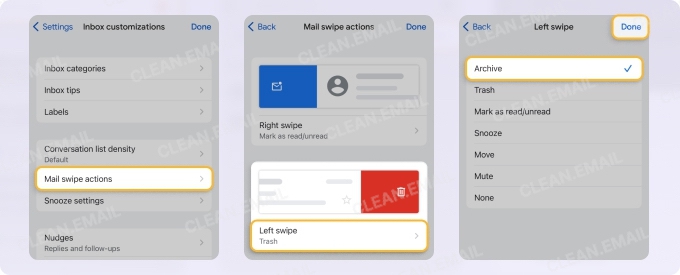
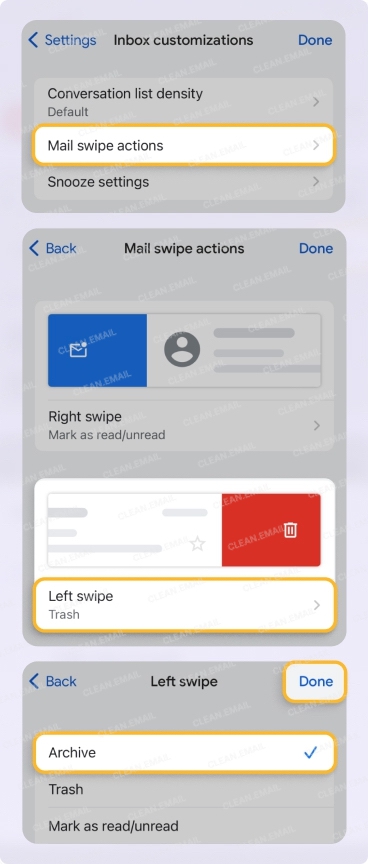
Set up swipe actions on iPhone:
- Open the Gmail app on iPhone.
- Display the left-hand menu and pick Settings.
- Choose Inbox customizations.
- Pick Mail swipe actions.
- Select Right swipe and Left swipe individually to select the action for each.
- Tap Done.
Remember, the Gmail mobile app does have limitations. So, it’s best to use the web application for filters, major cleanups, and creating a label structure.
Step 7: Gemini in Gmail as the AI Processing Layer
While it doesn’t replace a solid inbox structure, Gemini AI in Gmail can help you process complex emails faster.
Thread summaries: Ask Gemini to summarize long email and conversation threads.
AI support in Gmail search: Use natural language to search for specific messages.
Suggested replies and drafting: Take advantage of AI for replying to emails and creating drafts.
Keep in mind that Gemini assists with summarizing and responding to emails, but not with reducing email volume, unsubscribing, or clearing out old messages.
For other ways to improve on email management, check out some Gmail tips and tricks.
What Gmail Still Can’t Do
As you can see, Gmail does offer a healthy feature set for creating an inbox zero system. But unfortunately, there are still several aspects of this type of system that Gmail doesn’t support like advanced automation, retroactive cleanup, and sender control.
- Native unsubscribe depends on sender compliance.
- Gmail cannot run age-based cleanup rules.
- Filters do not fully solve existing inbox cleanup.
- Gmail has no new-sender review queue.
- Gmail does not manage multiple accounts through one unified rule system.
Fill Gmail Gaps With Clean Email
Because of those items listed above, you can see that Gmail does have some gaps and limitations for creating the ultimate inbox zero system. This is where Clean Email can come in and fill those gaps.
Use the following Clean Email smart features to enhance your system:
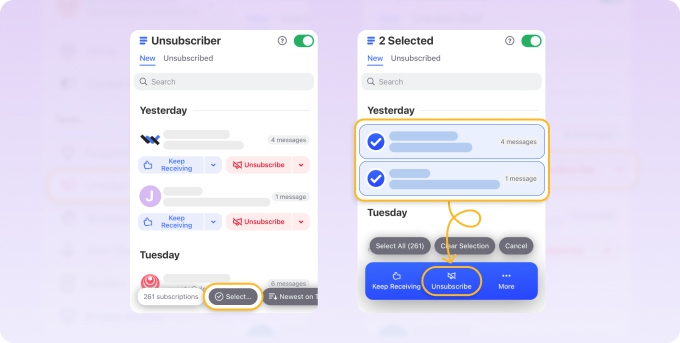
Unsubscriber: Unsubscriber sends the opt-out request to the sender and automatically delivers future messages to the Trash. This differs from Gmail where the sender can ignore the opt-out request, re-add you to the list later, or keep you on another list while emails continue to arrive.
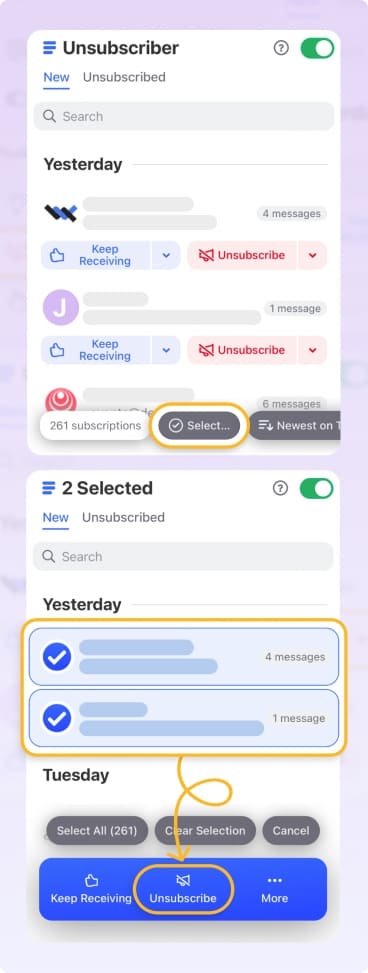
Additional features:
- Unsubscribe from multiple emails at once, rather than just one at a time.
- Pause subscriptions temporarily when needed.
- Continue the subscription, but use Keep Newest to hold onto only the most recent email.
Auto Clean: Auto Clean lets you set up mailbox rules similar to Gmail’s automated filters. The difference here is that with Auto Clean, you can create age-based rules. For example, you can automatically send emails to the Trash after 1, 7, or 30 days.
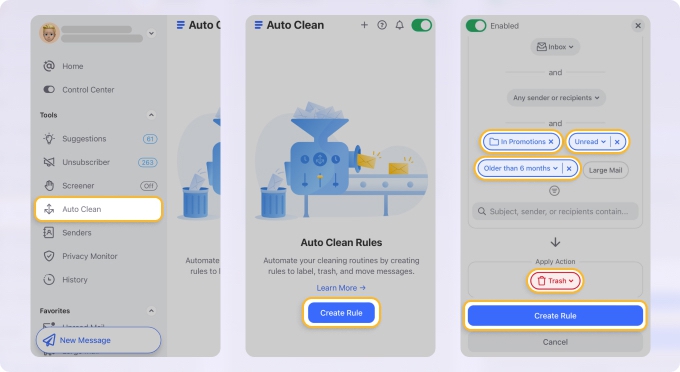
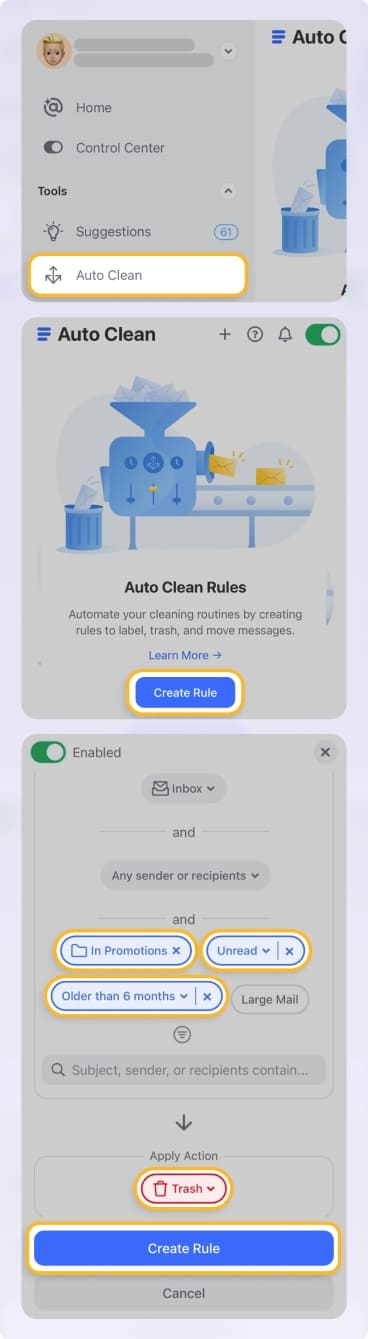
Auto Clean rules apply to all messages in your mailbox, not just new emails you receive as with Gmail’s filters.
Screener: Screener helps you review emails from unknown senders before they reach and disrupt your already-processed inbox.
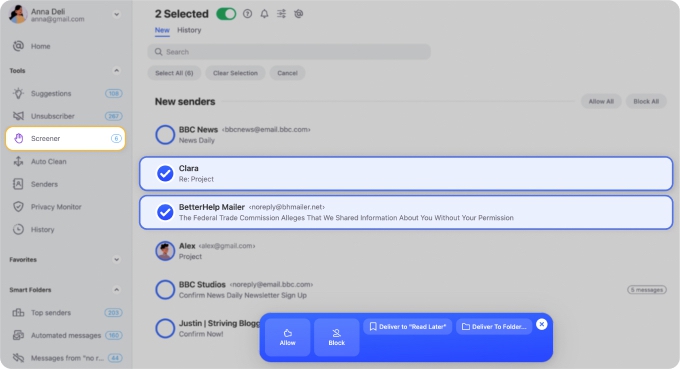
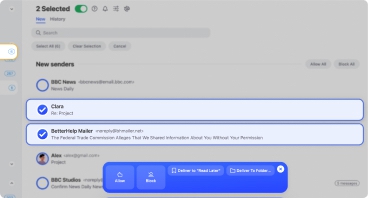
The emails are kept in a designated Screener section where you can review and then Allow, Block, or Deliver to a Folder for quick and easy decision-marking.
Clean Email has both web and mobile apps with seamless syncing, lets you move between multiple email accounts with a switch, and is committed to its users’ privacy and security.
FAQ
How do I set up inbox zero in Gmail?
To reach inbox zero in Gmail, start by clearing out the existing clutter with a clean Gmail inbox walkthrough. Then, adjust your settings for core features like Multiple Inboxes and Automated Filters, create labels for inbox triage, and set up swipe action for triage on your mobile device.
Does Gmail have a sort button?
Gmail is search-based, not traditional sort-based. So, it does not have a customary sort button like other email systems.
Can you achieve inbox zero in Gmail without deleting emails?
Yes, you can reach inbox zero by processing items and removing them from your inbox, but that doesn’t mean you have to delete them. Consider archiving emails you may need later, snoozing messages for follow-up, labeling emails to organize them, and unsubscribing from messages you no longer want to receive.
Can I maintain inbox zero across multiple Gmail accounts?
Yes, there are a few ways to maintain inbox zero for more than one Gmail account. You can use email forwarding to send messages from your secondary account to your primary account, use the combined mobile view for moving between accounts, or consider a third-party tool like Clean Email that lets you switch between email accounts in a click.
What is the fastest way to get Gmail inbox zero for the first time?
For a quick inbox zero start, clean your inbox of old clutter, bulk archive emails you want to keep, and then review and use importance markers or labels for the remaining messages.


