


How to Customize Gmail Backgrounds and Themes
Changing your theme on desktop is easy to do. From colorful pictures to your own photos, you have plenty of options.
📌 While you cannot choose a theme or photo for your Gmail background on mobile, we’ll explain how to make a slight change on both Android and iPhone.
On Desktop
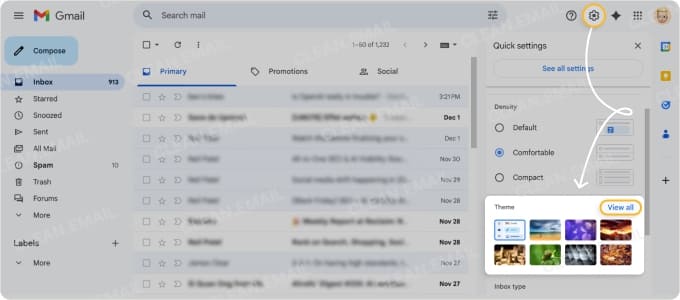
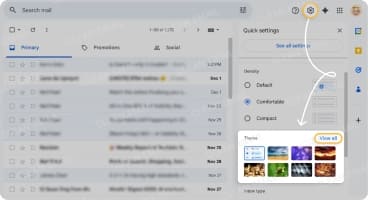
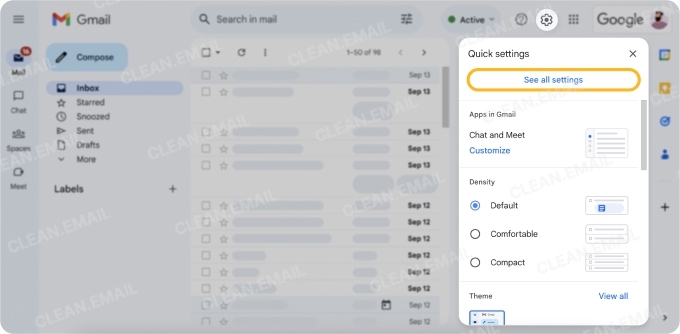
- In Gmail, select Settings (gear icon).
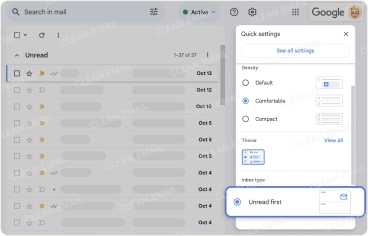
- In the Quick settings pane, choose a theme, or click View all to see more options.
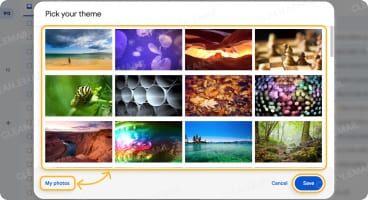
- Pick a theme from the options or click My photos to upload a picture background from your Google Photos.
- Optional: If you see the formatting toolbar at the bottom of the pop-up window, you can change the text background, vignette, and blur for that theme. Note that these options may not be available for all themes.
- Choose Save.


On Android
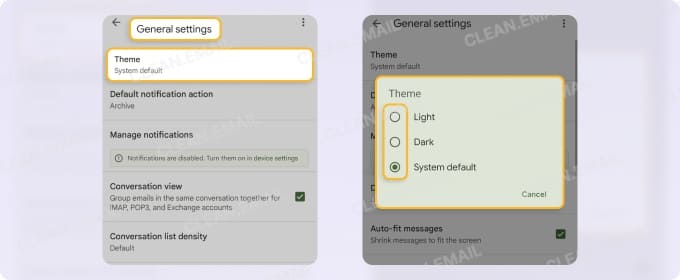
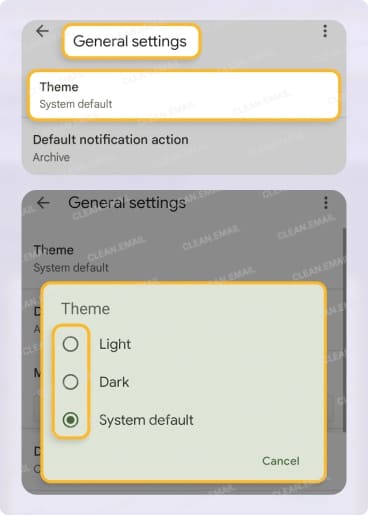
On Android, you can have Gmail match your system default or use light or dark mode.
- Open the left-hand menu using the icon on the top left.
- Select Settings → General settings.
- Choose Theme.
- Pick Light, Dark, or System default.
On iPhone
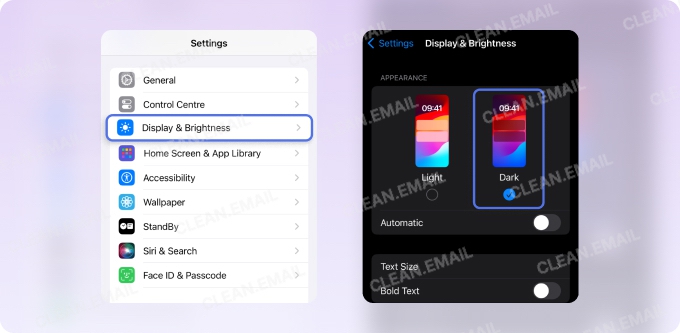
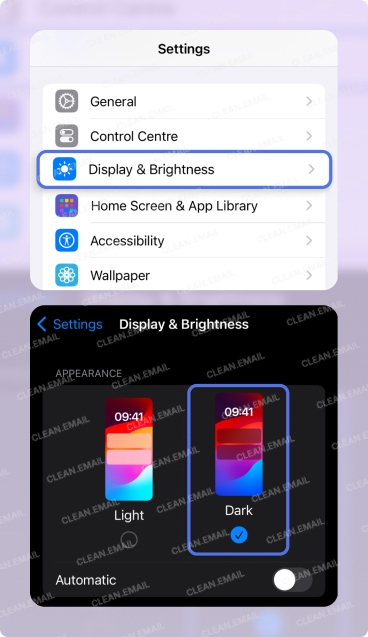
📌 On iPhone, you can currently only have Gmail match the Dark Mode setting on your device.
To turn on Dark Mode on iPhone, go to Settings → Display & Brightness and select Dark.
How to Customize Gmail Layouts and Tabs
Choosing an inbox layout is not only essential to effective mailbox management but to your overall email experience.
You can change the layout and optionally include tabs at the top on desktop. And on mobile, you have similar options.
Here are the inbox types available in Gmail and what they mean:
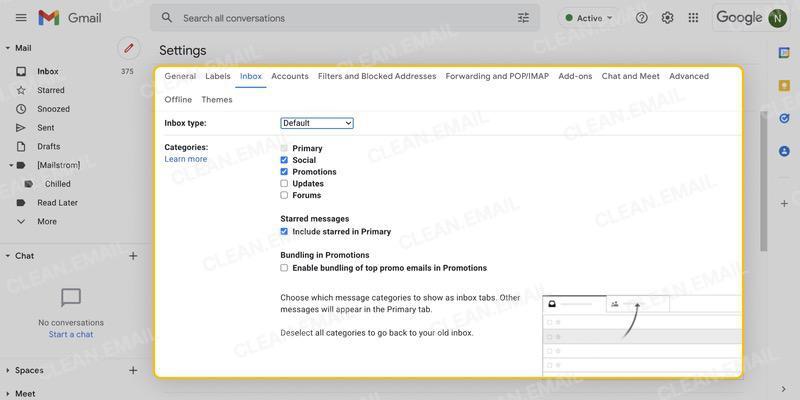
- Default: Divides your inbox into category tabs for Primary, Social, Promotions, Updates, and Forums.
- Important first: Creates sections for Important (top) and Everything Else (bottom).
- Unread first: Creates sections for Unread (top) and Everything Else (bottom).
- Starred first: Creates sections for Starred (top) and Everything Else (bottom).
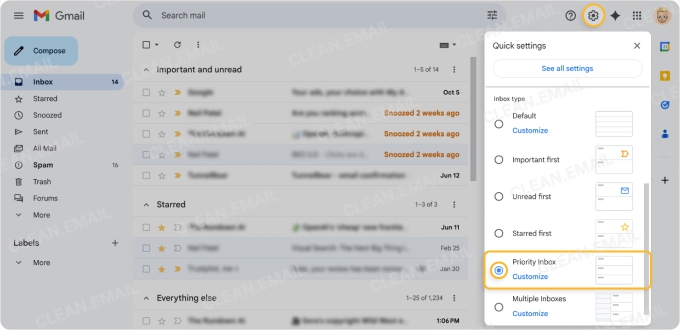
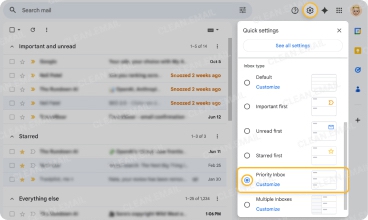
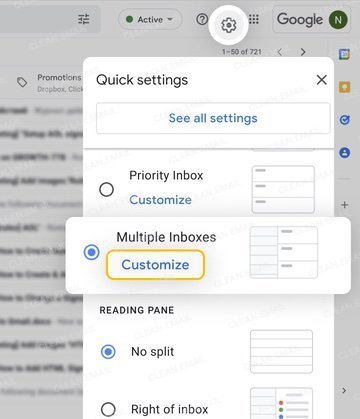
- Priority Inbox: Lets you choose three sections to display above the Everything Else section.
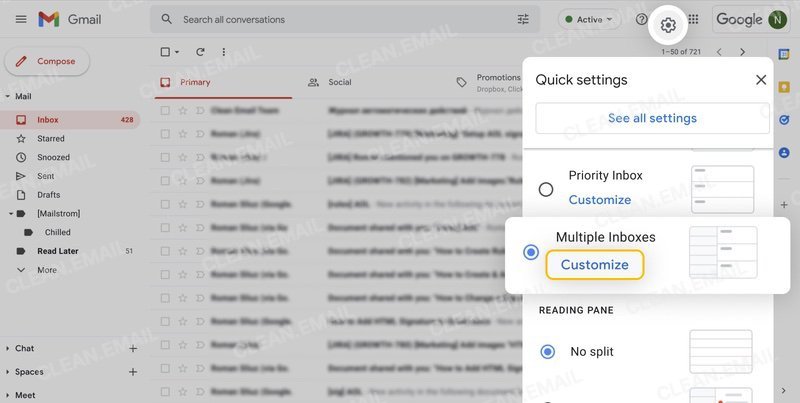
- Multiple Inboxes (desktop only): Lets you choose which sections to display using search queries and section names.
💡 Tip: If you decide to go with the Default layout, check out how to best use the Gmail category tabs.
On Desktop
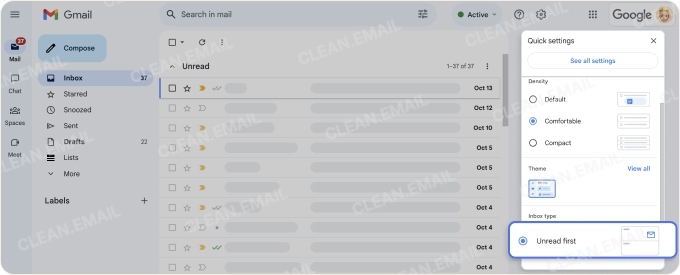
- Select Settings and choose a layout below Inbox type on the right.
- Alternatively, you can customize the inbox type from the get-go:
- Select Settings → See all settings and go to the Inbox tab.
- Choose an Inbox type in the drop-down list.
- Optional: Depending on the layout you pick, you can customize certain options. As examples, for the Important First layout, you can select the number of items to show and for Priority Inbox, you can select the sections to display.
- Click Save Changes at the bottom.
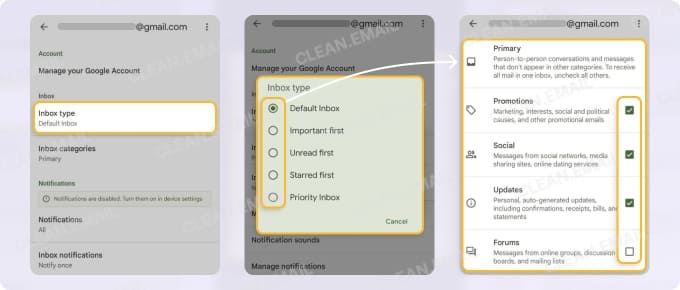
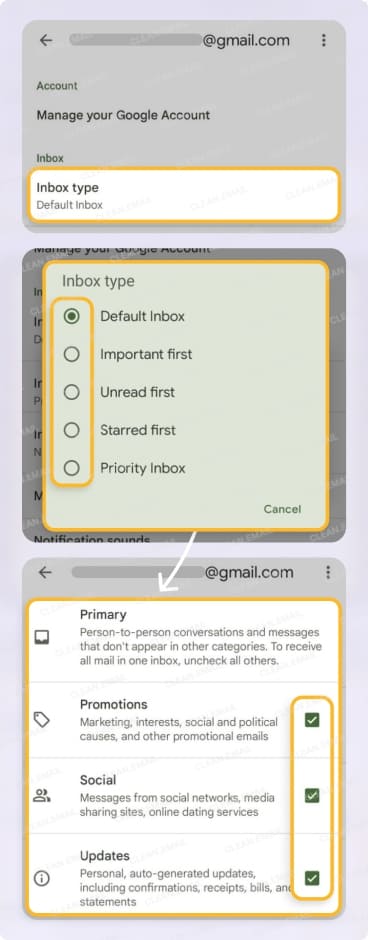
On Android
- Open the left-hand menu and pick Settings.
- Choose an account.
- Pick Inbox type in the Inbox section.
- Select a layout. If you choose the Default, you can customize which categories display as shown below. Pick Inbox categories in the Inbox section and mark the ones you want to see.
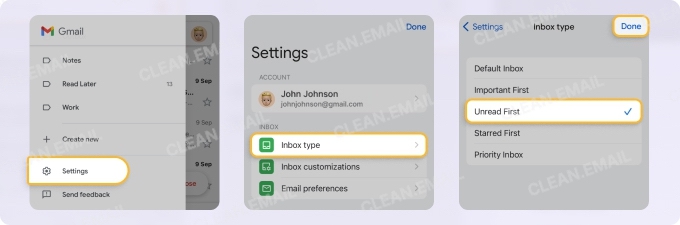
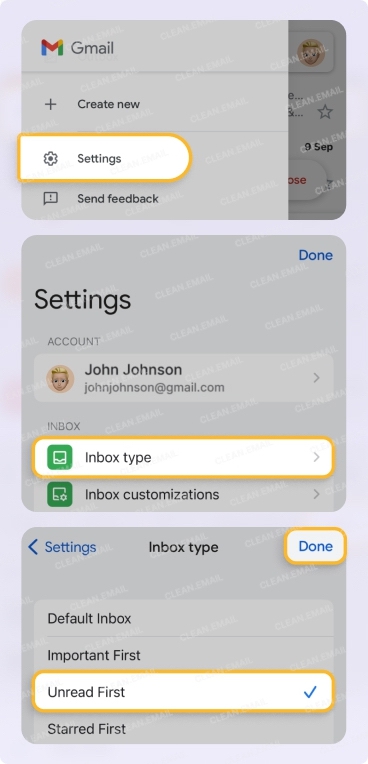
On iPhone
- Optionally choose an account using your profile icon on the top right.
- Open the left-hand menu and pick Settings.
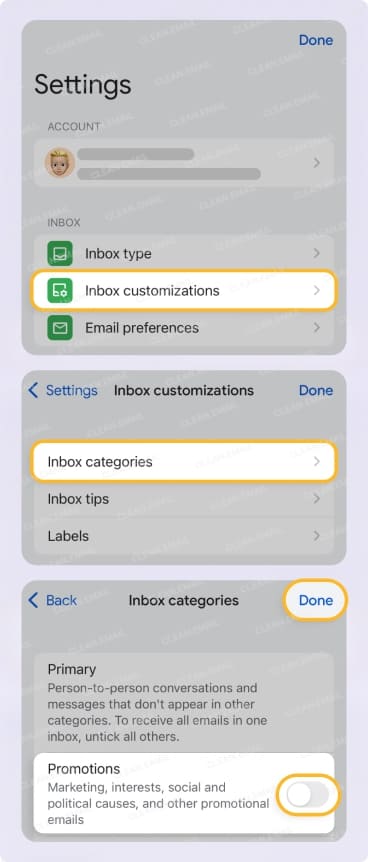
- Pick Inbox type in the Inbox section.
- Select a layout.
- Tap Done.
If you choose the Default or Priority Inbox, you can customize what displays:
- Pick Inbox customizations in the Inbox section.
- Select Inbox categories or Inbox labels depending on the layout.
- Choose what you want to display, and tap Done or Save.

How to Customize Gmail Signatures
A designated email signature ensures you always have a closing in your messages. Whether your name and phone number or your title and company logo, you can add a signature to automatically populate for you.
In the mobile Gmail app, you can add a different signature than on the web if you want your recipients to know you’re on-the-go.
On Desktop
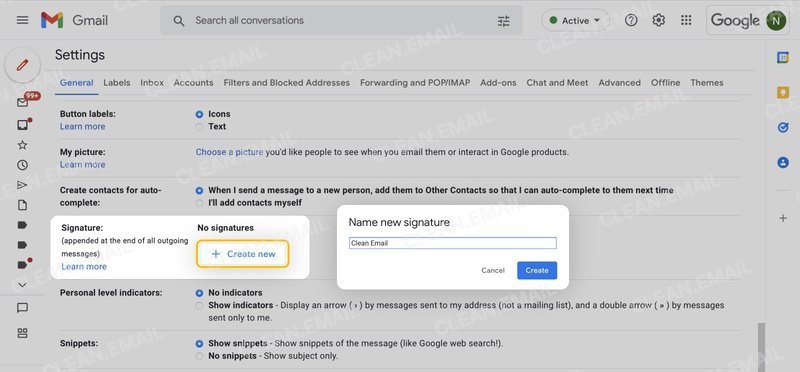
- Select Settings → See all settings and go to the General tab.
- Choose Create new in the Signature section.
- Name the new signature and click Create.
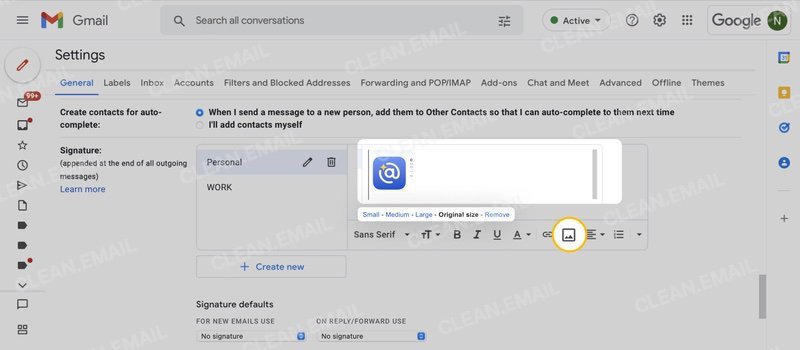
- Enter your signature in the text box and use the toolbar to format it, add a link, or insert an image.
- Pick the Signature defaults for new emails, replies, and forwards, and optionally check the box to insert the signature before the quoted text.
- Click Save Changes.
On Android
- Open the menu and pick Settings.
- Choose an account.
- Pick Mobile signature in the General section.
- Enter your signature and tap OK.
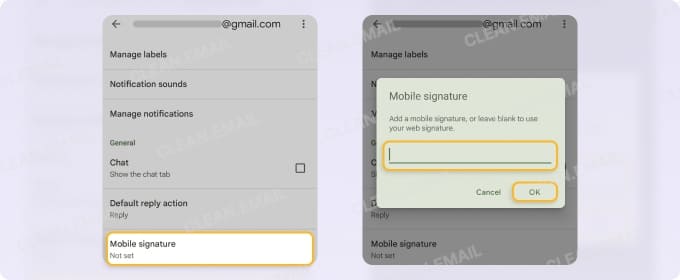
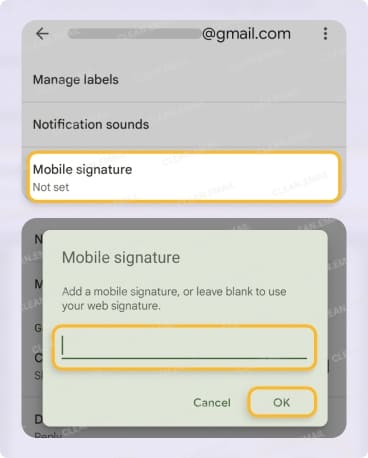
If your mobile signature is left blank in the Android app, Gmail will use the signature you set up on the web.
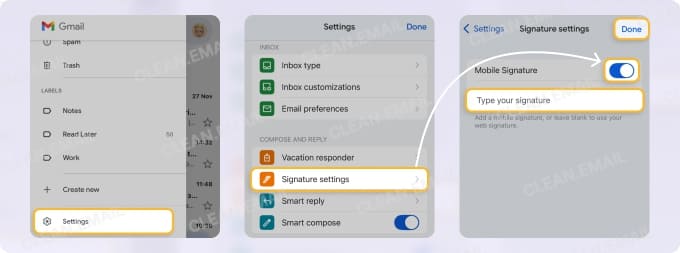
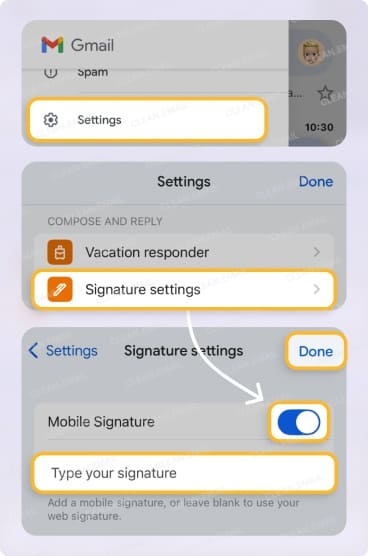
On iPhone
- Optionally choose an account using your profile icon.
- Open the menu and pick Settings.
- Pick Signature settings in the Compose and Reply section.
- Turn on the Mobile Signature toggle.
- Enter your signature or leave the box blank to use your web signature.
- Tap Done.
💡 Tip: For help with your signature or for something unique, look at how to make a professional signature, or to add an HTML signature.
How to Customize the Gmail Sidebar Menu
While there aren’t a ton of customization options for the sidebar (menu) in Gmail’s web application, there are a few things you can do to make it more useful for you.
Select Settings → See all settings and go to the Labels tab.
You’ll then see System Labels at the top along with your custom Labels at the bottom and can do the following:
- Choose Show or Hide next to each label to either display or hide the label.
- Pick Show if unread for certain labels to only display the label when it has unread emails.
- Click Edit to change a label name or Remove to delete a label. Warning: Deleting a label removes it completely, not just from the menu.
As you make the above adjustments, you’ll see your Gmail menu update.
💡 Note: Customization helps Gmail look the way you want, but it doesn't reduce the volume of messages coming in. Clean Email is an inbox management tool that handles that side: Cleaning Suggestions point out what to remove, Auto Clean sorts incoming messages by rules you set, and Unsubscriber removes you from mailing lists in bulk.
It works on the web, macOS, and mobile, so you can manage your inbox from the same device you use Gmail on.
Conclusion
Customizing Gmail is more than a visual upgrade. The right theme, layout, signature, and sidebar setup shape how quickly you find what you need and how comfortable your inbox feels day to day.
Start with the changes that affect your workflow most, usually the inbox type and signature, then layer in the smaller touches like themes and sidebar labels. A few minutes of setup on desktop and mobile pays off every time you open the app.
And once your Gmail looks and works the way you want, keeping it that way is the easier half of the job.


