


What You’ll Learn in This Guide
When I first started digging into Outlook, I realized most people use it the way it comes out of the box — plain, functional, but far from optimized. In this article, I want to show you how to take it further and make Outlook work the way you actually need it to.
I’ll walk you through how a few small tweaks can completely change the look and feel of your inbox — from adjusting colors and display styles to setting up smarter ways of sorting and labeling messages.
I’ll also show you how Outlook’s built-in AI can save hours of your time, breaking down long threads into quick highlights and even drafting replies for you.
But personalization isn’t just about colors or AI tricks — it’s also about how your inbox is organized on screen. I’ll explain how to adjust the layout so you can instantly spot what matters most, whether that’s urgent client emails or project updates.
And because your emails should always leave the right impression, I’ll show you how to create a signature that looks polished and consistent across devices, with or without AI’s help.
Finally, I’ll share some add-ins that can transform Outlook into a true productivity hub, from writing assistants to project management tools.
By the end, you’ll see Outlook through a completely new lens — and you’ll know exactly how to turn it into an inbox that feels designed just for you.

How to Make Outlook Look Better
If your Outlook feels dull or cluttered, a few tweaks can make it much easier on the eyes:
- Switch to Dark Mode to reduce eye strain.
- Use Focused Inbox to separate important mail from newsletters and promotions.
- Apply Categories with colors to make emails easier to scan.
- Adjust message spacing and reading pane for a cleaner, less overwhelming layout.
These small changes add up, helping you build an inbox that’s not just functional but enjoyable to use.
How To Personalize Outlook Email
Outlook offers numerous customization options. For example, you can change the theme, change how the messages in your inbox are displayed, and more. However, if you aren’t very familiar with the ins and outs of this email provider, you may not know how to use Outlook and personalize it more. So, let’s walk through how to personalize your Outlook inbox a bit more!
To personalize Outlook through the web application:
- Go to https://outlook.live.com/.
- Click on Settings in the upper right.
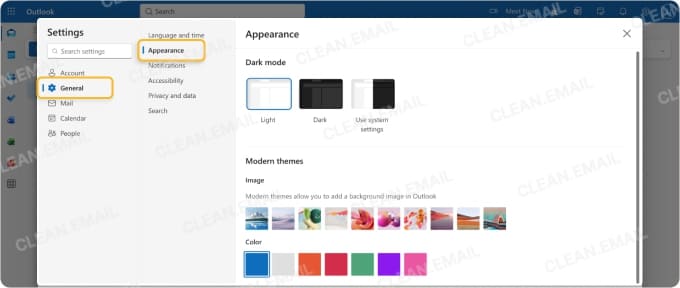
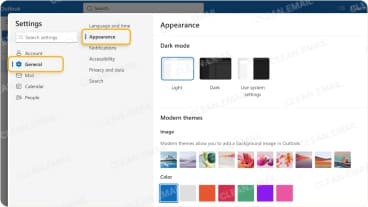
- Go to General → Appearance. From here, you can select a theme (color scheme), change the display density, or swap between Dark mode. Any of these settings will automatically change — no saving required.
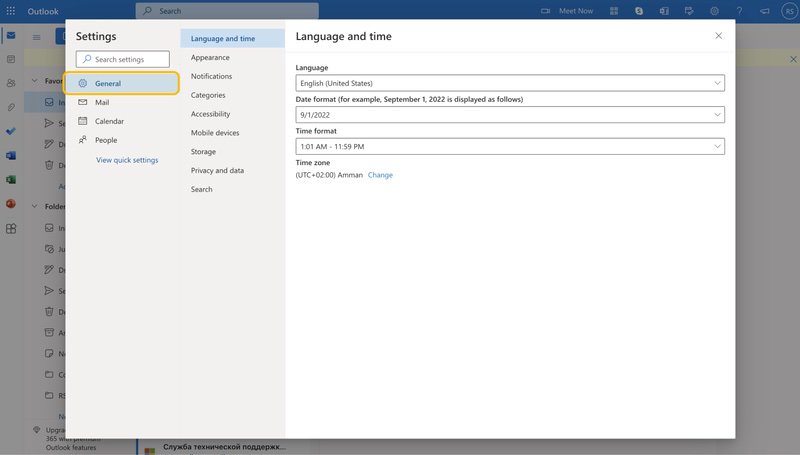
- Under General, you can change the language and time, notifications, customize categories, and more.
- Under Mail, you can change the view of your inbox, create Outlook rules, and more.
- Once you make any changes to the settings, be sure to push Save in the lower right corner.


Similarly, if you use the Outlook mobile app, you can personalize some aspects of your inbox as well (although the options are more limited).
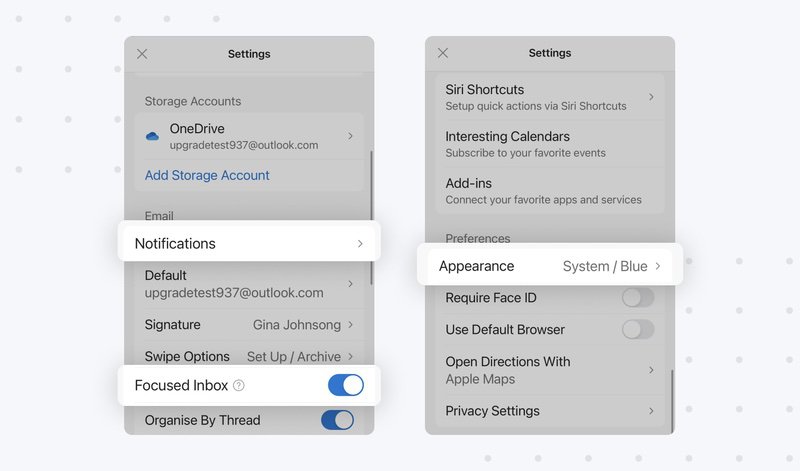
To customize Outlook view on mobile (for iPhone users):
- Open the mobile app.
- Click the logo in the upper left corner.
- Select Settings in the bottom left.
- From here, you can do several things, like:
- Set notifications
- Select a focused inbox
- Set appearance and other settings


How to Use Outlook Copilot for Personalization
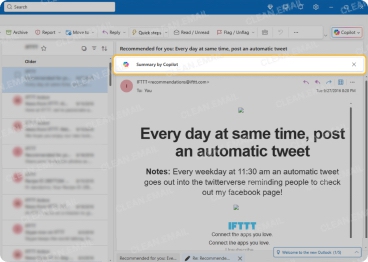
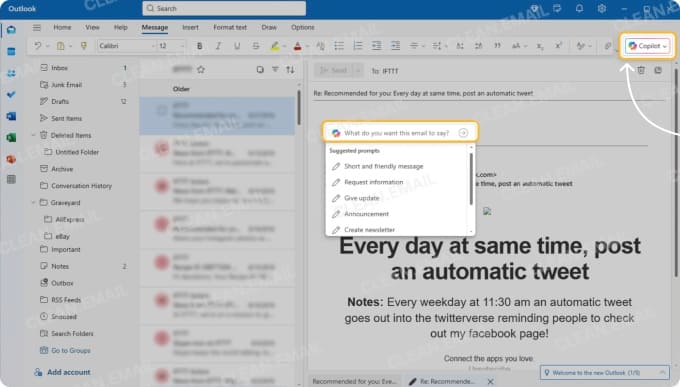
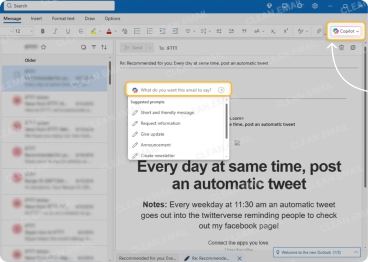
Outlook’s new Copilot AI takes personalization to another level by helping you manage email faster and with less effort. Instead of manually reading through endless threads or drafting replies from scratch, Copilot can handle the heavy lifting for you.
With Copilot, you can:
- Summarize conversations – Quickly get the key points from long email chains without reading every message.
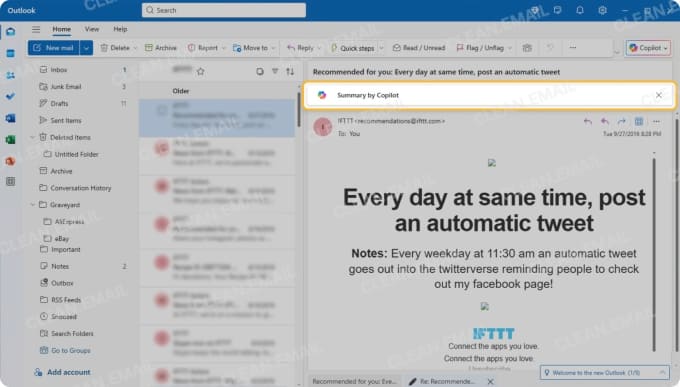
- Draft or rephrase replies – Ask Copilot to write responses in a specific tone, whether you need something formal, casual, or friendly.
- Turn emails into tasks or reminders – Convert important messages into action items with a single click, so nothing slips through the cracks.
Copilot is available in Outlook web, desktop, and mobile (where enabled), making it easy to keep your inbox organized and your communication polished no matter which device you use.
How To Customize Outlook Email Client
In the Outlook desktop app (Microsoft 365, Outlook 2021, 2019, 2016, and older), you can’t add themes like in the web version, but you can still adjust fonts and text size to personalize how your inbox looks.
- Change fonts in your message list (Windows): Go to View → View Settings → Other Settings, then adjust the Row Font (controls sender names, subject lines, and previews) and Column Font.
- Change fonts for composing and replying (Windows): Go to File → Options → Mail → Stationery and Fonts, then pick fonts for new messages, replies/forwards, and plain text messages.
- Change fonts on Mac: Go to Outlook → Preferences → Fonts, then choose fonts for New Mail, Replies/Forwards, or Plain Text. You can also adjust Text Display Size with a slider.
💡 Keep in mind: These font changes only apply on the device where you set them — they don’t sync across Outlook web, mobile, or other platforms. On Mac, you can also personalize your inbox by editing the toolbar or setting custom swipe actions for quicker control.
How To Change Outlook Layout
Customizing the New Outlook App
Microsoft has been rolling out the new, unified Outlook app (sometimes called “One Outlook”) for Windows and Mac. This version looks and feels much closer to Outlook on the web, so most of the customization tips you use there — like themes and dark mode, focused inbox and categories, or even signature customization — apply here too.
If you’ve switched to the new Outlook, keep in mind that some older settings (like Stationery and Fonts) aren’t available anymore. Instead, personalization now revolves around themes, layout options, and built-in AI tools.
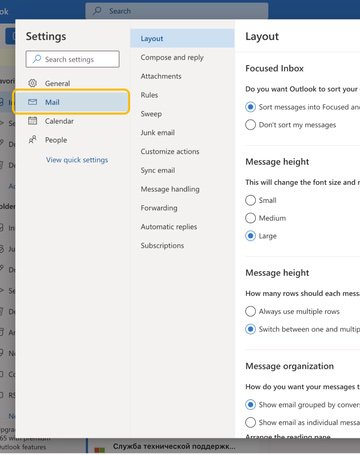
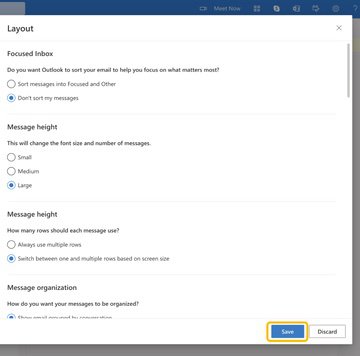
Sometimes you don’t need to change up everything in Outlook — you just want to make sure the layout meets your needs. So, let’s look at how to change Outlook layout a bit more.
For the web app, you can:
- Go to https://outlook.live.com/.
- Click on Settings in the upper right.
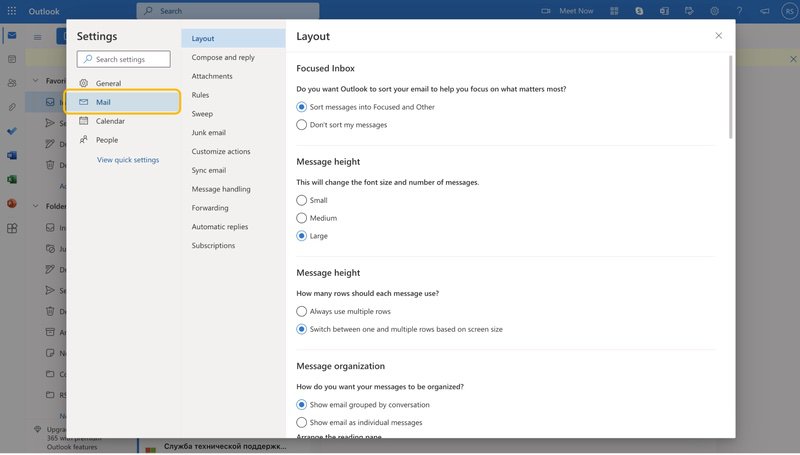
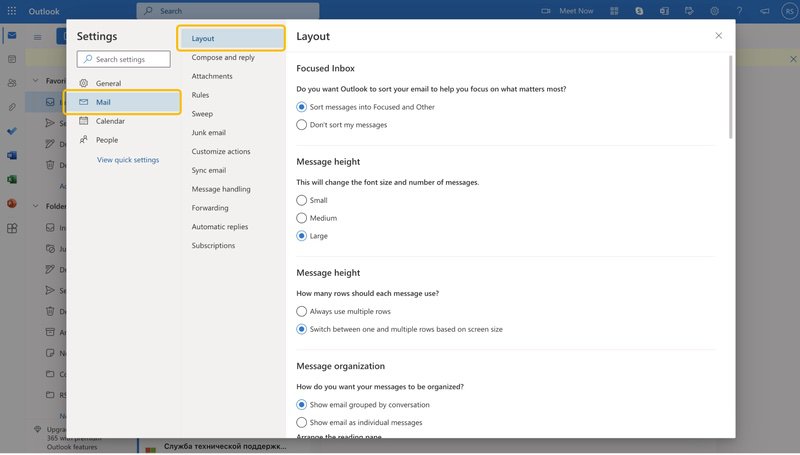
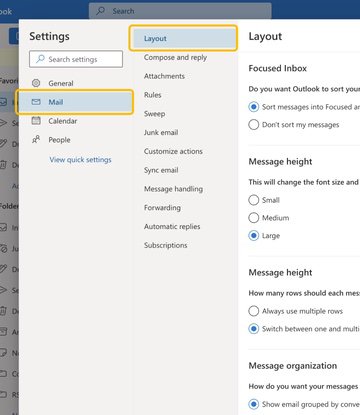
- On the left side, select Mail. Now press Layout.
- Here you can customize the focused inbox, message height, message organization, reading pane, and more.
- Change any settings you’d like.
- Push Save at the bottom to make these changes stick.
You can also color-code emails with categories that now sync across web and desktop. Plus, the ‘My Day’ panel shows tasks and calendar events right in your mail view.
How To Customize Signature In Outlook
A custom email signature adds a professional touch and saves you from typing the same details over and over again. Outlook makes it easy to set different signatures for each account, including Office 365 signatures. You can create and manage signatures on both the web and mobile app, and with the addition of Copilot AI, you can even generate polished signatures automatically.
Use Copilot AI to Create Signatures
- Open Outlook (web or desktop) with Copilot enabled.
- In a new email, click the Copilot icon.
- Type a prompt like “Create a professional email signature with my name, job title, phone number, and website.”
- Review the signature Copilot generates.
- Edit or refine it by asking Copilot to adjust the style (for example, “Make it more casual” or “Add my LinkedIn profile”).
- Save the final version into your Outlook signature settings for future use.
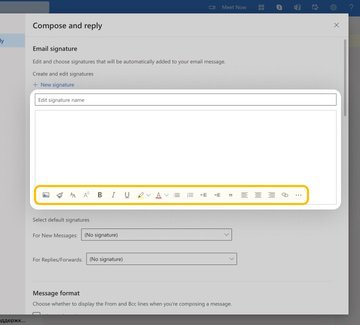
Use Web App to Create Signatures
To customize your signature in web app, follow these steps:
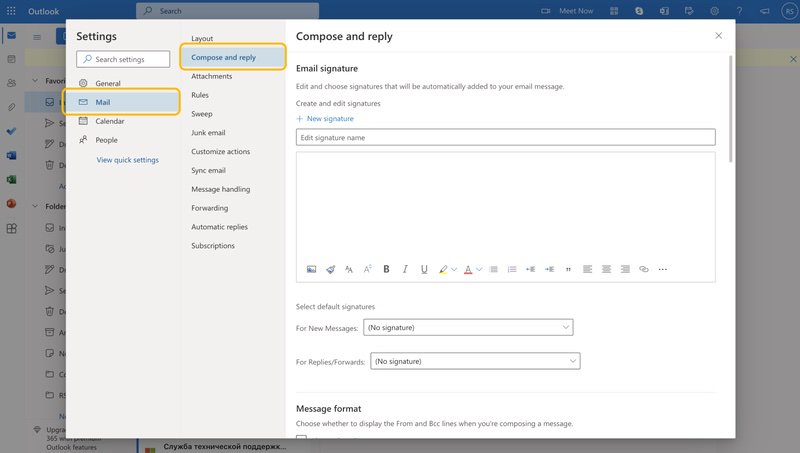
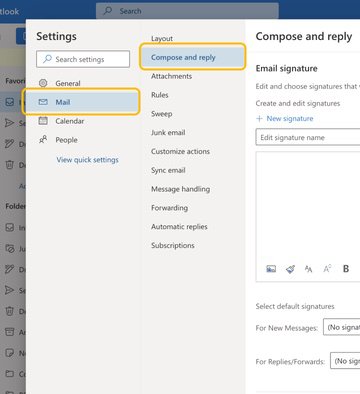
- Open your inbox, then navigate to Settings at the top right of the page.
- When the Settings menu is visible, select Mail → Compose and reply.
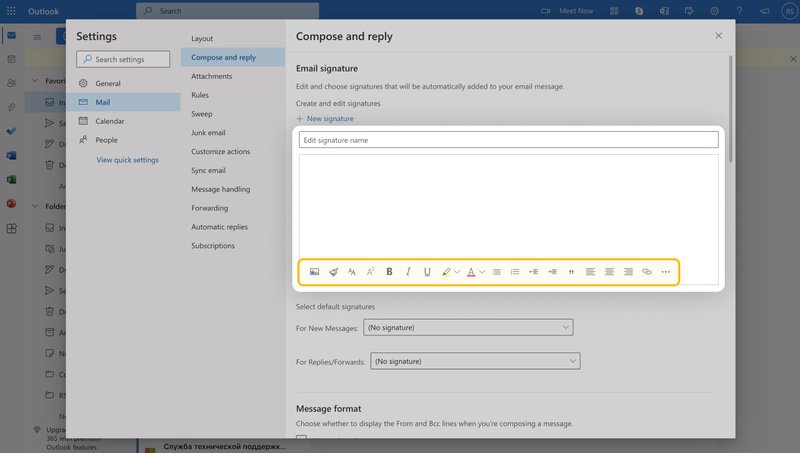
- From here, you will see a text box that you can create a custom signature in, with a smaller box above to name the signature.
- Type your email signature into the box and use the editing tools at the bottom of the text box to change the font, size, color, and other aspects of your signature. At this step, you can also add your electronic business card to your email signature.
- Once you’ve set up your signature how you like, scroll down to establish other settings, such as when you want the signature to be used.
- When you’re finished, press Save in the lower right.
Use Mobile App to Create Signatures
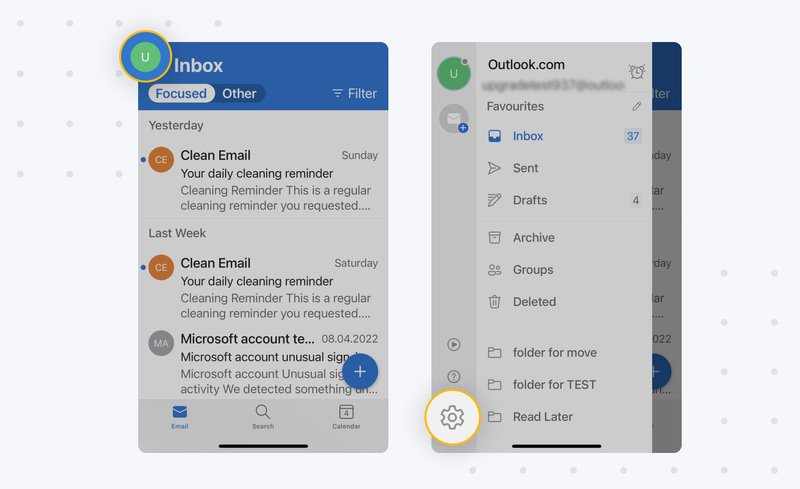
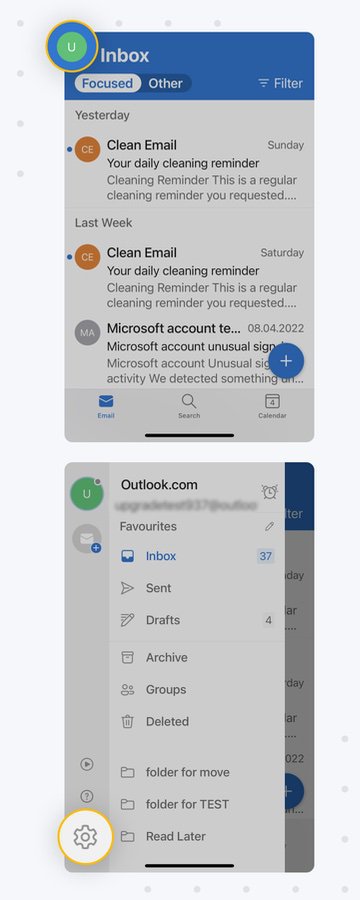
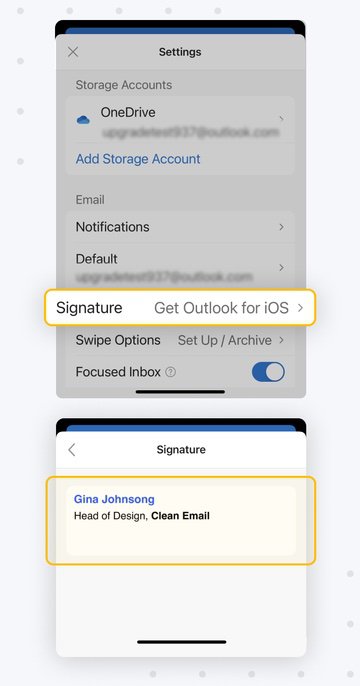
If you use the Outlook mobile app, you will also need to set a signature for messages you send from there. To do this:
- Open the mobile app.
- Click on the circle at the top left to open the menu.
- Tap Settings at the bottom left.
- Scroll down to Signature. Tap on it to edit.
- Type the signature you’d like to display.
- When you have the signature set how you’d like, click the checkmark in the upper right to Save.
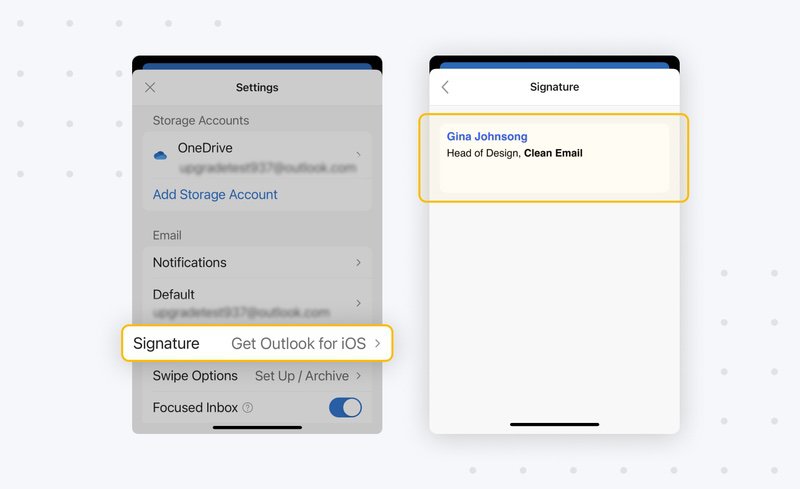
💡 Note: You can also paste a formatted signature from any word processor if you’d like more customization options.
How to Customize Outlook Email Templates
If you often send similar messages, templates can save you a ton of time. Instead of rewriting the same content, you can create a template once and reuse it whenever needed.
- On Outlook Web: Open a new email → click More options ⋯ → choose My Templates → create or insert a saved template.
- On Outlook Desktop: Go to Insert → Quick Parts to save or reuse text blocks for common replies.
In this article, we cover how to create, use, and edit templates step by step — check out our full guide to Outlook email templates to learn more.
Other Outlook Customization Tips
Although many people see Outlook as a basic email provider, there are many plugins you can get to optimize Outlook and make it even more personal for you. Here are some plugins we recommend to help you make this mail provider even better.
You can install add-ins like Mailbutler (email tracking & tasks), Boomerang (send-later & follow-ups), Grammarly (tone & clarity), or MailMaestro (personalized replies)—and you can explore more options in our guide to the best AI tools for Outlook.
There are also tools like Custom Signatures if you want more control over your email signature. Outlook supports hundreds of add-ins you can browse and install directly from the store.
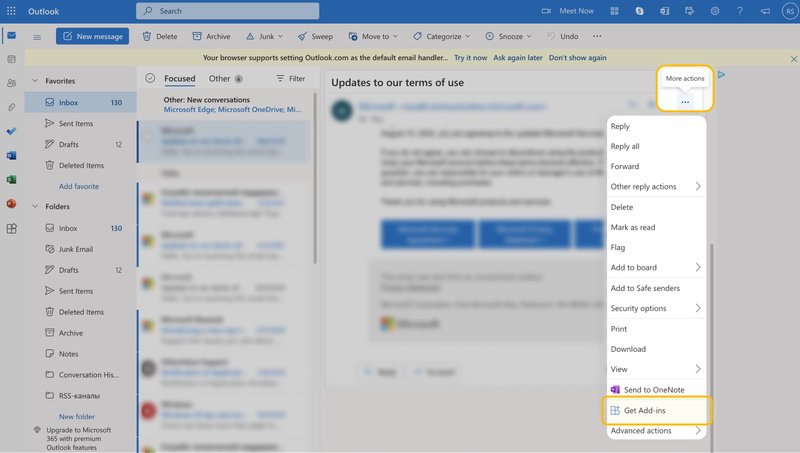
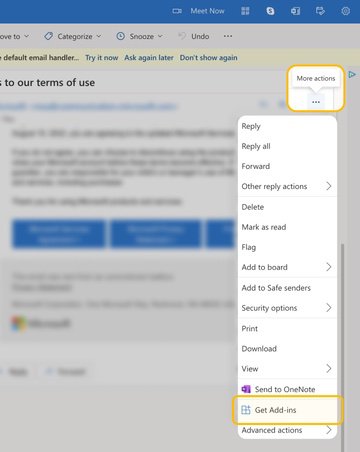
To check out the plugin options in the web app, simply:
- Go to https://outlook.live.com/.
- Open any email in your inbox.
- At the bottom of the message, click on the three dots. Then, select Get Add-Ins at the bottom of the menu.
- Browse and select any plugins you want.
How to Customize Your Outlook Experience Even More
While Outlook offers plenty of built-in options for personalization, Clean Email goes further by keeping your inbox free of clutter and helping you stay productive. Unlike Outlook’s rules, which can be tricky to set up, Clean Email makes organizing simple and automatic.
Here’s how the app enhances your Outlook experience:
- Screener feature – Holds messages from unknown senders until you approve them, keeping spam out of your inbox.
- Unsubscriber – Lets you unsubscribe from unwanted senders in bulk, pause subscriptions you may want later, or keep only the newest message while removing older ones.
- Cleaning Suggestions – Works like AI by learning your habits and recommending quick bulk cleanups for newsletters, promotions, and other recurring emails.
- Auto Clean rules – Automate repetitive tasks like deleting old emails, marking certain senders as read, or moving messages into folders.
You can use Clean Email on the web, masOS, and mobile, with full-featured apps that sync your actions everywhere.
How To Customize Outlook - FAQs
Can I customize Microsoft Outlook?
You can do several things to customize Outlook. However, these methods vary depending on whether you are using the web application, Outlook 365, or the mobile app.
How do I personalize my Outlook email?
Within the Settings section of Outlook, you can do several things to personalize your inbox and make it match your style. You can create email templates and signatures that are personalized as well.
How can I make my Outlook more attractive?
The basic Outlook blue can be a bit boring. However, you can change the theme for web application in the Settings section or change the fonts that display in Outlook 365.
Can you customize Outlook colors?
You can customize colors through changing the color theme. However, this is only available in the Outlook web version and mobile app.
Why is my Outlook layout different?
There are several layout options for Outlook, but they don’t carry across multiple platforms (web, mobile, Outlook 365). Therefore, you have to go and set up customizations for each version you use.
How do I customize notifications in Outlook mobile?
Go to Settings → Notifications, where you can set alerts for specific accounts, categories, or people.


