


How to Send a Calendar Invite in Outlook
Let's jump straight into the practical steps on how to send a calendar invite in Outlook across various platforms. Our instructions are designed to be straightforward and easy for any user, whether you're working from your desktop, browsing on the web, or on-the-go with your mobile device.
How to Create an Invite in Outlook on Desktop
Since the desktop version of Outlook for Windows and Mac is the most basic one, it only makes sense to start with it. The process for creating meeting invites and calendar appointments is very similar across different platforms and email client versions, but let’s have a closer look at each of them.
Here's what you need to do:
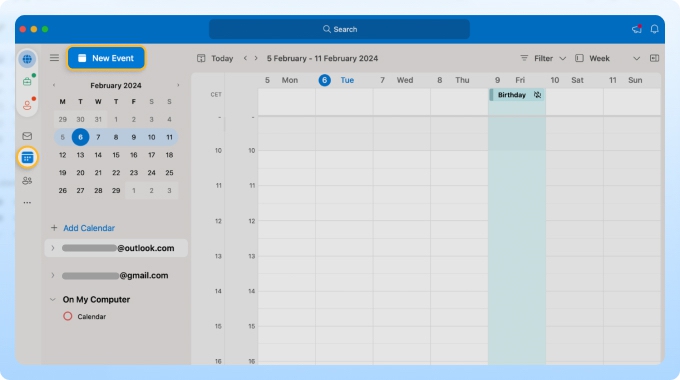
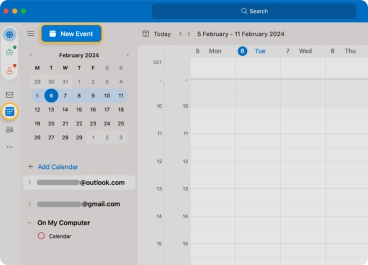
- Launch the application on your desktop.
- Click the calendar icon in the lower-left corner of the window (Windows version) or near the top of the left pane (macOS version).
- Double-click on the desired date or click on the New Event button.
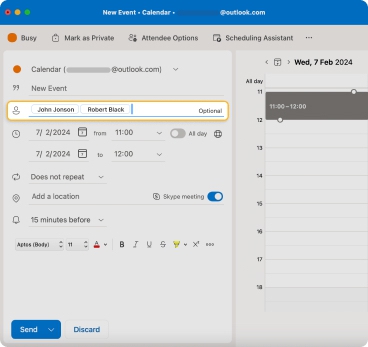
- Fill out the event title, location, start and end times, and any other relevant details. For virtual meetings, you can also include the link to the virtual meeting platform in the event details.
- Enter the email address (or addresses) of the people you want to share the invite with in the corresponding field.
- Send the invitation.

💡 Note: Unfortunately, it's not possible to schedule an invitation the same way you can schedule an email in Outlook—you can only save it as draft and then manually send it later.

How to Create a Calendar Invite in Outlook on the Web
The design of Outlook.com reflects the desktop version, so it's no surprise that the steps you need to follow are nearly identical:
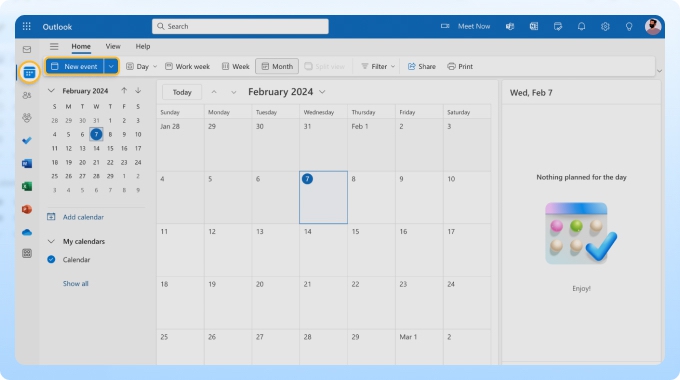
- Go to Outlook.com and sign in with your credentials.
- Click the calendar icon on the left sidebar to open your calendar.
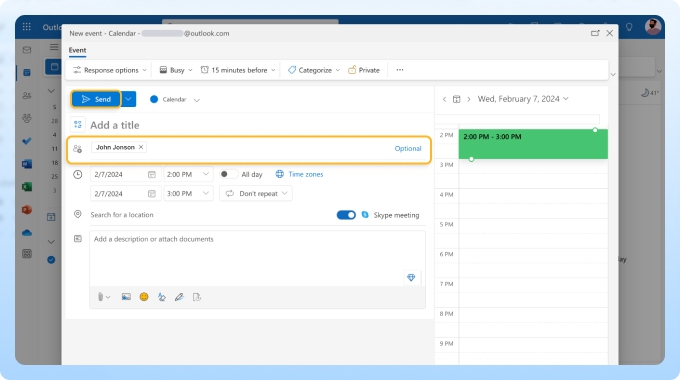
- Click the New event button or double-click a calendar date.
- Add all necessary information about the event.
- Click on the Invite attendees field to add participants by their email addresses.
- Click Send at the top of the window to issue your invites.

Just like in the desktop version, there's no Outlook schedule option for invites in Outlook on the web, but you can click the small arrow next to the Send button and save your invite as a draft.
📌 Tip: If you're often sending invites to the same people, then you should create a group in Outlook.
How to Send an Invite in Outlook on Mobile
Finally, you can follow the steps below if you don't know how to send a meeting invite in Outlook on mobile:
- Launch the app on your mobile device.
- Tap the Calendar icon at the bottom of the app.
- Tap the New Event button at the lower-right corner.
- Fill in all the usual details.
- Tap the People button and add the email addresses of the invitees. Then tap the checkmark icon.
- Tap the checkmark icon again to save and send out the calendar invite.
How to Set up Recurring Meetings in Outlook
What if your meeting is going to happen several times? Instead of creating separate events, you can save time by setting up a recurring meeting in Outlook. Here’s how to do it on Outlook Web:
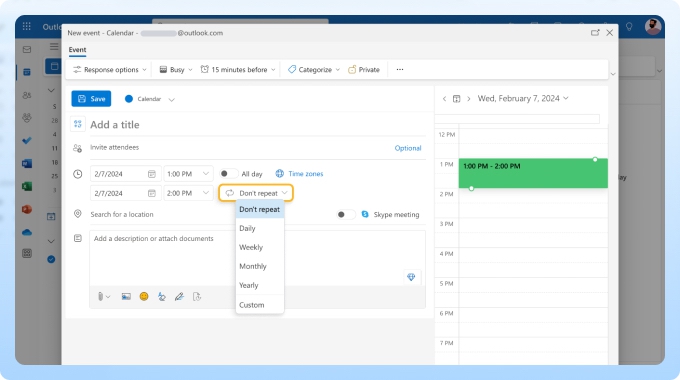
- While managing your meeting, click the Don’t repeat button.
- Choose the desired recurrence or click Custom.
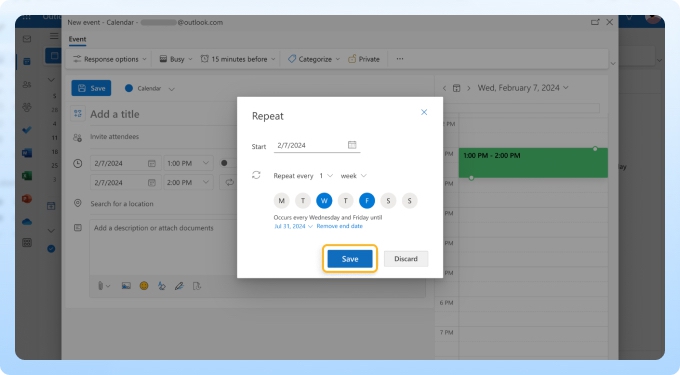
- In the pop-up window, customize the recurrence according to your needs: select the time range for the event—the start and end dates, days of the week for the event, and the frequency of repetition.
- Save the settings.


As you can see, the process is very simple, so the most difficult part might be writing the invite itself. The good news is that you can use an email template to schedule a meeting in no time.
Tips for Smarter Outlook Scheduling
Now that you've mastered the basics of how to send an invite in Outlook, it's time to elevate your scheduling skills with some practical tips:
- Be detailed in your event descriptions: A clear and comprehensive event description can significantly improve the attendance and preparation of your invitees. Remember that there's no need for every description to be unique. In fact, it's best to consistently follow the same template because your recipients will know what information to expect and where to find it.
- Set up Outlook out-of-office emails: If you're planning to be unavailable during an event or meeting, set up an Outlook out-of-office email. This automatic response will inform others of your absence and when you'll return and reduce the likelihood of scheduling conflicts during your unavailability.
- Use the Outlook Scheduler feature: The Scheduling Assistant (available on the desktop version for Windows) can help you find suitable times for your meetings. This feature lets you see when participants are available so that you can quickly select a time that works for everyone.
- Schedule recurring meetings in Outlook: Save time by setting up events that occur multiple times by configuring the settings of a single event, rather than creating a series of similar events individually.
To make event confirmations even more effective, include an Add to Calendar link in your email. Tools like AddEvent let recipients save the event to their calendar in one click, complete with the correct date, time, location, and updates if anything changes.
Why Send Calendar Invites in Outlook
Creating and sending Outlook invitations is a fundamental skill for anyone who is regularly coordinating team meetings, planning special events, or simply organizing their personal schedule. With just a few clicks, you can reach multiple recipients, keep track of RSVPs, and maintain an organized record of your events.
But what if you barely know how to use Outlook? Isn't it difficult to learn how to send a calendar invite in Outlook? Well, it can be because Microsoft's mail client is a complex application with a seemingly endless number of features and options to choose from.
But fear not! The next section of this article provides simple step-by-step instructions for all platforms where you can send calendar invites.
Optimize Outlook Email Management with Clean Email
As you become adept at sending invites in Outlook, your inbox may quickly become overwhelmed with responses, RSVPs, follow-up questions, and related emails. This influx can clutter your inbox and make it difficult to focus on and manage important emails efficiently.
In such scenarios, Clean Email can keep your inbox organized by automatically grouping similar emails together, making it easier to review meeting confirmations, attendee replies, and scheduling updates in one place instead of sorting through them individually.
With Auto Clean, you can take your inbox organization a step further by creating rules for incoming emails, such as automatically archiving confirmations for a particular recurring meeting. This automation guarantees that your inbox stays tidy with minimal effort required on your part.
These and other features are available on macOS, mobile devices, and through the web app, helping you keep your inbox organized across all devices without interrupting your scheduling workflow.
Wrap-Up
As you can see, it doesn't take much effort to learn how to send meeting invites in Outlook on mobile, desktop, or the web. The only problem is that as your proficiency with Microsoft's mail client grows, so too might the volume of responses and related emails.
FAQs
How to create a calendar invite in Outlook?
Launch Outlook, click the calendar icon, select the date, click "New Event," fill in details and invitees' email addresses, and send the invitation.
How to send a meeting invite on Outlook on mobile?
Open the Outlook app, tap the Calendar icon, tap "New Event," enter details, tap the People button to add invitees, and send by tapping the checkmark icon.
How to make a recurring meeting in Outlook?
To set up a meeting that repeats multiple times, in the New Event window, click "Don’t Repeat" (web) or "Does Not Repeat" (desktop), select the desired recurrence, customize it in the pop-up window, and then save the settings.


