


What Is Gmail Multiple Inboxes – and What It Is Not
The Multiple Inbox feature in Gmail gives you a different view of your Inbox. You can use it to easily see specific emails, such as starred and drafts, or those with a specific label or from certain senders. These then display in separate sections, with the remaining emails you receive in the Inbox section at the bottom.
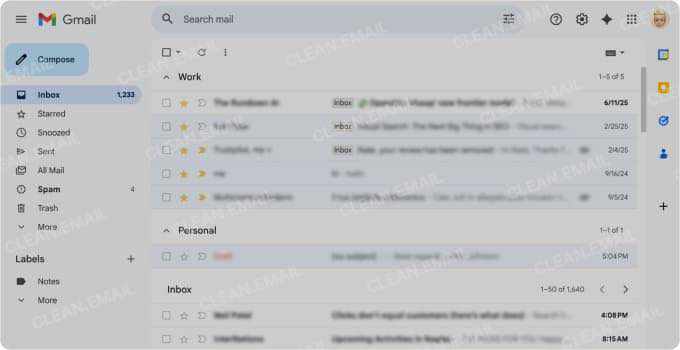
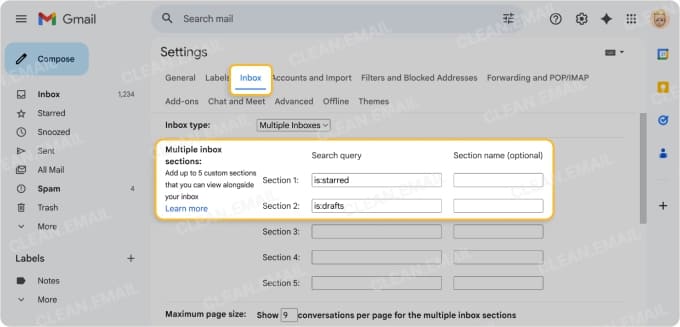
You can have a maximum of five sections with customizable section titles and matching emails based on search queries you set up. This feature is not intended for multiple email accounts or inbox tabs. And it’s available on desktop only, not in the Gmail mobile app.

How Multiple Inboxes Actually Behaves in Daily Use
With the above explanation in mind, you may be wondering how the Multiple Inbox feature actually works.
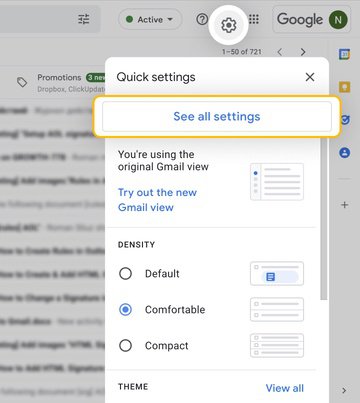
When you set up the sections for Multiple Inboxes, you’ll use queries with search operators. Gmail then displays the matching messages in the corresponding section. For example, you can enter the Section Name as Starred, the Search Query as is:starred, and see all and only Starred emails in that section.
The emails in the Multiple Inbox sections still reside in your Inbox and contain the Inbox label. This means that the sections are not containers that hold emails, nor are emails moved there. The sections are simply sifted views to quickly see the messages you want.
A few things to keep in mind when using Multiple Inboxes in Gmail is that you cannot use the automated filters to manipulate the sections that appear. Additionally, you must be careful with the search queries you use so that the correct emails display and also manually maintain those queries.
Can You Use Gmail Multiple Inboxes on Mobile?
No, you cannot use Multiple Inboxes in the Gmail mobile app. The feature is only available for desktop; however, you can use other features and Inbox types for various views on Android or iPhone.
- Labels: Apply labels to incoming messages for better spotting and organization.
- Search: Search with quick filters or search operators to find the emails you need.
- Inbox Types: Use other Inbox Types including Default (with category tabs), Important first, Unread first, Starred first, or Priority inbox (important and unread first).

As with the above features and others, you’ll find the Gmail desktop app to offer more flexibility and control than the Gmail mobile app. But you can certainly find, read, and organize emails on your mobile device, just slightly differently depending on your needs.
What Changed in 2026: Gmail No Longer Fetches External Mail
Connecting and checking emails from other accounts has changed in Gmail, which is important if you use Multiple Inboxes for this purpose.
As of 2026, Gmail no longer supports POP3 fetching for non-Gmail providers (and never supported IMAP aggregation). This may be disappointing to those accustomed to checking their Yahoo Mail or Outlook accounts in Gmail with POP.
| Scenario | Works? |
|---|---|
| Gmail fetching Gmail | ✅ Yes |
| Gmail fetching Yahoo / Outlook via POP3 | ❌ No |
| Gmail aggregating via IMAP | ❌ Never |
| Desktop / mobile IMAP clients | ✅ Yes |
| Forwarding into Gmail | ✅ Provider-dependent |
The Gmailify and “Check mail from other accounts” settings on the web are unavailable to those setting up new Gmail accounts and will disappear over time for current users throughout 2026. However, you can still use the Gmail mobile app to read and send emails from other accounts.
What Are Your Options If You Used POP3 Before?
If you used POP3 with Gmail before, you do have other options for checking those emails.
Forward Emails to Gmail: Review your email provider’s instructions to set up forwarding of your messages to your Gmail account. Note that this option doesn’t provide an organizational structure or reply-from accuracy.
Switch to an IMAP client: Look for an email app that uses IMAP rather than POP. This works well for multiple provider setups but likely has a different workflow than Gmail on the web.
Add Your Account to the Mobile App: As mentioned earlier, Gmail’s mobile app still supports reading and sending emails from other accounts using standard IMAP. This is a good option if you only or normally use Gmail on mobile.
Keep Gmail and Add a Maintenance Layer: Continue using Gmail to manage your emails, but add a supplementary tool that reduces clutter after messages arrive.
Is Multiple Inboxes the Best Way to Organize Gmail Long-Term?
Gmail’s Multiple Inboxes does provide a convenient and customized inbox view. So, it is good for visibility. However, it doesn’t offer the maintenance, scale, and ongoing decluttering needed by many users.
| Need | Gmail Multiple Inboxes | Inbox Maintenance with Clean Email |
|---|---|---|
| Main purpose | View emails in parallel sections | Reduce incoming clutter over time |
| How it works | Search-based sections (desktop only) | Grouping + rules across inboxes |
| Handles volume reduction | ❌ No | ✅ Yes |
| Automation level | Low | High |
| Mobile support | ❌ No | ✅ Yes |
| Best used when | You want visibility | You want fewer low-value emails |
For these reasons, consider a tool that complements Gmail and picks up where Multiple Inboxes leave off.
Declutter Your Merged Inbox with Clean Email
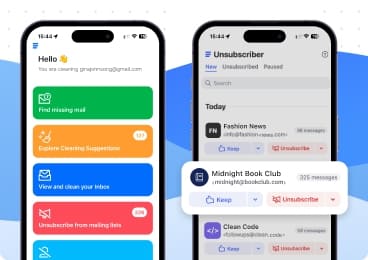
One tool that offers a host of smart features for maintaining a “merged” inbox in Gmail is Clean Email. The app is available on the web, Mac desktop, and mobile with the same feature set across the board.
With Clean Email, you can:
- Manage 5 to 10 Gmail accounts with simple account switching.
- Reduce noise so that the Multiple Inboxes feature in Gmail remains useful.
- Handle emails in groups rather than one at a time.
- Automate repetitive decisions and actions for things like newsletters and old messages.

📌 Note: Clean Email does not support POP3 email accounts. It’s compatible with IMAP and provider APIs, which gives you reliable server-side actions like deleting, moving, and cleaning in bulk.
Conclusion
Multiple Inboxes in Gmail is useful for easily spotting the emails you need most as soon as you open your Inbox. But keep in mind that this is not a system but simply a filtered view of your messages. Sustainable inboxes require both structure and maintenance to prevent clutter and chaos.
With Gmail ending support for POP3, you’ll need to change your strategy if you use an account with that protocol. And while Clean Email doesn’t support POP3, it does offer connecting multiple email accounts with features and automations that help you better manage Multiple Inboxes in Gmail.


