Step 0: Identify Your Outlook Version
The main differences between Classic and New Outlook alone are numerous, and there are several other versions to further complicate things. To set up inbox zero in Outlook smoothly, you need to know which version you're using so you don't waste time on features your version doesn't support. Here's how to tell them apart:
- Classic Outlook on Windows has a File tab in the ribbon and a Try the new Outlook toggle switched off in the upper-right corner.
On Mac the ribbon tabs are Home, Organize, and Tools with no File tab, and a Legacy Outlook toggle sits near the top switched on.
Both keep the full ribbon of labeled buttons.
- New Outlook has a simplified, web-like interface on both platforms. On Windows it also shows a Settings gear and a New Outlook toggle in the upper-right corner.
On Mac there is no Settings gear (settings live under the Outlook menu), so the web-like layout is the tell.
- Outlook on the web runs in a browser and resembles New Outlook.
- Outlook mobile is an iOS or Android app.

Step 1: Design Your Outlook Inbox Zero Workflow
Before setting up folders or automations, decide what should happen to your messages the first time you process them. Ideally, you should touch each email just once during cleanup. That's possible only when every message is associated with a specific outcome:
- Reply: Send a short response now, then Archive the conversation.
- Delegate: Forward the request to its new owner.
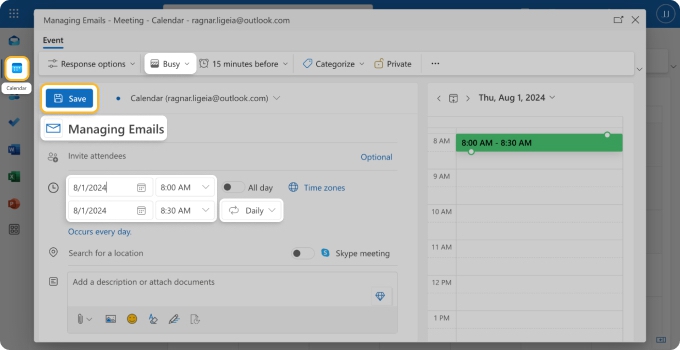
- Schedule: Put the work on your calendar or task list, then remove the email from the Inbox.
- Reference: Move reusable information to a dedicated Reference folder.
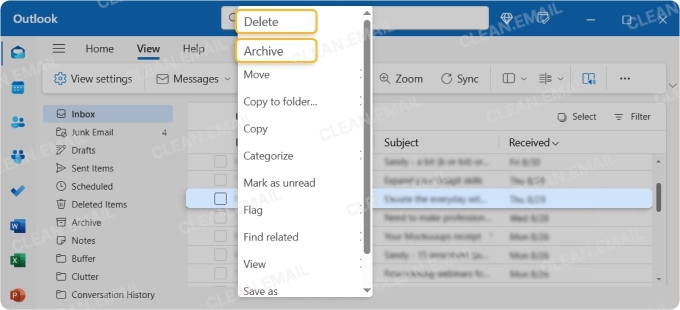
- Archive: Keep a message that requires no action but may be useful later.
- Delete: Remove mail with no future value.
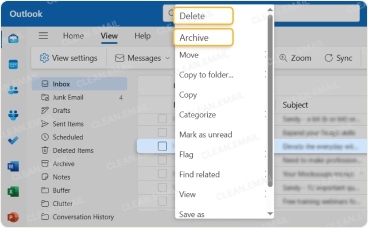
Inbox management features can make these outcomes easier to apply, but they can't reliably decide which one is appropriate for every message. That part is still up to you, so take the time to design a workflow that reflects how you actually work before you start automating it.
💡 Our separate explainer covers how inbox zero works and whether it's worth pursuing.
Step 2: Set Up a Minimal Folder System
Once you've defined the possible outcomes, create a small number of destinations that reflect them. Folders for every project, person, or message type may look organized at first, but they can replace one crowded inbox with an overly complex system that's too difficult to navigate and maintain. What's more, every extra folder creates another filing decision whenever you process a message.
One tried-and-tested approach is to group messages by what still needs to happen with them rather than by topic. Following this logic, you need only three custom folders (Archive already exists in all versions of Outlook):
- @Action for messages that require work you cannot finish during the current processing session.
- @Waiting For for requests you delegated or conversations awaiting a reply.
- Reference for information you want to browse separately from ordinary archived mail.
To create a folder in Classic Outlook, right-click your email address in the folder pane and choose New Folder.
In New Outlook, right-click your email address or open its More options menu, then choose Create new folder.
The @ prefix keeps the two active queues conspicuous in an alphabetical list. Add both to Favorites so they stay near the top of the folder pane.
Both queues need regular reviews: check @Action during work blocks and @Waiting For once or twice a week, or they'll just hide clutter.
💡 Tip: See our dedicated guide for other ways to organize email in Outlook with folders and Favorites.
Step 3: Use Quick Steps as Your Main Inbox Zero Tool
Your folder system gives each email a destination, but moving messages there manually still takes several clicks. That's fine in isolation, but multiply it by everything you receive in a day and the wasted seconds add up to hours of unnecessary work.
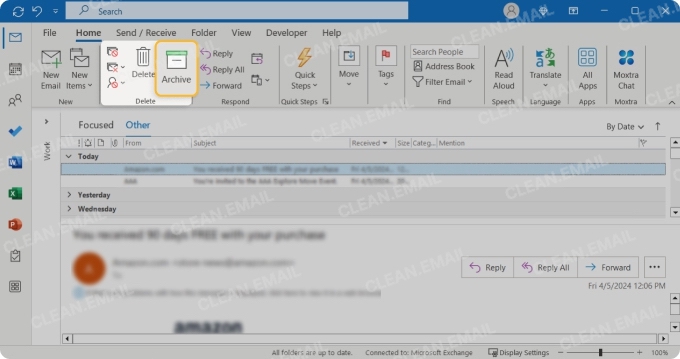
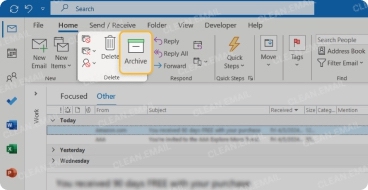
Quick Steps is the first native Outlook inbox zero tool we recommend you configure because it lets you perform several routine actions with a single click. For example, you can create the following Quick Steps to save time:
- Archive: Mark the message as read and move it to Archive.
- To Action: Mark it as read and move it to @Action.
- To Waiting: Mark it as read and move it to @Waiting For.
- Delegate + Archive: Forward it to a chosen person and file the original after sending. Use @Waiting For instead of Archive when you still own the follow-up.
Classic Outlook has the most complete Quick Steps implementation and a straightforward creation process. Here's how to create the To Action example from the list above:
- Make sure you have Classic Ribbon turned on.
- Open the Home tab and select Create New in the Quick Steps gallery. If it is not visible, open Manage Quick Steps and create one there.
- Name it To Action.
- Add the Move to folder action and select @Action.
- Add Mark as read as the second action.
- Assign a keyboard shortcut if your version offers one.
- Save the Quick Step by clicking Finish and test it on a non-critical message.
New Outlook includes Quick Steps as well, but Microsoft's own feature comparison still lists the support as partial, and the available actions can depend on your account type.
Outlook on the web can run and edit configured Quick Steps with the same caveat, so if an action is missing in your version, that's expected, not a mistake in your setup.
Quick Steps are not available in Outlook mobile, where you need to rely on swipe actions instead.
⚠️ Warning: Quick Steps can be major productivity multipliers, but they also multiply mistakes since a misconfigured one may repeatedly move, forward, or delete the wrong messages.
Quick Steps are just one way to make Outlook faster. For others, see our collection of Outlook tips and productivity shortcuts.
Step 4: Remove Repeat Decisions with Rules
Even with Quick Steps, every message still costs you a moment of attention (you read it, decide what it means, and click). The problem is that some mail doesn't deserve that moment because you already know what should happen to it before it arrives, and that's exactly what Rules are for.
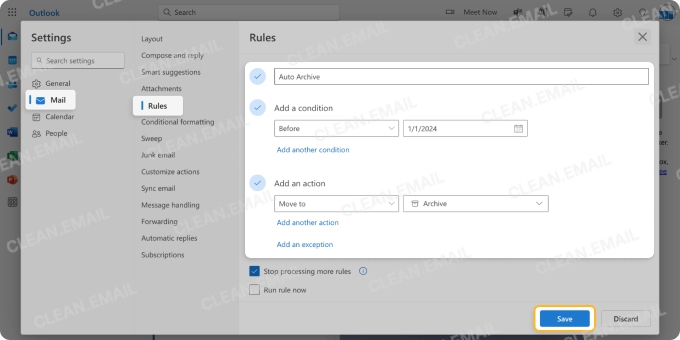
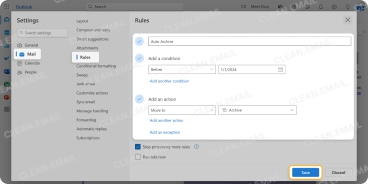
Unlike a Quick Step, which needs you to trigger it, a Rule acts on a matching message the moment it arrives. Use Rules only when it's clear how a message should be handled before you read it.
Good candidates for messages to be handled by Rules include automated service notifications, receipts, newsletters you still want, and mail from a narrowly defined system or domain. A receipt can go to your reference folder, while a routine status notification can bypass the Inbox.
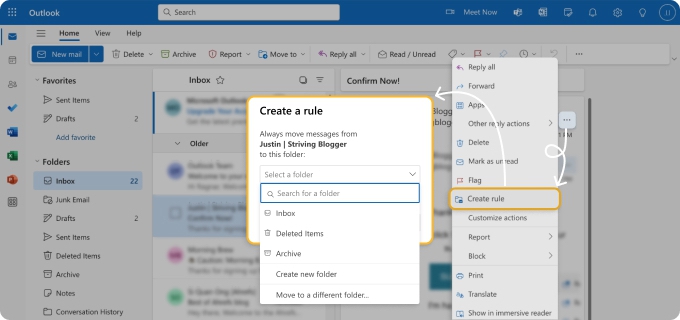
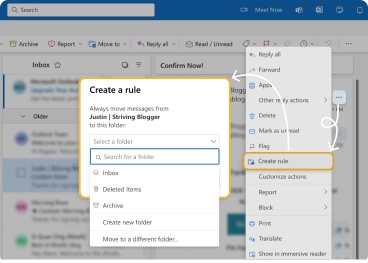
⚠️ Warning: Be careful with broad keywords and domains because the same condition may also match something urgent.
Two limitations are worth knowing before you build your first rule.
- First, Rules in New Outlook don't support third-party accounts such as Gmail, Yahoo, and iCloud, and some rules created in Classic can't be processed by New Outlook at all.
- Second, Classic Outlook can create client-only rules that run solely while the app is open on that computer, and warns you when that's the case. Server-side rules apply inside the mailbox itself, so they work on every device even when your PC is off.
The setup of Rules varies by Outlook version, so follow our guide on how to create and manage Outlook Rules when you're ready.
Step 5: Use Copilot as the AI Priority Layer
Rules take care of the predictable mail, but everything else still ends up in your Inbox and competes for attention. On a busy day, just deciding what to read first can be exhausting, and that's the part Microsoft Copilot can speed up.
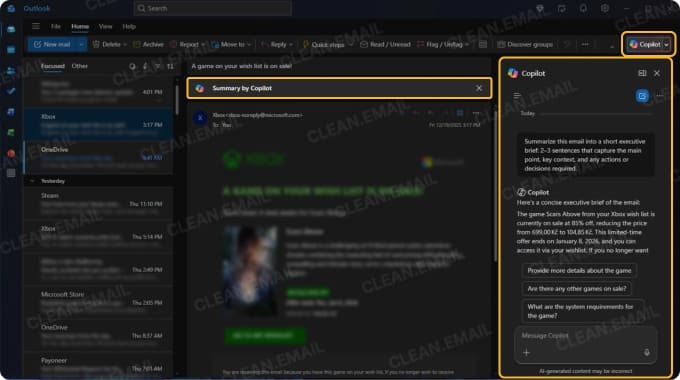
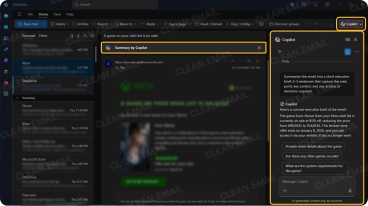
If your account includes the AI-powered tool, then the most relevant feature for inbox zero workflow described in this guide is Prioritize my inbox, which marks incoming messages as high, normal, or low priority (it can even explain why). You can give it plain-language instructions, such as flagging anything from your manager or about a specific customer, then sort or filter by priority during processing sessions.
Keep in mind that Copilot only evaluates messages received after you turn it on, and it skips mail that your Rules have already moved out of the Inbox. As such, it doesn't replace your folders, Rules, or review routine. It complements them.
Copilot availability depends on your plan. Business and enterprise Microsoft 365 accounts get the most features, but they can run into restrictive administrator settings. Personal Outlook.com users get a smaller feature set through Microsoft 365 Personal, Family, or Premium, and they shouldn't expect every new feature to show up right away.
💡 Tip: See our full guide on how to use Microsoft Copilot in Outlook for setup instructions and everything else it can do.
Step 6: Maintain the System on Outlook Mobile
No inbox stays at zero on its own. Unless you maintain it, the inbox you cleared today can easily be a backlog again a few days later. Outlook mobile provides the easiest way to do regular inbox maintenance, because you can use it whenever you have a few minutes of spare time and turn moments of waiting, like a line at a store or a gap between meetings, into quick triage sessions.
In the app, go to Inbox→ Settings→Mail→Swipe Options, then assign Archive to one direction and Delete or Flag to the other, depending on which action you use more often.
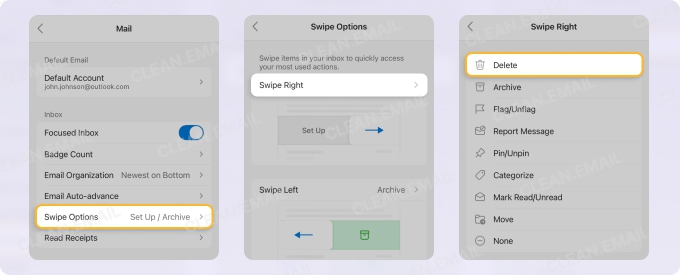
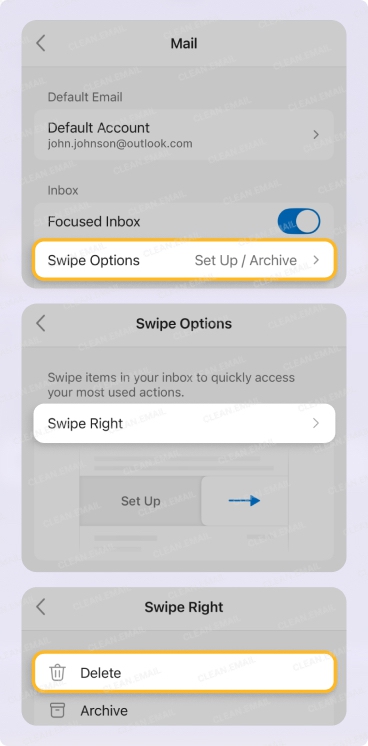
Keep things simple during your short sessions with Outlook mobile. Archive messages you're done with and delete anything that's just clutter. Flag or leave messages that need careful delegation, scheduling, or filing for your next desktop processing session.
Avoid using "mark unread" as a permanent reminder because it returns undecided work to the Inbox. Done this way, Outlook mobile can be an effective extension of the system you built on a computer.
What Desktop Outlook Can't Do Across All Your Devices
The workflow above works best on a computer, and mostly in Classic Outlook. Once you move to your phone or a different Outlook desktop version, problems start to appear.
For example, Outlook mobile can't create Rules, New Outlook offers only part of the feature set depending on your account, and Quick Steps behave differently from one place to the next.
Clean Email closes these gaps by giving you one cleanup and automation layer that works the same in its web, iOS, and Android apps, which makes it a practical Outlook inbox zero app for anyone who reads mail on more than one device.
Rather than replacing your Outlook setup, it extends it where the native tools thin out:
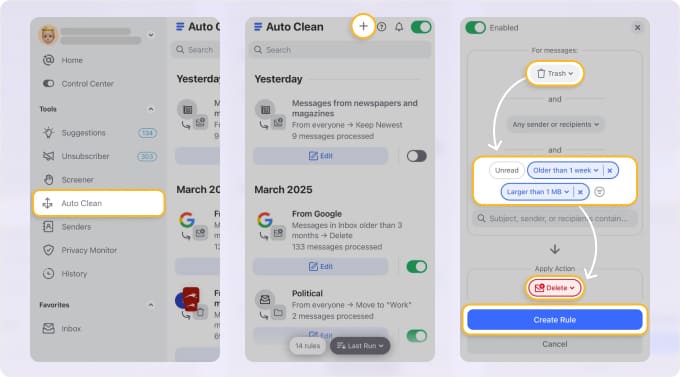
- Auto Clean rules accept more flexible criteria than Outlook Rules, can be paused without being deleted, and are fully manageable from your phone.
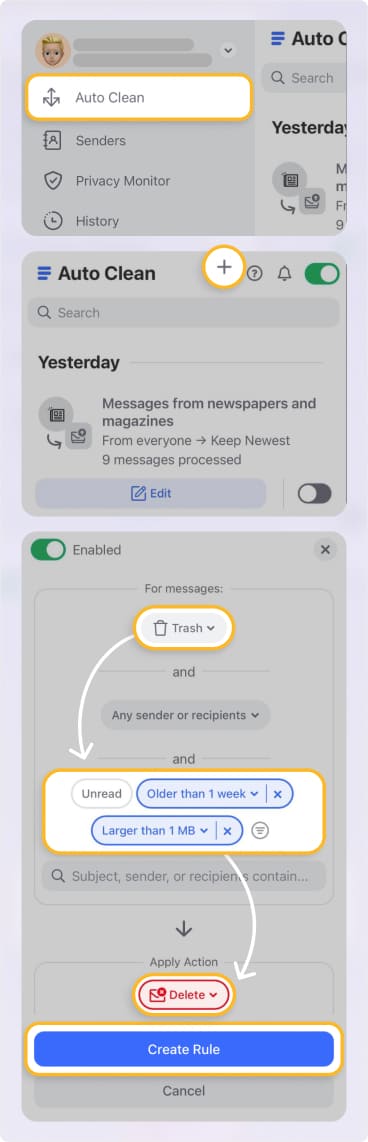
- Unsubscriber gathers your newsletter subscriptions into one view so you can drop dozens at once instead of one at a time.
- Smart Folders are ready-made views for categories like shopping, finance, and social notifications, with no manual filter setup required.
- Cleaning Suggestions analyzes your mailbox patterns and recommends cleanups, a feature Outlook has no native equivalent for.
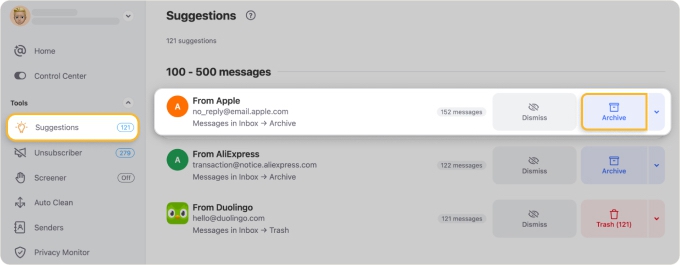
These and other Clean Email features fit into the inbox zero workflow you've already built. If you keep accepting the same Cleaning Suggestion, for example, that's a strong hint it should become an Auto Clean rule.
And if your mailbox needs serious decluttering before the workflow can take hold, our complete Outlook inbox cleanup walkthrough is the place to begin.
📌 Note: Clean Email works with Outlook.com personal Microsoft accounts. Users with work Exchange or Microsoft 365 accounts should check with their IT administrator before connecting third-party apps.
FAQs
What are Quick Steps in Outlook?
Quick Steps are saved combinations of Outlook actions, such as moving a message to a folder and marking it as read, that you apply to a selected email with one click. Classic Outlook supports them fully, but New Outlook and the web offer them with account-dependent limitations.
How do I set up Inbox Zero in New Outlook?
Create the @Action, @Waiting For, and Reference folders, add the first two to Favorites, then set up Quick Steps from the Home ribbon and Rules from the Settings gear. Rules don't work for third-party accounts like Gmail, and it's best to build the whole system on desktop, using the mobile app only for quick triage.