


What Is a Mail Merge in Outlook?
Mail merge in Outlook is a powerful feature that allows you to send personalized mass emails to a large number of recipients without having to send each email individually.
With the mail merge feature, you can create a single email template and merge it with a data source containing the recipients' names, email addresses, and other relevant information. The result is a set of personalized emails that appear as if they were sent individually to each recipient.
In other words, Outlook mail merge helps you save time and effort by automating the process of sending bulk emails, while still making it possible for each recipient to receive a personalized message. This is perfect for newsletters, announcements, special offers, or simply keeping in touch with a large group of people in a way that feels more personal.
📌 Tip: For those looking to further optimize their email strategy, we highly recommend studying other Outlook email management practices and learning how to customize Outlook.

How to Use Mail Merge in Outlook
To mail merge in Outlook, you don’t need to know how to use Outlook like a pro. You just need to create an email template in Microsoft Word, link it to an Excel spreadsheet containing your recipients' names and mail addresses, and then configure the template to use the data from the spreadsheet.
Here's a step-by-step guide on how to do this:
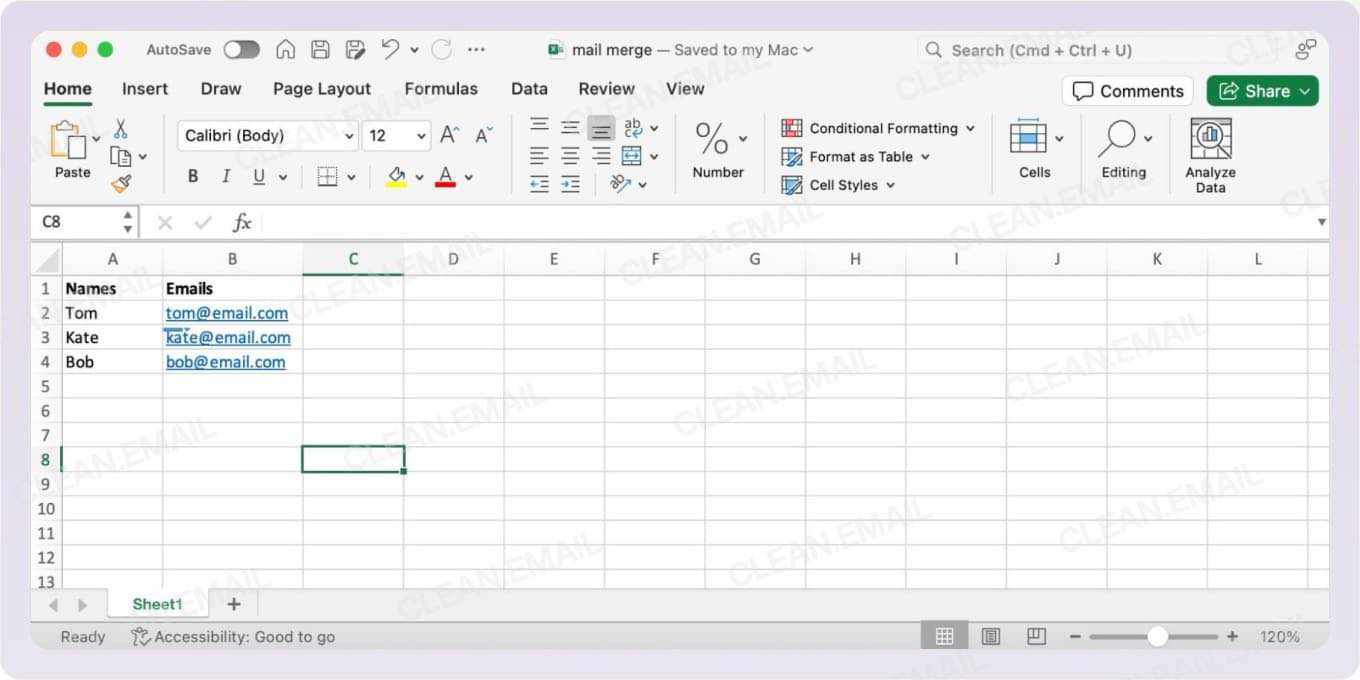
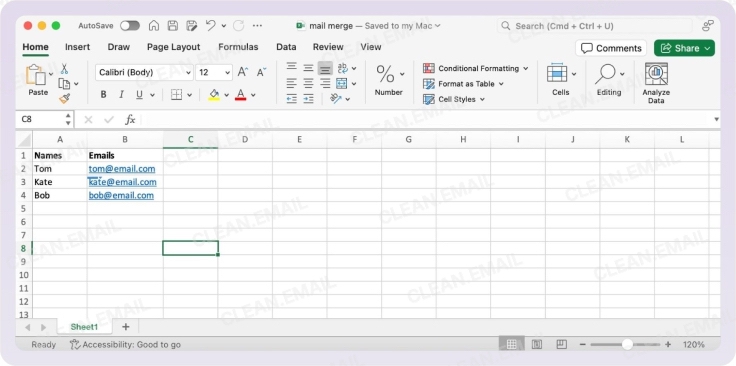
- Create an Excel spreadsheet ready with columns for each piece of personalized data you'll use in your emails.
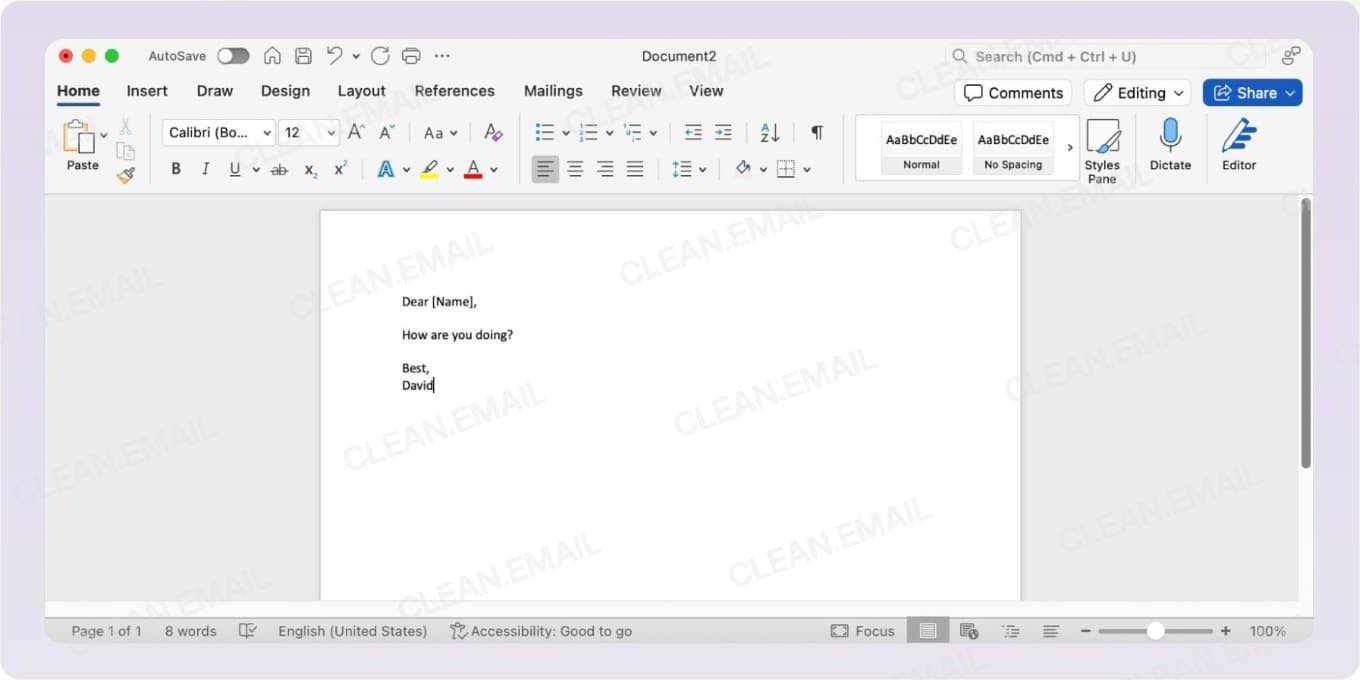
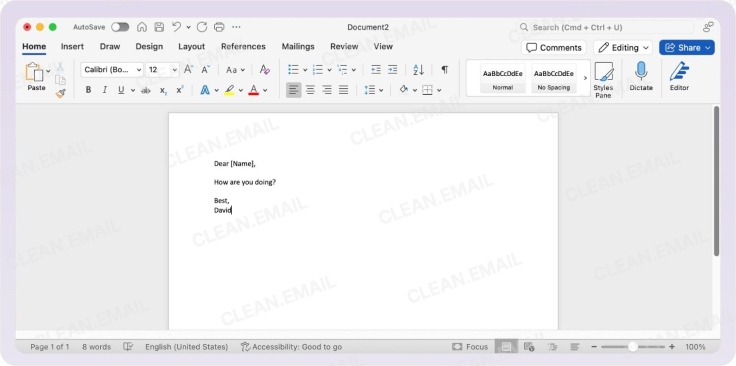
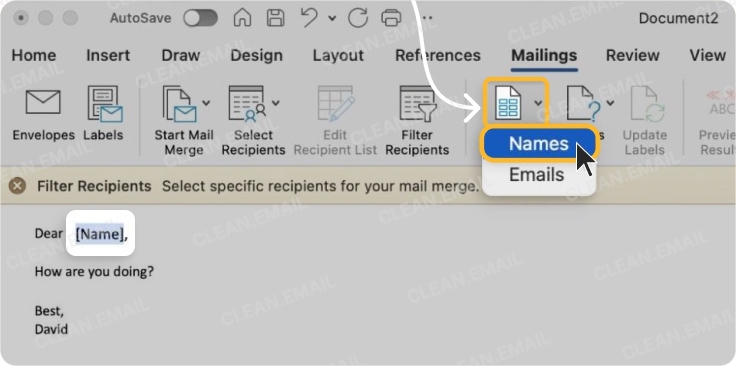
(For example: "Names," Emails," and "Company") - Open Microsoft Word and draft your Outlook email template. Include placeholders for personalized content, such as "Dear [Name]," by simply typing where these personalized pieces will go.
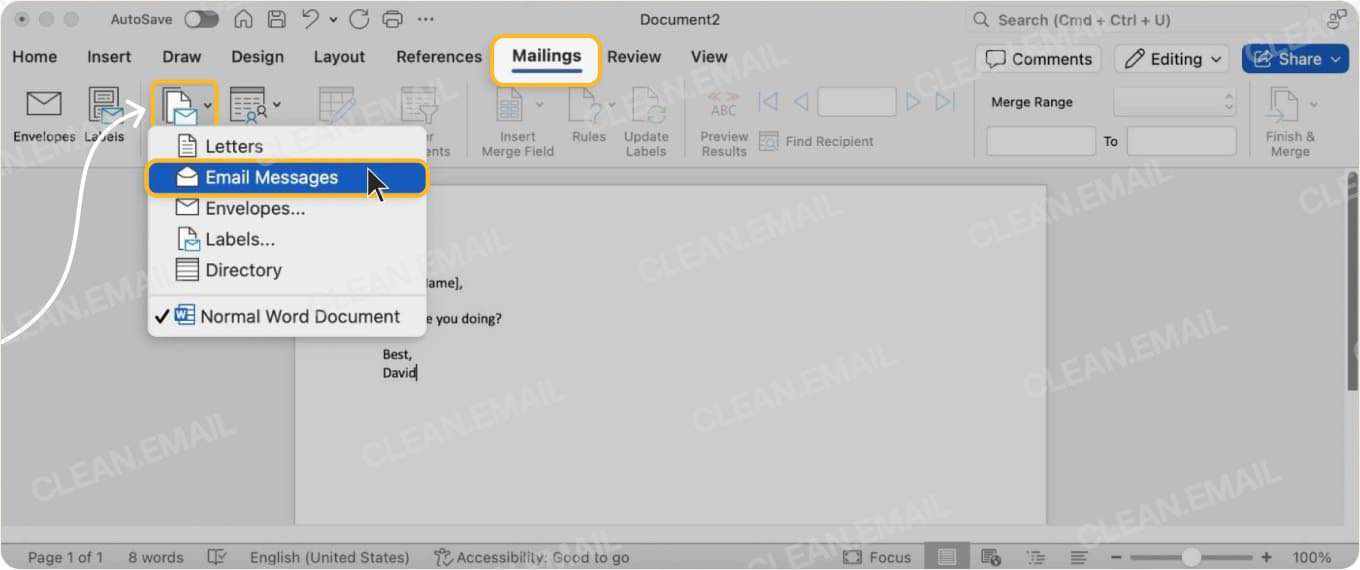
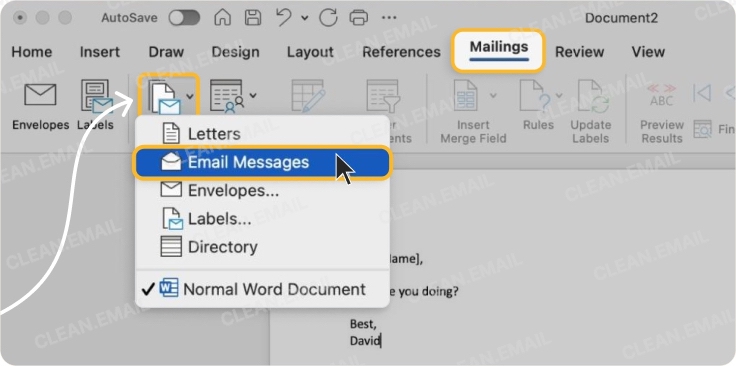
- Go to the Mailings tab in Word, select Start Mail Merge, and choose Email Messages.
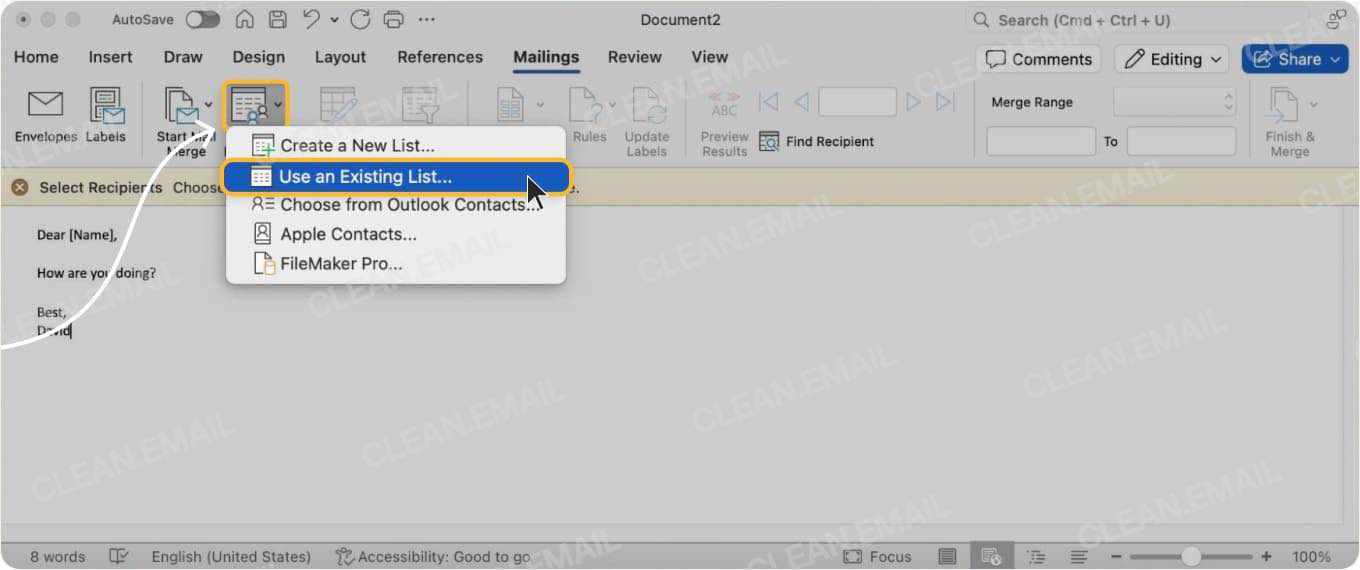
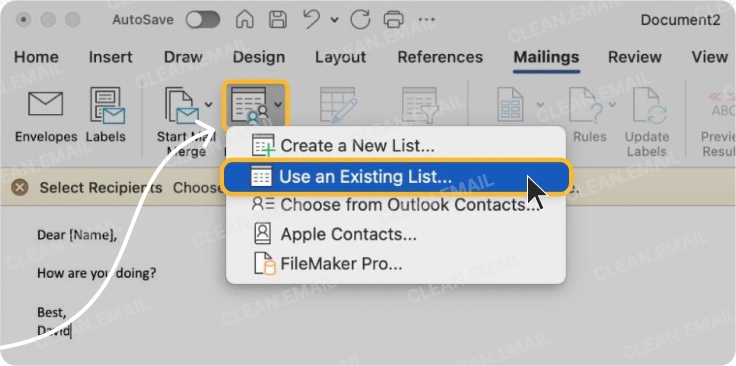
- Within the Mailings tab, click Select Recipients and choose Use an Existing List. Then, navigate to and select your Excel spreadsheet.
- Locate and click on your chosen file, selecting the correct worksheet if your workbook has several tabs. Once you tap OK, Word recognizes your Excel columns as merge fields.
- Merge fields are the placeholders where your recipient's data appears. You can start with the address box before the salutation ("Dear [x]"). Position your cursor above the space for the greeting or salutation and click Address Block from the Mailings tab.
- When the dialogue window opens, select your preferred address elements (format for the recipient's name and postal address). A preview window is available on the right side.
- Сlick Match Fields and follow the steps to include additional information in the address box. If that doesn't work, click Insert Merge Field to place merge fields one at a time.
- To automate the text for your salutation, click the Greeting line and select your preferred content and format from the dialogue box.
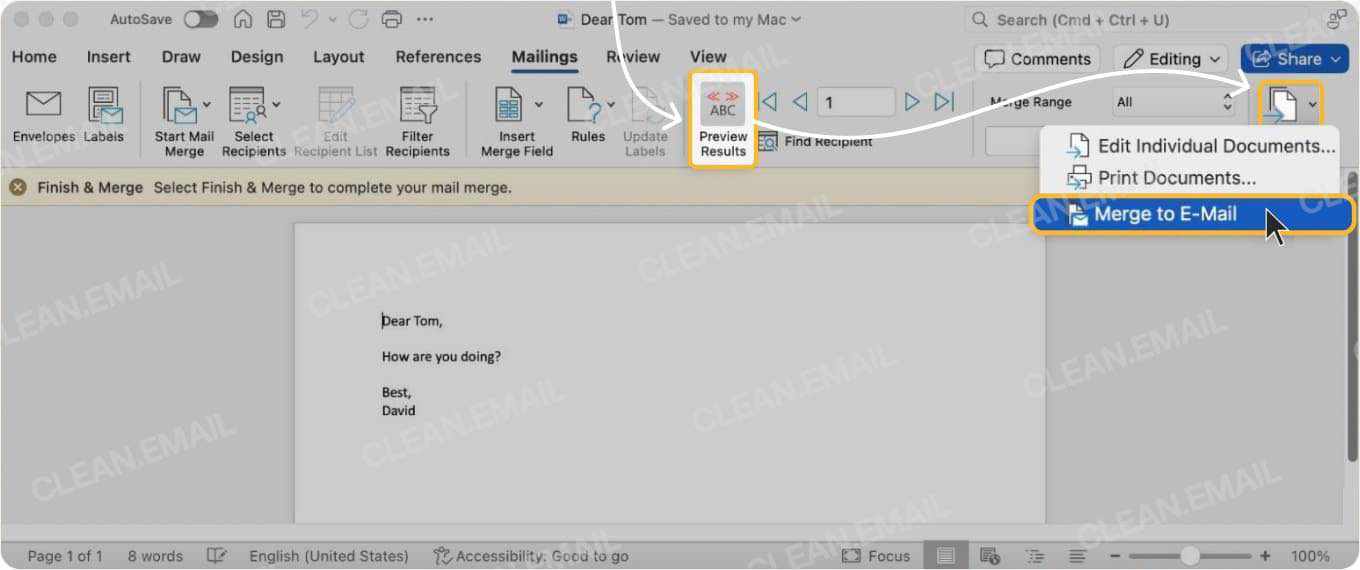
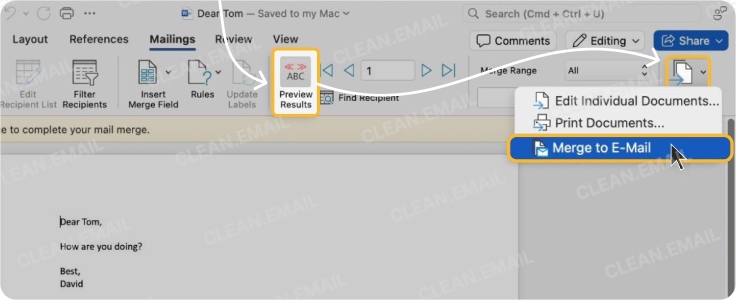
- To check whether you have successfully done the steps in this section on how to do a mail merge in Word, tap Preview Results from the Preview Results tab.
- After previewing, click Finish & Merge and select Send E-mail Messages (Windows) or Merge to E-Mail (Mac). If the option isn’t available, then you need to select your default email program.
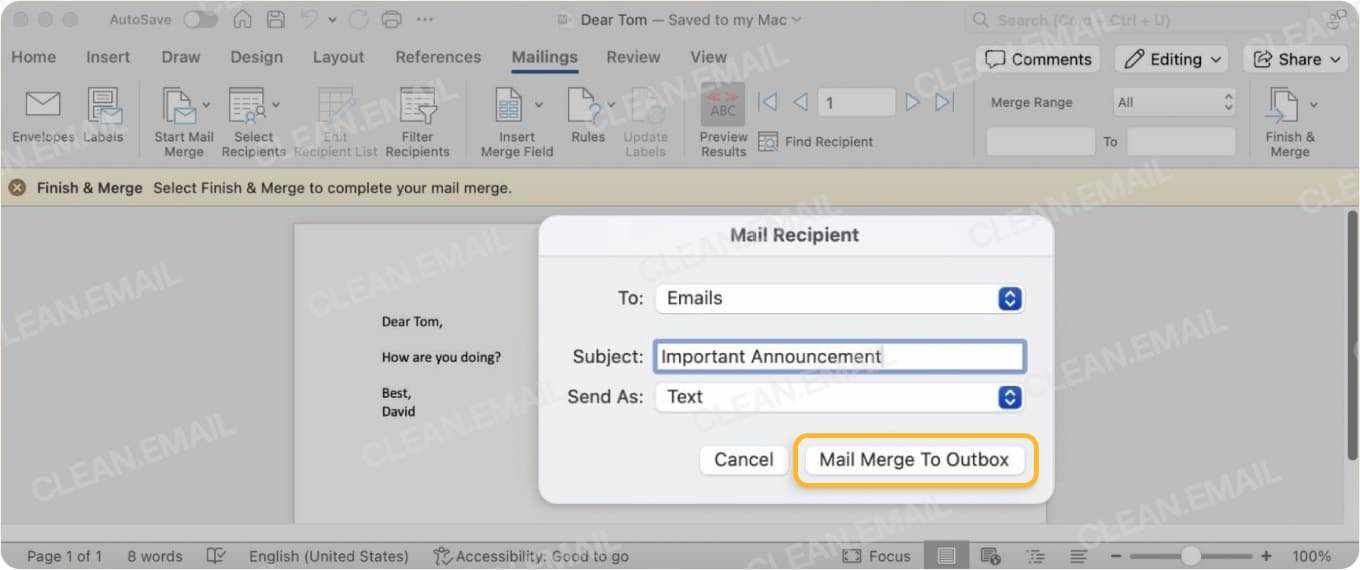
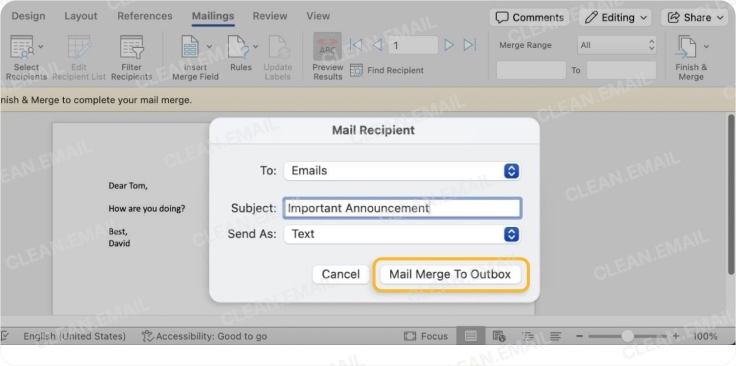
- Choose the email field for the "To" section, type your subject line, select your mail format (HTML or Plain text), and decide which records to send (all, current, or a specific range). Finally, click OK or Mail Merge to Outlook to send your emails.
Keep all the details of a single contact in a single row. Avoid skipping rows or columns because MS Word treats them as errors.
💡 Tip: The mail merge feature only works with Excel documents on a local drive. Close your spreadsheet before linking it to Word, then save it in a memorable folder (for instance: Contacts_mail merge_[email campaign name].xlsx) so Word can find it later.
💡 Tip: Keep your template intact by saving your mail merge document under a different filename. This makes it easier to create new mail merge documents in the future with slightly revised or overhauled body text.
💡 Tip: You can click Edit Recipient List from the Mailings tab to include only specific people from the list. Clicking this button also allows you to specify the sequence of your letters (for instance, arrange surnames alphabetically in ascending order). Simply tap Sort from the Refine recipient list options.

💡 Tip: You can position merge fields beside regular text—just keep your spacing and punctuation consistent. Doing a preview will help.
You can print the letters or send them as an email by choosing the option from the drop-down menu.
💡 Tip: To save your mail merge document as a separate file, select Edit Individual Documents from the Finish & Merge button and click All. You can rename the new file later.
If you would like to use the same email template in the future, then don’t forget to save it. And remember: mail merge is just one of many useful Outlook tips and tricks that can optimize your email tasks and make your communication efforts more efficient and impactful.
Maximize Outlook Efficiency with Clean Email
Sending bulk emails, while efficient, can lead to a significant increase in the number of emails you receive. This can clutter your inbox and make it difficult to manage your emails effectively. While Outlook does offer some mailbox organization features, they may not be sufficient to handle the influx of emails. This is where Clean Email, a powerful inbox cleaner app, comes into play.
💡Note: If during the cleaning process, you find an email you need to quickly respond to or forward to somebody, no worries, Clean Email can handle this too. You can reply, forward, and send messages directly from your account in the Clean Email app on desktop, web, or mobile.
All these features, and much more, are available on any platform for easier mailbox management, and they’re designed with privacy in mind. Your email data remains yours and is never misused by Clean Email beyond its intended purpose of helping you organize your inbox.
Wrap-Up
The mail merge feature in Outlook is a powerful tool that allows you to send personalized mass emails to a large number of recipients without having to send each message individually. By following the step-by-step guide provided in this article, you can easily use mail merge in Outlook to save time and effort while still making each recipient feel valued.
Merge Emails in Outlook - FAQs
How to send mass email in Outlook?
Send mass emails by utilizing the mail merge Outlook feature with Microsoft Word for personalized communication or by adding multiple recipients in the BCC field for a more general approach.
What is a mail merge in Outlook?
Mail merge lets you send bulk email from Outlook by merging an email template with an Excel recipient list for personalized messages to multiple people at once.
How to do mail merge in Outlook?
Use Word to create an email template, link it to a data source like an Excel spreadsheet containing recipient details, and use the 'Mailings' tab in Word to merge and send personalized emails.


