


Does Outlook Have a Unified Inbox?
No, Outlook for Windows does not have a unified inbox in 2026. Despite being one of the most requested features for nearly a decade, Windows users are still unable to view messages from multiple accounts in a single, combined inbox. Instead, you're forced to click through each account separately.
So, if you're a user of the Windows version of Outlook with three mail accounts and want to check them all, you have to manually navigate to each inbox individually by clicking through Account 1, then Account 2, then Account 3, potentially missing important messages while you're checking the wrong inbox.
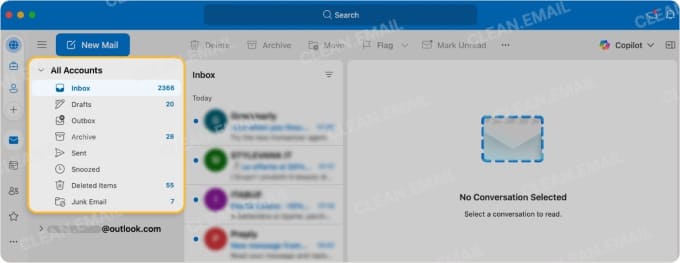
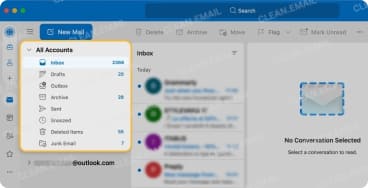
Confusingly, what we've just stated above applies only to Outlook for Windows. Mac and mobile Outlook users have enjoyed full unified inbox functionality for years. Their users can select the "All Accounts" inbox and instantly see every message from every account in one place.
It's no wonder that so many are puzzled by the current state of Outlook for Windows. "It’s 2025, and Outlook still doesn’t have a unified inbox or a proper, accurate global search on the desktop app. Every other email client I’ve tried has these basic features. Even Outlook Mobile supports them—so why is the desktop version still stuck in the past?" wrote one user in the r/Office365 subreddit last year.
Even those upgrading to the New Outlook, expecting to see a polished unified inbox experience are met with disappointment. Just like the classic version of Outlook, the New Outlook still lacks a unified inbox, so its users are forced to implement what's widely considered to be one of Outlook email management best practices using various workarounds.

How to Combine Inboxes in Outlook (Workarounds)
You can use these five methods to view or manage multiple inboxes in Outlook for Windows more efficiently so that you have something that at least resembles the Outlook unified inbox experience we all deserve in 2026.
Option 1: Search Across All Mailboxes (Quick & Temporary)
This is the fastest way to see messages from all accounts at once, but the downside is that you have to repeat the process each time.
Steps:
- Open Outlook and click in the Search bar.
- Select All Mailboxes or All Accounts from the dropdown.
- Enter a query like received:today to see all new emails. You can also search for unread messages using isread:no to quickly find unread emails in Outlook across all accounts.
💡 Pro Tip: Convert frequent searches into Search Folders for slightly faster access to your messages.
Option 2: Use Rules + Unified Folder (Semi-Permanent Solution)
Creating a centralized folder where all incoming messages are automatically copied provides a more lasting solution for those wondering how to create an Outlook unified inbox that includes multiple accounts.
The biggest limitation of this workaround is that it requires initial setup time and ongoing maintenance, especially when account settings change. That said, those who have experience with creating sweep rules in Outlook will find the process familiar, and those who don't have any experience should still be able to follow our instructions without much difficulty.
Steps:
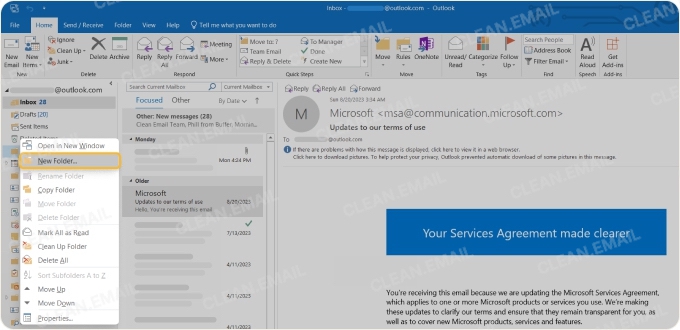
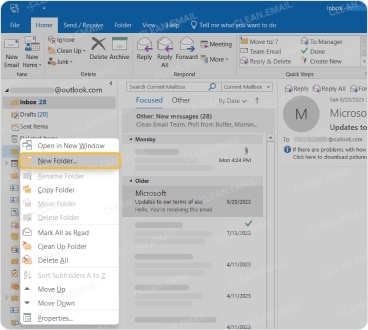
- Right-click on your primary account name in the folder pane and select New Folder. Name it "Unified Inbox".
- Navigate to File → Manage Rules & Alerts (or Home → Rules → Manage Rules & Alerts in newer versions).
- Click New Rule and select "Apply rule on messages I receive" from the Start from a blank rule section.
- Click Next without selecting any conditions.
- When Outlook warns you this rule will apply to all messages, click Yes to confirm.
- In the actions window, check "move a copy to the specified folder" and click the underlined "specified" link to select your newly created Unified Inbox folder.
- Name your rule something descriptive like "Copy [Account Name] to Unified" and click Finish.
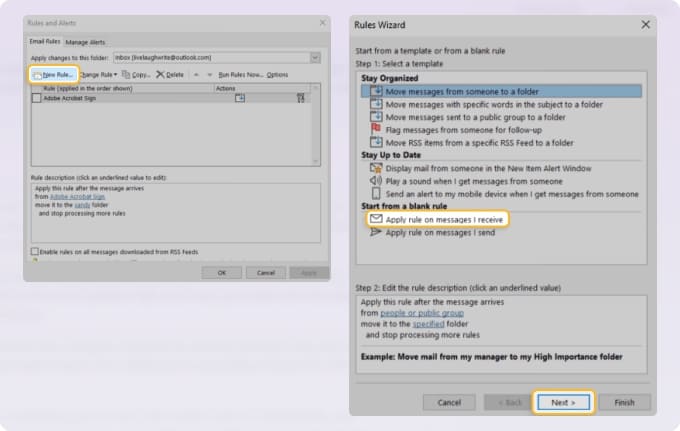
Repeat this entire process for each email account you have connected to Outlook, creating a separate rule for each account.
📌 Important note: This method doubles your storage usage since messages exist in both their original location and the unified folder. If you're concerned about mailbox size limits, consider modifying the rule to move messages instead of copying them, but keep in mind that this can complicate reply tracking.
Option 3: Pin All Inboxes to Favorites (Fast Access, Not Merged)
This workaround makes it more convenient to check all messages across all your accounts by placing every inbox within easy reach, though it doesn't produce anything that could genuinely be called an Outlook unified inbox Windows 11 experience.
Basically, instead of hunting through nested folders or scrolling through a long account list, you'll have all your inboxes pinned to the top of your navigation pane for one-click access. It's similar to how you might sort emails in Outlook for better organization.
Steps:
- Locate your first inbox in the folder pane (usually on the left side of Outlook).
- Right-click on the inbox folder and select "Show in Favorites" or "Add to Favorites" (wording varies by version).
- Repeat this process for each additional email account's inbox.
- Once all inboxes appear in the Favorites section at the top of the folder pane, you can drag them to reorder by priority.
- Optional: Collapse the main folder list below to focus only on your Favorites section, creating a cleaner interface.
💡 Pro Tip: You can also add other frequently accessed folders to Favorites, such as Sent Items or specific project folders, creating a customized command center for your most important email locations.
Option 4: Forward All Accounts to a Single Account (Permanent but Limited)
This method creates the closest thing to a true unified inbox in Outlook desktop by automatically forwarding all emails from your secondary accounts to one primary inbox.
While it genuinely consolidates all messages in one place without requiring manual work, it comes with significant drawbacks: replies will default to your primary email address unless you remember to manually switch the "From" field. What's more, email threading often breaks when messages are forwarded and forwarding can sometimes trigger spam filters, especially with large volumes of messages.
Steps:
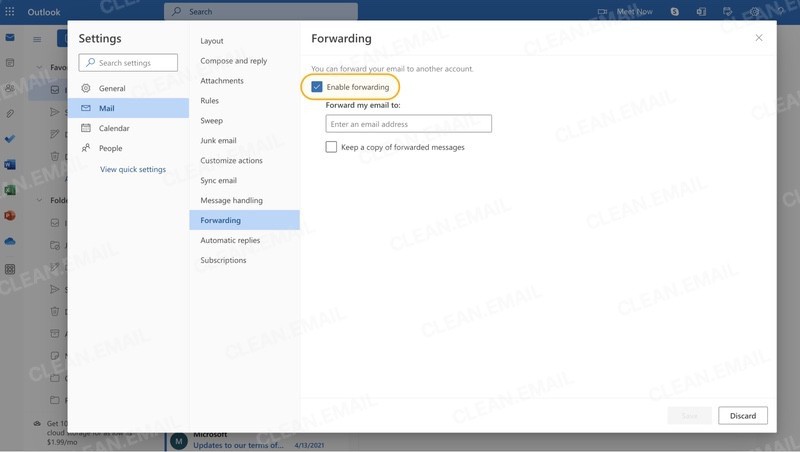
- Log in to your first Outlook email account through the web interface (such as Outlook.com for personal accounts).
- Navigate to Settings (gear icon) → Mail → Forwarding.
- Enable the "Enable forwarding" checkbox.
- Enter your primary email address where all messages should be forwarded.
- Choose whether to "Keep a copy of forwarded messages" (recommended for backup purposes).
- Save the settings and repeat this process for each additional email account.
- Send a test email to each secondary account to verify forwarding is working correctly.
⚠️ Important: Some organizations disable mail forwarding for security reasons, so this option may not be available for corporate accounts.
Option 5: VBA Macro to Merge Inboxes (Advanced Users Only – Not Recommended by Microsoft)
For technically proficient users comfortable with programming, VBA (Visual Basic for Applications) macros can be used to search across all connected accounts and either display results in a temporary view or automatically copy messages to a designated unified folder.
The macro can run either on-demand when you trigger it or automatically when new mail arrives, depending on your configuration.
Unfortunately, the use of VBA macros in Outlook comes with serious caveats. The most important one is the fact that the New Outlook unified inbox dream remains impossible with this method since Windows 11's New Outlook completely lacks VBA support.
Additionally, Microsoft actively discourages macro use due to security vulnerabilities, and many corporate IT departments block VBA entirely to prevent malware risks
Steps (basic implementation example):
- Press Alt + F11 to open the Visual Basic Editor in Classic Outlook.
- Insert a new module via Insert → Module.
- Create a macro that searches across all accounts using code like:
- For automatic processing, use the Application_NewMailEx event to trigger actions when mail arrives.
- Save your macro and enable it through File → Options → Trust Center → Macro Settings.
Sub CreateUnifiedView()
   Dim mySearch As Search
   Dim myTable As Table
   Set mySearch = Application.AdvancedSearch("folder:Inbox", , , "UnifiedInbox")
End SubWhile VBA macros can technically be used for all kinds of inbox management tasks, such as managing unwanted emails automatically or creating automated filing systems, third-party tools offer safer, more user-friendly alternatives without the technical overhead and security concerns.
Pro Tips for Managing Multiple Outlook Accounts Efficiently
The workarounds above can help you put together something resembling a unified inbox Outlook 365 experience, but, as we've explained, they all come with serious limitations. If your main issue is inbox volume rather than simply switching between accounts, Clean Email can work alongside Outlook to help reduce clutter across multiple mailboxes.
You can use it to manage subscriptions in bulk, block recurring spam, filter out unknown senders, and apply actions like archiving or deleting to large volumes of similar messages.
Rather than dumping all emails into one overwhelming view (which is what most unified inboxes attempt to create), Clean Email helps you prioritize what matters with its convenient grouping and sorting options.
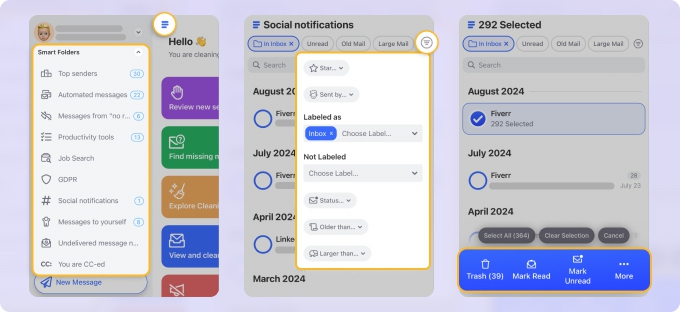
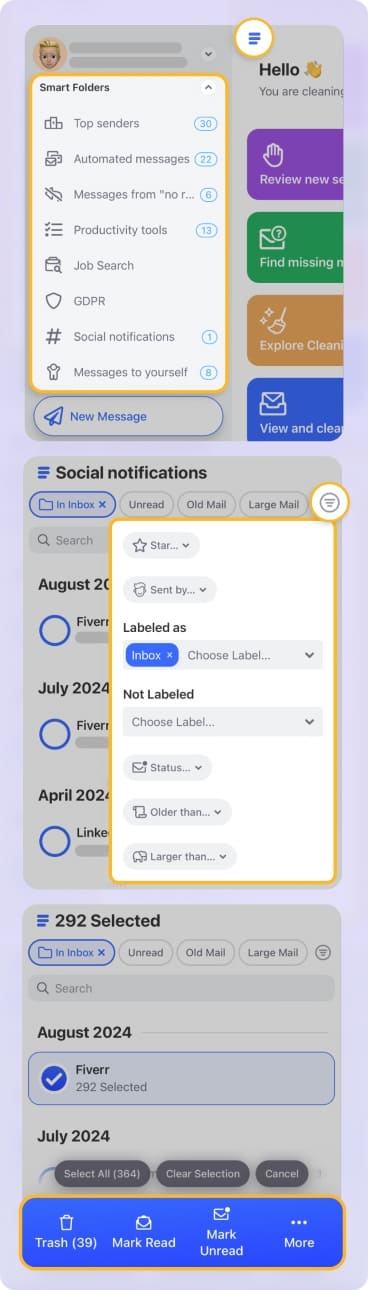
The beauty of this approach is that it works alongside your existing Outlook setup. You can continue using Outlook for composing and reading emails while Clean Email handles the organization and automation on the web, macOS, and mobile.
To Sum It Up
The reality remains unchanged: Outlook for Windows still does not offer a true unified inbox in 2026, even though the feature is available in Outlook for Mac and mobile.
Windows users can still get close by searching across all mailboxes, using rules with a shared folder, pinning inboxes to Favorites, forwarding accounts, or relying on advanced VBA workarounds.
Each method has trade-offs, so the best choice depends on what you need most: quick visibility, easier access, automatic consolidation, or long-term inbox control. If your real problem is the volume of messages across accounts, reducing clutter may be just as important as combining inboxes.
FAQs
Does Outlook 2026 have a unified inbox?
No. Windows Outlook, including the new Windows 11 app, doesn’t offer a native unified inbox. Only mobile and Mac versions do.
How can I see all Outlook inboxes in one view?
You can only add each account to Outlook and then use the Favorites section or Search Folders to quickly see mail from all inboxes in one place.


