


What to do to solve the issue:
📌 For outgoing emails: Remove spam triggers from the content, use trustworthy links, and add unsubscribe options.
📌 For admins: Implement authentication protocols, create compliance rules, configure spam settings, and enable safety settings.
📌 For recipients: Mark messages as “not spam,” add the sender to your contacts, and use Clean Email to automatically manage incoming messages.
Why Google Workspace Emails Go to Spam
There are several possible reasons your Google Workspace emails end up in the Spam folder. These can affect both external and internal messages, and be caught by spam filters or caused by recipient actions.
- Email content or design can trigger spam filters. This can include words like “urgent” or “free” as well as messages containing too many links or images.
- Suspicious links in message content can also indicate spam. This can be mismatched text and links along with using link shorteners.
- No unsubscribe options can not only violate the CAN-SPAM act but cause recipients to mark your emails as spam.
- Emails sent without permission can also lead recipients to report your messages as spam.
- Missing or incorrect details in the From field along with a missing physical address can trigger spam filters.
- No email authentication setup can signal to email providers that your messages aren’t authentic.
- Lack of compliance rules can result in spam on the receiving end.
- Poor domain reputation can result from things like sending too many unauthenticated emails, having tons of unsubscribers, and getting messages marked as spam.

Gmail Settings Guide for Admins
With the above issues in mind, you can take care of creating more acceptable email content, using trusted links, including unsubscribe options, and improving your domain reputation.
But to make sure your emails reach the recipients’ inboxes and not their Spam folders, consider adjusting a few Google Workspace spam settings for Gmail.
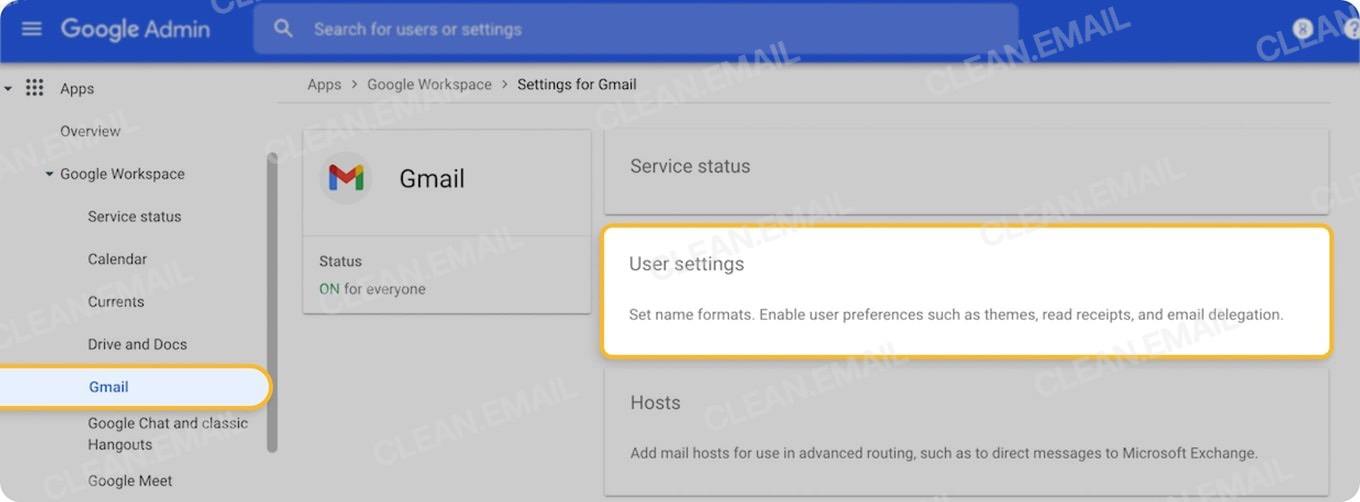
- To get started, sign into the Google Workspace Admin site.
- Expand Apps → Google Workspace in the menu.
- Select Gmail.
You can then adjust the following settings and others per your preference.
Implement Authentication Protocols
To authorize mail servers (SPF), add digital signatures to emails (DKIM), and define how receiving servers should handle messages that fail checks (DMARC), you can make adjustments to your DNS (Domain Name Server).
You can start by setting up DKIM in the Gmail settings.
- Select Authenticate email.
- Choose the domain in the drop-down box.
- Click Generate New Record, select your DKIM key settings, and click Generate.
- Enter the DNS TXT record into your DNS settings location.
- Click Start Authentication.
💡 For additional information on the field names, values, and the authentication process, visit the Google Workspace Admin Help page for setting up DKIM. You can also then set up SPF and DMARC authentication in your DNS.
Create Compliance Rules
By creating content compliance rules, you can automatically modify headers, reroute messages, bypass spam filters, and remove attachments.
- Select Compliance.
- Click Configure next to Content Compliance.
- Pick the emails to be affected, add expressions to match, and choose how to act on matching messages.
- Click Save.
📌 Notice that you can also set up compliance rules for attachments and secure transport.
Configure Security Settings
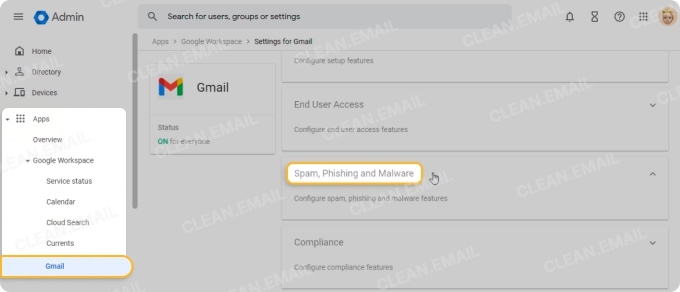
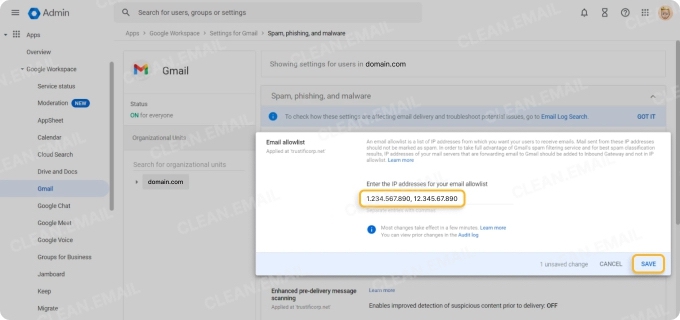
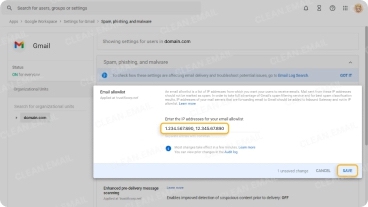
Using the spam, phishing, and malware settings, you can create an IP allowlist, perform message scanning, and approve senders to avoid the spam folder for enhanced Google Workspace spam filtering.
- Select Spam, Phishing, and Malware.
- Hover over the following and click Edit (pencil icon):
- Email allowlist to enter accepted IP addresses.
- Enhanced pre-delivery message scanning to enable improved detection of suspicious content.
- Enhanced malware & phishing protection to identify harmful links and reclassify spam quicker.
- Choose Configure next to Spam to create an approved senders list.
📌 Notice that you can also configure blocked senders and enable gateways to help with spam management.
💡 Tip: For help with some settings, such as obtaining addresses to block senders, you can view Google Workspace alerts for spam using the Alerts button (bell) or by going to Safety → Alert center to review spam alert details.
Enable Advanced Safety Settings
To assist with Google Workspace spam protection for team members, you can adjust safety features for attachments, links, images, and spoofing for incoming messages.
- Select Safety.
- Hover over the following and click Edit:
- Attachments to turn on protections for encrypted attachments, scripts, and unusual attachment types.
- Links and external images to identify links behind shortened URLs, scan linked images, and show warnings for clicking links from untrusted domains.
- Spoofing and authentication to enable protections for domain, name, and inbound email spoofing as well as unauthenticated messages.
- Optionally, turn on IMAP view time protections for users interacting with emails.
📌 Keep in mind that admins can’t currently use Google Workspace to disable spam filters, but can proactively head-off potential dangers.
Gmail Settings Guide for Recipients
As an end user, there are a couple of Gmail settings you can use to stop emails from going to spam that you receive through Google Workspace or even other avenues.
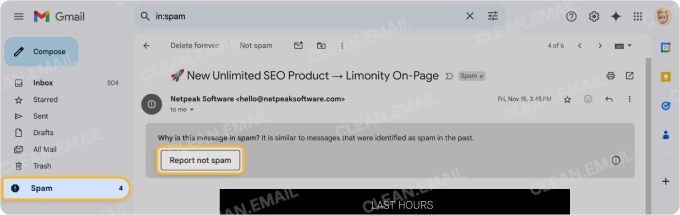
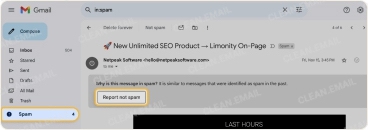
Mark as Not Spam
One of the simplest actions you can take if your internal Google Workspace communications are getting caught by the Gmail spam filter is to mark them as “not spam.”
Open the Spam folder (label) in the menu, choose a Google Workspace email, and select Report not spam at the top of the message body.
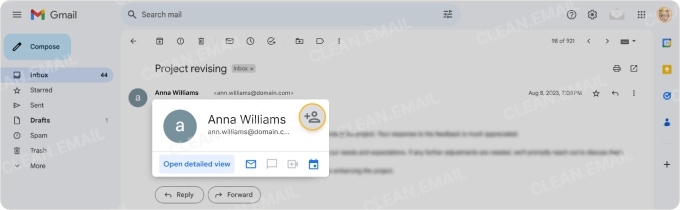
Add a Contact
Another way to deter Google Workspace emails from being seen as spam is to add the sender to your contact list. This tells Gmail that you trust the sender and want their messages.
Hover your cursor over the sender’s name and email address in the message header and select Add to Contacts.
💡 Tip: While the above Gmail settings should help, there is a sure-fire way to make sure Google Workspace messages don’t go to spam. Plus, it gives you a way to quickly access those emails at the same time. Read on!
Clean Email Guide and Use Case for Recipients
As an end user or recipient, you can go beyond the basic features of Gmail to ensure you receive internal communications from Google Workspace. Using Clean Email, you can set up Auto Clean rules to direct those emails to a specific spot and access them with ease.
Here’s an example:
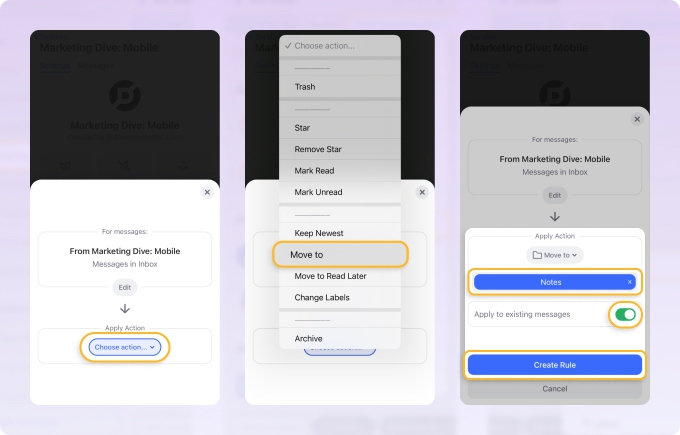
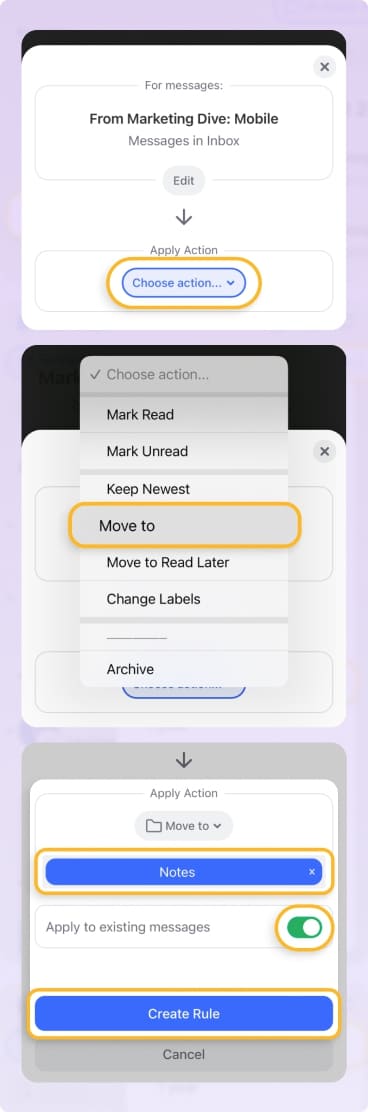
- Head to the Auto Clean section of Clean Email and create a new rule.
- Enter the domain for your Google Workspace emails as the filter, for example, “@company.com”.
- Create a new folder, such as “GWorkspace” or similar, and use the Move action to send the messages there.
- Remove the Inbox label that’s automatically attached to new Gmail messages so that they skip the inbox.
- Add the new folder to the Favorites section for quick access.
With this simple setup, you can keep your internal communications organized, searchable, easily accessible, and most importantly, out of the Spam folder.
Clean Email is a supplementary application that you can use with any IMAP service provider. This makes it handy if you have multiple email accounts such as Gmail, Outlook, iCloud Mail, and more.
It works on iOS, Android, macOS, and as a web app, never reads email content or sells user data, and is compliant with the Gmail privacy policy. Better still, Clean Email provides a variety of smart features for maintaining the tidiest of inboxes.

Wrap-Up
As an admin, there are things you can do to both improve on anti-spam for Google Workspace members and get your external messages to your recipients. Take your time walking through this guide and making adjustments to email content and settings as needed.
And as a recipient, keep in mind that you can use Clean Email to improve on Gmail’s offerings. By using the automations Clean Email provides, you never have to worry about missing an important Google Workspace communication again.


