


How to Create an HTML Signature for Outlook
If you don’t already have an Outlook HTML signature ready for use, then don’t skip this chapter. In it, we explain how to create an HTML signature for Outlook using two different methods.

Method 1: Online Generators
These days, you don’t need any design or coding skills to create a stunning sig. There are many HTML signature Outlook 365 online generators that can spit out stunning sigs in seconds, including:
- HubSpot Email Signature Generator: a completely free generator whose features rival many paid rivals.
- WiseStamp: an easy-to-use generator that makes it easy to create sigs with contact information, social media profiles, and even a handwritten signature.
- Signature.email: a fairly priced generator with six totally free templates optimized for Outlook and other popular email services.
All of these generators output a sig that you copy & paste into Outlook.
Method 2: Manual Creation
Mail sigs can also be created manually using readily available word processors like Microsoft Word or Google Docs, and the process is fairly straightforward.
First, create your sig in Microsoft Word or Google Docs using available text formatting tools. If you have something complicated in mind, then you can use the table generator feature to create the desired layout.
Once your signature is ready, you need to turn it into HTML code. This website can be used to convert your Microsoft Word or Google Docs text into HyperText Markup Language, and you can then add the HTML signature to Outlook by following the steps in the next section of this article.
How to Add an HTML Signature to Outlook
Now that your sig is ready, you should learn how to add an HTML signature to Outlook across the different platforms for which the mail client is available.
Click here if you have yet to create your sig for instructions on how to do so.
Outlook on the Web
The web version of Outlook supports HyperText Markup Language sigs, so adding a new sig is easy:
- Go to: https://outlook.live.com/.
- Log in with your email address and password if asked to do so.
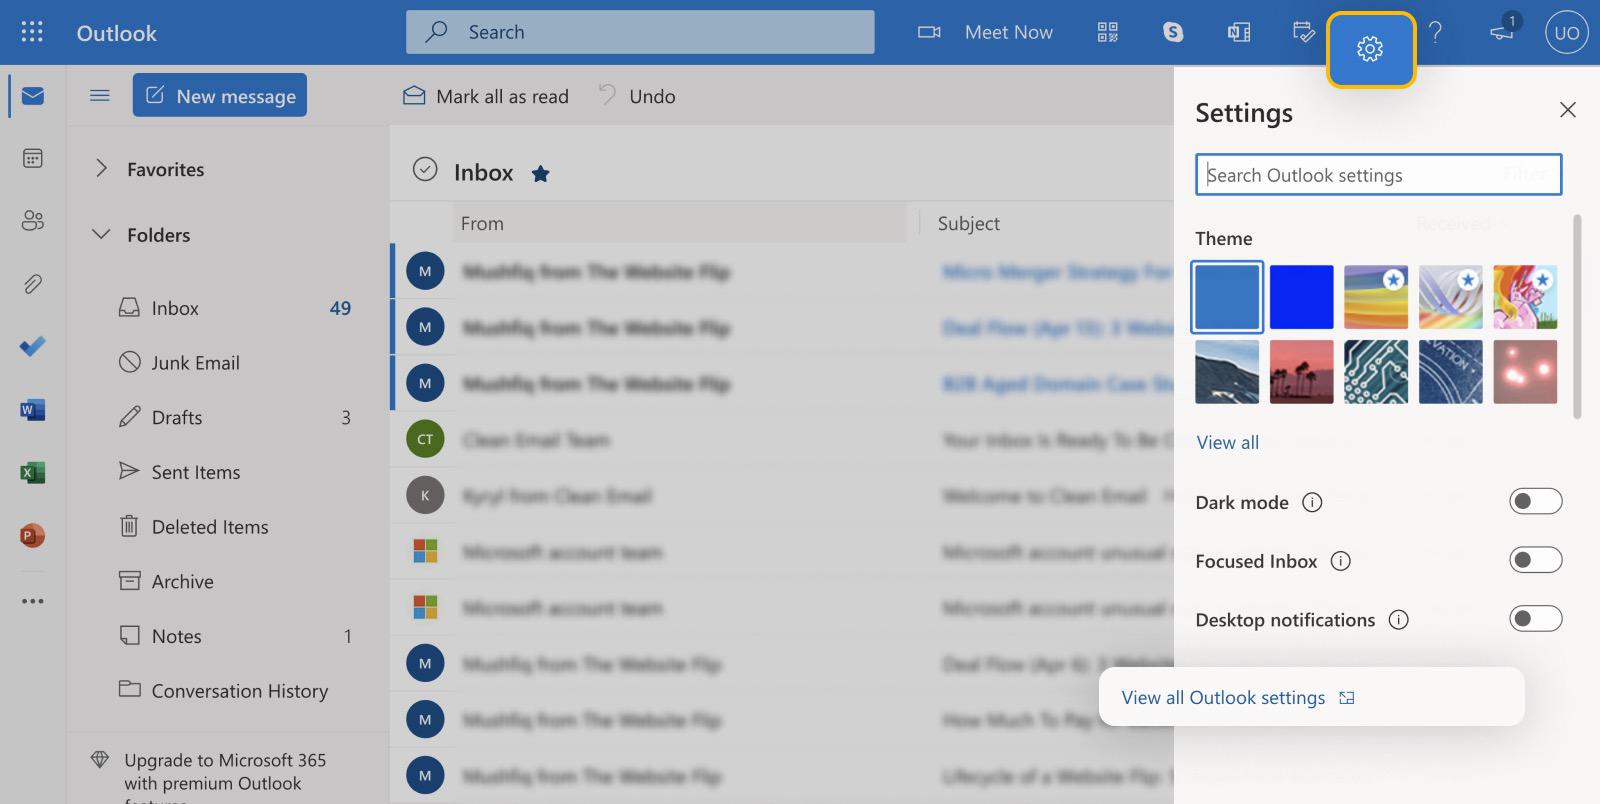
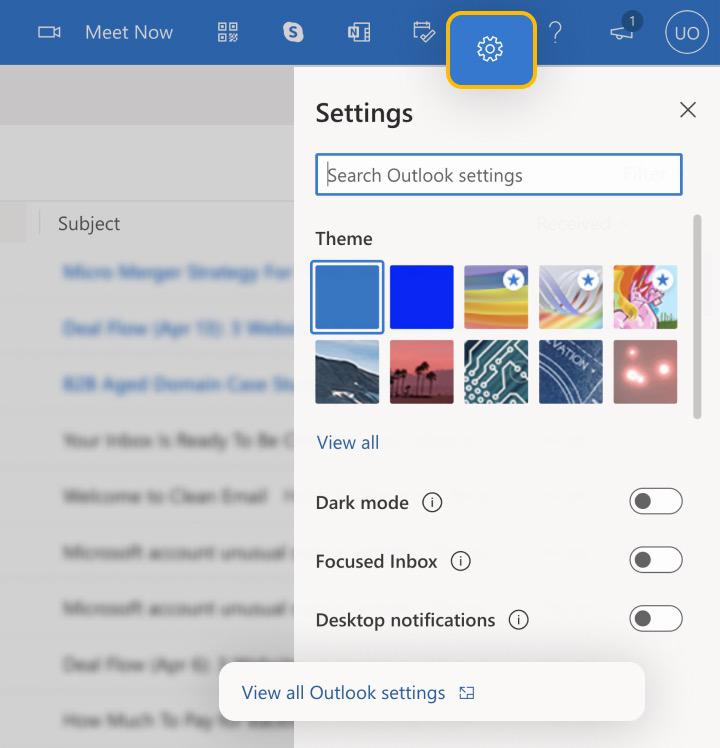
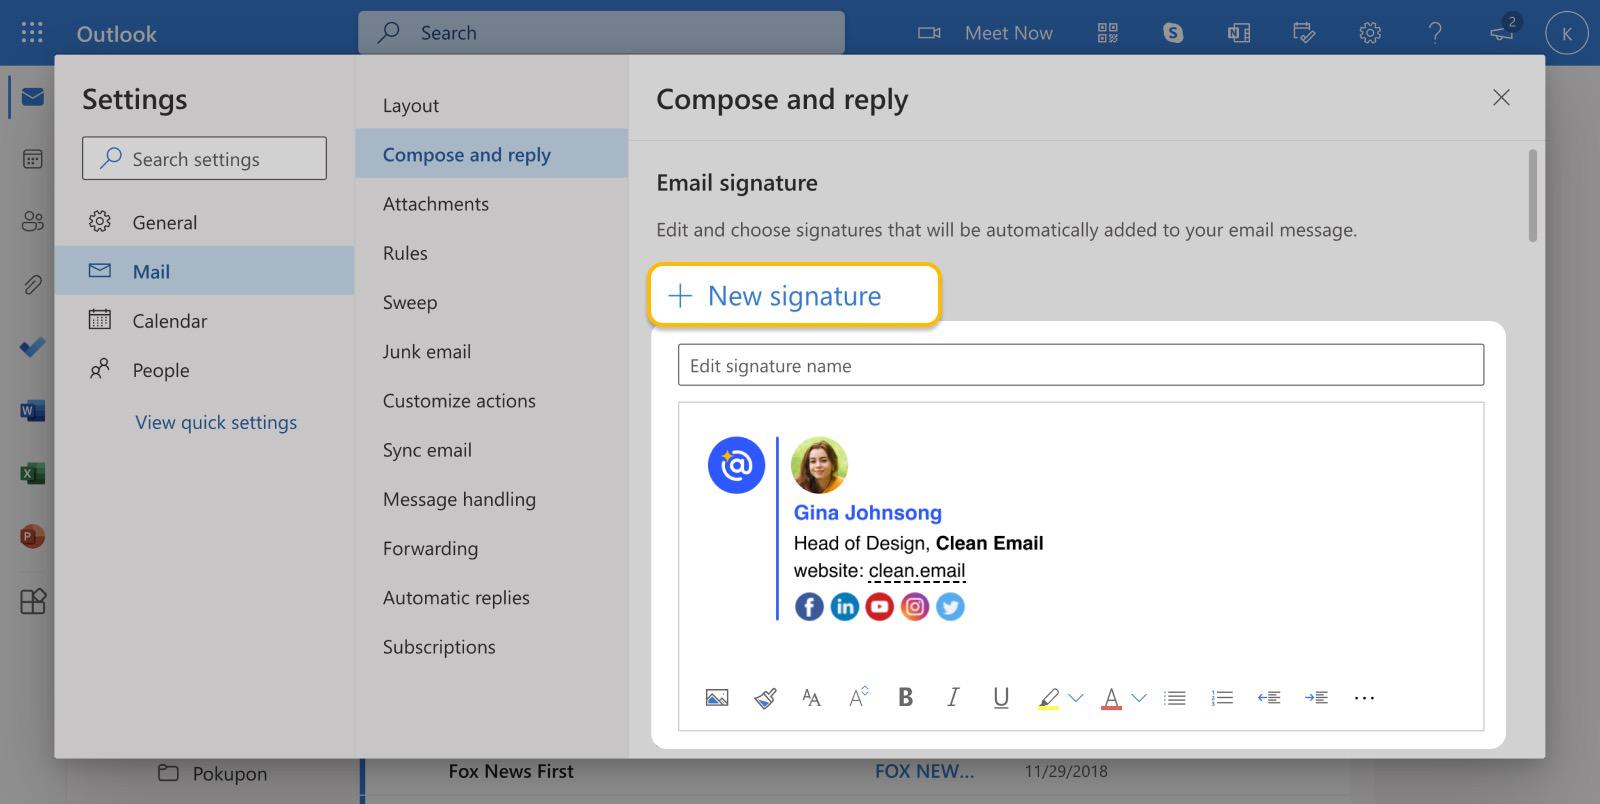
- Click the Settings gear icon.
- Choose the View all Outlook settings option.
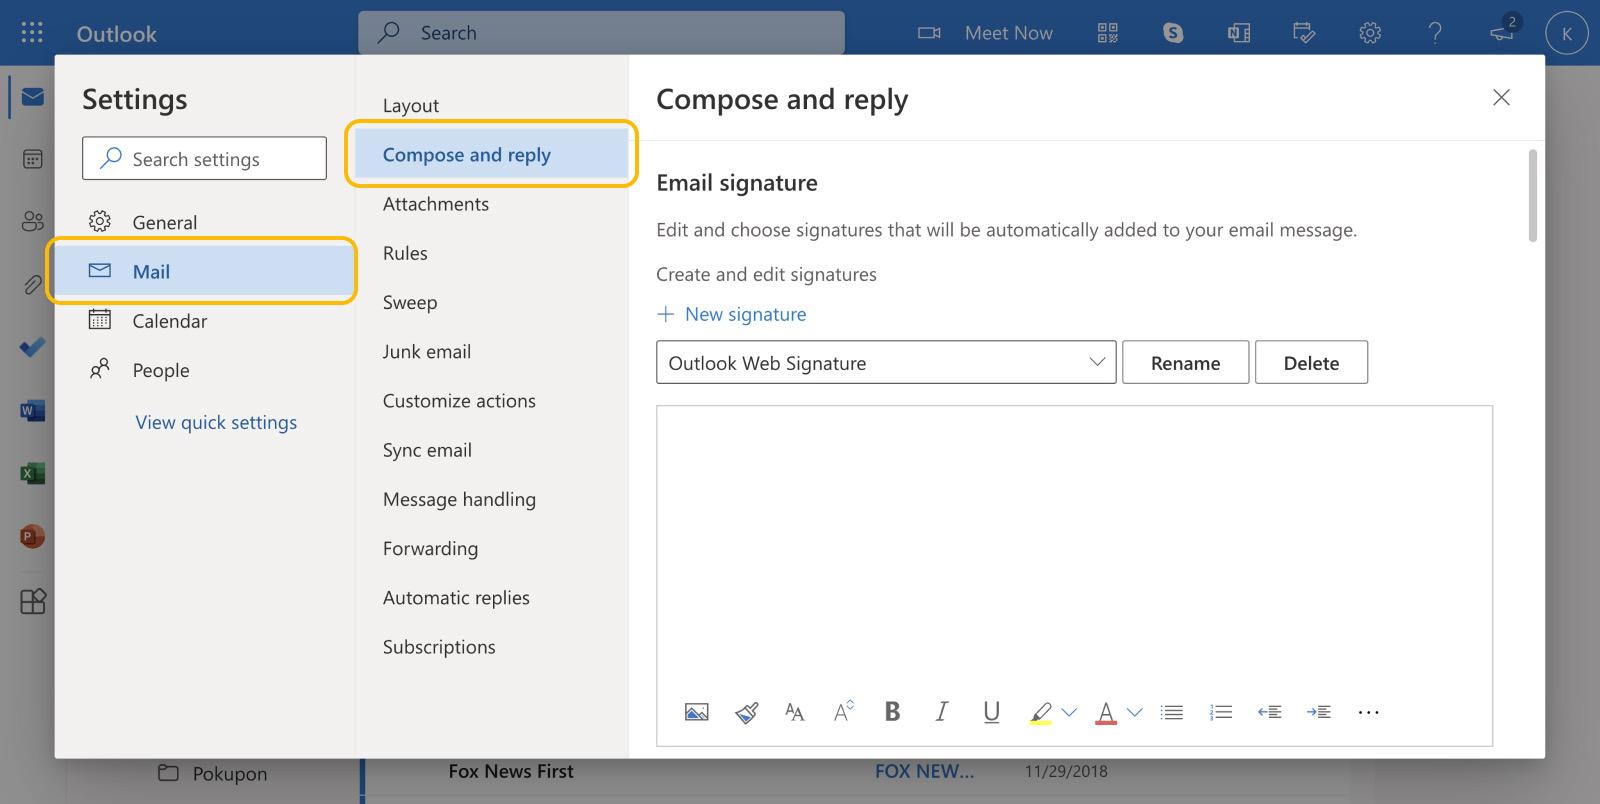
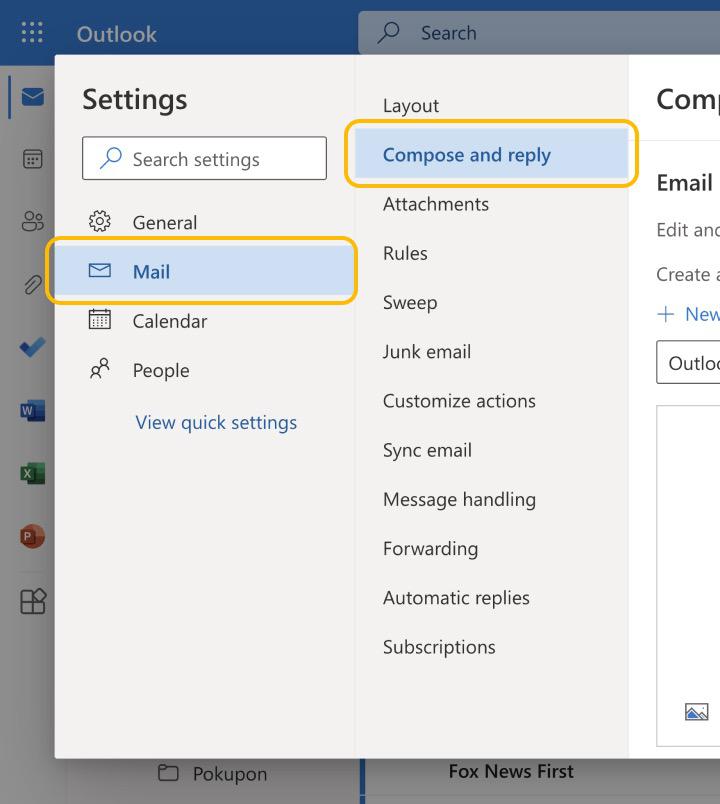
- Select the Mail tab and then navigate to the Compose and reply sub-tab.
- Under Email signature, click New Signature.
- Paste your HTML email signature for Outlook into the text box.
- Click Save.

Outlook for Windows & Mac
There are some important differences between the desktop versions of Outlook for Windows and Mac, so make sure to follow the right instructions depending on your operating system:
Windows
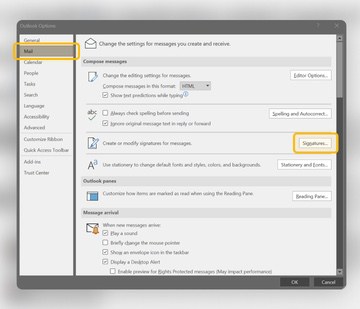
To add a HyperText Markup Language sig in Outlook for Windows:
- Launch the email client.
- Click on File in the menu bar.
- Select Options.
- Go to the Mail tab.
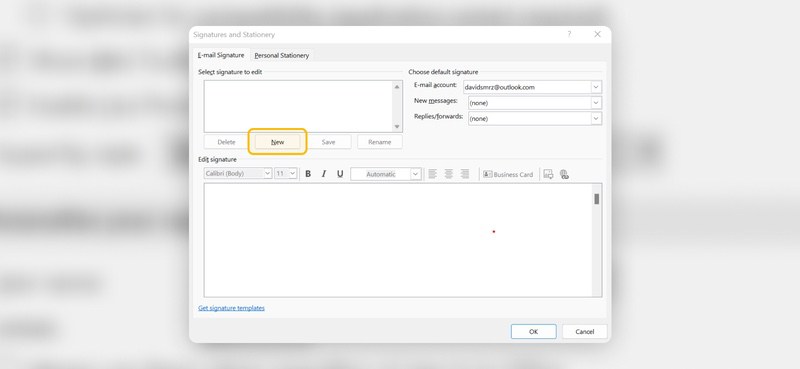
- Click Signatures.
- Click the New button.
- Name the new sig.
- Paste your sig into the text box.
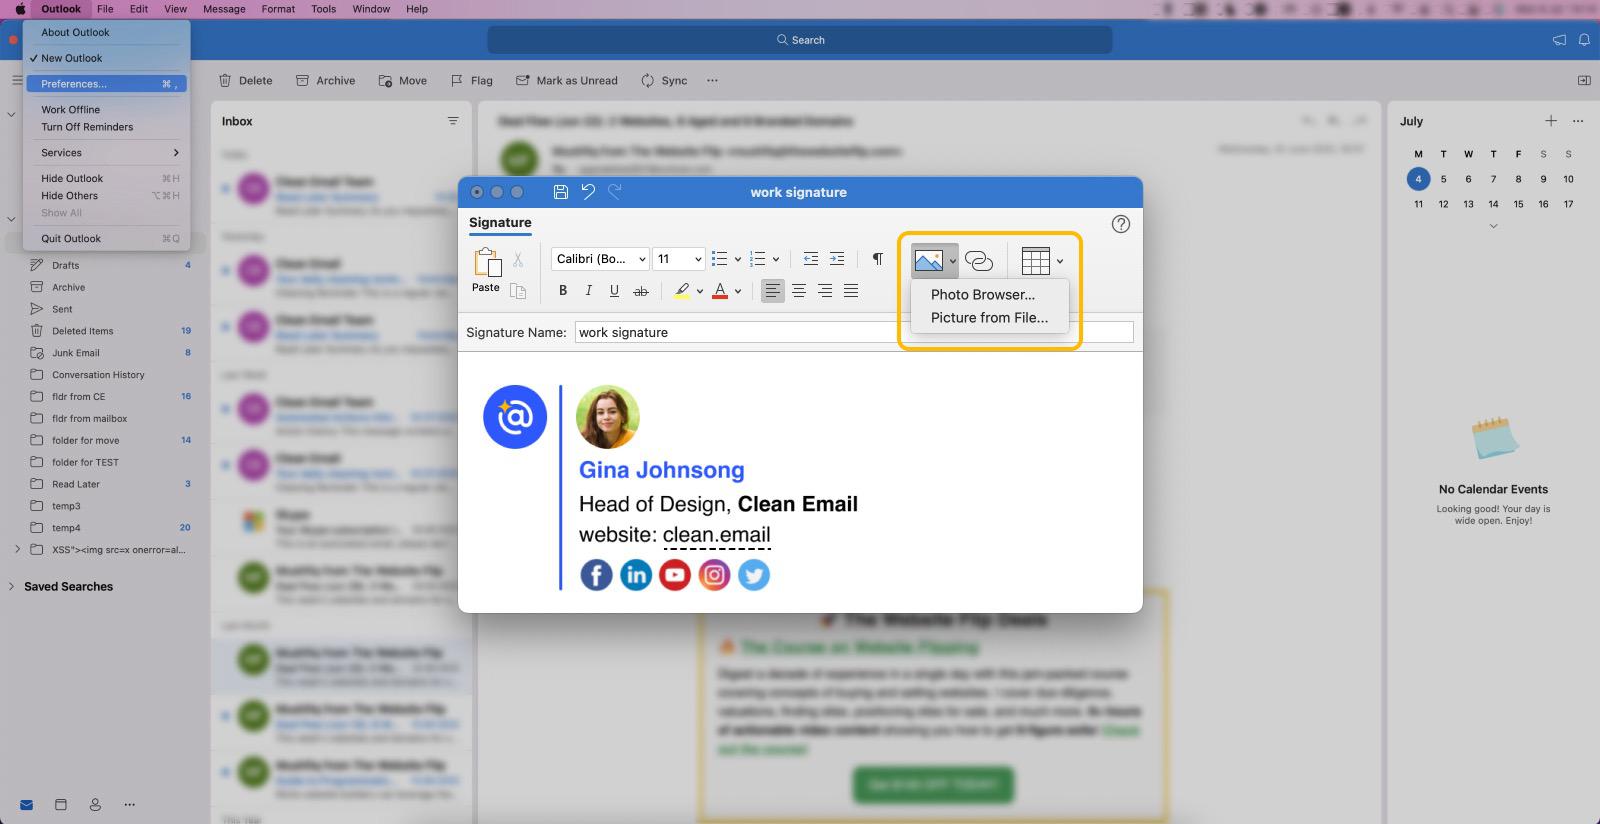
- (Optional) Click the Pictures button to add an image.
- Click OK.

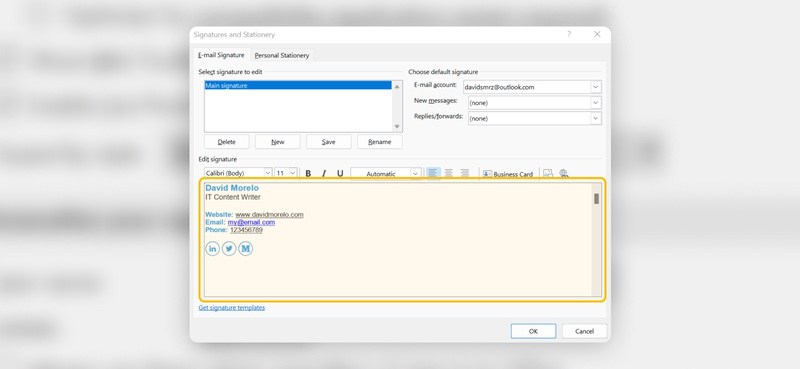
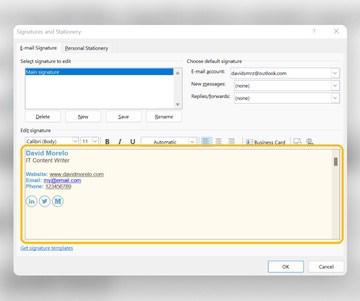
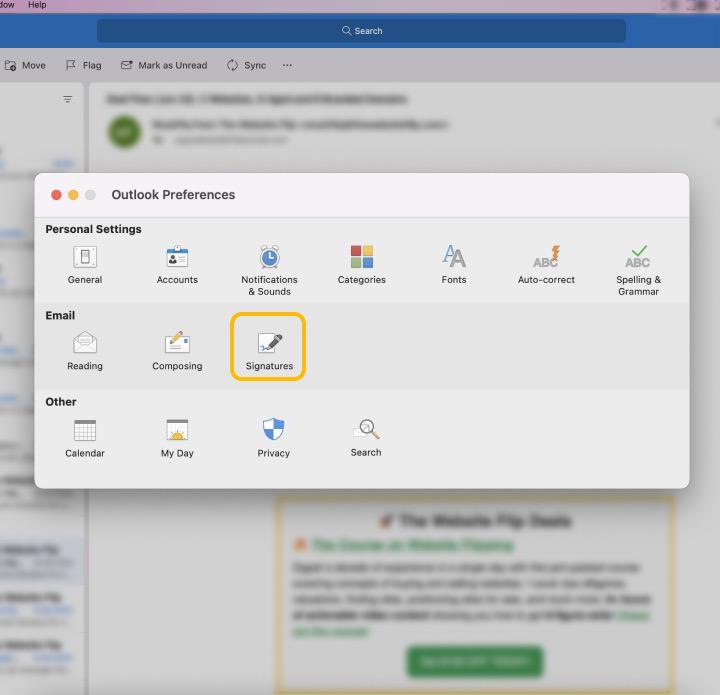
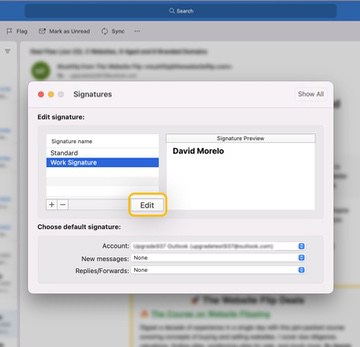
Mac
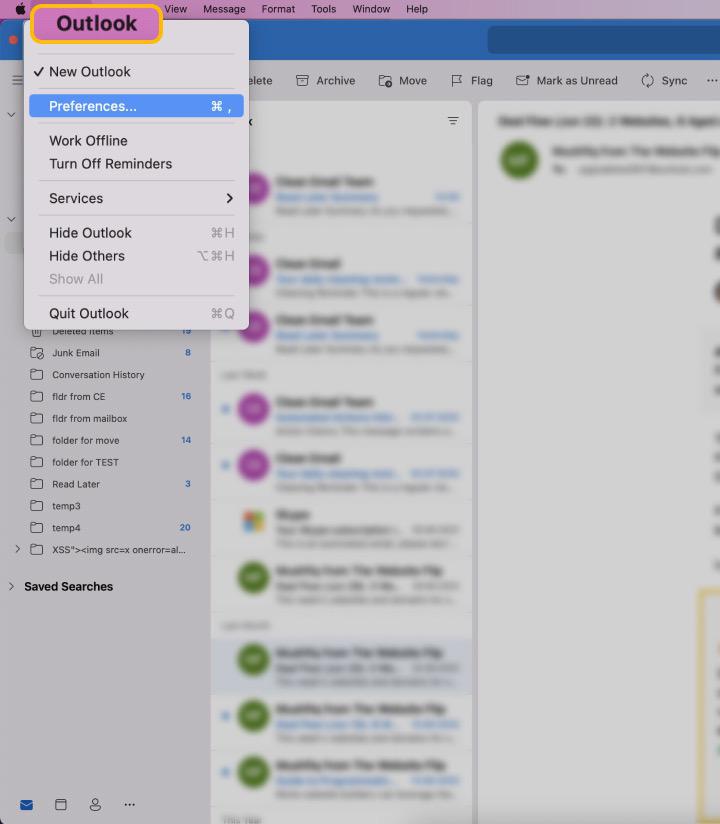
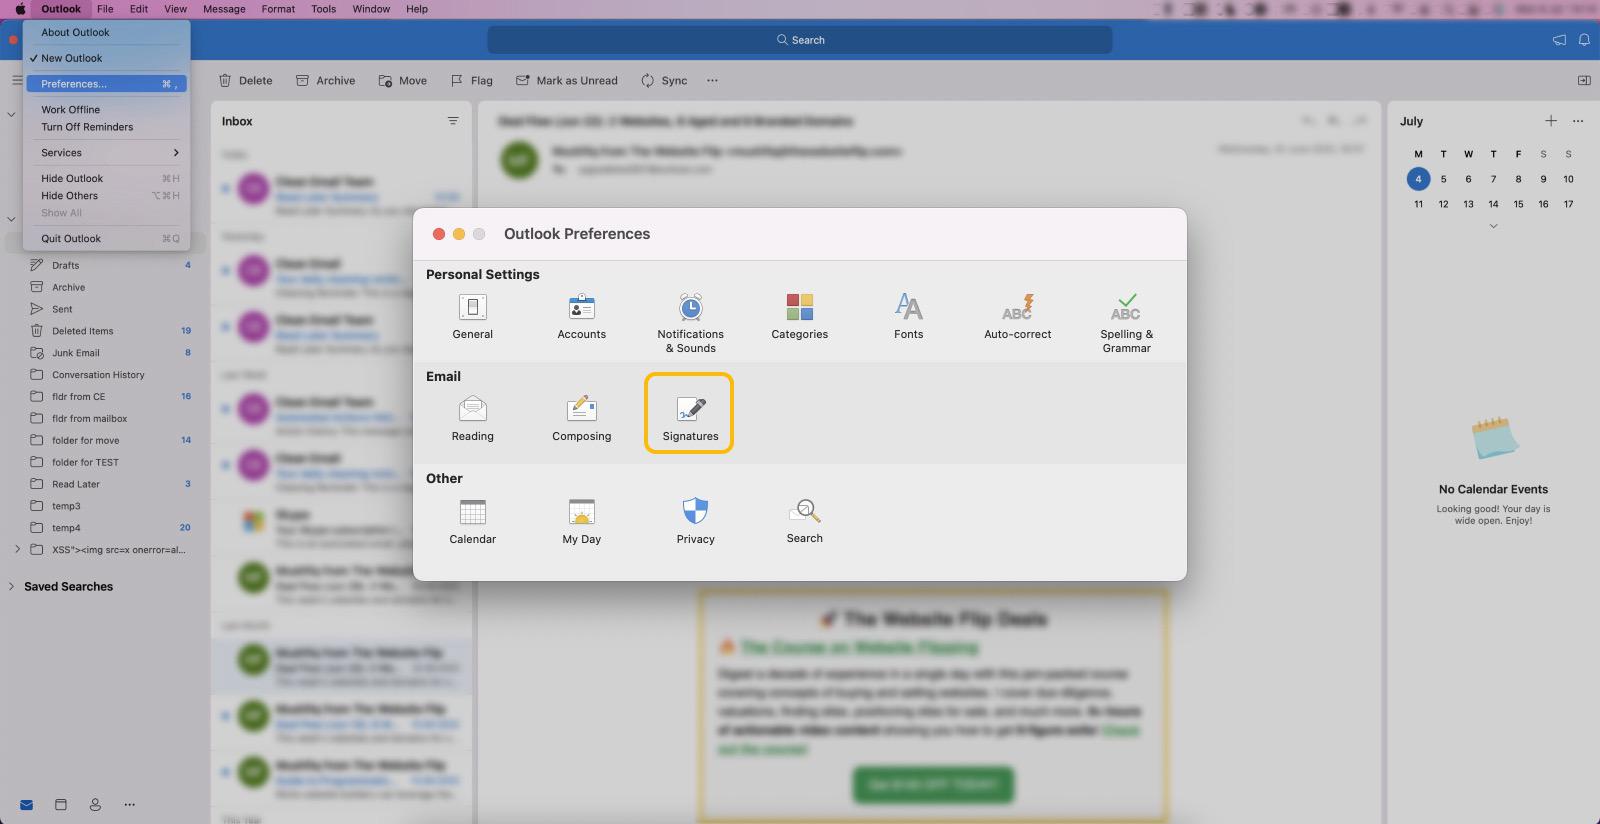
To add a HyperText Markup Language sig in Outlook for Mac:
- Launch the email client.
- Open Preferences.
- Click Signatures.
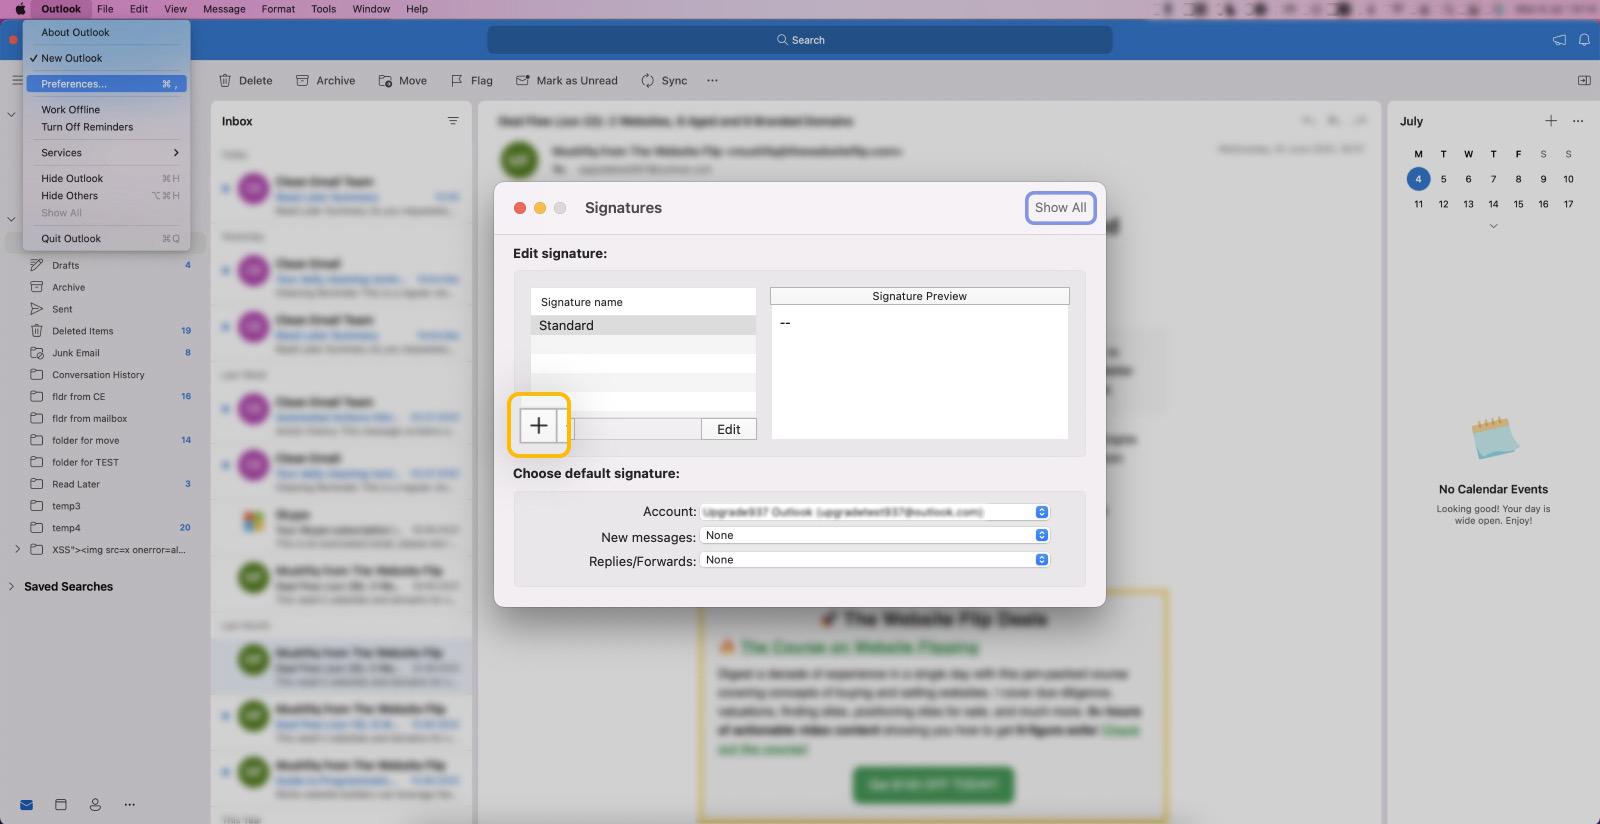
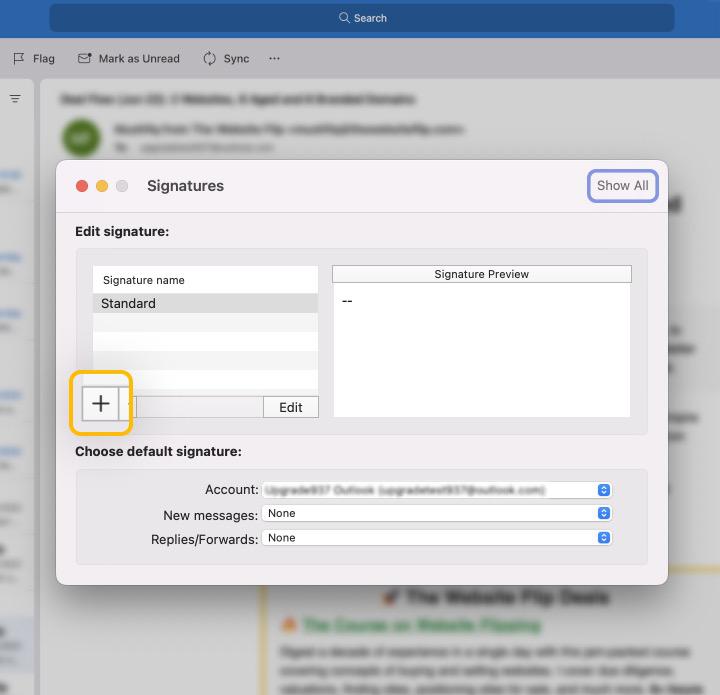
- Click the Plus icon.
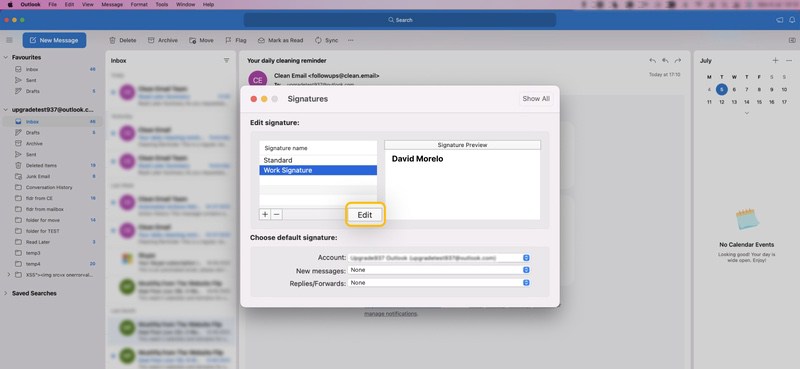
- Edit the newly created sig.
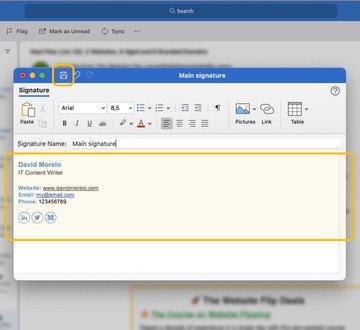
- Give the new sig a fitting name.
- Paste your Outlook HTML signature or Outlook plain text signature into the main textbox.
- (Optional) Click the Pictures button to add an HTML image to the Outlook signature.
- Click the Save icon.


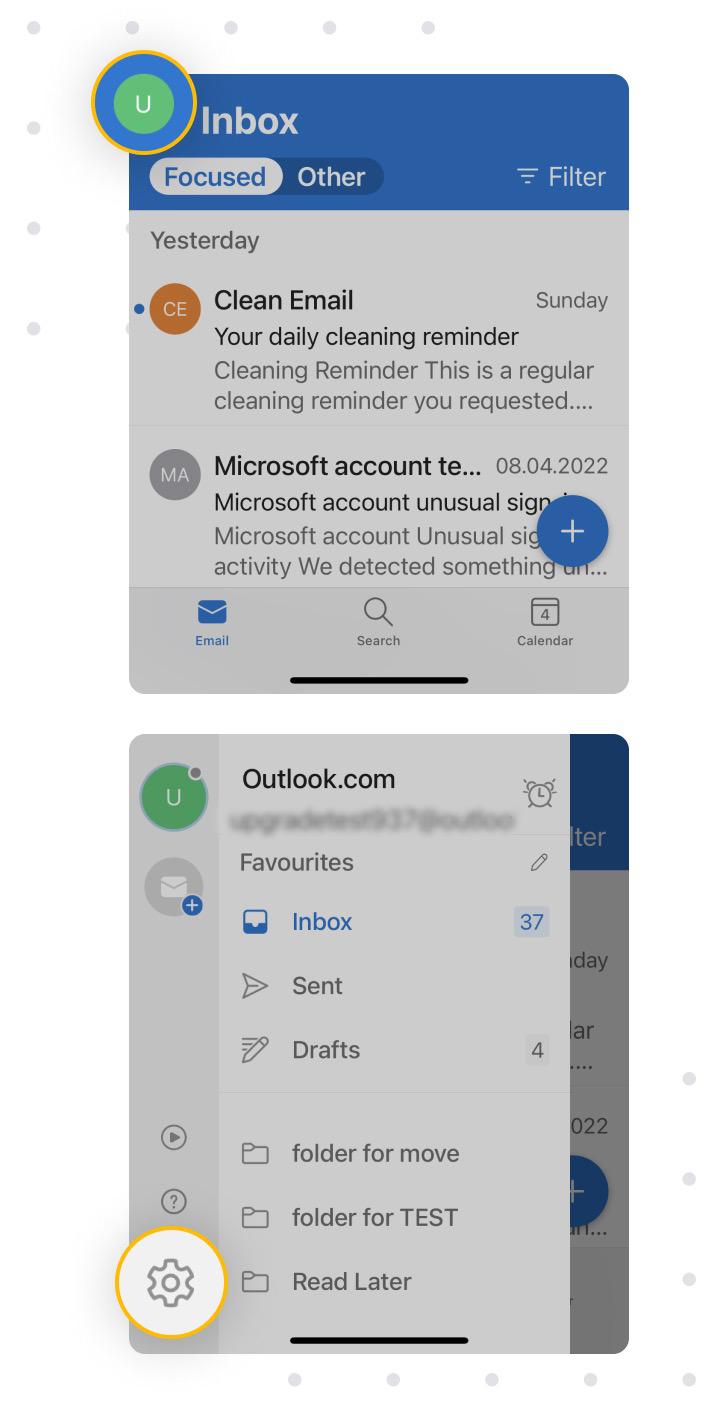
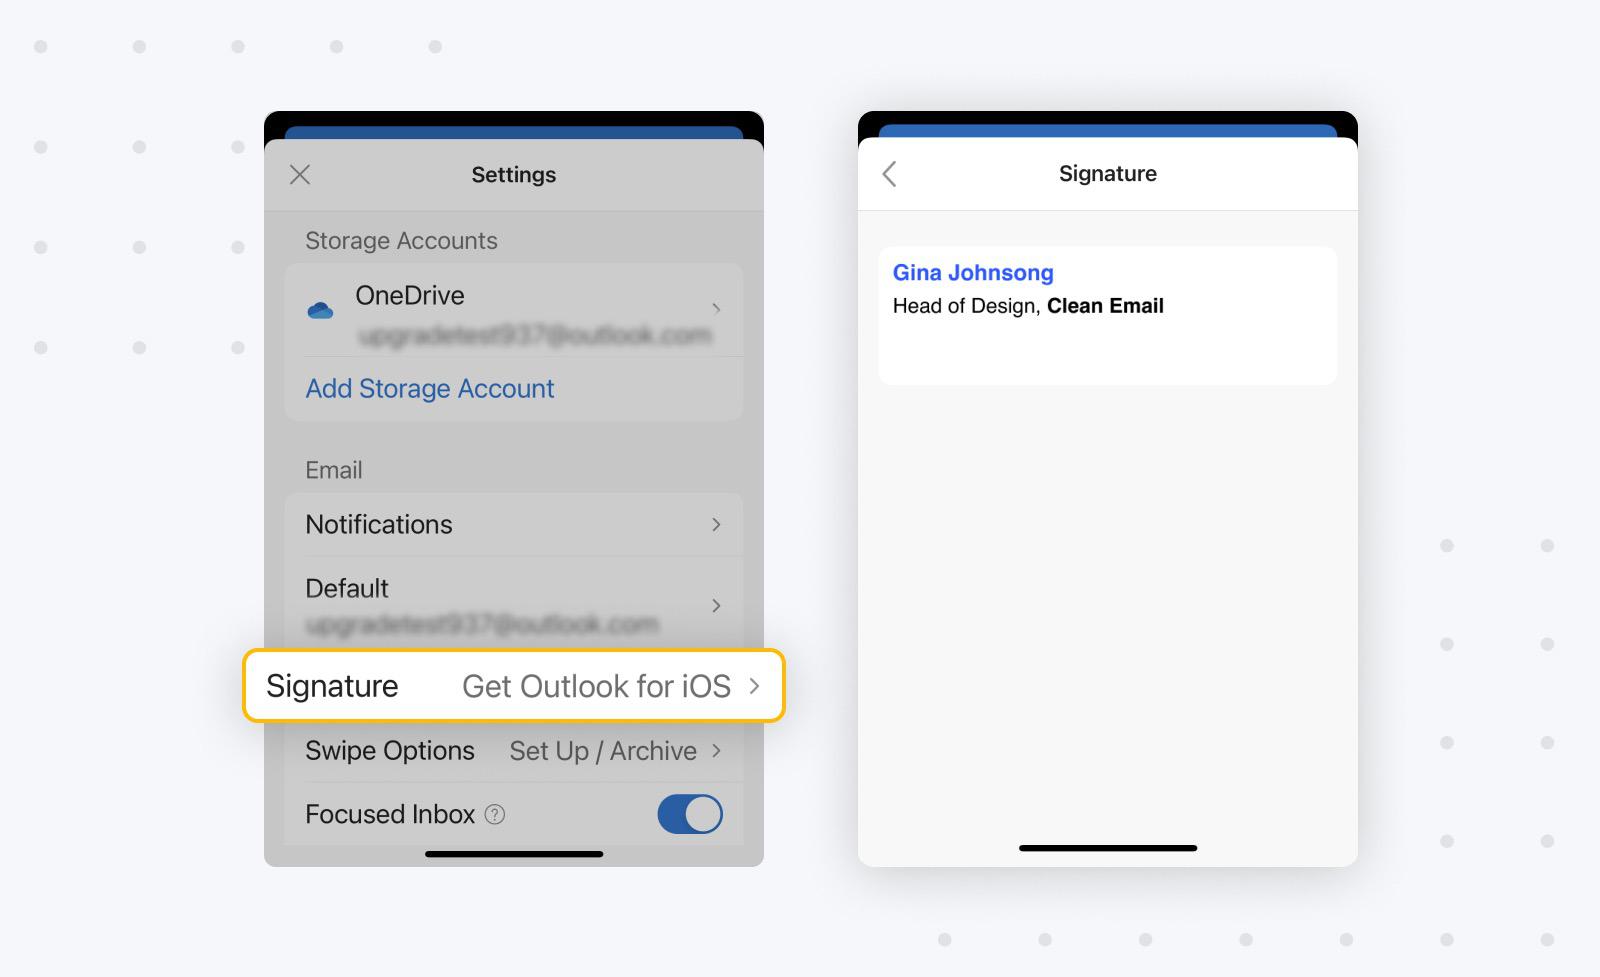
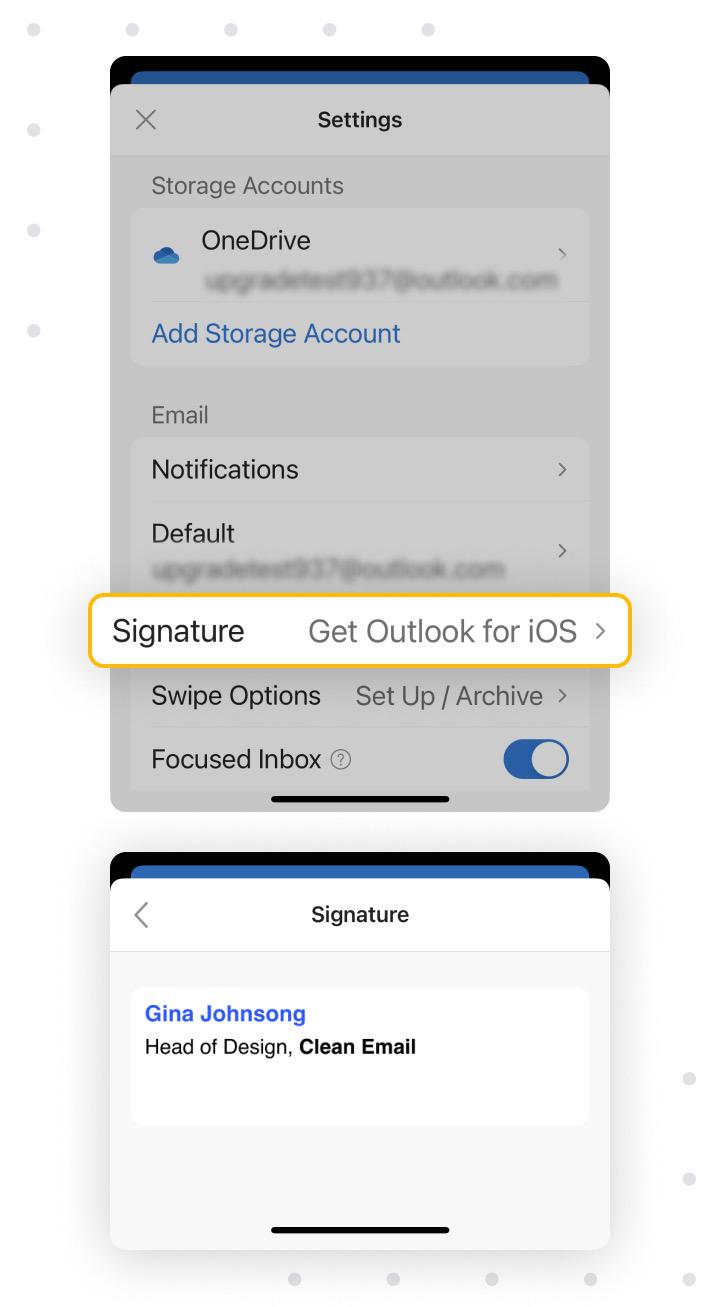
Outlook for Android and iOS
Unfortunately, neither of the two mobile versions of Microsoft’s email client supports HyperText Markup Language sigs.
The best you can do is create a plain text sig by following these steps:
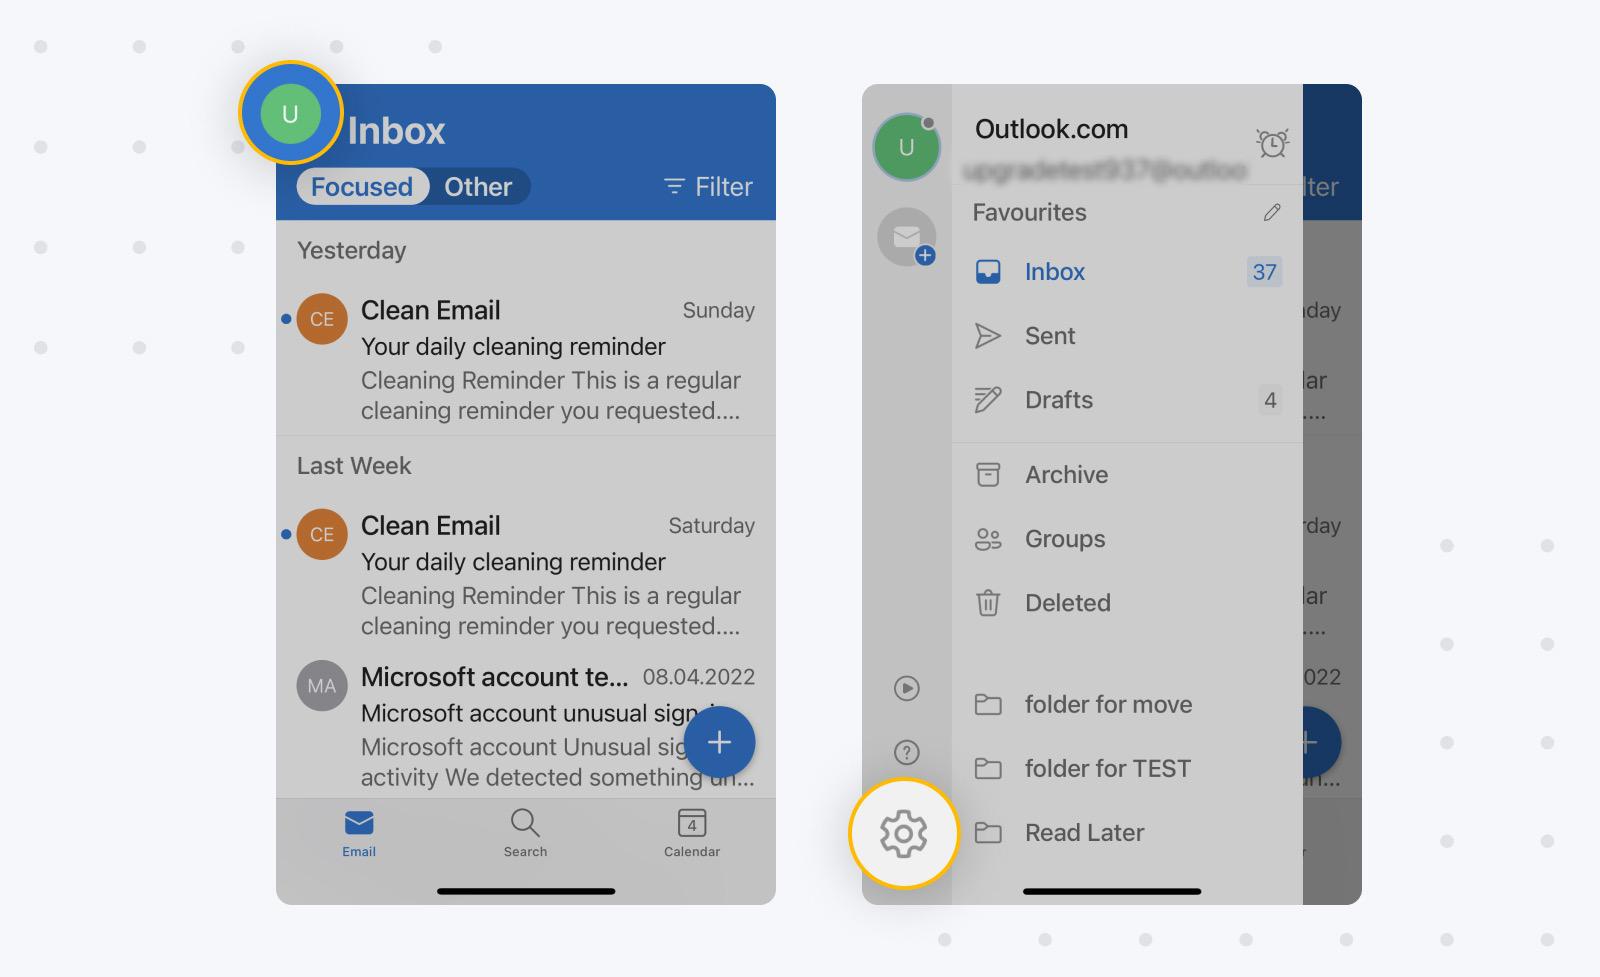
- Launch the Android or iOS app.
- Go to Settings.
- Tap the signature option under Mail.
- Create your signature.
- Confirm.
Keep Your Outlook Inbox Clean
Now that you know how to create and insert HTML into Outlook signatures across all platforms where Microsoft’s email client is available, you should learn how to keep your inbox organized.
While it’s true that Microsoft offers some basic inbox organization features, such as filters and rules, they pale in comparison with third-party inbox organizers like Clean Email.


This popular inbox organizer is smart enough to understand what your emails are about (without compromising your privacy or security), which allows it to intelligently categorize your messages into convenient bundles.
To save you as much time as possible, Clean Email can perform inbox management routines automatically whenever you receive a new message that matches certain criteria.
Here’s how easy it is to, for example, automatically label all social notifications using Clean Email:
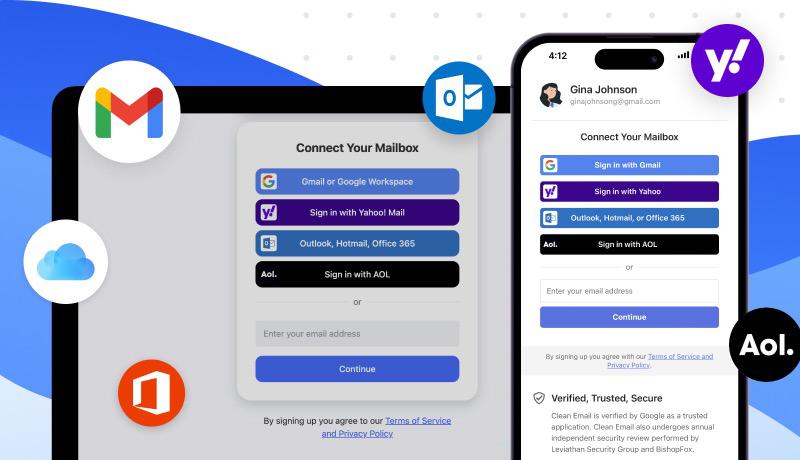
- Go to: https://app.clean.email/.
- Connect Clean Email with your Outlook inbox.
- Select the Social Notifications in Smart Folder in the left panel.
- Make sure all messages are selected.
- Click the Label button.
- Choose an available label or create a new one.
- Tell Clean Email to apply the action to selected and future similar emails.
- Confirm.
As if the ability to quickly organize emails into easy-to-manage bundles and the option to perform various actions automatically were not enough, Clean Email also comes with several useful extra features to help its users tackle unwanted subscriptions, annoying senders, and other issues.
You can try what this inbox organizer has to offer for free. Clean Email works with all popular email services, so you can also use it with your Gmail, iCloud, Yahoo, and other inboxes.

How to Create & Add HTML Signature in Outlook - FAQs
Does Outlook for iOS support HTML signatures?
No, Outlook for iOS currently doesn’t support HyperText Markup Language mail sigs—only plain text sigs are supported.
Why do my images look broken when installing?
Don’t worry; this is normal behavior when pasting a mail sig into Outlook. Your images will look as they should in your messages, and that’s all that matters.
What are the best HTML signature generators?
The best sig generators currently available include HubSpot Email Signature Generator, WiseStamp, and signature.email. All of these tools can create great-looking sigs that work with all major mail services, and some do it for free.
How to create the best HTML sig for business?
When creating a mail sig for business purposes, there are a few best practices that you should keep in mind:
- Include all important content information.
- Optimize images for size.
- Test the signature by sending yourself a mail.
- Make sure the sig works well on mobile devices.
- Keep it nice and simple.


