


Select Your Issue for Fast Assistance

- How do I quickly clean up my Outlook mailbox?
- How to clean up Outlook mailbox without deleting emails?
- How do I clean up Outlook to run faster?
- How do I clean up thousands of emails in Outlook?
- What does the Cleanup button do in Outlook?
- Does Clean Up in Outlook remove attachments?
- What is the difference between Clean Up Conversation and Clean Up Folder?
- What is the best way to clean up Outlook mailbox?
- How do I declutter my Outlook email?
- How do I tidy up folders in Outlook?
- How do I free up space in my Outlook mailbox?
- How do I empty my inbox in Outlook?
- How to clean up Outlook mailbox in Office 365?
- Why is my Outlook mailbox storage full after deleting everything?

How to Determine the Size of Your Mailbox
Sometimes, finding time to clean up Outlook mailbox can be challenging, yet it's essential as your email account has limited capacity.
⚠️ If you’re seeing an Outlook mailbox full message, it’s time to manage old and unnecessary emails.
To check how much space you have left, check your mailbox size by following these steps (if you have an Outlook client through Microsoft 365 or use Outlook 2021, Outlook 2019, Outlook 2016, or Outlook 2013):
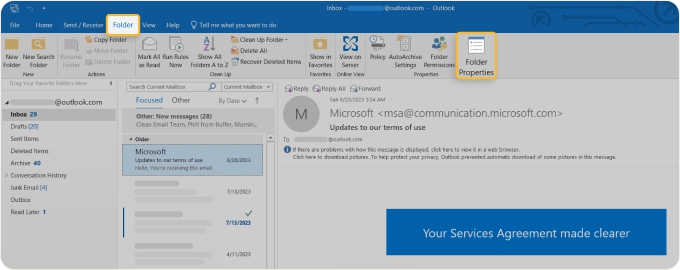
- From your mailbox, select your account.
- Then click on Folder → Folder Properties.
- In the Inbox Properties window, click the button that says Folder Size.
- Once the box opens, you will see the total size of your Inbox and all of the subfolders you have set up.
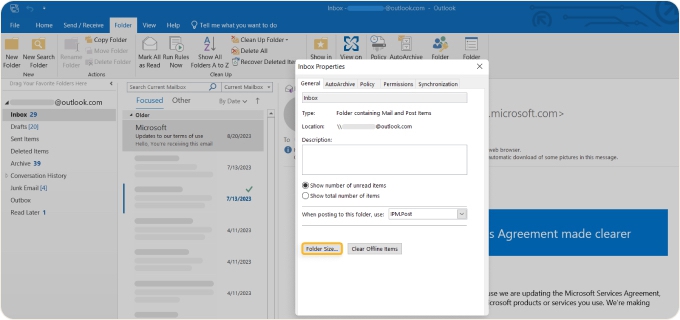
📌 Note: As you will notice, the mailbox size only appears in kilobytes (KB). However, you can easily determine the size in megabytes (MB) by sliding the decimal three places to the left. So, if your inbox says it is 4742 KB, it would be 4.7 MB.
As you’ll learn below, you can also access your mailbox size through Outlook Mailbox Cleanup, which gives you several other tools to help you keep your email account clean.
💡 Tip: Clean Email can assist you in managing and cleaning up Outlook mailbox regardless of its size, but it truly shines when tackling overloaded inboxes filled with old and large unnecessary emails. Read on to discover the quickest way to clean up Outlook inbox: how Clean Email can simplify your email management and help you regain control of your inbox effortlessly.
Using Outlook Mailbox Cleanup Tool
Outlook Mailbox Cleanup is a section within the Outlook desktop app that has tools specifically designed to help you clean up Outlook inbox easily and effectively. In fact, you can use the handy Outlook Mailbox Cleanup tools to review the size of your inbox, clear out specific items based on criteria such as the email size or date received, and archive items.
How to use Mailbox Cleanup in Outlook
If you use Outlook as your primary email account, then this set of tools can really help you keep everything organized and under control.
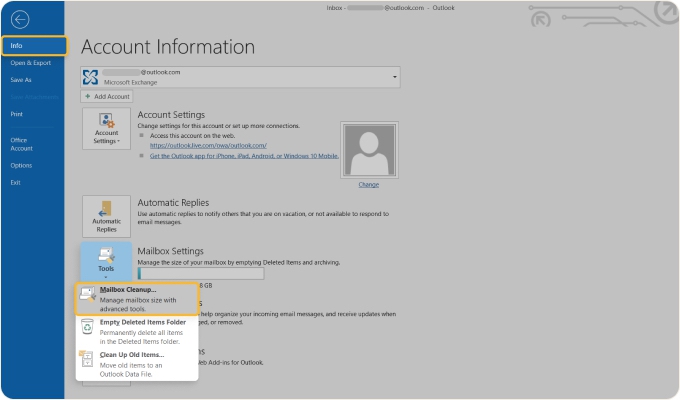
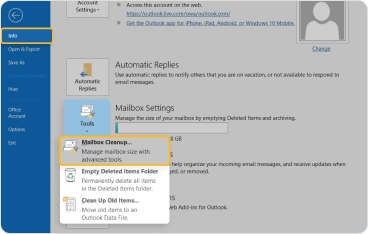
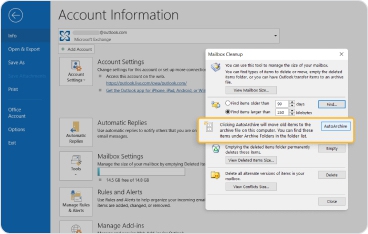
To access Outlook Mailbox Cleanup, open your Outlook desktop client, then navigate to File → Info → Tools → Mailbox Cleanup.
From here, you will have options to use any of the following tools, each of which is outlined below:
1. View Mailbox Size
While this tool is fairly self-explanatory, it is helpful to know how much space your inbox is taking up, along with what large emails might be tucked away in certain folders.
To view your Outlook mailbox size:
- Go to File at the top of your desktop application.
- Select Info on the left side, then click Tools in the center.
- When the drop-down menu appears, click Mailbox Cleanup.
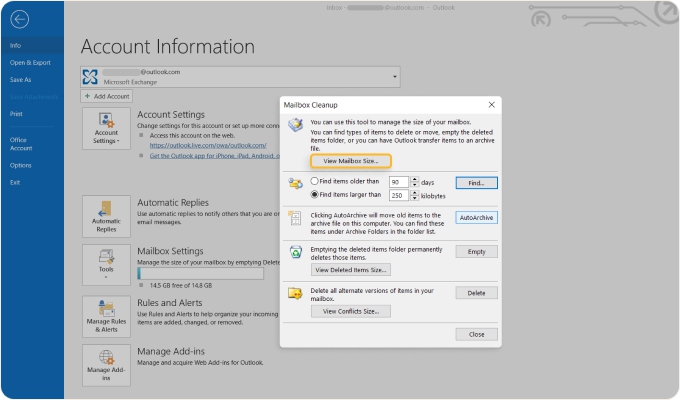
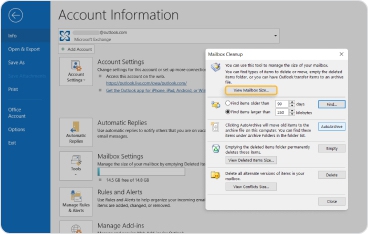
- When the dialog box appears, click the button that says View Mailbox Size.
- Like the previous directions, you will now see the total mailbox size and each subfolder’s size in KB.
When looking at your subfolders, pay close attention to any that look significantly larger than others. This can help you see areas where you may need to delete items that are no longer needed. Also, consider subfolders you may not typically think about as data hogs, like your calendar or contact list — there may be old appointments or old contacts you no longer need.
In addition to the contents stored locally, you can also view the storage in your mail server (assuming you have one). To do this, just click the tab at the top of the mailbox size box that says Server Data instead of Local Data. This can be an important place to check periodically if your emails automatically archive to the server.
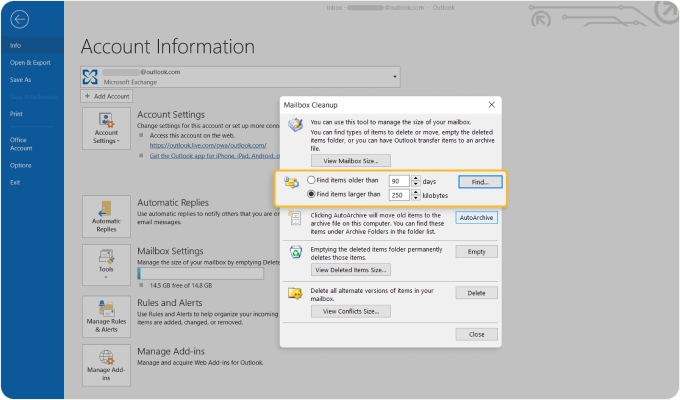
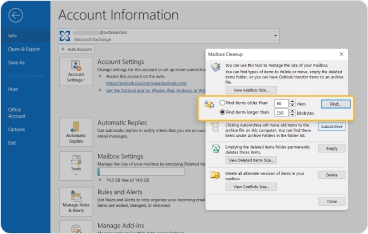
2. Find Items Older Than a Certain Date or Larger Than a Certain Size
Besides checking the amount of data each folder contains within your inbox, you can also hunt down specific messages based on dates or message size by using the ‘Find’ function within these tools. In fact, this is an easy way to free up storage in Outlook without spending hours looking through each subfolder in your mailbox.
To use this tool, simply select whether you’d like to search for emails older than a certain number of days or all messages larger than a certain size. Then, input your data parameters (i.e. ‘older than 90 days’ or ‘larger than 500KB’) and push the Find button on the right.
After this, an advanced find window will appear. You can use this to narrow down your search results even further, or you can simply scroll through the messages your desktop client found based on your initial criteria. On the right side of each message, you’ll have the option to flag it for follow-up or delete the message completely.
You can also click on the message to open it, or right-click on the email to see more options like ‘quick print’, ‘forward’, ‘move’, and more. You can even use Shift + Click to highlight multiple messages and perform the same action to them all, which can really save you time. This is a great way to delete multiple emails in Outlook.
Use Clean Email to manage old and large emails easily
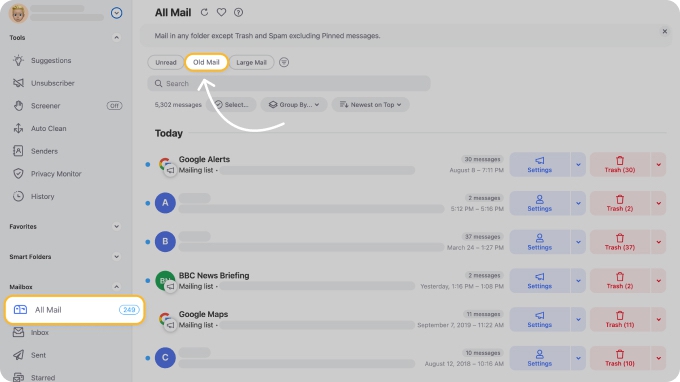
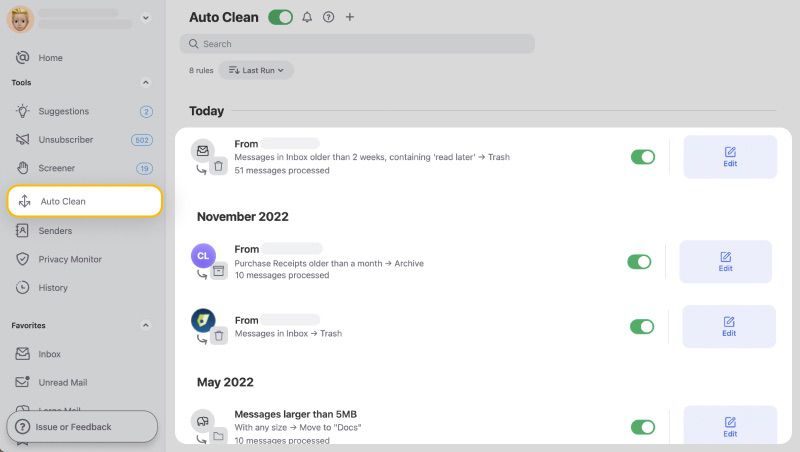
Clean Email, an online bulk email organizer, simplifies managing old and large emails with its Auto Clean feature, allowing you to delete messages older than a specified period automatically.
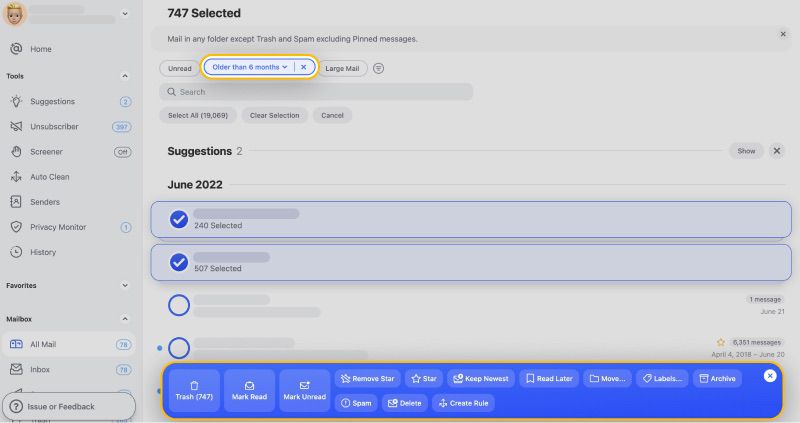
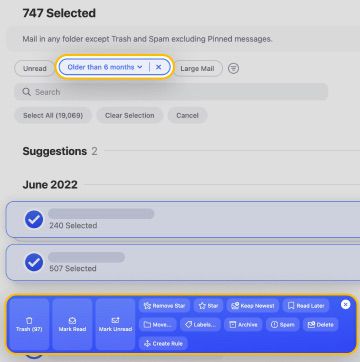
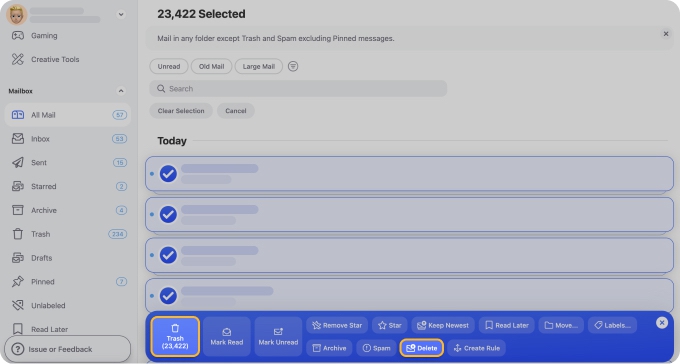
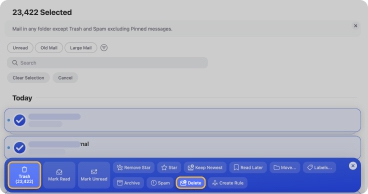
- Visit https://app.clean.email/ and connect your inbox.
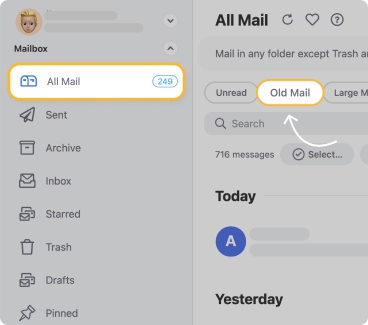
- Select the Inbox or All Mail folder, then apply the Old Mail or Large Mail filter.
- For old emails, adjust the timeframe (e.g., older than 6 months ); for large emails, choose the size.
- Select the emails, choose an action—such as Trash or Delete (for permanent removal), or create an Auto Clean rule—and confirm.
This rule is added to the Auto Clean dashboard for easy edits, and it works seamlessly across web, macOS, Android, and iOS platforms.
3. Archive Items by Using AutoArchive
Many people use email archiving to clean Outlook inbox while still maintaining certain messages so they can quickly retrieve them at a later date through a simple search. This can be a valuable tool for anyone who knows how to use it to their advantage.
Although you may already know how to archive in Outlook, the AutoArchive tool can help you quickly store items based on your set parameters. However, AutoArchive doesn’t have any pre-established archiving rules. This means you will need to set these up if you plan to use AutoArchive regularly.
⚠️ The AutoArchive tool is available in Outlook for Windows but is not present in Outlook for Mac, Outlook Web App (OWA), or Outlook mobile apps.
To set up AutoArchive parameters:
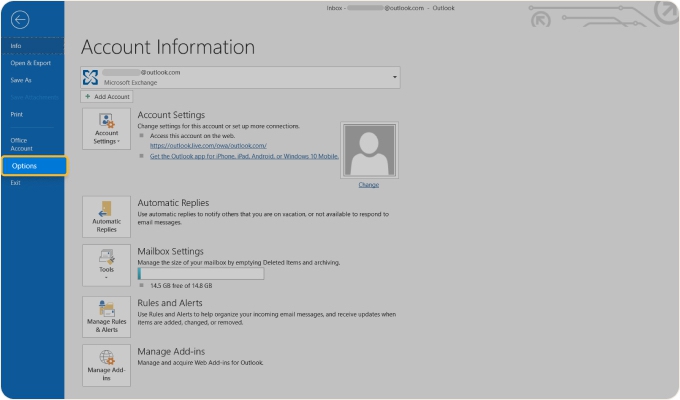
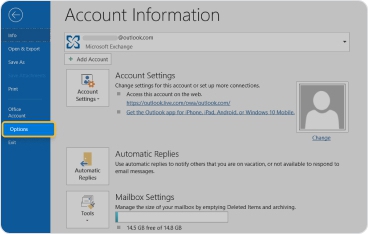
- Open your desktop client and click on File in the top menu.
- Select Options from the list.
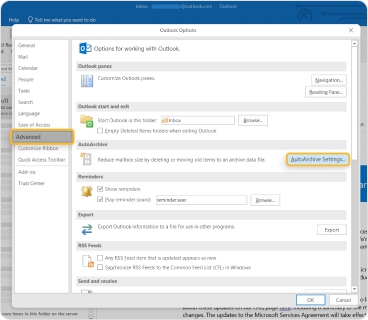
- In the Options menu, navigate to the Advanced tab. Under the AutoArchive section, click on AutoArchive Settings.
- Then set how frequently you want AutoArchive to run. For example, you can choose to run it monthly, quarterly, etc.
- Decide which emails should be archived. For instance, you can choose to archive messages older than 12 months. Specify where the archived emails will be moved. You can choose a specific folder or opt to have them permanently deleted.
- After completing these steps, your inbox will automatically apply these rules each time you use the AutoArchive function in Mailbox Cleanup.


Automatically archive emails with Clean Email
Clean Email makes it easy to auto-archive emails on any platform, including mobile, with its Auto Clean tool. Unlike the Outlook mobile app, which lacks advanced archiving options, Clean Email allows you to create custom rules to automatically move, archive, or organize emails based on your preferences.
Simply set your rules once, and Clean Email takes care of the rest—no need for manual effort.
- Visit https://app.clean.email/ or download a mobile app for Android or iOS and log in with your email account.
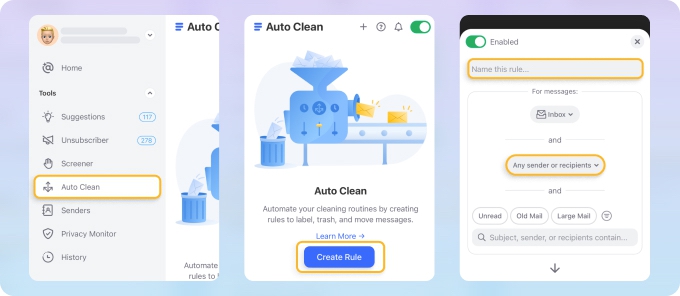
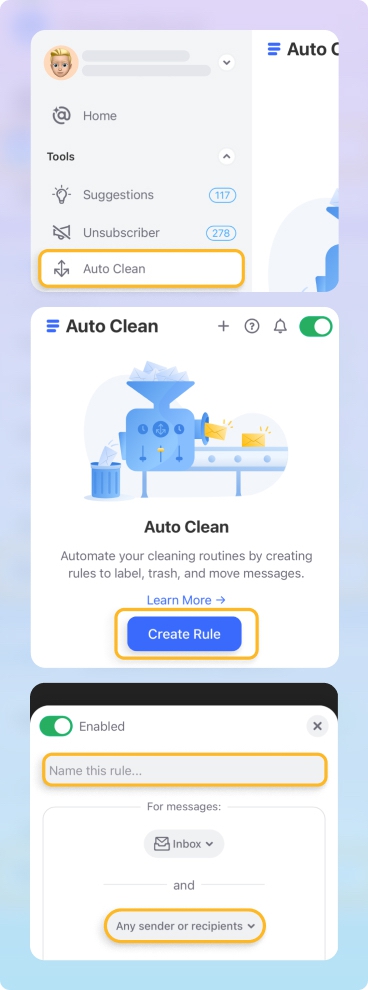
- Navigate to the Auto Clean section in the menu.
- Click Create Rule or tap the plus icon on the right.
- Name your rule and select a folder location if not the default Inbox.
- Set your conditions for the rule.
- In the Choose action box, select Archive.
- (Optional) Enable the toggle for Apply to existing messages, then click Create Rule to finalize.
You can easily access, edit, or manage the rules you’ve created anytime, ensuring your inbox stays organized and clutter-free across all your devices.
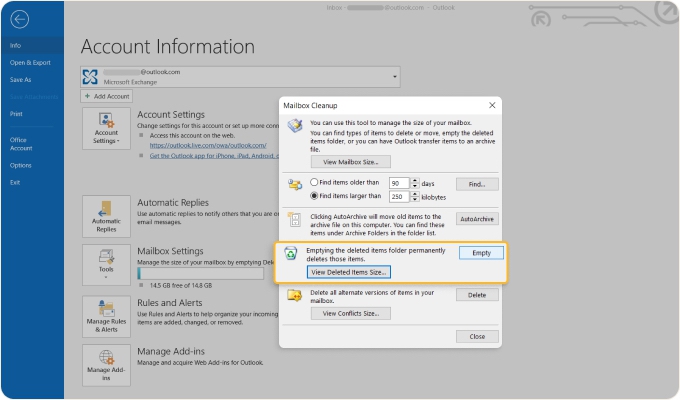
4. View Deleted Items Size
Did you know that pushing ‘delete’ on messages doesn’t permanently remove them from your inbox? Instead, it simply places them in the Trash, which you still need to empty. So, if you’re trying to figure out how to clean up Outlook inbox but realize archiving isn’t helping you reduce the inbox size, that’s why.
Thankfully, Outlook Mailbox Cleanup offers the option to view the size of your discarded messages before you permanently delete them with the View Deleted Items Size tool.
Like the View Mailbox Size feature, this tool breaks down how much space (in KB) your trash is taking up. If it’s pretty bad, then you can simply use the Empty button under this Mailbox Cleanup tool to clear out all that discarded clutter. Just remember, once an email is removed from your trash, it’s gone for good.
5. View Conflicts Size
The last tool within Outlook Mailbox Cleanup is called View Conflicts Size. This is essentially a storage area for emails Outlook thinks overlap with other messages in your folders because of similarities in things like the subject line or attachments.
If you click the View Conflicts Size button, you will see a filtered view of your mailbox with only messages Outlook has flagged as conflicts. Most of the time, these messages can be deleted, but it’s always best to double-check before you completely erase anything.
Clean Up Feature and Attachments
Outlook's Clean Up feature is designed to remove redundant messages in email conversations, but it does not delete attachments from the remaining emails.
However, you can remove attachments from emails in Outlook without deleting the emails themselves. This feature is available in Outlook for Microsoft 365, Outlook 2019, Outlook 2016, and Outlook 2013.
Clean Up Conversation vs Clean Up Folder
Clean Up Conversation removes redundant messages from a single email thread. It keeps only the latest message in the conversation that contains all previous replies, clearing unnecessary clutter.
Clean Up Folder, on the other hand, applies the same process to an entire folder, removing redundant messages across all conversations within that folder. This is useful for decluttering large email folders in bulk.
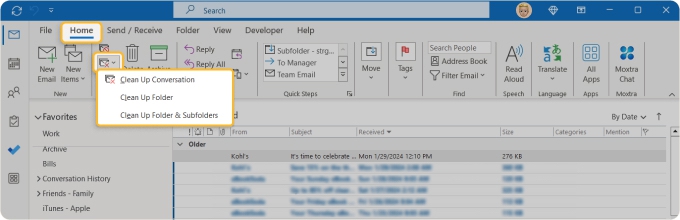
Both options are helpful for organizing your inbox efficiently.
How to Clean Up Outlook Inbox Fast with Clean Email
If you’re wondering how to clean Outlook inbox with a few simple clicks, then you should absolutely consider Clean Email.
💡 Clean Email is the best way to clean up your Outlook mailbox, offering powerful automation tools that simplify the process of keeping your inbox tidy and manageable without extra effort.
This app offers unique features not found in Microsoft Outlook, especially when it comes to using it on a smartphone. Let's take a closer look at these features to see how they can benefit email users.
💡 Note: Clean Email works with the Outlook web email service provider (or any other email service provider with IMAP). The app doesn’t synchronize with the Outlook desktop client. However, you can use Clean Email as a separate tool to provide additional inbox management features that your desktop email client doesn’t offer.
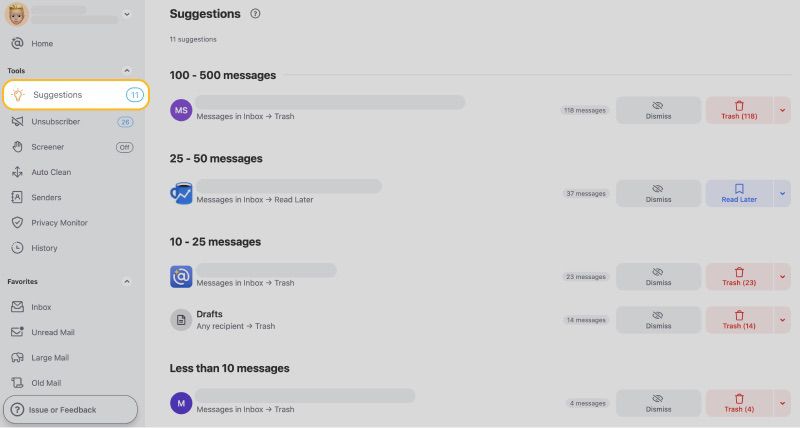
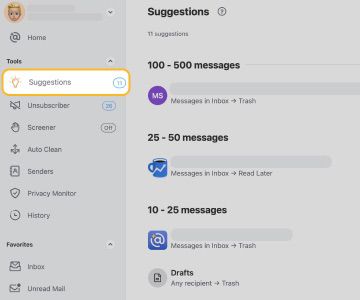
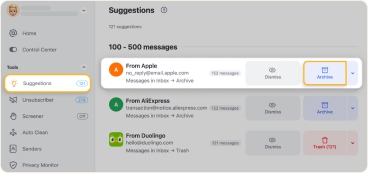
Cleaning Suggestions
The app provides tailored Cleaning Suggestions on which emails to clean up first, making it easier to have a clean Outlook inbox. For example, it might recommend archiving old newsletters or deleting promotional emails you never open, simplifying your email organization.
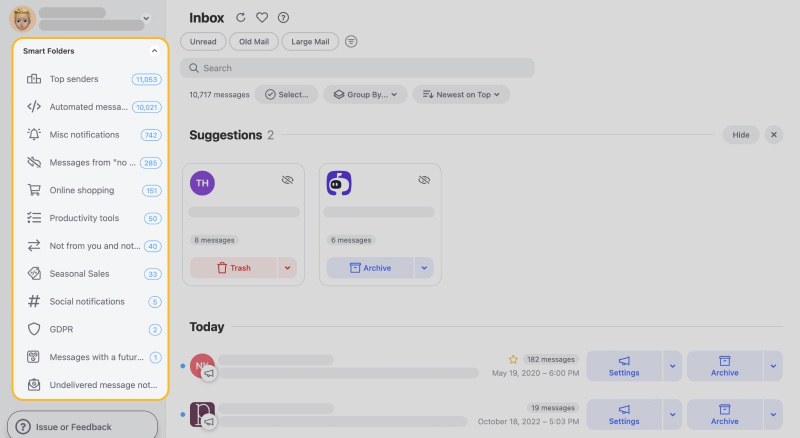
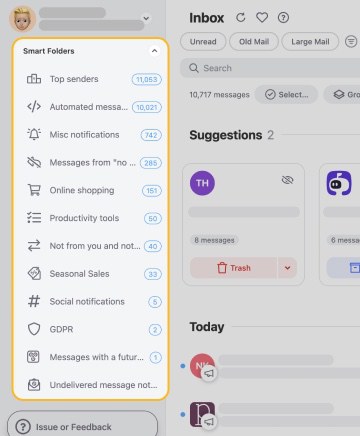
Smart Folders
Another key aspect of Clean Email is its organization capabilities. The app sorts your messages into different categories, like social media updates or financial notifications, using 33 unique Smart Folders. This helps you quickly find emails related to your work, hobbies, or personal matters without searching through your entire inbox.
When you access your Outlook inbox, whether via the web or the desktop application, you'll notice that your emails appear in their regular format. This means that the Smart Folders feature acts similarly to labels in Gmail; they organize your messages for easy identification without actually relocating them from their original place in your inbox.
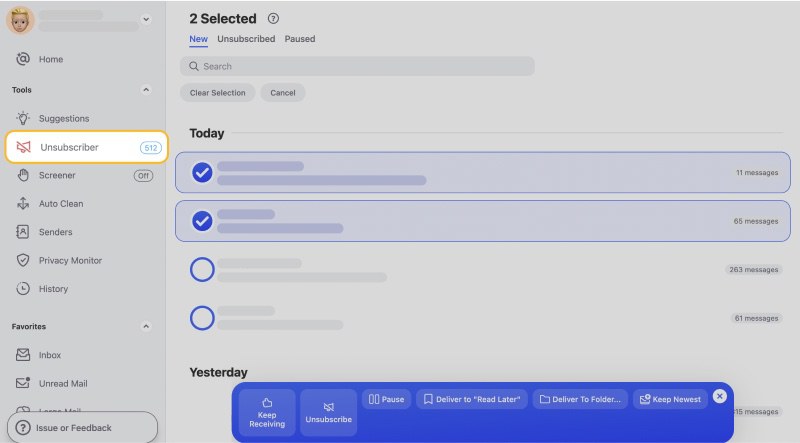
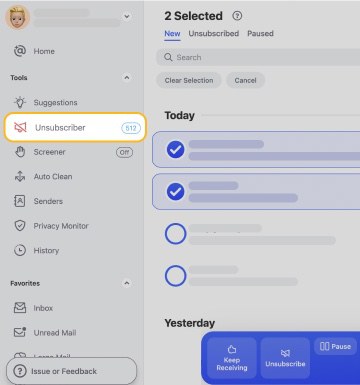
Unsubscriber
Also, since it’s rather time-consuming to unsubscribe from emails on Outlook manually, the Unsubscriber tool helps you permanently remove marketing newsletters you may not want, choosing them all from one screen.
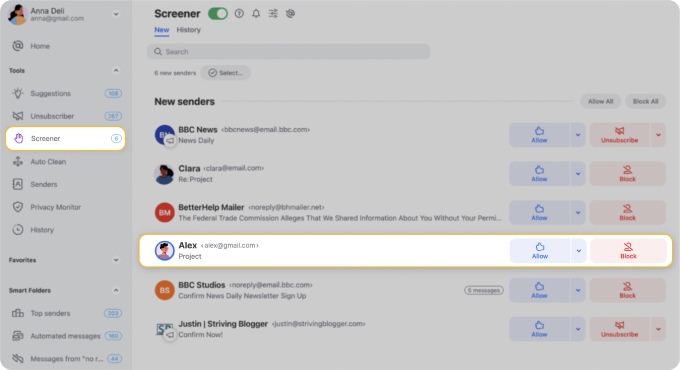
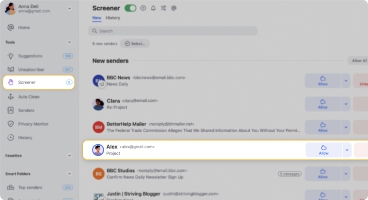
Screener
In addition to these organizational features, Clean Email also offers robust security tools. Unlike Outlook, the app has the Screener tool that acts as a first line of defense against spam or unwanted messages, allowing users to block emails from unknown senders before they hit your Inbox folder. This feature is highly useful for individuals who want to prevent spam and maintain a focused inbox.
Auto Clean
If you are wondering how to clean Outlook mailbox automatically, the Auto Clean feature lets you create automated rules that delete, archive, label, and categorize all your messages once they reach your inbox. You can also mute and block messages from specific addresses, and change or turn these settings off at any time, giving you complete control over your inbox.
This is particularly useful for professionals who receive a high volume of messages and need to know how to clean up emails in Outlook and keep their email accounts organized without manual intervention.
Best of all, the app respects user privacy by encrypting credentials and not downloading full emails, which might contain sensitive information. Whether on a computer or a mobile device, Clean Email offers easy access to all its features, ensuring users can maintain a clean Outlook inbox on the go.
How to Organize Outlook Inbox
Now that you know how to cleanup Outlook mailbox, you may also want to learn how to keep your inbox organized after you’ve cleared out the clutter. Luckily, these tips can help you organize email in Outlook so you don’t have to worry about messes again.
1. Archive older emails
If you simply want to declutter your inbox, organize messages, and get them out of your way, then you may want to consider archiving some of your older emails. When you archive an email, it leaves your inbox but doesn’t disappear completely. Instead, it goes to the Archive folder, and you can decide to leave it there, retrieve it, or delete it.
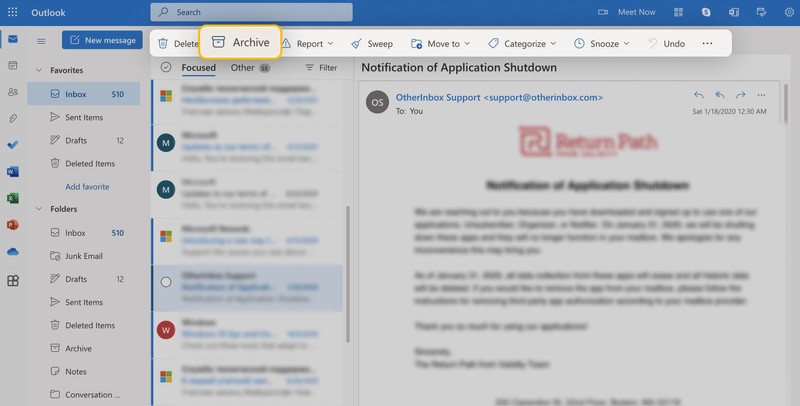
How to archive emails in Outlook.com:
- Open your mail account on the web.
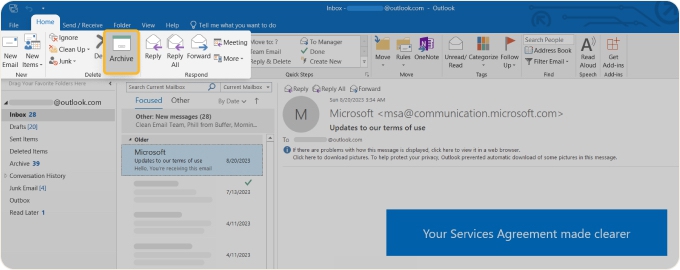
- Open any message you want to archive.
- Select the Archive option from the toolbar at the top of the page.
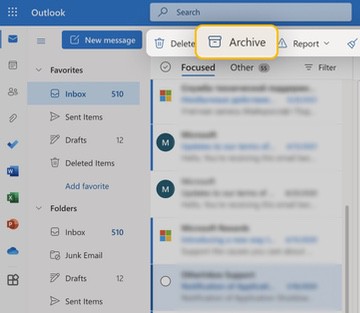
How to archive emails in Outlook desktop client for Windows:
- Open the client application on your computer.
- Select one or more messages in your Inbox or another folder to archive.
- Choose Archive in the Delete group.
- You can also use the Backspace key to immediately archive one or more selected messages.
Once you archive emails, it’s important to note that this does not instantly reduce the size of your inbox. Instead, all of your email account information is stored in an Outlook Data File (.pst) if you are using a POP account, and Offline Outlook Data File (.ost) if you are using an Microsoft 365, Exchange, Outlook.com account, or IMAP account.
You can, however, compress this file by following these steps on Outlook 2013 and newer versions:
- Delete any items and empty the Deleted Items folder.
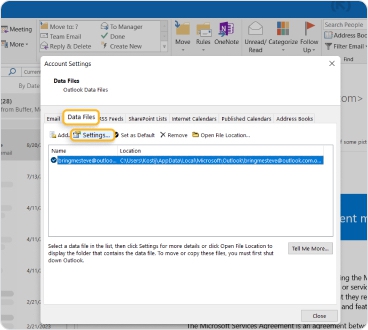
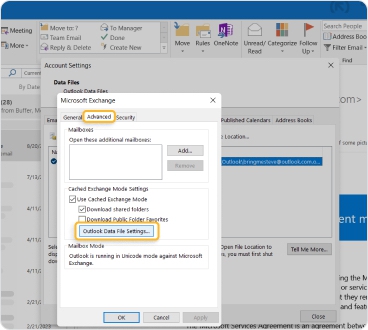
- Click File → Account Settings → Account Settings.
- On the Data Files tab, click the file you’d like to compact, then click Settings.
- Now, click Compact Now and then click OK.

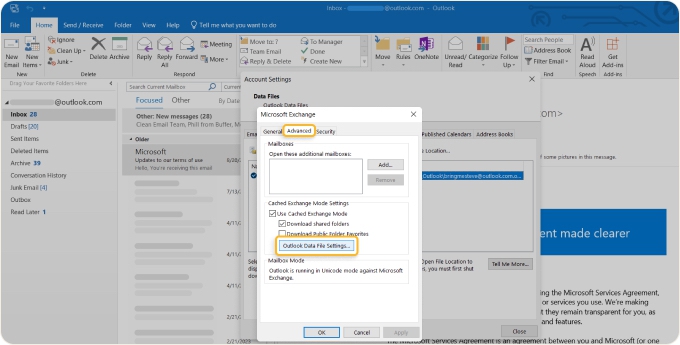
💡 Note: If you use an Outlook.com or Exchange email account, you must also click on the Advanced tab, then select Outlook Data File Settings.
2. Store attachments outside your mailbox
Unfortunately, attachments take up lots of unnecessary space in your Outlook inbox, especially if you hold onto the emails just to access the attachments time and time again.
However, you can avoid this! One practical solution for how to reduce mailbox size without deleting emails is to store attachments outside your mailbox so they aren’t filling up Outlook and wasting storage space.
There are tools that can help you store attachments outside the mailbox, but they cost money. Instead, you can do it for free by following these steps:
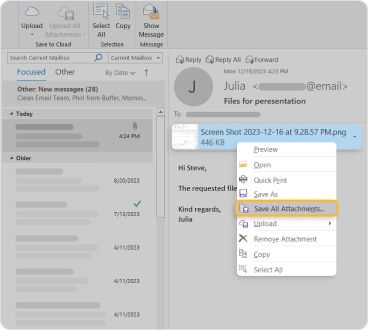
- Launch the Outlook desktop client on your computer.
- Select the message you’d like to download attachments from.
- Click on the downward arrow to open the list of options and choose Save All Attachments.
- Now, choose the location you want to store attachments outside of the mailbox, such as a folder on your desktop or your Documents folder.
- The attachments will then download to the chosen location, where you can access them anytime.

3. Empty the Deleted Items folder
Most people assume that when you delete an email, it disappears and that’s it. However, it first goes to the Deleted Items folder (trash), which you have to then empty. To do this, simply right-click on the Deleted Items folder (or Trash folder depending on the version of Outlook you use), then select Empty Folder.
💡 Clearing the Deleted Items folder not only frees up space but also helps Outlook run faster.
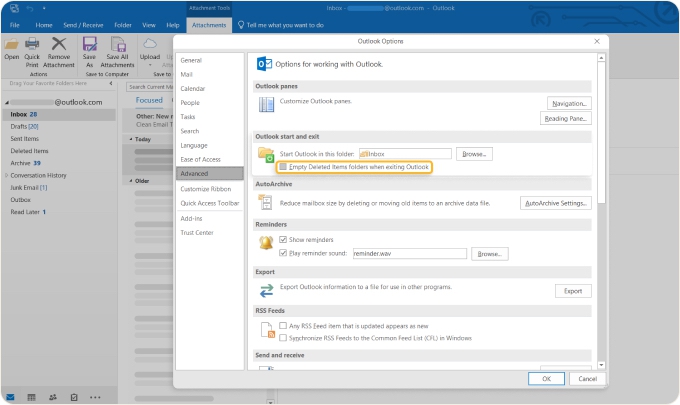
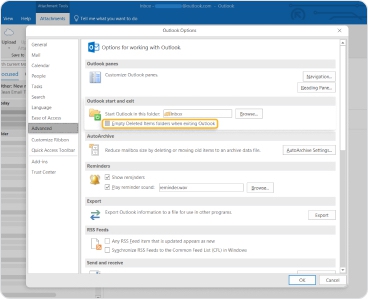
If you’d rather have a ‘set it and forget it’ approach to emptying your deleted items, you can also delete emails in Outlook automatically by using these steps:
- From Outlook on your desktop, navigate to File → Options.
- Click on the Advanced tab, then look for Outlook Start and Exit section.
- Check the box labeled Empty Deleted Items folders when exiting Outlook.
- Press OK to confirm.
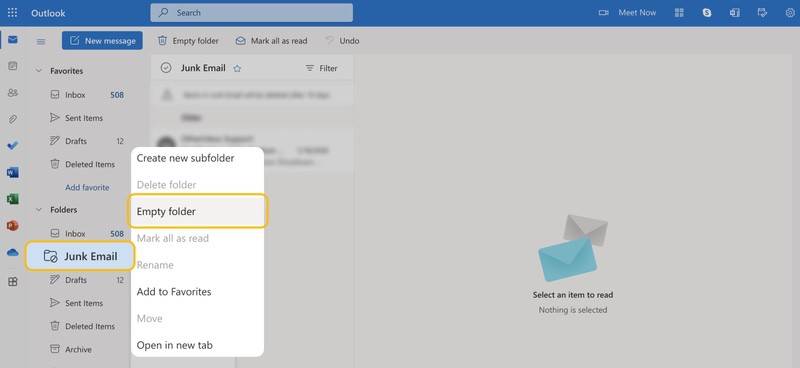
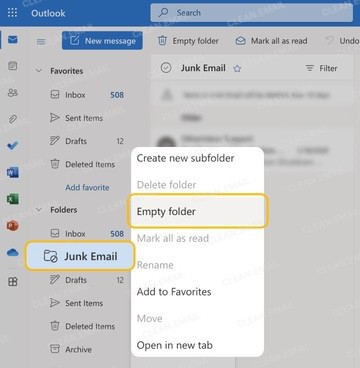
4. Empty the Junk Email folder
Just like with the Deleted Items folder, the Junk Email folder can also end up with a lot of messages you forget exist. This can take up valuable space in your mailbox, so you may want to delete these periodically as well to save yourself some space.
To do this, you can simply right-click on the Junk Email folder on the left side of the Outlook web app and select Empty Folder from the options listed.
5. Delete All Emails in Outlook
If clearing the Deleted Items folder has you wondering how to delete multiple emails in Outlook or even all of them, Outlook’s native features can help.
You can quickly select and delete emails by clicking on a folder, pressing Ctrl + A (or Command + A on Mac) to select all messages, and then pressing the Delete button or clicking Empty folder on the right. This allows you to remove emails in bulk directly from any folder.
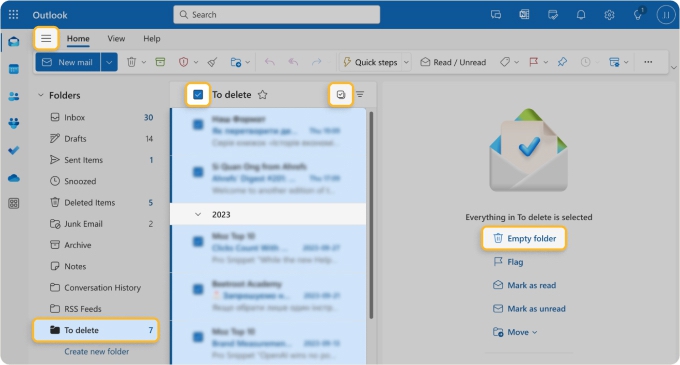
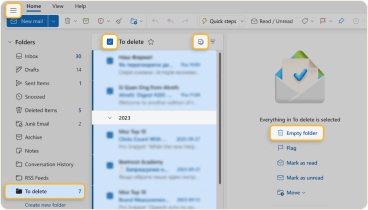
However, for larger mailboxes, this process can be tedious and still requires manual cleanup of the Deleted Items folder.
For a faster and more convenient solution, Clean Email makes it simple to select all emails in any folder and delete them in just a few clicks:
- Navigate to the folder you want to clean.
- Use the Select All feature to highlight all emails in the folder.
- Choose Delete to permanently remove them, bypassing the need to clear them again from the Deleted Items folder.
⚠️ Warning: Deleting emails with this method is permanent and cannot be undone. Make sure to review your selection carefully before proceeding.
6. Use the Outlook Focused Inbox feature
To help filter emails in Outlook, Microsoft enlisted the help of artificial intelligence and used it to develop the Outlook Focused Inbox feature. This feature proactively analyzes all incoming email messages to determine which are important and which can be safely ignored. It then places the important emails in the Focused tab and hides the rest in the Other tab.
Chances are, Focused Inbox is already activated for your inbox, but you can also follow our guide on how to use Outlook Focused Inbox and activate it manually.
⚠️ Warning: With Focused Inbox active, it’s easy to miss emails flowing to the Other tab. Sometimes, the artificial intelligence algorithm used by Microsoft to determine the importance of email messages makes the wrong decision and sends an important email to the wrong tab.
That’s why you should check the Other tab from time to time and mark all important emails that end up in it as such. When you do so, you teach the algorithm to make better decisions, improving the Focused Inbox experience for all Outlook users.
7. Use folders to organize your Outlook inbox
Another great way to organize your inbox is through the use of folders. Setting up folders allows you to separate your email management into more manageable chunks that take just a few minutes each to organize Outlook emails.
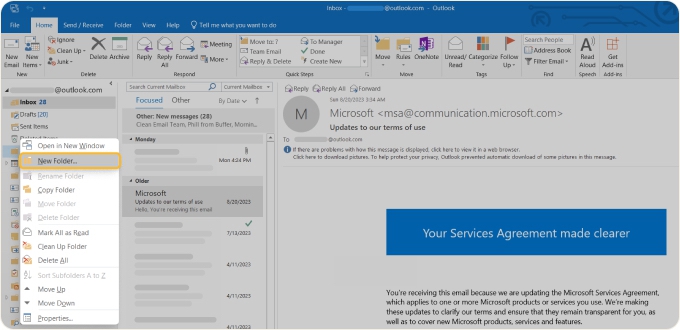
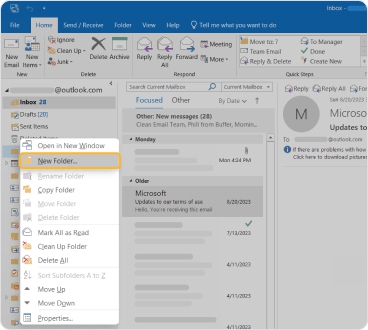
How to create email folders in Outlook for Windows:
- Open the desktop client on your computer.
- Move the mouse cursor above any folder from the left menu and right-click.
- Select the New Folder option.
- Enter the name of the folder in the Name box and set the other parameters.
- Hit the OK button to confirm.

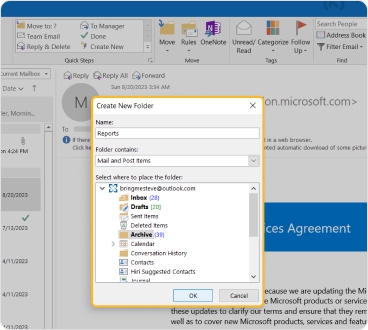
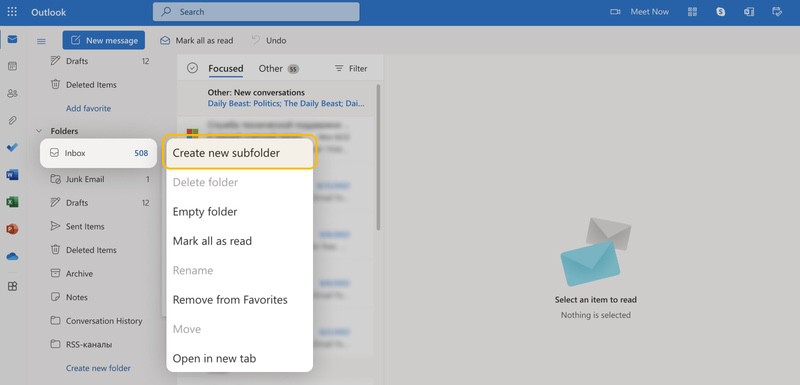
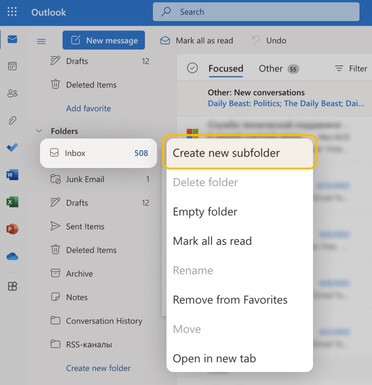
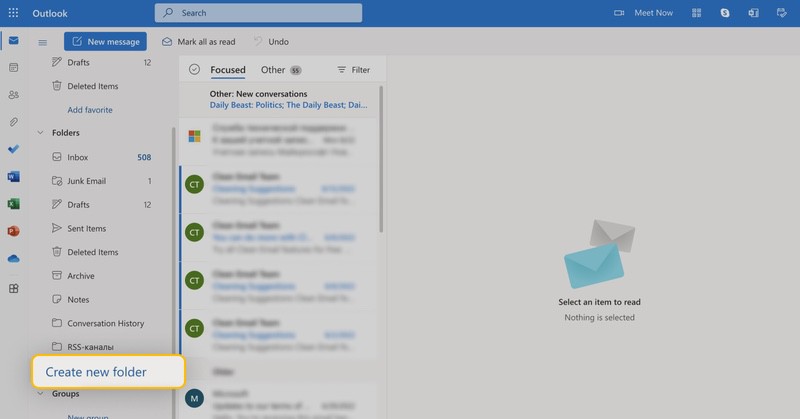
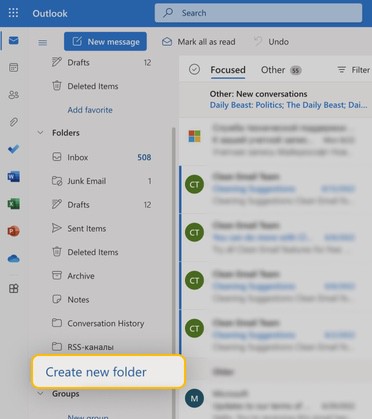
How to create email folders in Outlook for the web:
- Open your mail account on the web.
- Right-click the folder in which you want to create a new subfolder (right-click the Inbox if you want to create a new subfolder there).
- Or, choose Create new folder option under your folders on the left-side panel.
- Enter the name of the folder in the Name box.
- Hit the Enter key on your keyboard to confirm.
How to organize and clean up folders in Outlook
Once you have folders set up, you can even move Outlook incoming emails into specific folders automatically to save you even more time going forward.
To clean up entire folders, start by selecting the folder you want to tidy. Use the Select All option (Ctrl + A on Windows or Command + A on Mac) to highlight all emails, then either delete them or move them to an archive folder. This allows you to quickly clear out unnecessary messages in bulk.
For a more efficient cleanup, try Clean Email. Its smart filtering tools let you organize and delete emails from specific folders in just a few clicks.
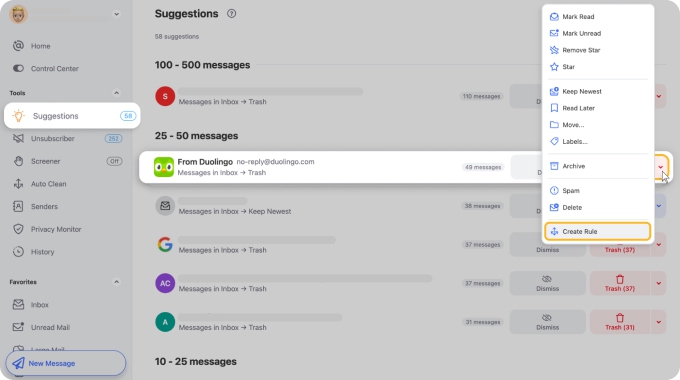
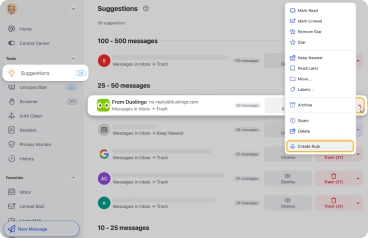
To clean up folders, Clean Email’s Cleaning Suggestions make it easy to delete large volumes of emails without erasing just everything. This feature identifies unnecessary messages, such as old notifications or irrelevant promotions, and provides tailored ideas on how to sort or delete them.

For long-term organization, the Auto Clean feature lets you set up rules to automatically manage emails in specific folders. You can organize incoming messages, move certain emails to dedicated folders, or delete unneeded ones—all without manual effort—ensuring your folders stay tidy over time.
💡 Hint: You can create automatic rules directly from the Cleaning Suggestions section.
Wrapping Up
By now, you should have a good grasp of how to clean up Outlook email and maintain a well-organized inbox. We trust that these tips have been helpful! However, if you ever find the built-in email management tools lacking, remember that Clean Email is always there to assist. It's designed to efficiently clean up Outlook mailbox, preventing it from becoming overly full and ensuring a smooth, uninterrupted email experience.
Outlook Mailbox Cleanup - FAQs
What do I do when my Outlook mailbox is full?
There are several ways you can clear out space if your Outlook mailbox is full. For example, you can archive old messages, empty your Deleted Items folder, or store attachments outside your inbox.
How to clean up your Outlook mailbox?
If you’re wondering how to reduce Outlook mailbox size, you can easily do this by using Outlook Mailbox Cleanup. This tool helps you delete or archive messages, check how full your inbox is, and identify conflicting messages that may be duplicates. Alternatively, try the Clean Email app for a more advanced email cleanup.
How to delete thousands of emails in Outlook?
Clean Email is the best solution for managing and removing large volumes of emails in Outlook. Its bulk action tools allow you to delete, archive, or organize thousands of emails quickly and easily, saving both time and effort.
How do I clean out my Outlook inbox without deleting emails?
If you are wondering how to clean Outlook inbox but don't want or need to delete emails, you can archive them instead. This moves the messages to a secondary location so you can search for them later. To free up space, store emails with large attachments outside of Outlook by saving the attachments to your computer or cloud storage.
Where is Clean Up in Outlook?
The Outlook Cleanup tool in the desktop client is located in the top panel, within the Delete section. By clicking the downward arrow next to the Clean Up tool, you can access further options for managing your emails.
What does Clean Up Folder do in Outlook?
The Clean Up Folder feature in Outlook removes redundant or duplicated messages from conversations in the selected folder and moves them to the Deleted Items folder, unless default settings are changed.
Why does my Outlook keep saying my mailbox is full?
Your Outlook mailbox may still be full after deleting emails because attachments and other data can take up significant space. To free up storage, try emptying the Deleted Items folder and saving attachments outside your mailbox.
Does archiving free up space in Outlook?
Unfortunately, no, archiving messages does not free up space in Outlook. Instead, archiving simply moves messages from your inbox into a dedicated Archive folder so they aren't in your way.
How to clean up Outlook mailbox Office 365?
Start by emptying the Deleted Items and Junk Email folders. Next, use the Clean Up feature to remove redundant messages in conversations or folders. Save large attachments to your computer or cloud storage, then remove them from emails to free up space. Finally, archive old emails or move them to a local folder to reduce mailbox size while keeping your important messages accessible.


