


What is a Sweep Rule in Outlook?
You might have read about or even set up rules in Microsoft Outlook to better manage your inbox. But maybe you’ve seen something about "sweep" rules and are wondering what these types of rules are and what they can do.
An Outlook Sweep rule is a method for quickly deleting multiple Outlook emails from one or more senders in your inbox. As an alternative to deleting the messages, you can use a Sweep rule to move the emails to a folder other than Deleted Items such as Archive or a custom folder.
For decluttering your inbox, you can create a Sweep rule for a sender to manage current messages, current along with future messages, all but the latest message, or messages older than 10 days.
💡 Note: You’ll notice Sweep rules running automatically once per day while other inbox rules apply as emails arrive.

Where to Find Outlook Sweep Rules
What’s important to know about setting up Sweep rules is that you won’t find the feature in every Outlook app version. You can currently only create these rules in Outlook on the web and with the new Outlook on Windows.
If you use classic Outlook, Outlook on Mac, or the Outlook mobile app on Android or iPhone, you can’t currently create a Sweep rule. You can set up other types of rules in Outlook’s classic version or on Mac, but not on mobile. However, your rules do apply to Outlook emails on all devices.
While disappointing because an Outlook Sweep rule is a fast and easy way to manage multiple emails at once, you do have other options. Using Clean Email (it’s free to try ), you can set up rules for sweeping your inbox as well as take advantage of other features for cleaning your mailbox with little effort.
Let’s get started!
How to Set Up Outlook Sweep Rules
As mentioned, you can create a Sweep rule in Outlook online and the new Outlook on Windows. And luckily, the steps are exactly the same. So, open whichever of these versions you prefer and follow along.
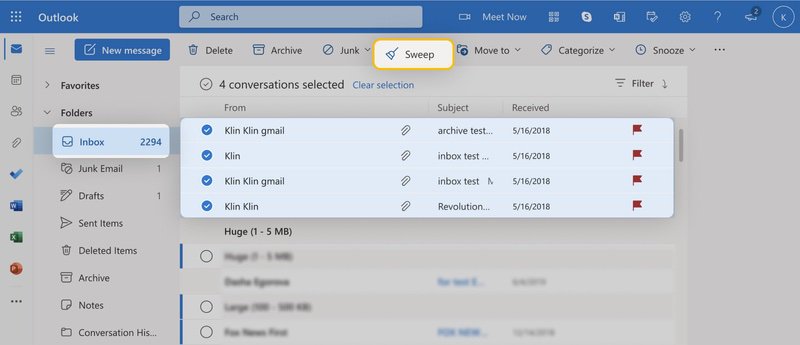
- Select the emails you want to sweep by marking the checkbox to the left of each one. Remember, the Sweep applies to each email sender.
- Choose Sweep in the top toolbar.
- Pick the action you want to take in the pop-up window from the following:
- Move all messages from the Inbox folder. (One-time sweep)
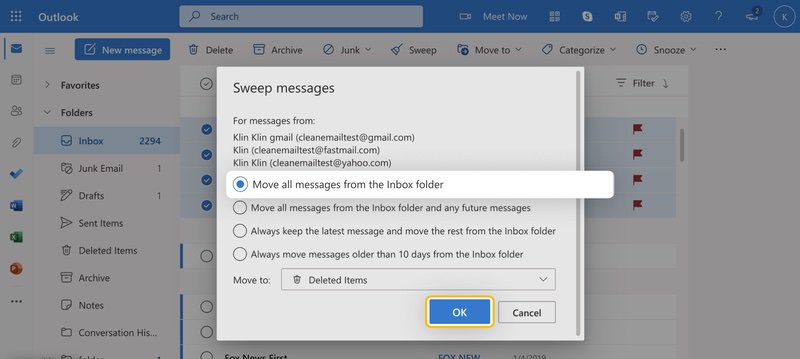
- Move all messages from the Inbox folder and any future messages.
- Always keep the latest message and move the rest from the Inbox folder.
- Always move messages older than 10 days from the Inbox folder.
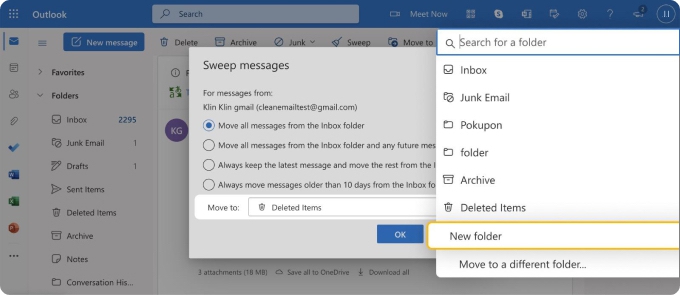
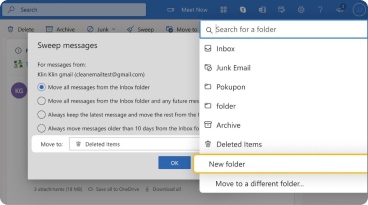
- Use the Move to drop-down box to select the location. To delete the emails, choose Deleted Items. Alternatively, you can select Junk Email, Archive, or Inbox, set up a new folder with Create new folder, or choose an existing location with Move to a different folder.
- Click OK to apply the rule.
- You can instantly click View Rules to see the ones you have recently created, or click OK again to close the pop-up window. Below, we explain how to find these rules later.
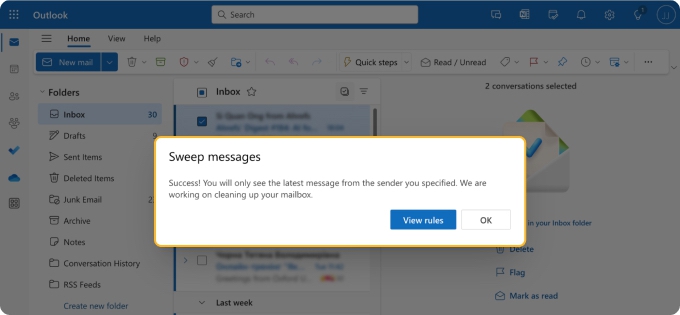
You should then see the emails removed from your inbox and sent to the Outlook folder you picked.
How to Set Up Quick Rules Using Clean Email
If you use an older version of Outlook, an app for Mac, or the Outlook mobile app and want to create a quick email rule, you’re probably thinking that you’re simply out of luck. But, you can set up a rule using one of the best Outlook cleanup tools—Clean Email—and do more with it than delete or move messages.
The Clean Email application is an inbox management tool available on all devices for IMAP accounts. Setting up a quick automated rule for Outlook with Clean Email is super easy and the steps are the same regardless of device.
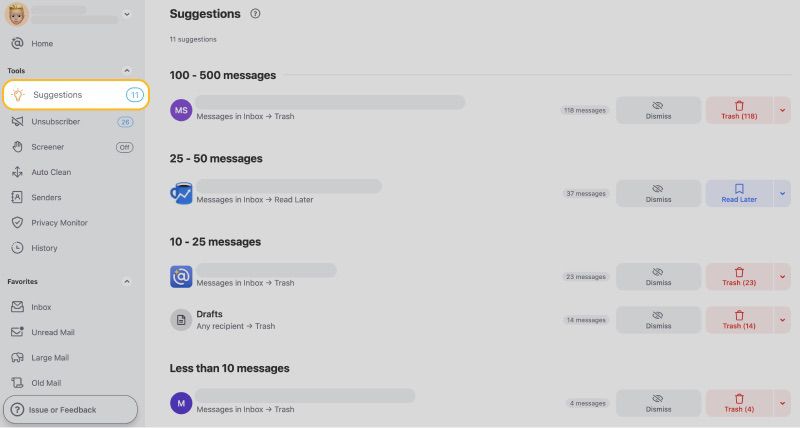
- Open the app , click Suggestions in the menu, and select a suggestion such as deleting messages from an online store or archiving reports from your project management tool.
- Near the suggestion you choose, click on the downward arrow on the right to find the list of all available actions. Click the Create Rule option.
- Optionally, enable the toggle to run the rule on current messages. Then click Create Rule again.
📌 Tip: If you want to rename the rule from the default, select Edit and enter a new name like "Microsoft Sweep" or whatever works best for you.
You’ll see the messages from that sender deleted, moved, flagged, or marked per the action you picked.
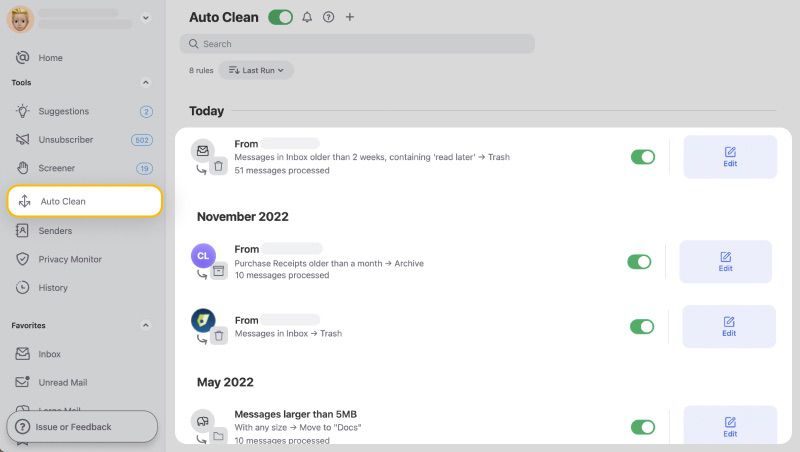
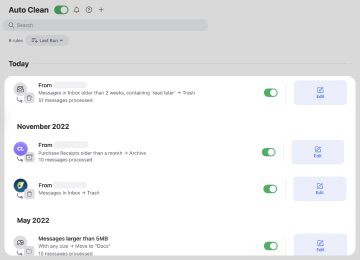
To manage your rules, choose Auto Clean in the menu. You can then edit, disable, or delete the rule.
Not sure what to do with the 50 emails you received from LinkedIn or Facebook? Suggestions help you decide and take action. Send emails to the trash, archive, or spam folder in a single click or tap!
Sweep Your Mailbox With Clean Email
Clean Email includes a variety of additional features for keeping your mailbox clean.
Manage multiple related messages from preset filters. Open Smart Folders in the menu and pick a folder. You can then select an action like Delete, Trash, Move, Archive, or Keep Newest.
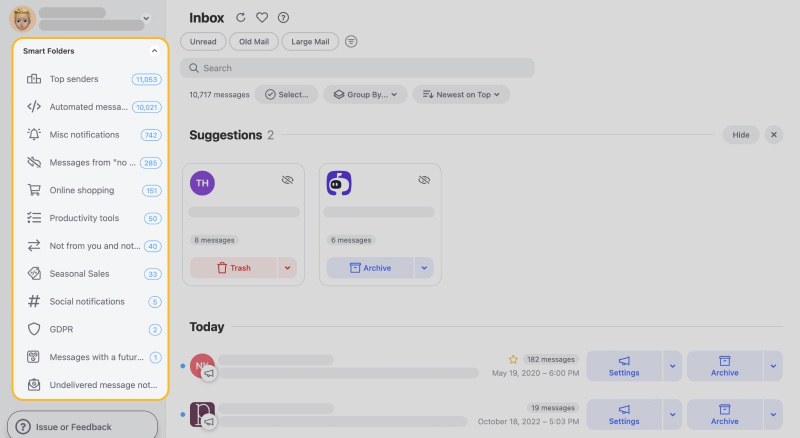
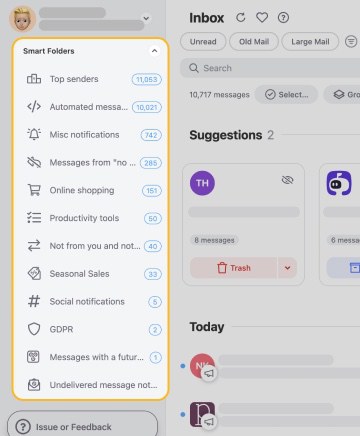
Instead of searching for related emails, Clean Email places them into premade folders automatically.
With the Screener feature, you can handle emails from unknown senders before they reach your inbox. Open Screener in the menu and Allow, Block, or Unsubscribe immediately.
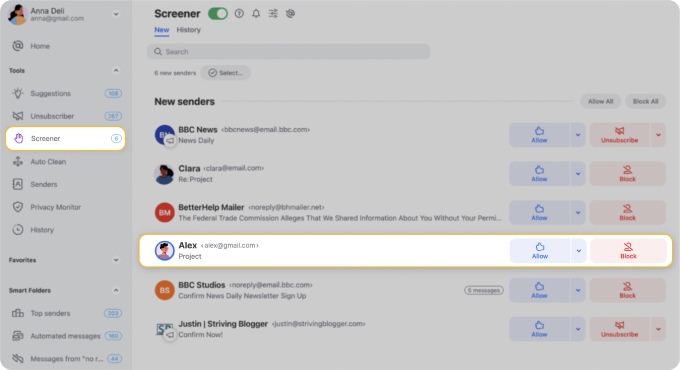
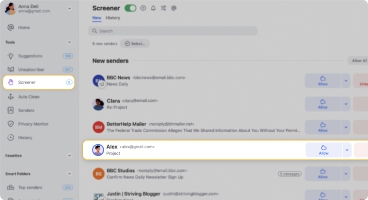
By isolating messages from new senders, you can remove the clutter before it even begins.
How to Edit, Disable, or Remove an Outlook Sweep Rule
If you choose one of the Sweep options to automatically move future messages, keep only the latest, or get rid of emails older than 10 days, you have the option to edit, disable, or remove this rule.
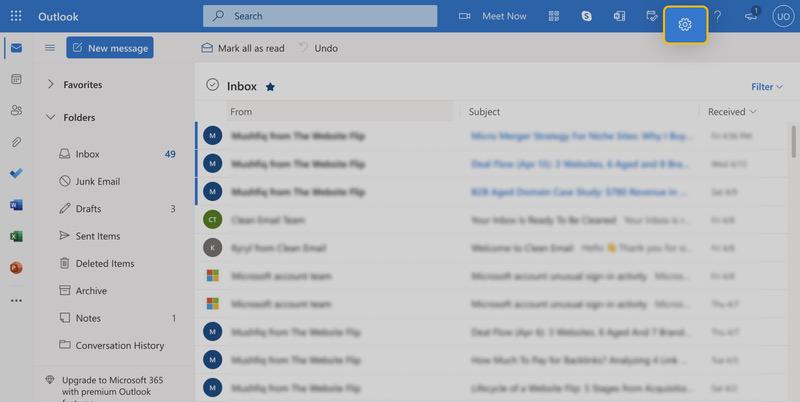
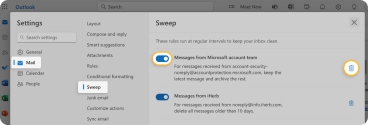
- To manage a Sweep rule, click the Settings gear icon in the top right corner.
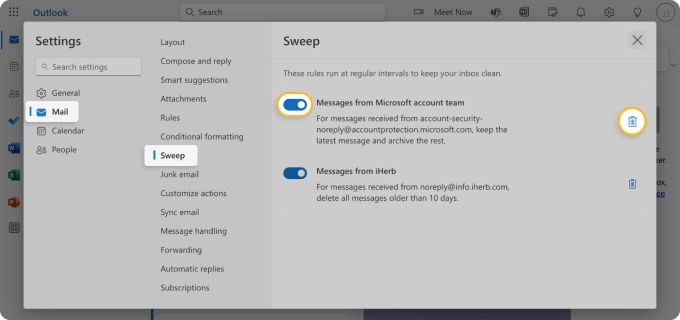
- In the Settings pop-up window, go to Mail and choose Sweep from the options on the right.
- To edit the rule, click the Edit icon (pencil), make your changes, and choose Save (the option is not available on the Web).
- To temporarily disable the rule, turn off the toggle. You can re-enable the rule later by turning on the toggle once again.
- To permanently remove the rule, click the Delete icon (trash can). Note that you may not be asked to confirm.
Remember, the first Sweep option is to do a quick cleaning of your Outlook inbox which isn’t a rule that runs each day; it’s simply a one-time action.
Rule Order, Conflicts, and Priority
Now what happens if a Sweep rule and a regular Outlook rule both apply to the same message? Would this create conflict where one rule gets completely disregarded?
Well, the outcome depends on the order in which the rules appear in your rules list. Outlook applies all the rules in order from top to bottom. It ensures all conditions of a rule are met before proceeding to the next applicable rule.
If you’ve selected Stop processing more rules for a specific rule, the other rules listed below won’t be processed.
In a nutshell, both rules will be applied in the order they’re listed.
Logs and Reporting
Sweep is designed to free up mailbox space automatically. Creating detailed records of its actions would take up more space and run counter to its purpose. So you won’t see a detailed log or history view of individual Sweep rule actions. You also won’t see a notification of each run or a list of which messages were moved or deleted as part of a Sweep.
Basically, Sweep is a set-and-forget tool with no feedback. If you need detailed tracking or audit history of rule-based email actions, you’ll need to rely on third-party tools like Clean Email.
Does Sweep work with IMAP, POP, or third-party accounts connected to Outlook?
Sweep is a server-side feature, which means it runs in Microsoft’s cloud and not in the desktop client. This limits its functionality outside Outlook and Microsoft 365 mailboxes.
IMAP and POP accounts, such as Gmail, Yahoo, and ISP emails, don’t support Sweep because they don’t have the backend to enforce the process. While you can manually move or delete messages in bulk, you can’t use automatic daily Sweep.
Wrap-Up
Using the built-in Sweep function in Outlook with web access or on Windows, you can quickly and easily rid your inbox of messages and create routines to do so daily. With these types of Outlook rules, you can make sure the emails you regularly delete are done so automatically.
For more advanced Outlook clean rules like Sweep, remember that Clean Email offers all premium features across devices along with additional tools for a consistently tidy mailbox.
How to Create a Sweep Rule in Outlook - FAQs
What does "sweep" mean in Outlook?
"Sweep" in Outlook refers to a feature that helps you quickly manage your inbox by automatically moving or deleting emails from specific senders.
How do you use Sweep in regular Outlook?
To use Sweep in regular Outlook, select an email from the sender you want to manage, click the "Sweep" option in the toolbar, and choose your desired action, such as moving future messages or deleting them after a certain period.
How often does an Outlook Sweep run?
It runs just once per day. Regular Outlook inbox rules, on the other hand, run as soon as a message arrives in your inbox.
How do I remove a Sweep rule in Outlook?
To remove a Sweep rule, log in to Outlook.com and click the Settings gear icon. Then, navigate to Mail and select "Sweep". From there, you can enable, disable, or delete any rule you want.
Why aren't my rules working in Outlook?
Sweep rules might not work if the rules are incorrectly set, if there are conflicts with other rules, or if there are syncing issues with your email server.
How to flag and sweep emails in Outlook?
First, flag the emails you want to highlight, then use the Sweep function to automatically move or delete future messages from those senders while keeping the flagged ones for reference.
How to undo Sweep in Outlook?
To undo a Sweep action, go to the folder where the emails were moved, select the messages, and manually move them back to your inbox or the original folder.
How many Outlook rules can you have?
Outlook does not specify the maximum number of Sweep rules you can create, but the total number of rules is constrained by the overall storage capacity for rules in your mailbox.


