Creating and Editing Auto Clean Rules
Using Auto Clean, you can create rules to automatically apply almost any action to messages that meet almost any specific criteria.
This article covers the following topics:
- Available Rule Criteria
- Available Auto Clean Actions
- Adding New Auto Clean Rules
- Editing Auto Clean Rules
For more information about the Auto Clean feature, please see these related articles:
Available Rule Criteria
Auto Clean rules can identify messages to be cleaned using almost any combination of the following criteria:
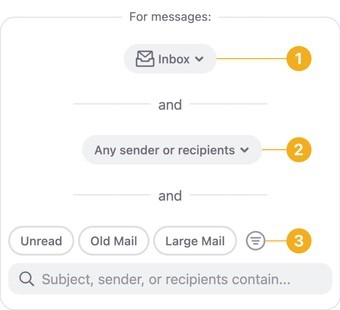
- Folder or Smart Folder: Optionally click the drop-down and select any regular mail folder or any Smart Folder. If you select a folder here, this Auto Clean rule will only take effect on messages in the selected folder.
- Sender or recipient details: Unlike the search option available under Filters (3), this tells Clean Email to look for an exact match based only on the sender or recipients. You can choose any of the following options:
- Any sender or recipients
- Recipients (one or more email addresses)
- Sender (name and email address) - For example:
Google (no-reply@accounts.google.com) - Email Address - For example:
no-reply@accounts.google.com - Email Domain - For example:
google.com
- Filters: Clean Email provides several frequently used filter options for quick access just near the Filters funnel button. You may use them or choose any combination of the following filters:
- A text search on messages’ sender addresses, recipient addresses, and subject lines
- Messages’ read or unread status
- Messages’ age (e.g., Older than 6 months)
- Messages’ size (e.g., Larger than 1 MB)
- Additional filter options
For more information about available filters, please see Searching and Filtering.
Available Auto Clean Actions
Auto Clean rules can apply any of the following actions:
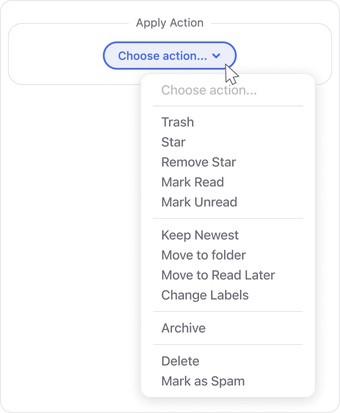
- Trash
- Star
- Remove Star
- Mark Read
- Mark Unread
- Keep Newest
- Move to Folder
- Move to Read Later
- Change Labels
- Archive
- Delete
- Mark as Spam
For detailed descriptions of each of these actions, please see Actions Clean Email Supports.
Adding New Auto Clean Rules
The process of creating Auto Clean rules consists of two steps:
- Specifying Messages to Be Cleaned Automatically
- Choosing a Cleaning Action
Specifying Messages to Be Cleaned Automatically
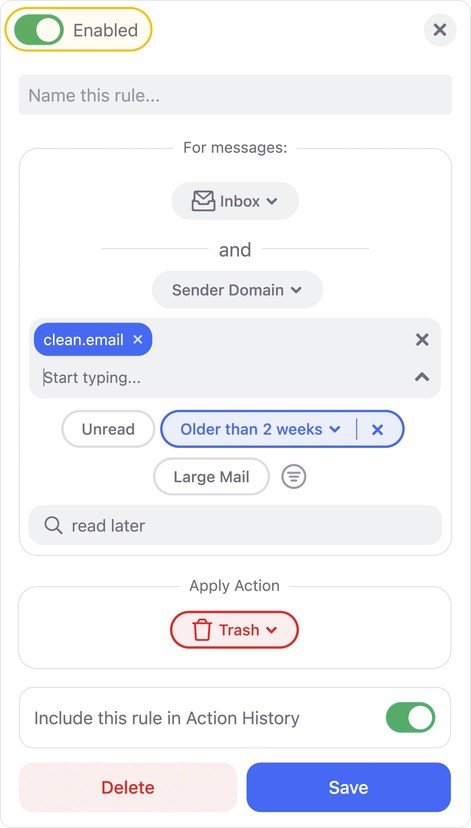
In the For messages: section, select the criteria that Clean Email will use to identify the messages to be cleaned. Plan carefully, and be very specific. It is critically important to consider both of the following:
- Clean Email will only clean the messages that meet the specific criteria of an Auto Clean rule
- Clean Email will clean every single one of the messages that meet the specific criteria of any Auto Clean rule, automatically
⚠️ Caution: Use caution when creating an Auto Clean rule. If the rule criteria are not specific enough, Clean Email will take the specified action on messages that you might not have expected, resulting in potentially lost messages. For more on this, please see I Am Missing Important Messages. Why?.
There are a variety of ways you can specify the messages that are to be cleaned automatically via an Auto Clean rule. Please click one of the following bookmarks to jump to the corresponding section of this article.
- Based on Folder or Smart Folder
- Based on Sender or Recipients
- Based on Read or Unread Status
- Based on Message Age
- Based on Message Size
- Using Other Filters to Specify Messages
- Based on a String of Text
Specifying Messages Based on Folder or Smart Folder
If you want to clean messages found in a specific folder or Smart Folder, click the Inbox drop-down and choose the folder.

Bear in mind that the Auto Clean rule will be applied automatically (and continuously) going forward. You also have the option to apply the rule to existing messages at the time you create it.
Specifying Messages Based on Sender or Recipients
In addition to optionally specifying the messages to be cleaned based on their folder or Smart Folder, you can specify messages to be cleaned based on the sender or recipient details. Click the Any sender or recipients drop-down to control whether or not these criteria are used.
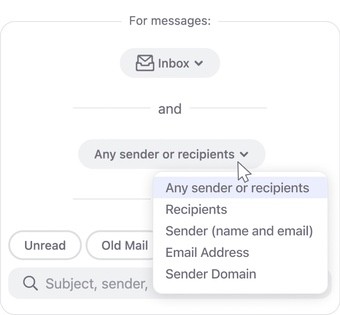
- If you leave the default value of Any sender or recipients, the rule will be applied to all messages that meet the other criteria, regardless of sender or recipient.
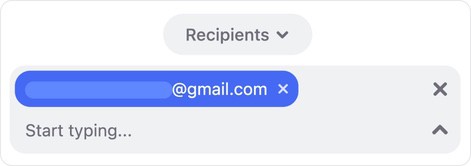
- If you select Recipients, Clean Email can identify the messages to be cleaned based on the recipients’ email addresses. This may be helpful if you have added more than one email account to your Clean Email profile.
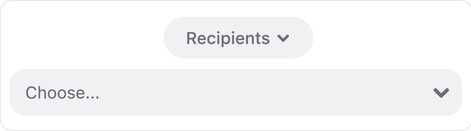
Click the Choose drop-down and begin typing the email address of the recipient for whom you want Clean Email to clean future messages. Clean Email displays a list of all recipient email addresses found in your account (including variations of your main address). You can click to select as many as necessary.
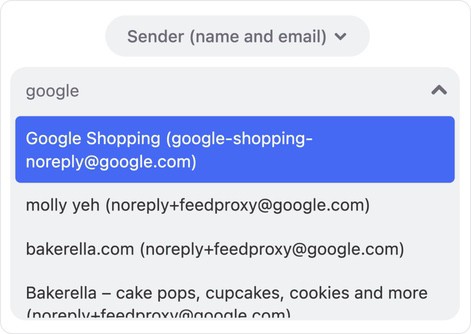
- If you select Sender (name and address), Clean Email can identify the messages to be cleaned based on a combination of the sender name and sender email address. This can be helpful if you receive messages from more than one sender at the same address, or from senders with generic names but different email addresses.

Click the Choose drop-down and enter the name or email address of the sender whose messages are to be cleaned. Clean Email displays a list of all senders matching your entry, with each sender’s email address appearing in parenthesis following the sender name; click the one to be used for the rule.
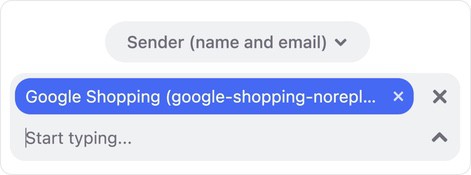
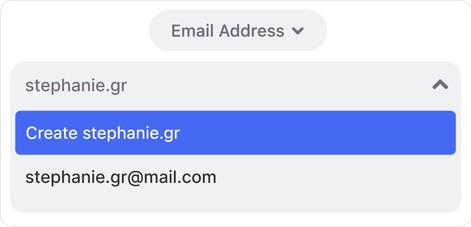
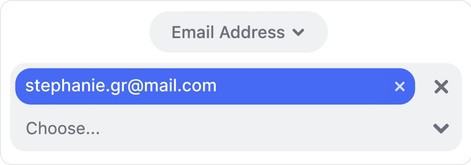
- If you select Email Address, Clean Email can identify the messages to be cleaned based solely on the sender’s email address. This lets you clean all messages that originate from a given email address, regardless of the sender’s name.
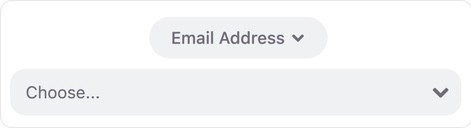
Click the Choose drop-down and begin typing the email address for which all messages that meet the rule’s other criteria are to be cleaned. Clean Email displays a list of matching addresses; click the one to be used for the rule.
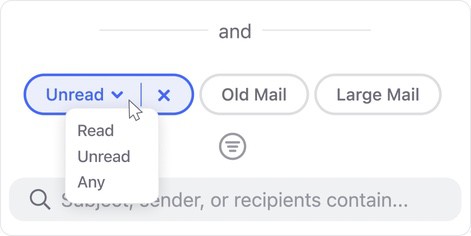
Specifying Messages Based on Read or Unread Status
Your Auto Clean rule can identify the messages to be cleaned based on whether or not the messages have been read. For example, you can configure the rule to only clean messages that are marked as read.
⚠️ Caution: If you choose to use the read or unread status as a criterion, it is important to choose at least one other criterion in addition to this. Otherwise, Clean Email will clean ALL messages that are read or unread. This will result in messages being cleaned that you did not intend to clean. For more information, please see our article I Am Missing Important Messages. Why?
To use the message status to help identify the messages to be cleaned, click the Unread drop-down and select the status of messages that are to be cleaned automatically.
Specifying Messages Based on Message Age
Another way to specify messages to be cleaned automatically is to use the age of the messages. Clean Email can automatically clean messages that are a certain age or older.
⚠️ Caution: If you choose to use the message age as a criterion, it is important to choose at least one other criterion in addition to this. Otherwise, Clean Email will clean ALL messages that reach the specified age. This will result in messages being cleaned that you did not intend to clean. For more information, please see our article I Am Missing Important Messages. Why?.
To use the message age to help identify messages to be cleaned, click first Old Mail.
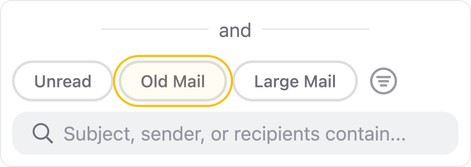
Then, click the Old mail drop-down and select the desired age.
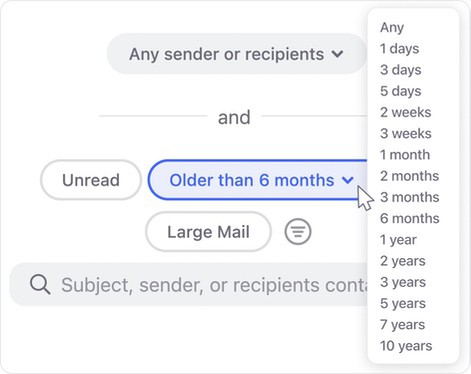
For example, if you select 1 month, the Auto Clean rule will look for messages that are at least one month old based on the date the message was received.
Specifying Messages Based on Message Size
You can also specify messages to be cleaned automatically using the message size, which takes into account any message attachments.
To use the message size to help identify the messages to be cleaned, click the Large Mail drop-down and select the minimum size of messages that are to be cleaned automatically. The Auto Clean rule will apply the cleaning actions (specified below) to all messages that are larger than the size you select (and which meet all other rule criteria).

Using Other Filters to Specify Messages
In addition to the other criteria in the For messages section, you can use Clean Email’s standard filter options to narrow down the scope of messages to be cleaned automatically.
Click the Filters drop-down to display a list of filter options.
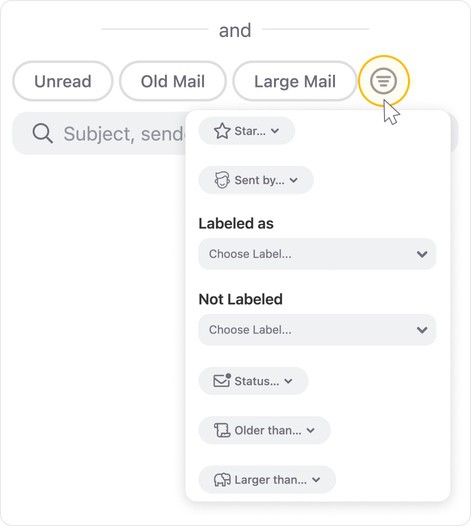
For more information about the available filter options, please see our article Searching and Filtering.
Specifying Messages Based on a String of Text
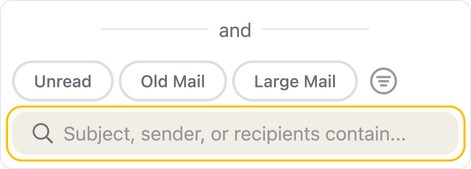
You can also create Auto Clean rules based on a certain string of text found in the subjects, senders, or recipients of your email messages. This may be helpful if you frequently receive automated messages with identical subject lines (or variations of a subject line).
For example, suppose you subscribe to daily informed delivery notifications from the postal service, showing you images of all postal mail and packages to be delivered to your postal address each day. The subject line may be identical for these messages, or may have an identical beginning string followed by the date, e.g., “Your Daily Digest for Monday, July 18”.
To clean messages that have a common string of text like this, click the search field and enter the string of text to be used in identifying messages to be cleaned. You can copy and paste from the subject line of one of the messages, if need be. To continue the example above, you might enter Your Daily Digest.
Choosing a Cleaning Action
Once you have identified the messages that are to be cleaned automatically via the Auto Clean rule, the last step is to specify how Clean Email should clean those messages.
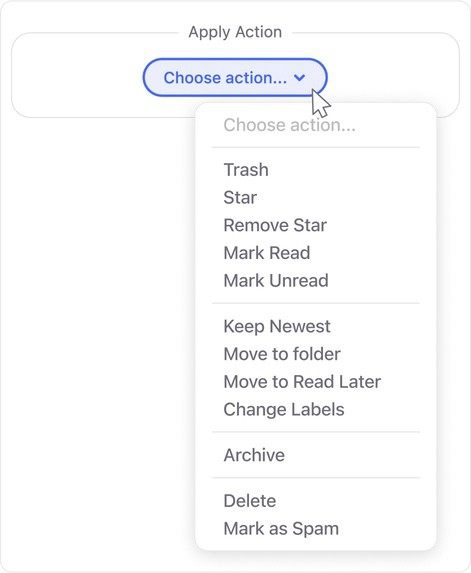
In the Apply Action section, click Choose action….
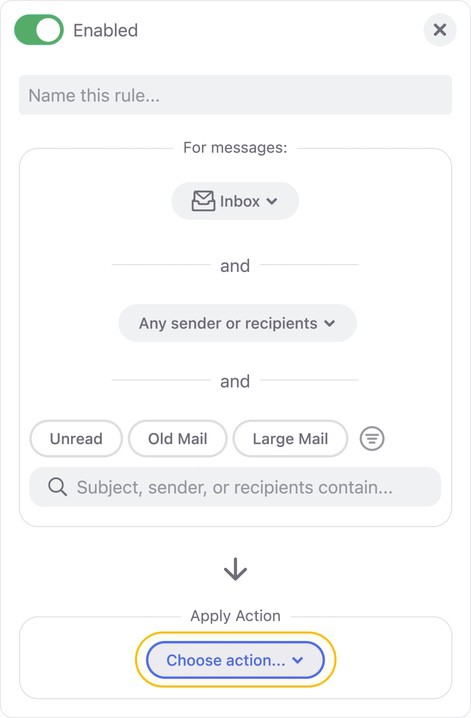
From the drop-down menu, select the action that Clean Email will take automatically for messages that match the criteria specified in the For messages section of the Auto Clean rule.
⚠️ Warning: When creating an Auto Clean rule, it is important to keep in mind that Clean Email will automatically apply the rule to any messages that meet the criteria you have selected in the For messages section. You will not be prompted to confirm the actions prior to execution. Use caution when creating Auto Clean rules.
⚠️ Caution: The Delete action automatically and permanently deletes all messages that meet the criteria you have selected in the For messages section. Message deletion cannot be reversed. It may be a good idea to initially create Auto Clean rules that use the Trash action rather than Delete, until you are confident that the rules are only affecting the desired messages.
For complete details of the actions available here, please see our article Actions Clean Email Supports.
Once you have chosen the cleaning action to be applied, you can click the toggle labeled Include this rule in Action History to enable or disable it; the toggle is enabled by default.

When this option is enabled, actions taken by this Auto Clean rule will be included in the Action History Summary notification that Clean Email sends you by email or in the application. Click to disable this option if you do not want actions associated with this rule to be included in the notification.
For more information, please see >Action History Summary.
Before finalizing the new rule, you can also choose whether or not to apply the rule to existing messages. This option is disabled by default.

If you click the toggle to enable this option, all existing messages that meet the rule’s criteria will be cleaned immediately upon clicking Create Rule.
In case you see a red warning message with a Continue button as pictured below, please carefully evaluate the rule criteria in the first two sections of the dialog. Ensure that the criteria are not too broad and will not result in cleaning of messages that you want to keep.
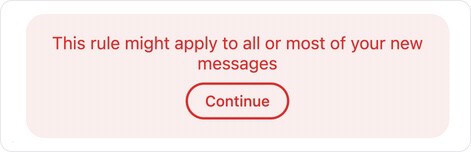
If you are certain the rule criteria are correctly configured, click Continue.
To complete rule creation, click Create Rule.

Editing Auto Clean Rules
You can modify existing Auto Clean rules by clicking Auto Clean in the left-hand navigation menu:
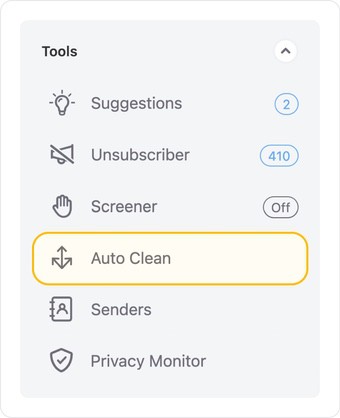
A list of all Auto Clean rules in your account appears.
Enabling and Disabling Individual Rules
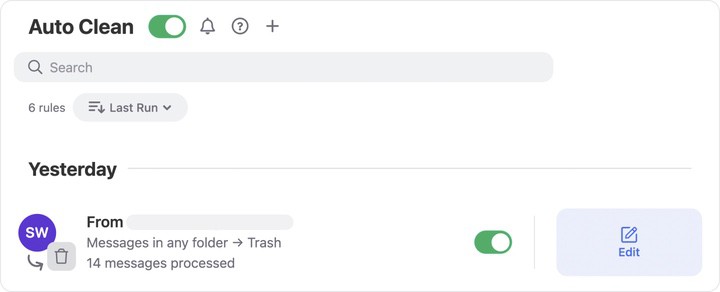
The toggle to the right of each rule lets you turn individual rules on or off.
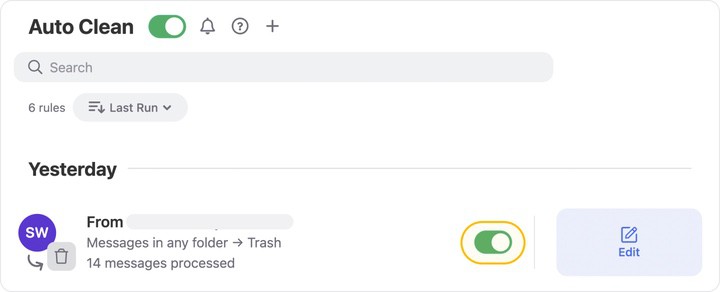
- When a rule is enabled, the button is on the right-hand side of the toggle and the toggle is green, as illustrated above.
- When a rule is disabled, the button is on the left-hand side of the toggle and the green color goes away, as shown here:

Modifying Rule Settings
To modify the settings for a rule, click Edit next to the rule you want to modify.

The rule criteria dialog appears. You can use the toggle at the top to enable or disable the selected rule.
Make the desired changes to the rule criteria–for example, updating the sender’s email address or adding additional senders–and then click Save to finish modifying the rule.

Please contact us and we will be happy to help.
