Block All Messages Sent from a Specific Domain
One tactic used by spammers is to send messages from multiple email addresses or multiple subdomains. For example, you may receive messages from senders name1@sub1.domain.com, name2@sub2.domain.com, and so on.
These spam messages come in all forms and are usually computer generated. Blocking such senders one by one is a tedious task and is unlikely to succeed in stopping their spam messages. To fight against these spammers, you need to block their entire domain.
📌 Note: If you need to block only a single specific sender, please see Block or Mute a Sender.
To block all messages sent from a specific domain:
⚠️ Caution: Auto Clean is a very powerful feature, recommended for advanced users. It is important to follow these instructions exactly as they are presented here, or unexpected results may occur.
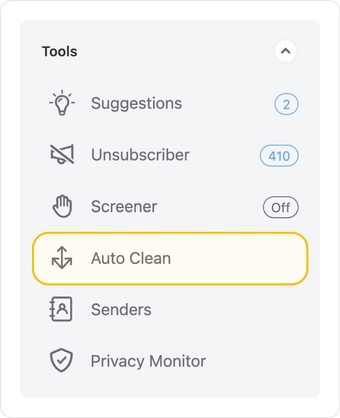
- In the left-hand navigation pane, click Auto Clean.
- Ensure that Auto Clean is enabled. When Auto Clean is enabled, the toggle switch at the top of the page is green, and the button is on the right-hand side of the switch:

If Auto Clean is not enabled, click the toggle switch to turn it on.
- Click + at the top of the page to create a new Auto Clean rule.
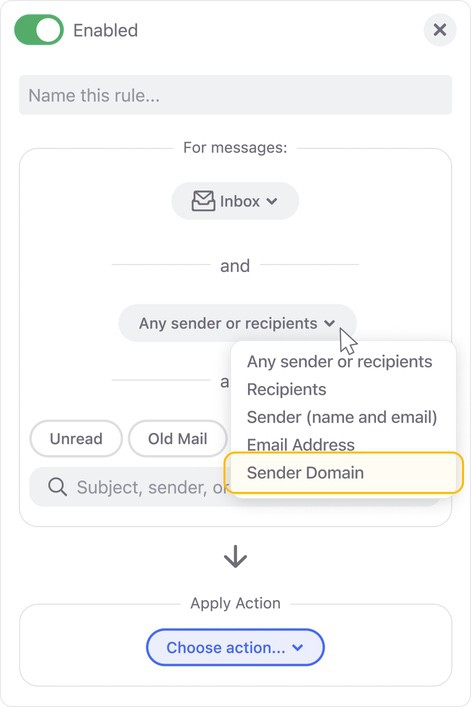
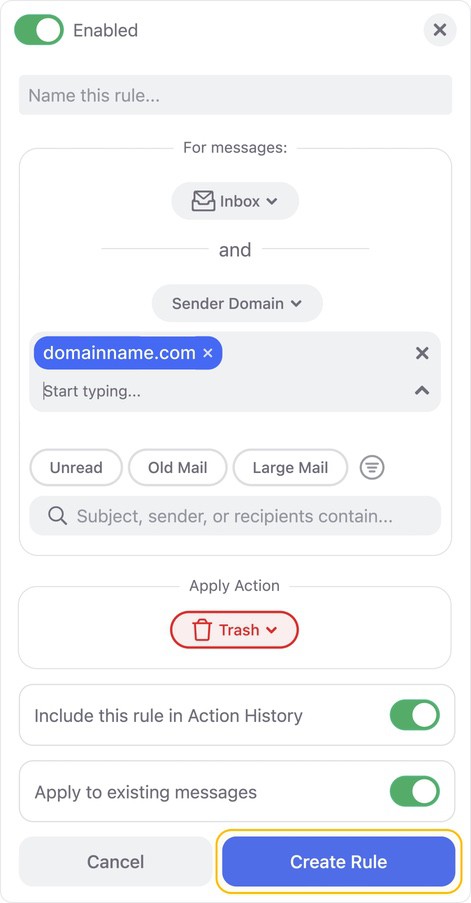
- In the rule creation dialog, click the Any sender or recipients drop-down and select Sender Domain.
- Enter the domain you want to block. As you type, Clean Email displays a list of matching domains. Select the domain or subdomain you want to block from that list.
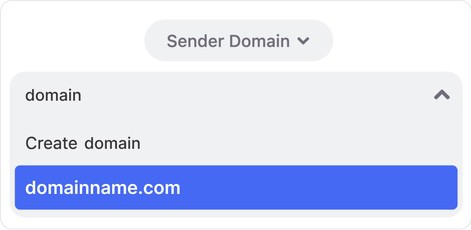
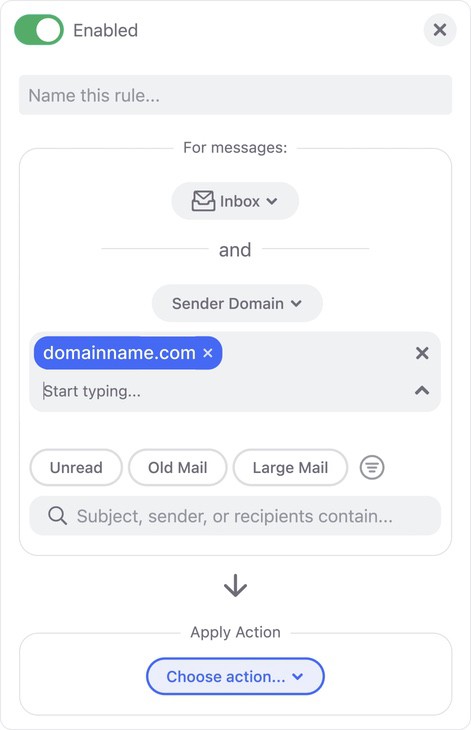
When you select one of the domains or subdomains from the list, the selected item appears with a blue background in place of the search text, as illustrated below. This confirms that you have selected the domain or subdomain.
⚠️ WARNING: You must click one of the domains or subdomains listed in the search results. If you do not select an item from the list, Clean Email does not store the domain you typed. This means that no filter will be applied to the Auto Clean rule, and ALL messages in your inbox may be deleted.
If you have never received a message from the domain you want to block, or if you have permanently deleted all messages from that domain, Clean Email will not be able to present the domain as a selectable option in the list. In that case, stop and wait until you have received a message from the domain (even if the message is in the trash), and then perform this process. - Click Choose action… and then select Trash from the drop-down menu.
- If you want Clean Email to include this rule in the optional Action History Summary notifications, leave the Include this rule in Action History toggle enabled.
- If you want to trash all existing messages from the domain, click the Apply to existing messages toggle to turn it on. The button moves to the right-hand side of the switch, and the switch turns green as shown here.
- Click Create Rule to finish creating the Auto Clean rule.


Please contact us and we will be happy to help.
