Account Preferences
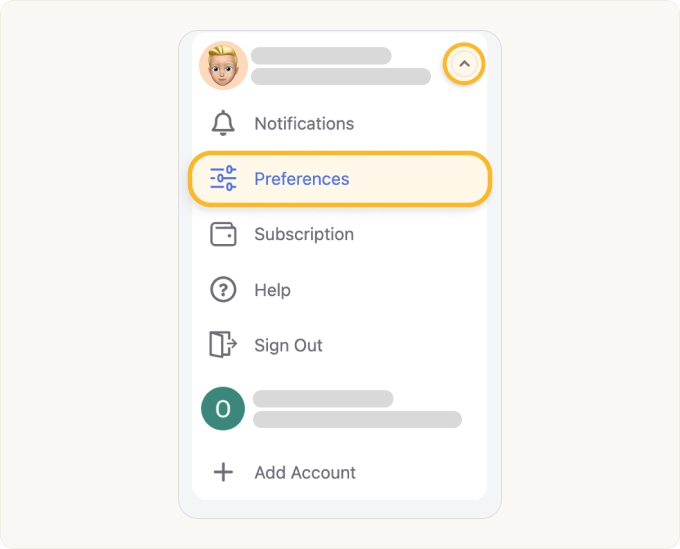
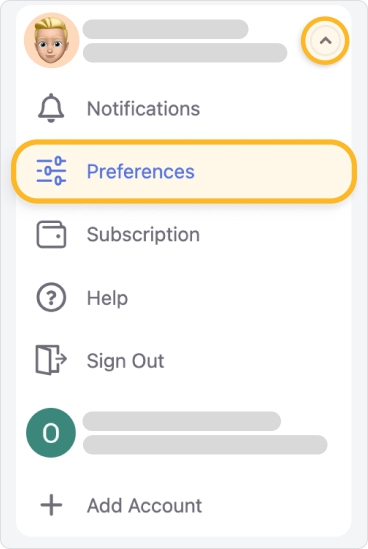
You can access your Clean Email account preferences by clicking your email address at the top left-hand corner of the page and then clicking Preferences in the menu.
The Preferences page consists of five tabs:
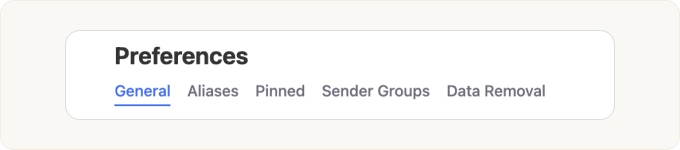

- General
- Start Screen
- Language
- Display Cleaning Suggestions in Smart Folders
- Animate “Screener” Button
- Always Show "New Message” Button
- Default Action
- Quick Cancel
- Reset “Confirmation Required” Dialogs
- Aliases
- Pinned
- Sender Groups
- Data Removal
General Tab
The General tab contains a variety of preferences settings, including which page appears each time you log in to Clean Email, and which language is used in the Clean Email interface and communications.
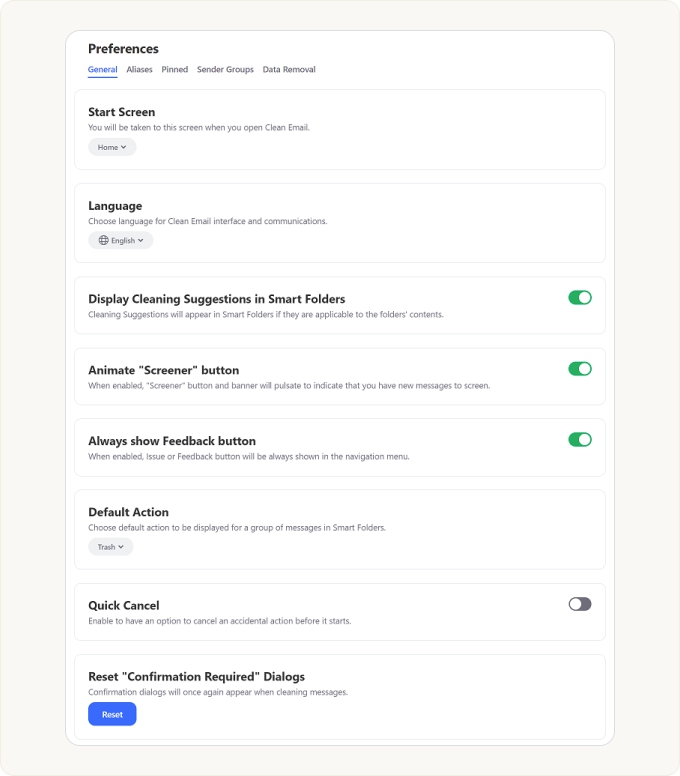
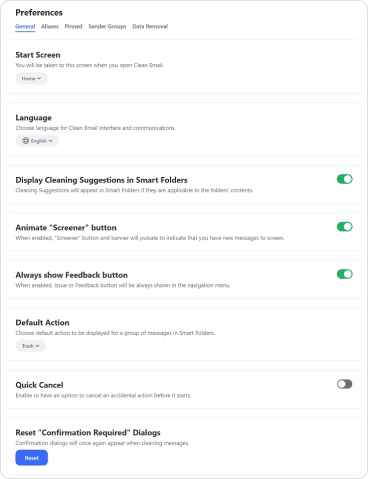
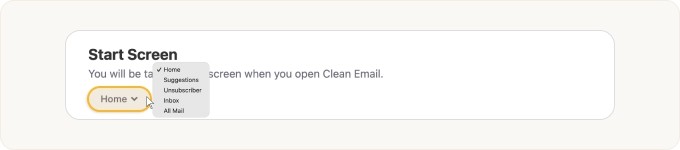
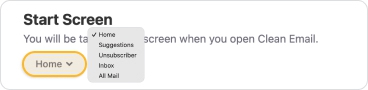
Start Screen
In the Start Screen section, you click the drop-down menu to select which page appears each time you log in to Clean Email.
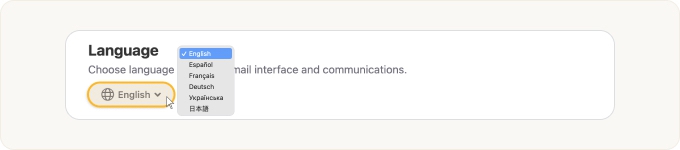
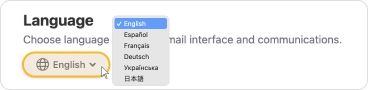
Language
In the Language section, you can click the drop-down menu to select which language is used by the Clean Email interface and communications.
Display Cleaning Suggestions in Smart Folders
In the section labeled Display Cleaning Suggestions in Smart Folders, you can click the toggle to control whether or not relevant Cleaning Suggestions will appear in Smart Folders. The toggle is enabled by default.


Animate “Screener” Button
The Animate “Screener” Button toggle switch lets you control whether or not the Screener button in the left-hand navigation menu and the Screener banner on the Home page will pulsate to notify you when you have new senders waiting to be reviewed.


This option is turned on by default. If you do not want the Screener banner and button to pulsate, click the toggle switch to turn this option off.
Always Show "New Message” Button
The Always Show “New Message" Button toggle switch lets you control whether or not the New Message button appears at the bottom left-hand corner of the page in Clean Email.


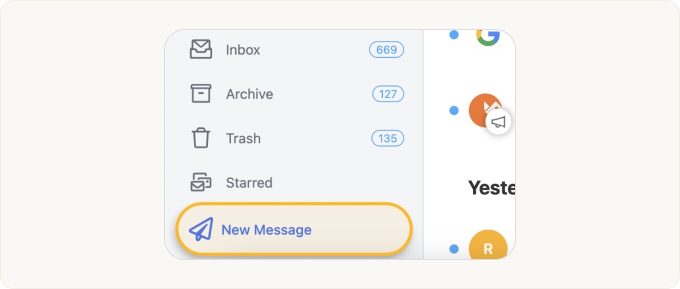
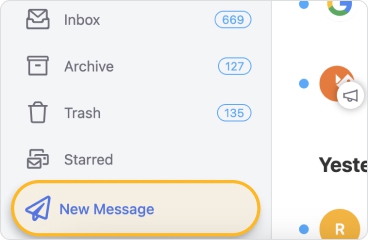
This option is turned on by default. If you do not want the New Message button to appear, click the toggle switch to turn this option off.
Default Action
The Default action section lets you control which action is displayed by default when viewing a group of messages in a Smart Folder. By default, this field is set to Trash, but you can click the drop-down and choose a different default action.


For example, if you select Archive as the default action, when you view a smart folder, the Archive button will appear for each message group instead of the Trash button.
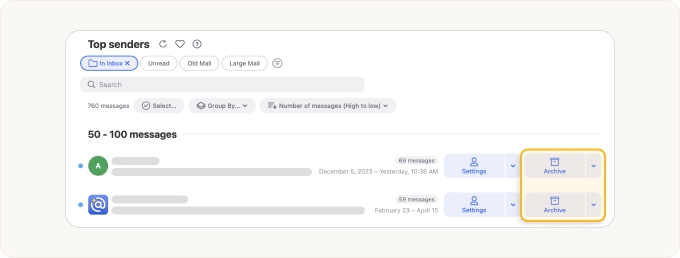
Quick Cancel
In the Quick Cancel section, you can control whether or not Clean Email will present a cancel button briefly before executing cleaning actions. This option is disabled by default, as shown in the following illustration.


For more information, please see Canceling an Accidental Action with Quick Cancel.
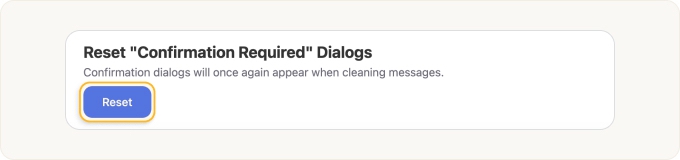
Reset “Confirmation Required” Dialogs
In the section labeled Reset “Confirmation Required” Dialogs, you can optionally reset the status of all confirmation dialogs in the system back to their default settings.
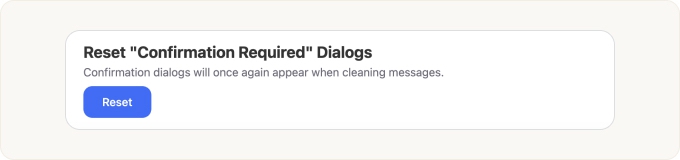

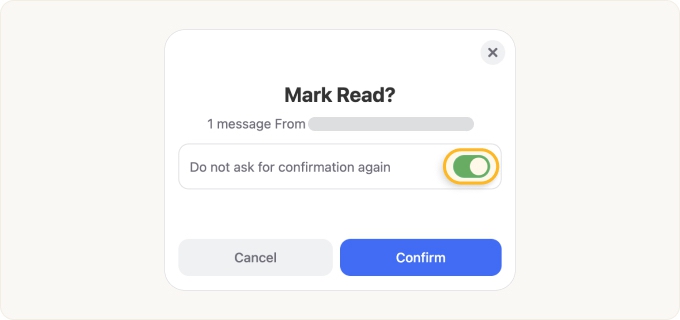
For example, when applying a cleaning action, you may see a confirmation dialog that asks you to verify the action you want to perform. In many of these confirmation dialogs, you can toggle on or off the option Do not ask for confirmation again.

If you want to reset all confirmation dialogs to their default statuses, click Reset.

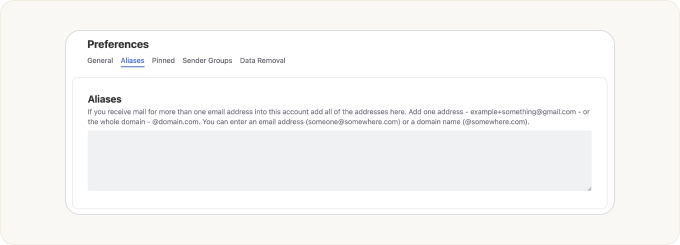
Aliases Tab
On the Aliases tab, you can enter any email aliases that can be used to send mail to your primary email account.
An email alias is an address that is different than your primary email address but is configured to automatically forward messages to your primary address. For example, suppose you have a special address that you only provide to certain people. When someone sends a message to that address, the message is automatically forwarded to you at your primary address. Enter the forwarding address–that is, the alias–in this field so that Clean Email can receive, display, and process messages sent to that alias.
You can add individual addresses or the whole email domain.
Pinned Tab
On the Pinned tab, you can control your pinned messages. When you pin messages (e.g., all messages from a given sender), the messages are not affected by any automated cleaning rules at all.
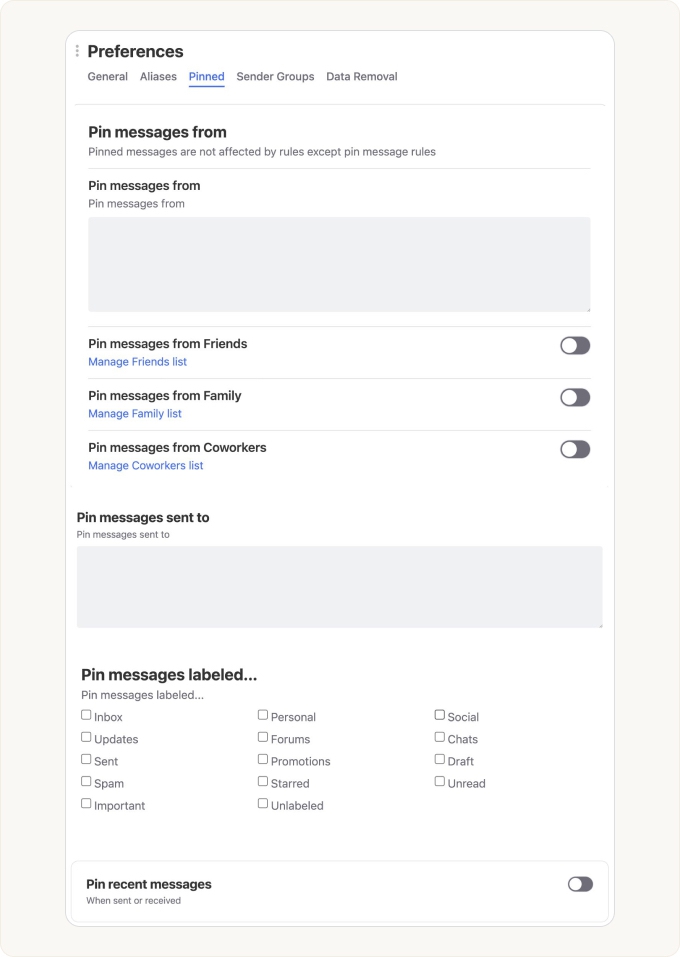
For more information about pinned messages, please see our article Pinned Messages.
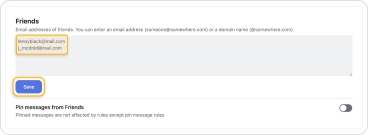
Sender Groups Tab
On the Sender Groups tab, you can define groups of contacts and optionally pin messages from the email addresses of the members of those groups.
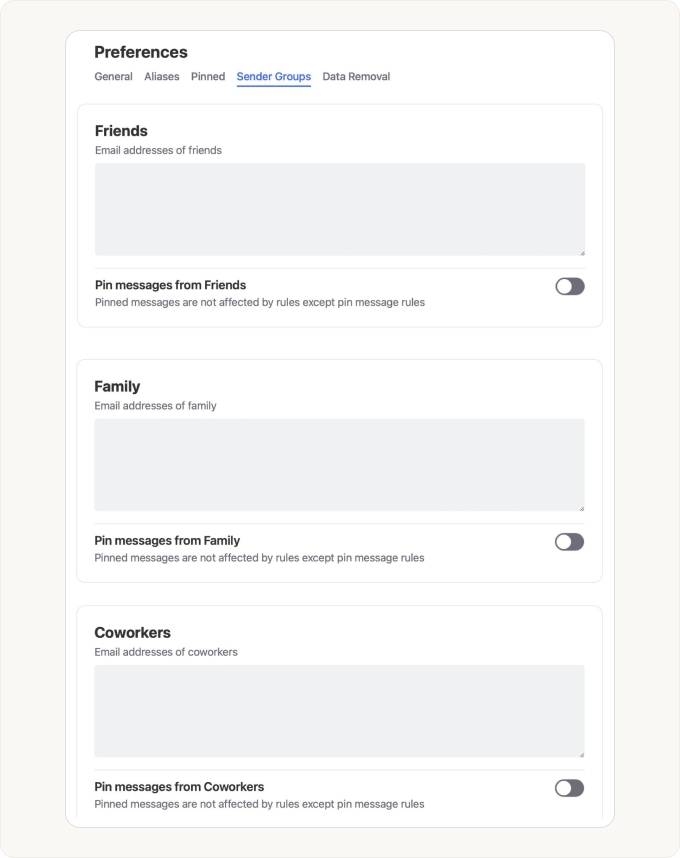
For example, you can enter your friends’ email addresses in the Friends group. Press Enter to start a new line after each address, and click Save to save your changes.
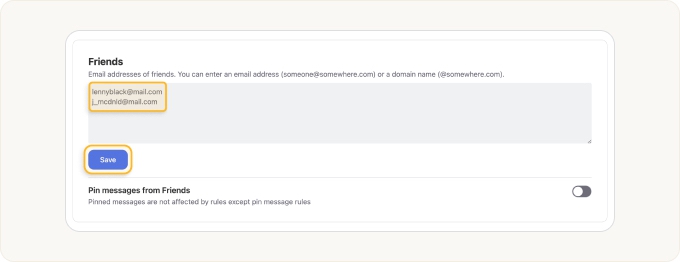
For each contact group (Friends, Family, or Coworkers), you can optionally click to enable the Pin messages switch. Turning this on automatically pins all messages received from members of the selected group, so that Clean Email will not apply any cleaning actions (other than pin rules) to those messages. For more information, please see our article Pinned Messages.
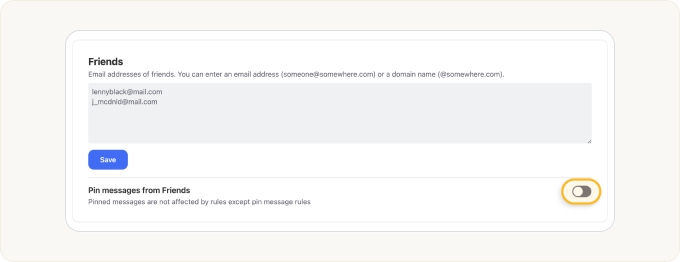

- When the switch is enabled, it moves to the right-hand side of the toggle and turns green.


- When the switch is turned off, it is on the left-hand side of the toggle and it is gray.


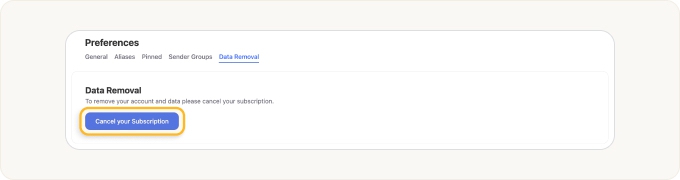
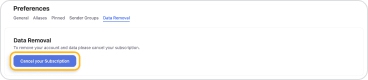
Data Removal Tab
On the Data Removal tab, you can completely delete your Clean Email account data from our service.
📌 Your satisfaction is our top priority. If you have any questions or problems with Clean Email, please reach out to our Support team for assistance. However, if you need to delete your account data from our service, you can do so on the Data Removal tab.
If you have an active subscription, please click the Cancel your Subscription button before deleting your account data in order to prevent future automatic payments. For more information, please see Canceling Your Subscription.
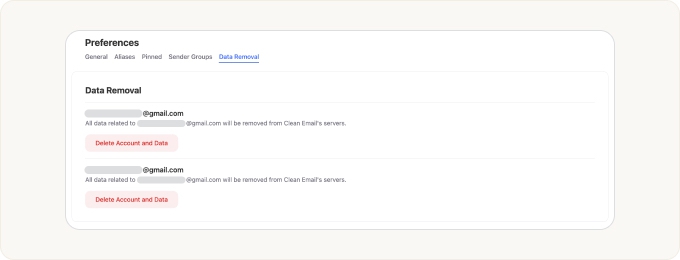
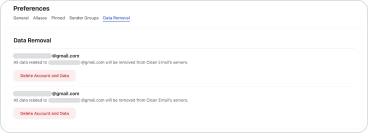
If you do not have a subscription or once your subscription has been canceled, the Delete Account and Data button appears.
When you click Delete Account and Data, a confirmation dialog similar to the following illustration may appear.
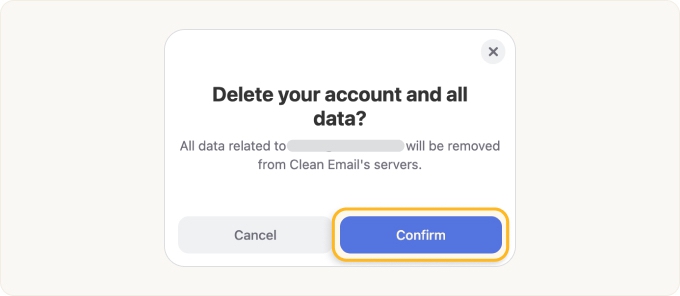
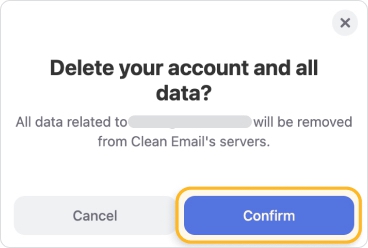
If you are sure you want to proceed, click Confirm. All data related to your email account is immediately and permanently removed from Clean Email.
Please contact us and we will be happy to help.
