


Key Takeaways
- iCloud.com rules are server-side: once set, messages from the blocked address go directly to Trash across all devices — no device needs to be online for the rule to run
- Apple Mail on iPhone: open email → tap sender name → tap name next to "From" → Block This Contact — routes future messages to Junk, not Trash
- Blocked emails still arriving? If you used Apple Mail's block, messages can still arrive at server level; switching to iCloud.com rules is the fix
- Addresses only, not domains: iCloud rules block specific email addresses — if a spammer switches to a new address from the same domain, they can still reach you
- Unblocking: go to iCloud.com → Mail → gear icon → Settings → Rules and edit or delete the rule

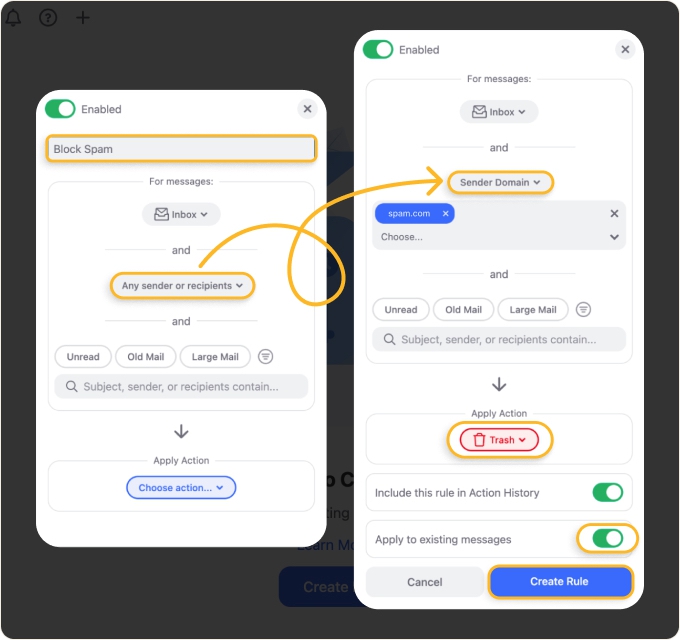
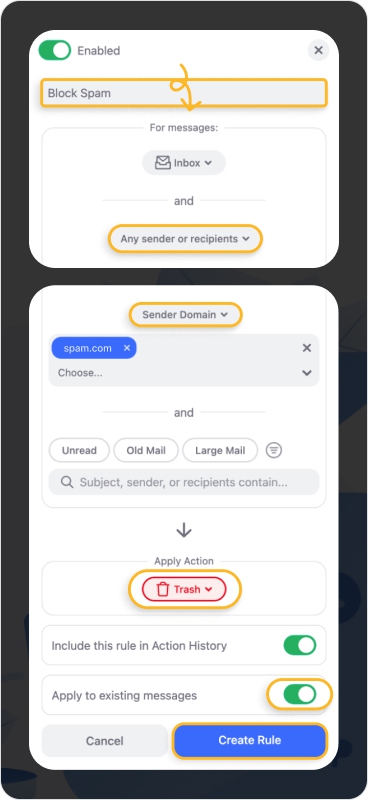
How to Block Emails Using iCloud.com Rules
This method creates a server-side rule that runs before your mail app ever sees the message. It works across iPhone, Mac, iPad, and any browser — because the rule lives in your iCloud account, not on a specific device.
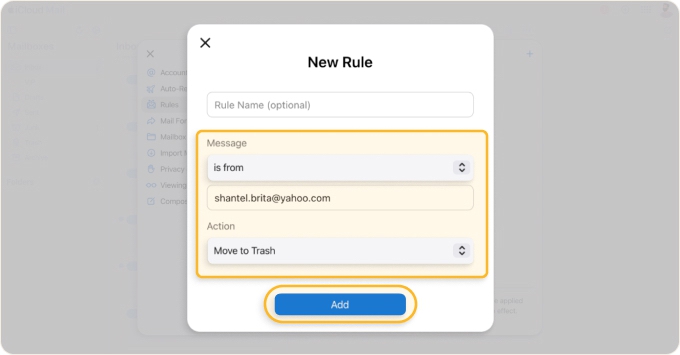
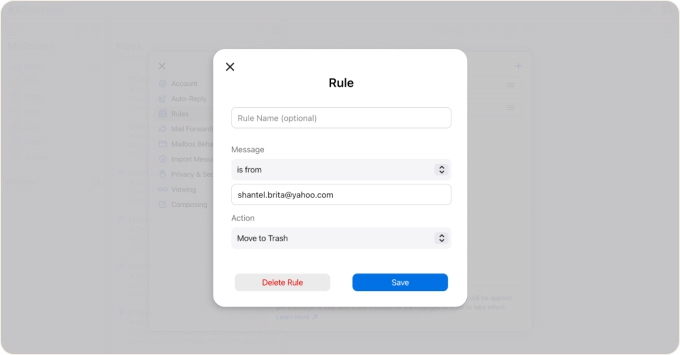
- Go to iCloud.com and sign in to your account.
- Open Mail.
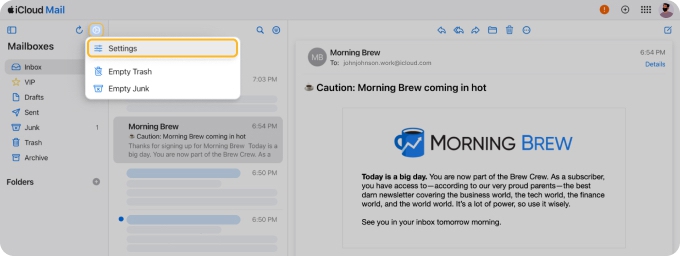
- Click the gear icon at the bottom left of your mail list and choose Settings.
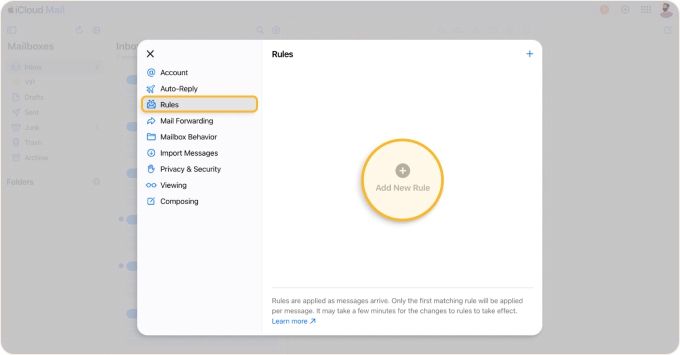
- Navigate to the Rules tab and click + Add a Rule.
- Under If a message, select is from and enter the email address you want to block.
- Under Then, choose Move to Trash.
- Click Add.
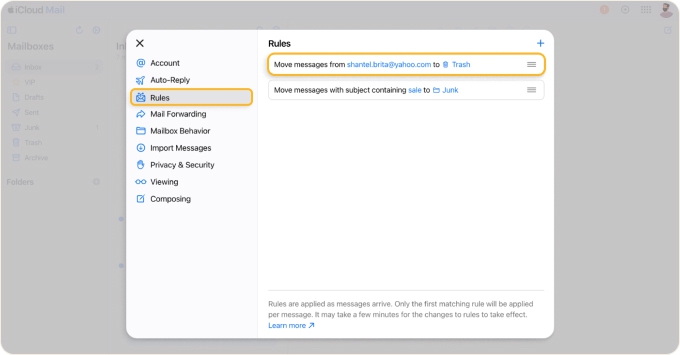
The rule activates immediately. All future emails from that address go directly to Trash — they never appear in your inbox on any device.
How to Block Emails in Apple Mail on iPhone
You can also block a sender directly from the Mail app on your iPhone. This block runs at the app level, not server-side, so it behaves differently from the iCloud.com rules method above.
- Open the Mail app on your iPhone and select an email from the sender you want to block.
- Tap the sender's name at the top of the message.
- Tap the name next to "From" in the contact card that appears.
- Scroll down and tap Block This Contact.
- Tap Block This Contact again to confirm.
Future messages from this address are automatically moved to your Junk folder — not Trash. The sender is not notified. To review your blocked contacts, go to Settings → Mail → Blocked.
💡 Note: This block applies only to the Mail app on your iPhone. It does not create a rule in iCloud.com and does not sync to your Mac's Mail app. For a block that applies across all devices, use the iCloud.com rules method above.
How to Block Emails in Apple Mail on Mac
Apple Mail on Mac has its own block feature — including a right-click shortcut, a settings-based blocked list, and the option to route blocked messages to Trash. For the full walkthrough of all three methods, see how to block emails on Mac.
If you want the block to apply across all your devices rather than just the Mac app, use the iCloud.com rules method in the first section of this article instead.
How to Unblock Emails on iCloud
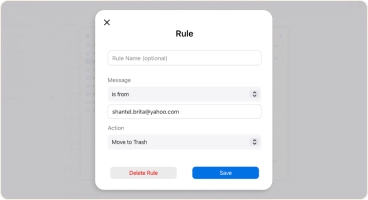
Remove a Block Rule on iCloud.com
- Go to iCloud.com, open Mail, and click the gear icon → Settings.
- Navigate to the Rules tab.
- Click the rule you want to change.
- To update it: edit the conditions and click Save. To remove it: click Delete Rule.
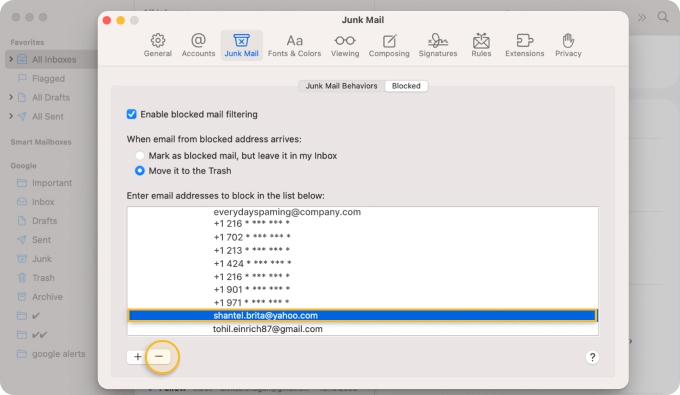
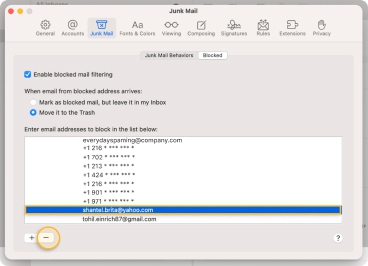
Remove a Block in Apple Mail on Mac
- Open the Mail app and go to Mail → Settings in the menu bar.
- Click Junk Mail, then select the Blocked tab.
- Find the address you want to unblock and click the − button to remove it.
Remove a Block on iPhone
Go to Settings → Mail → Blocked and swipe left on the address, then tap Delete.
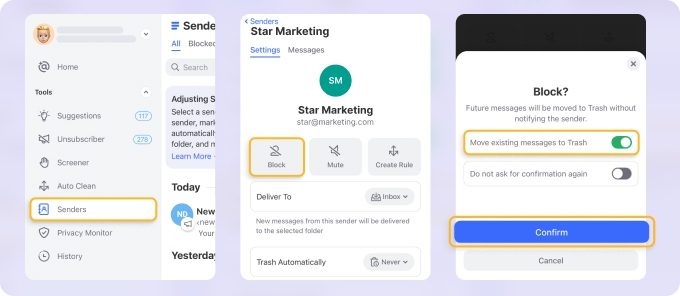
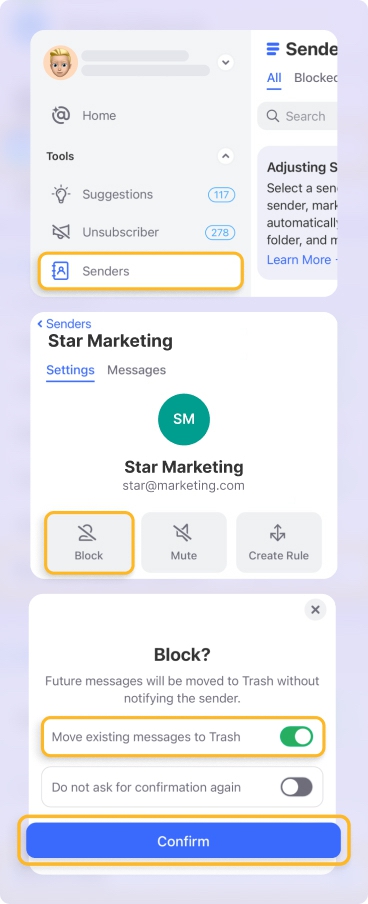
How to See All Senders in iCloud and Block Instantly
If you want to review and block senders across your iCloud inbox without opening each message individually, Clean Email's Senders feature groups every sender in your account into a single list. You can see how many messages each sender has delivered and sort them, then block, unsubscribe, or create rules for them in one click. It works in the browser and on iOS and Android, so you can manage your iCloud inbox from any device.
To block a sender: open the Senders section, find the address, and click Block — all future messages from that address go directly to Trash.
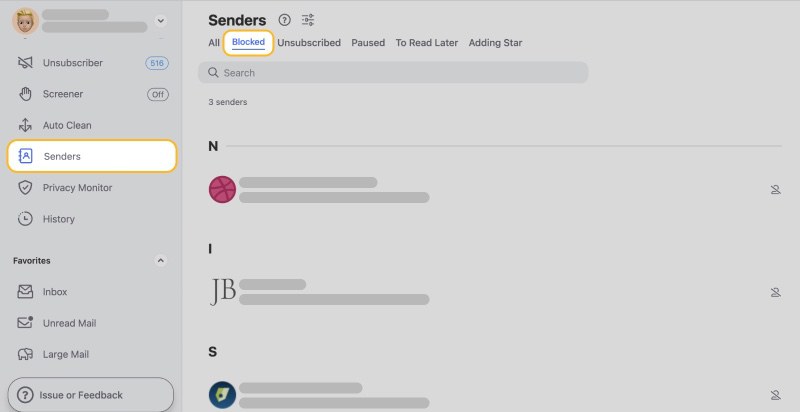
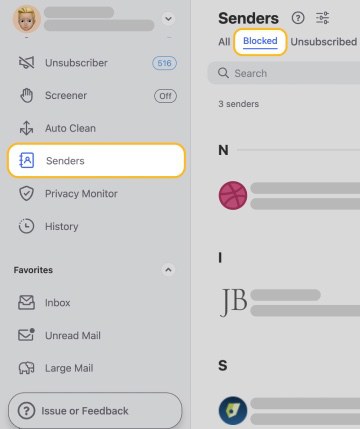
To see all senders you've already blocked: go to Blocked in the top menu. From there you can unblock addresses individually or review what rules are applied to each one.
If a spammer keeps switching to new addresses within the same domain, blocking individual addresses won't stop them. In that case, Clean Email's Auto Clean lets you create domain-level rules that send all messages from an entire domain to Trash automatically.
Why Blocked Emails Sometimes Still Arrive
This is the most common complaint about iCloud email blocking, and the cause is almost always a mismatch between where the block lives and where filtering actually happens.
If you used Apple Mail's "Block Contact" on Mac or iPhone: this block runs inside the Mail app on that device, after the email has already been delivered to your iCloud account by the server. If your mail server delivers the message before the app can filter it — or if the app isn't open at the time — the email can slip through to your inbox. The fix is to use iCloud.com rules instead, which run at the server level before delivery.
If you used iCloud.com rules but emails still arrive: double-check that the rule action is set to Move to Trash (not Move to Archive or a specific folder). Also verify that the sender address in the rule matches exactly — even a minor variation like a different subdomain will bypass the rule.
If the sender keeps changing their address: address-level blocking won't help here. iCloud doesn't natively support domain-level blocking via rules. In this case, marking messages as spam in Apple Mail to retrain the junk filter is a more effective approach, and the section below covers domain-filtering options.
Blocking vs. Marking as Spam in iCloud
Blocking and marking as spam do different things and are easy to confuse.
Blocking stops a specific address and routes its messages to Trash (via iCloud.com rules) or Junk (via the Mail app). It doesn't affect iCloud's junk filter.
Marking as spam moves the message to your Junk folder and signals iCloud's junk filter to treat similar messages as junk in the future — it affects the filter broadly, but doesn't explicitly stop that specific address from reaching you.
Use blocking for a sender you never want to hear from again. Use marking as spam for unknown senders whose messages fit a spam pattern and you want the filter to learn from.
Frequently Asked Questions
How do I block an email address in iCloud?
The most reliable method is to create a rule in iCloud.com: open Mail → click the gear icon → Settings → Rules → Add a Rule. Set the condition to "is from [address]" and the action to "Move to Trash," then click Add. The rule runs server-side and applies across all your devices immediately.
How do I permanently block an email on iCloud?
Use iCloud.com rules — they persist indefinitely until you delete them and run server-side, so they don't depend on any device being on or the Mail app being open. The "Block Contact" feature in Apple Mail is processed at the app level and is less reliable for permanent blocking.
How do I block emails on iCloud on iPhone?
Open the email in the Mail app, tap the sender's name, tap the name next to "From" in the contact card, scroll down, and tap Block This Contact. This moves future messages from that address to your Junk folder. For a block that applies across all your devices, use the iCloud.com rules method above instead.
Why am I still getting emails from a blocked sender on iCloud?
If you blocked the sender in the Mail app (on Mac or iPhone), the block runs at the app level — emails can still be delivered by iCloud's server before the app filters them. Switch to iCloud.com rules (Settings → Rules → Add a Rule → Move to Trash) for server-side blocking that works regardless of which device you're using. If you already have a rule but emails still arrive, verify the sender address in the rule matches exactly.
What's the difference between blocking in Apple Mail and blocking on iCloud.com?
Apple Mail's "Block Contact" is client-side — it runs on the device where you set it up and only when that app is active. iCloud.com rules are server-side — they run in your iCloud account before the message is delivered, regardless of device. iCloud.com rules are more reliable for actually preventing messages from reaching your inbox.
Does blocking on iPhone sync to Mac or iCloud.com?
No. A block set in the Mail app on iPhone does not create an iCloud.com rule and does not sync to the Mail app on your Mac. Each device maintains its own blocked-contact list independently. For cross-device blocking, use iCloud.com rules.
How do I stop spam emails on iCloud?
Spam emails are typically routed to your Junk folder automatically by iCloud's filter. If spam reaches your inbox, you can either block the specific sender using an iCloud.com rule (which sends their messages to Trash) or mark the message as junk in the Mail app (which trains the junk filter to catch similar messages in the future). For persistent spam from multiple senders, see how to mark email as spam in Apple Mail.


