


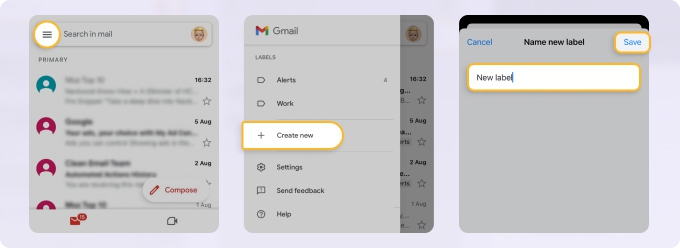
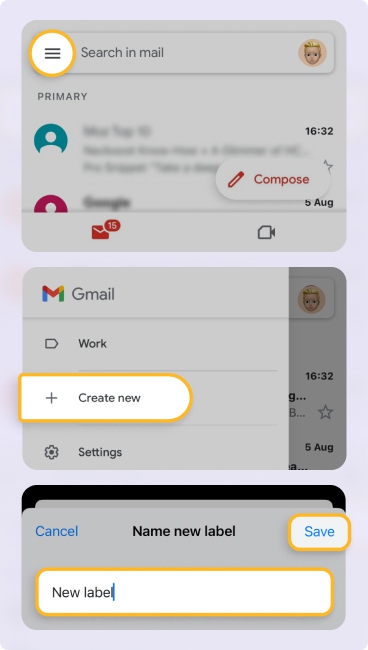
Create Folders in the Gmail Mobile App
To set up folders in the Gmail mobile app on iPhone, follow these steps:
- Tap the menu icon on the top left.
- Select + Create new in the Labels section.
- Enter a name for the label.
- Tap Save.
⚠️ As of this writing, you cannot create folders in Gmail’s app on Android. Instead, consider using Clean Email for Gmail on your Android device. You can set up folders and automatically move messages or use the built-in Smart Folders to manage messages on-the-go.

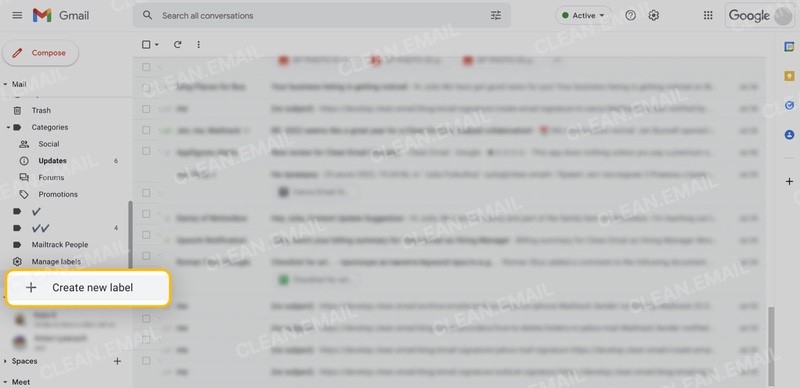
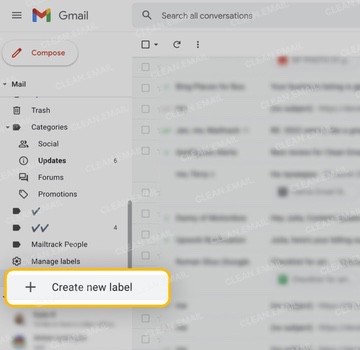
How to Create Labels in Gmail on the Web
You can create a new label in Gmail a few different ways, so you can use whichever is most comfortable for you.
- Sign into Gmail and do one of the following to create a label:
- Either click the plus sign next to Labels in the lower sidebar or click More → Create new label in the upper sidebar.
- Either select More → Manage labels in the upper sidebar or go to Settings → See all settings → Labels. Then, click Create new label.
- Click Labels in the top toolbar and pick Create new.
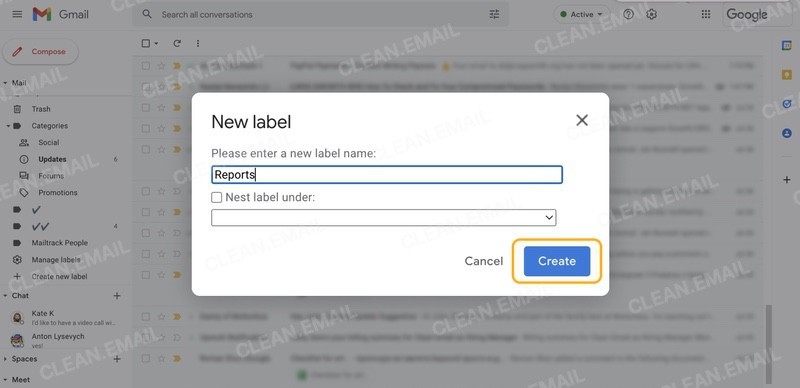
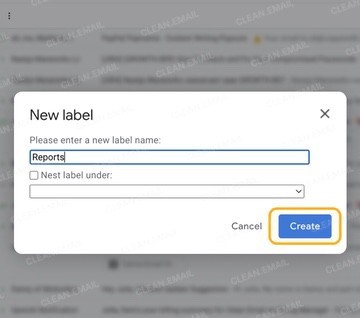
![How to create labels in Gmail]()
![How to create labels in Gmail]()
- Enter a label name.
- Optionally, check the box to nest the label and choose the parent label.
- Click Create.
Move Emails to Folders in Gmail Mobile
While you may not be able to create folders in Gmail on Android, you can move messages to folders. And of course, you can do this on iPhone as well.
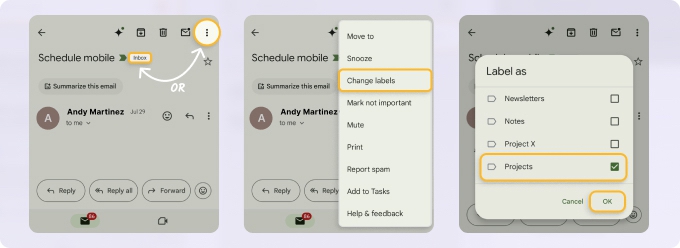
Move Emails on Android
- Open the message and do one of the following:
- Tap the three dots on the top right and pick Change labels.
- Tap the current label at the top of the email.
- Check the boxes for all labels you want to apply.
- Select OK to finish.

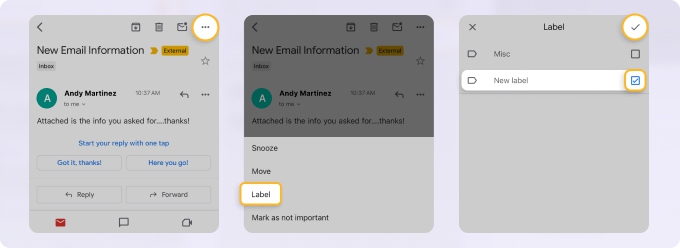
Move Emails on iPhone
- Open the message and tap the three dots on the top right.
- Select Label.
- Check the boxes for all labels you want to apply.
- Tap the checkmark to finish.

Keep in mind that moving an email to a folder (assigning a label) only applies to the current message on Android and iPhone.
Fortunately, you can create a folder and automatically move an email to it at the same time using Auto Clean in the Clean Email app.
Create Folders and Move Messages in the Clean Email App
Because you can create folders in the Clean Email mobile app, this is a great solution for Android users who want to use Gmail labels. Plus, it’s a convenient way to manage your inbox on Android or iPhone because you can automatically move incoming emails to the new folder with the Auto Clean feature.
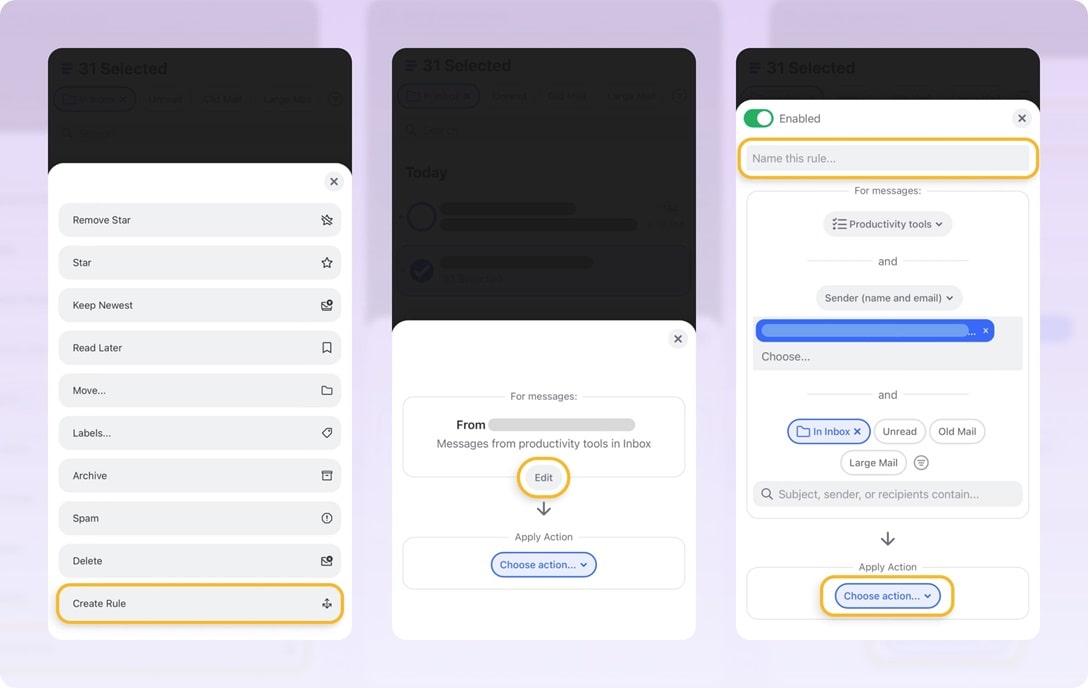
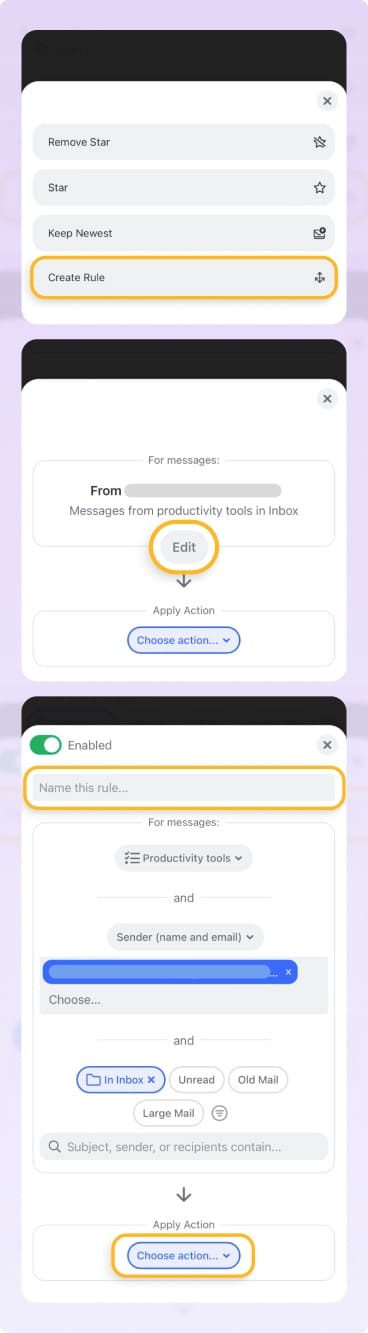
Select an email or message group and follow these steps:
- Tap More in the action bar at the bottom.
- Pick Create Rule.
- Open the Choose action menu and pick Move to.
- In the Choose or create folder menu, type the folder name and tap Create [name].
- Optionally, apply the rule to existing messages and select Create Rule.
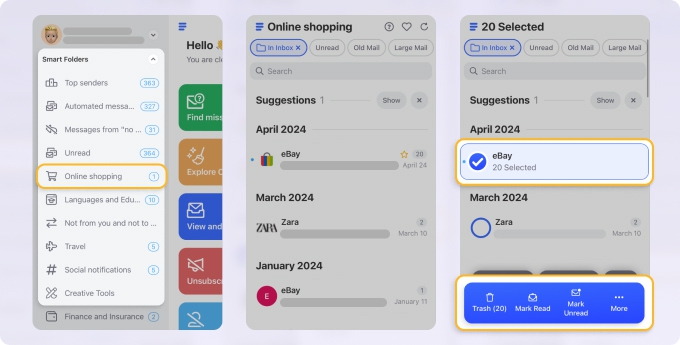
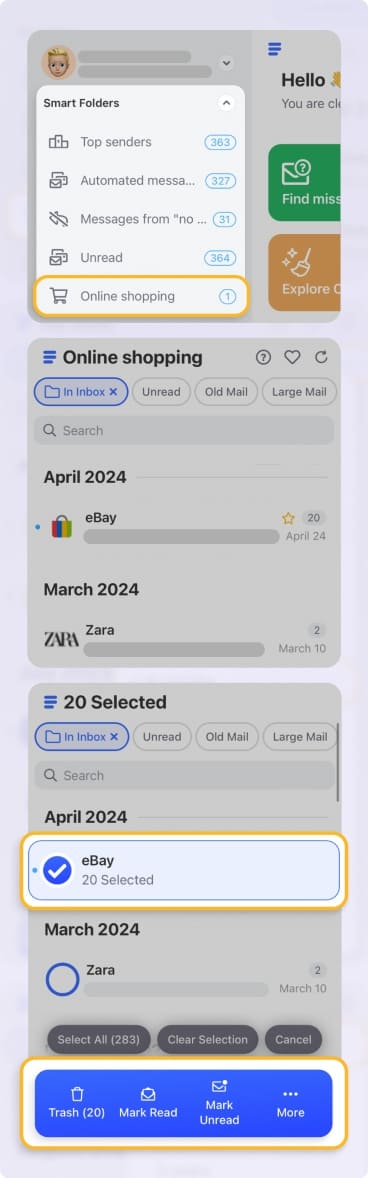
Quickly Find Emails With Smart Folders in Clean Email
Smart Folders are automatically set up for you and help you quickly spot messages and even act on them in bulk.
For instance, you’ll find Smart Folders for things like Online Shopping, Social Notifications, Productivity Tools, Food Delivery, and more. You’ll then see messages that the app identifies as these types inside the corresponding folder.
Best of all, you can use all features the same way in Clean Email on the web, desktop, and mobile app. There are no limits for certain tools or different steps to perform depending on where you use it like Gmail and similar apps. Give Clean Email a try and see for yourself!
Related guides:


