


How I Used Clean Email to Prepare for Exporting My Gmail Inbox
When I first considered creating a backup, my inbox had nearly reached 15 GB. After checking the Gmail email limits, I realized I needed to clean house before exporting anything.
But even if your inbox is considerably smaller than mine was, exporting an unorganized inbox is a recipe for future headaches. If you were to create a Gmail email backup right now, then I'm willing to bet that it would contain a ton of unwanted and spam messages whose presence would only complicate future recovery.
Fortunately, I found that the Clean Email app offered a perfect solution to quickly declutter my Gmail inbox before export. In fact, it took just three steps to turn chaos into order:
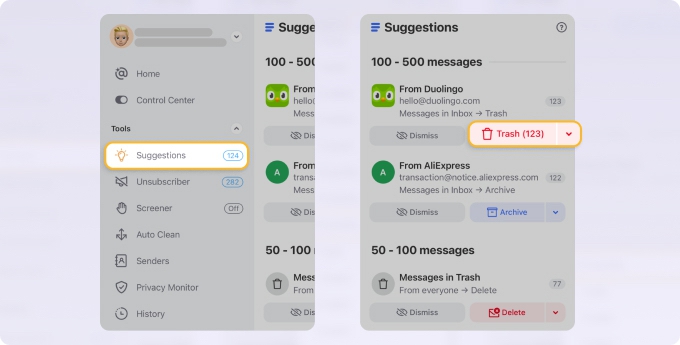
- The first thing I did was explore Clean Email's Cleaning Suggestions. This feature automatically identifies groups of similar emails that users commonly delete, such as old newsletters from companies I no longer engage with or automatic notifications from platforms I rarely use.
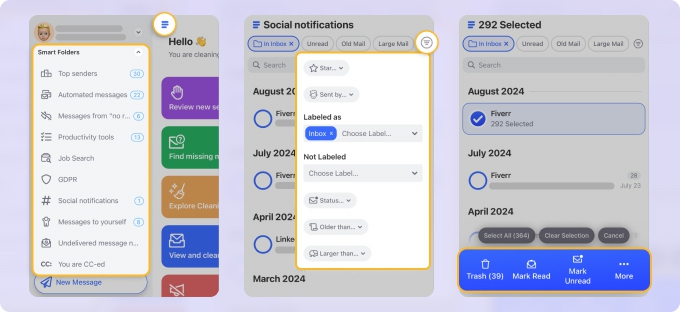
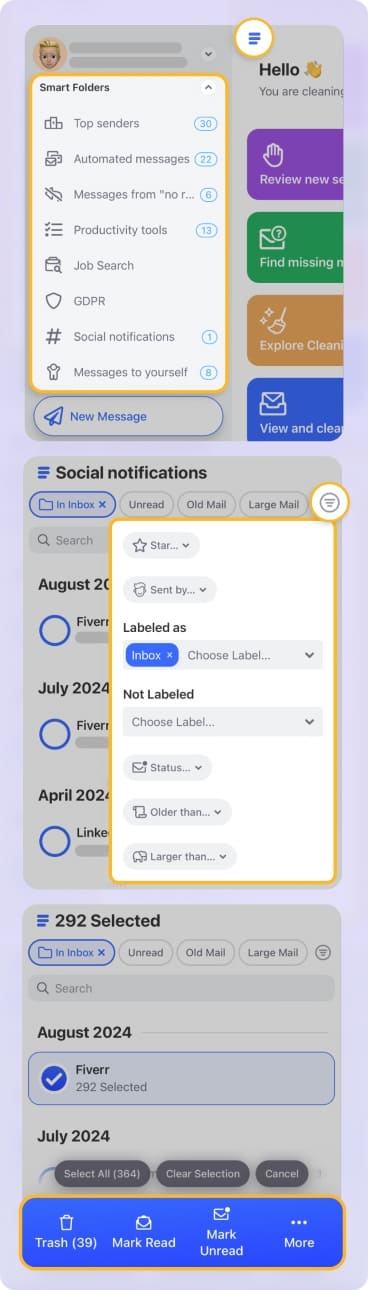
I was shocked to discover that almost 20% of my inbox consisted of these types of messages! - Next, I explored Clean Email's Smart Folders, which automatically organize emails into logical categories.
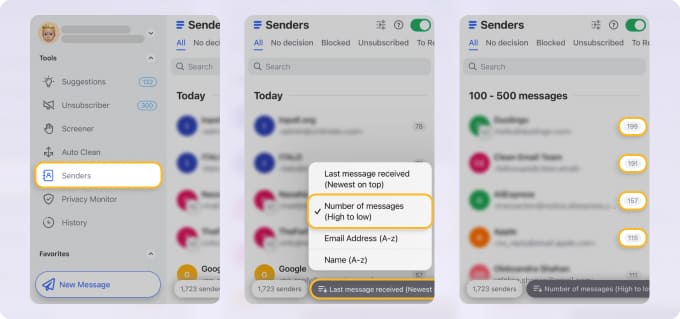
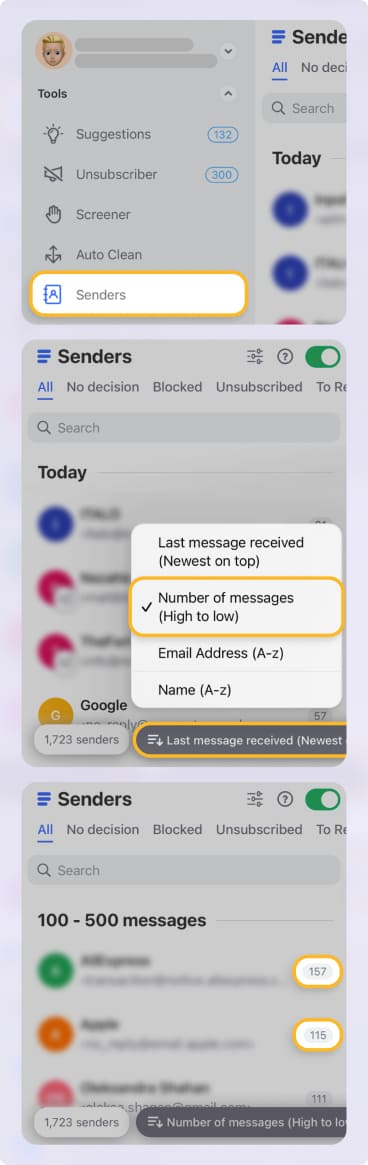
I focused specifically on folders containing messages I could delete without regrets, including GDPR and privacy policy updates, social media notifications, and delivery confirmations. - For my final cleanup phase, I opened the Senders page in Clean Email, where all emails are grouped by sender, and sorted these message groups using the "Number of messages (High to Low)" option to identify my top email sources.
I couldn't believe it when I saw that nearly 40% of my remaining emails came from just 15 senders!

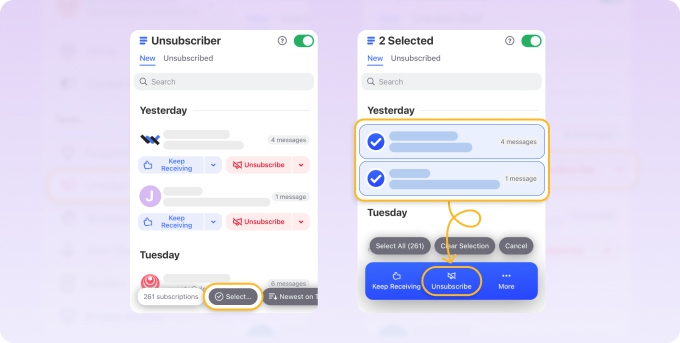
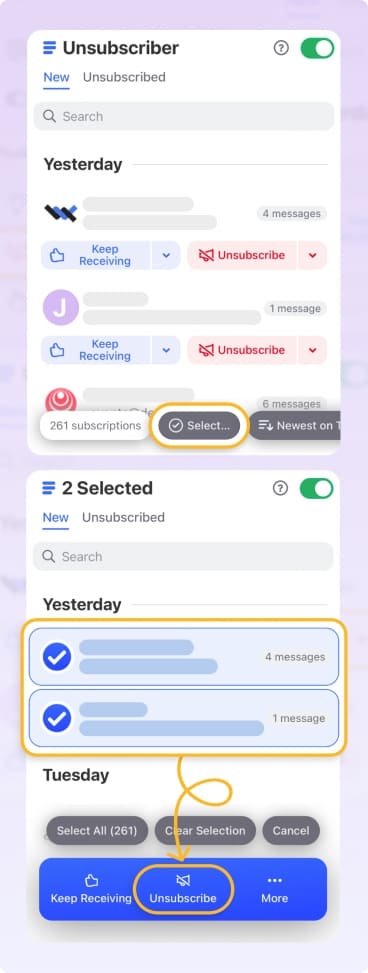
I also used this opportunity to see the list of email subscriptions I was still receiving and unsubscribe from those no longer relevant, which would prevent my newly-cleaned inbox from filling up again after the backup. Using the Unsubscriber feature, I was able to get rid of all unwanted subscriptions without having to fight deceiving unsubscribe forms.
With this thorough cleanup complete, I had reduced my Gmail storage usage by over 50%. Now I was ready to export all Gmail emails that truly mattered.

Approach 1: Download Your Gmail Data in the MBOX Format
My top recommendation for Gmail email backup is Google Takeout. This native Google tool provides the most comprehensive way to download all Gmail emails in the industry-standard MBOX format, complete with all attachments, labels, and metadata intact.
Best of all, this method doesn't require you to share your credentials with any external services, so you can safely use it even if you consider your messages to be highly sensitive.
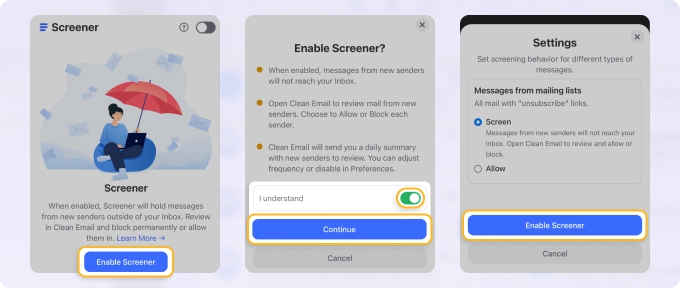
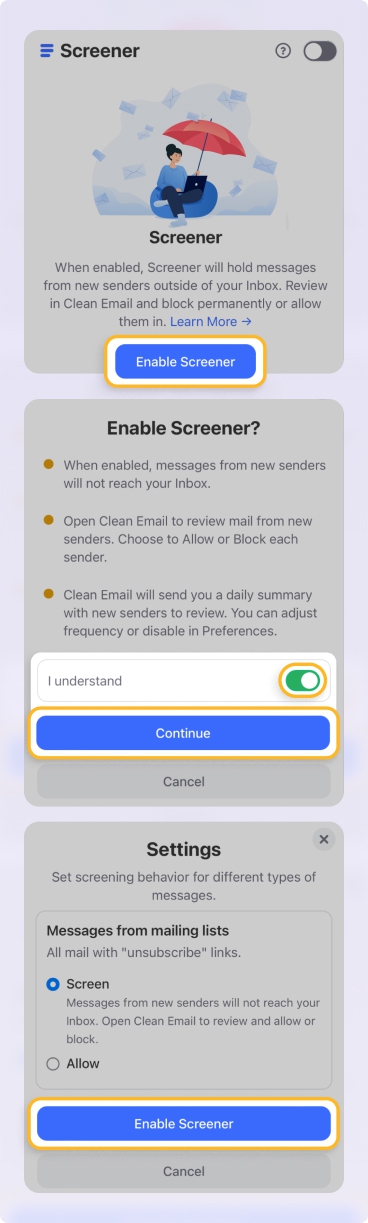
💡Tip: Before initiating your Google Takeout export, consider activating Clean Email's Screener feature. Since the backup can take several days to complete, enabling Screener will hold messages from new senders outside your Inbox during this time, preventing your backup from being polluted with unsolicited emails that arrive during the export process.
To download your Gmail data in the MBOX format using Google Takeout, you need to:
- Visit Google Takeout.
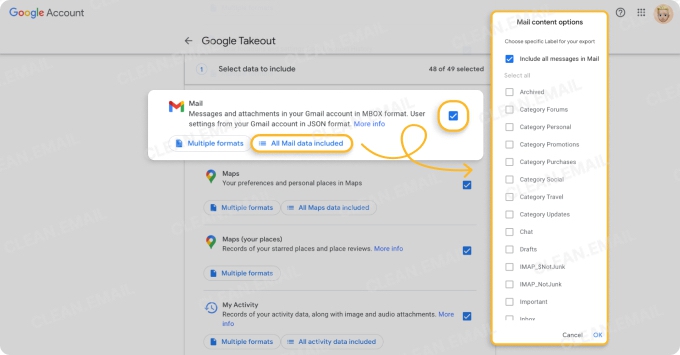
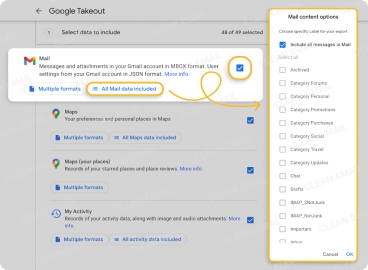
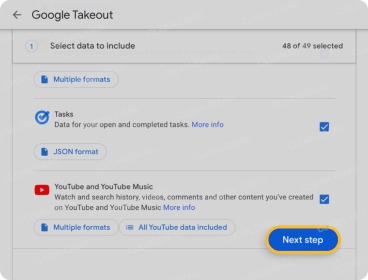
- By default, all Google services are selected. Click Deselect all and then check only Mail.
- For a more targeted backup, click the All Mail data included button to choose specific labels to export.
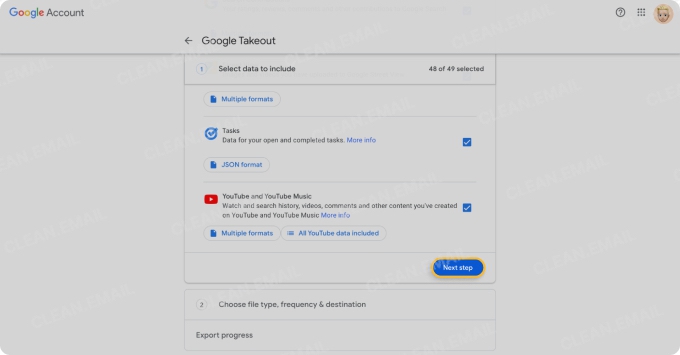
- Scroll down and click Next step.
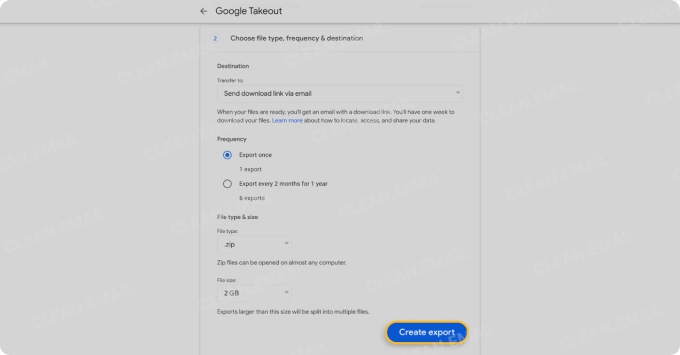
- Choose your preferred delivery method (I recommend the Send download link via email option).
- Select your file type and size (I chose .zip and 2GB per archive).
- Click Create export.

Google will then process your request, which can take anywhere from a few hours to several days depending on the size of your inbox. In my case, with over 10 years of emails, it took about 36 hours to receive the download link.
Keep in mind that the download link will expire after about a week (for security reasons and also because Google doesn't want to keep piles of exported data on its servers indefinitely), so don't take too long to click it otherwise you might miss the deadline.
Unfortunately, the MBOX format isn't directly readable, so you'll need to use a third-party application to read your messages. I recommend Mozilla Thunderbird—a free, open-source mail client available for Windows, Mac, and Linux—because it works perfectly for this purpose:
- Download and install Mozilla Thunderbird.
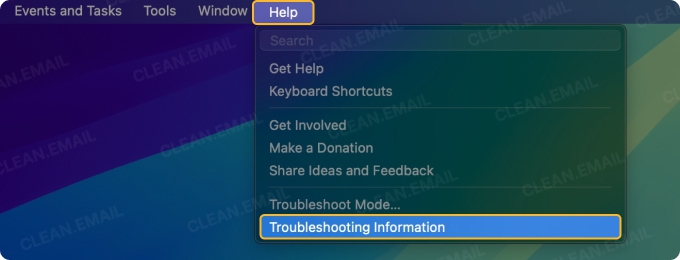
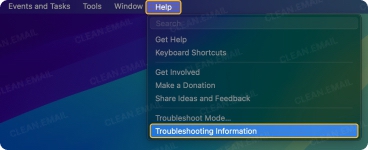
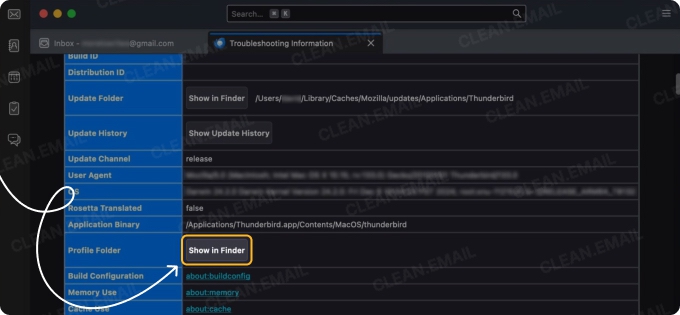
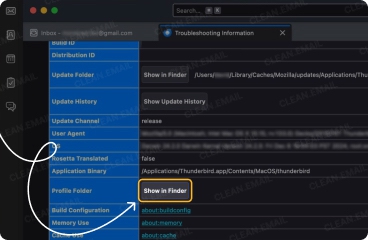
- Launch Thunderbird and access the Help menu.
- Select Troubleshooting Information.
- Click the Open Folder or Show in Finder button next to Profile Folder.
- Close Thunderbird completely (⚠️ important for the next steps).
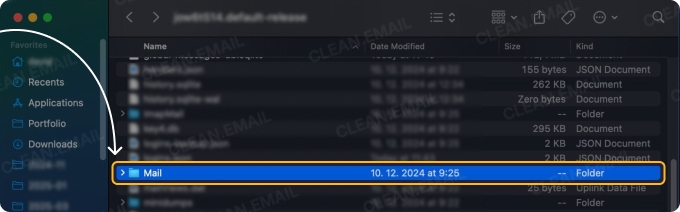
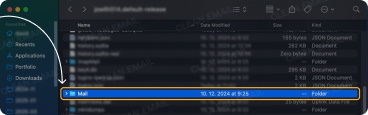
- In the opened profile folder, navigate to the Mail folder, then Local Folders.
- Copy your MBOX files into this location.
- Restart Thunderbird.
⚠️ Important: Rename any files with .mbox extensions to remove that extension (e.g., change "inbox.mbox" to just "inbox")
After restarting, you'll find all your emails neatly organized in Thunderbird's Local Folders section. This gives you a complete, searchable archive of your Gmail communications that works even without an internet connection.
If you ever need to restore these emails to Gmail or transfer emails between Gmail accounts, Thunderbird can help with that too. You simply need to set up your Gmail account in Thunderbird using IMAP, select the emails you want to restore from the Local Folders, and drag and drop them to the appropriate folder in your Gmail account.
Approach 2: Use Outlook to Download Gmail Inbox as a CSV File
While the MBOX format is comprehensive, it requires specialized software to read. If you want to download your Gmail inbox in a format that's universally accessible on any platform or device without additional third-party software like Thunderbird, exporting Gmail emails to CSV is an excellent alternative.
CSV (Comma-Separated Values) files can be opened with virtually any spreadsheet application or even basic text editors. The only downside is that Gmail doesn't offer a native option to export Gmail emails to CSV. However, Microsoft Outlook provides this functionality, and you'll only need it temporarily for the export process itself.
Before you can use Outlook to download multiple emails from Gmail as a CSV file, you'll need to prepare your Gmail account for external access:
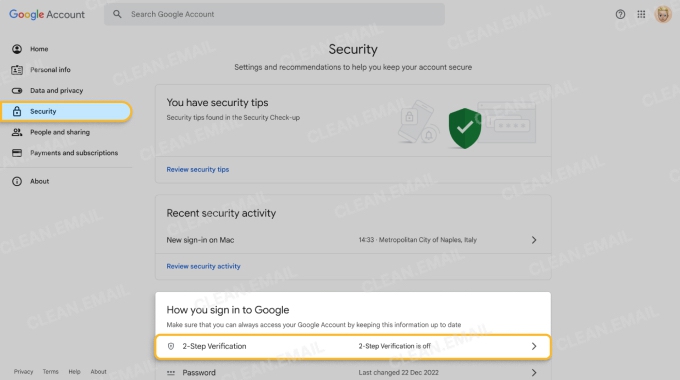
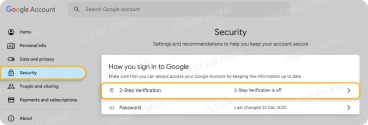
- Enable two-factor authentication on my Gmail account by going to your Google Account and then navigating to Security and 2-Step Verification.
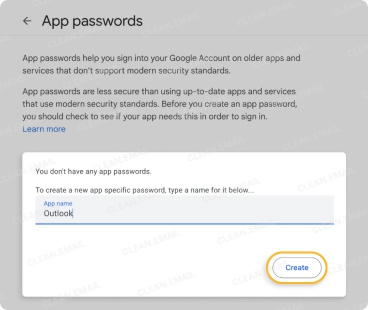
- Go to the App passwords settings page and generate an app password for Outlook.
- Save the password in a password manager or in some other suitable way (you'll need it soon).

With your security credentials ready, you can proceed to connect your Gmail account to Outlook:
- Install the desktop version of Outlook for Windows (the option we need isn’t available in the Mac version) if you haven't already and launch it.
- Click on the File tab and choose the Add Account option.
- Add your Gmail account.
- When prompted for a password, paste the app password generated earlier (⚠️ not your regular Gmail password).
📌 It took a few minutes for my emails to start syncing, with older messages appearing gradually. If your inbox is large, make sure to clean up Gmail storage using Clean Email to speed up this process.
When the syncing is over, you can export Gmail emails to CSV:
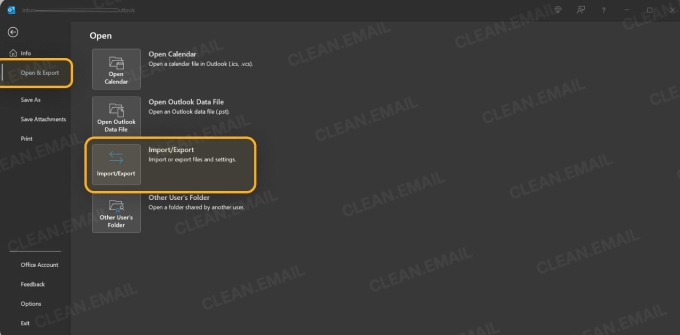
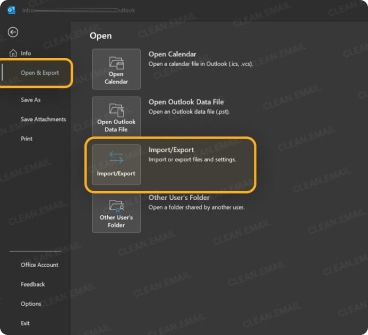
- In Legacy Outlook, click on File → Open & Export → Import/Export.
- In the Import and Export Wizard, select Export to a File and click Next.
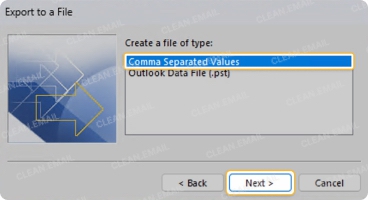
- Choose Comma Separated Values as the file type and click Next.
- Select the Gmail folder you want to export (such as Inbox or a specific label) and click Next.
- Use the Browse button to select a destination location and filename for your CSV file.
- Click Finish to begin the export process.

After exporting, you can open the CSV file in Excel or even Notepad. The file should contain columns for information like the subject line or date and time received.
💡 Tip: Make your CSV exports more useful by setting up Clean Email's Auto Clean rules to automatically label and categorize messages before exporting. When you open your backup in Excel, these consistent labels enable you to create informative pivot tables that reveal communication patterns, response rates, and productivity trends (something AI tools like Gemini can help you with a lot).
Approach 3: Export Your Gmail Messages Using a Third-Party Tool
You can also turn to specialized third-party tools designed specifically for Gmail backup. There are many such tools available on the market, but I've had particularly good experiences with Kernel Gmail Backup, which many other users seem to appreciate as well.
The software supports backing up both personal Gmail and Google Workspace accounts, and it can preserve all email metadata, attachments, and folder structures. In terms of compatibility, it works with virtually all modern Windows operating systems including Windows 11, 10, 8.1, 7, and various Windows Server editions (2022 through 2003), though unfortunately there's no native version for Mac or Linux users.
To export your Gmail messages using Kernel Gmail Backup:
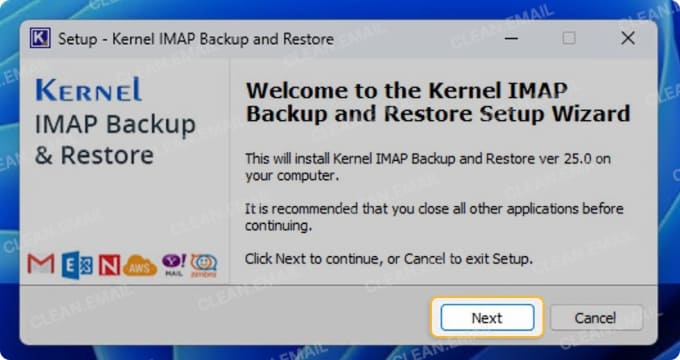
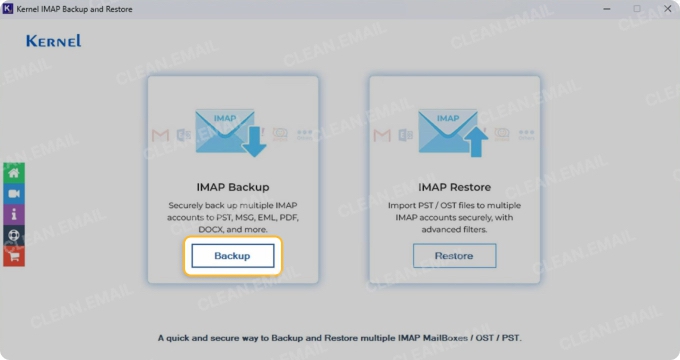
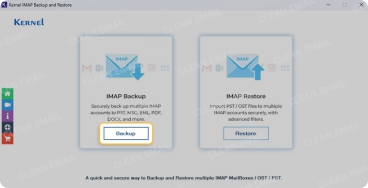
- Download and install the tool from its official website.
- Launch the application and click the Backup button to begin.
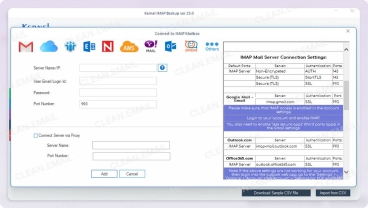
- Click the Add button and enter your Gmail account details including server information (which the tool typically auto-fills correctly).
- Select which folders you want to back up—you can choose specific labels or your entire Gmail inbox.
- Apply any filters you might want, such as date ranges or options to exclude empty folders.
- Choose your preferred output format. The tool supports multiple formats including PST, MSG, EML, PDF, DOC, and HTML—giving you flexibility in how you save all emails from Gmail.
- Select a destination folder where you want to store your backup. Click to begin the process and monitor the progress until completion.

⚠️ The free trial version of Kernel Gmail Backup limits you to backing up only 10 items per folder. For a complete backup of your Gmail account, you'll need to purchase a license. This limitation is common among third-party email backup solutions, which is why I've presented this option as the final approach after covering Google's native tools and Microsoft Outlook.
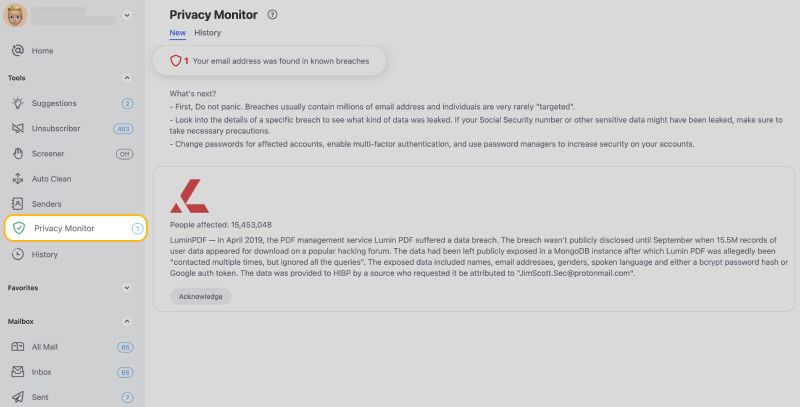
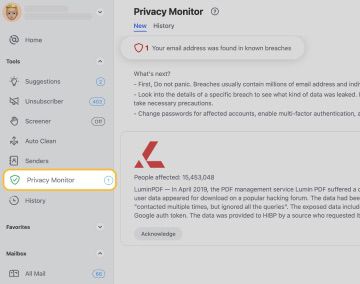
💡 Tip: Most reputable backup tools maintain strong security practices, but there's always some level of risk when sharing access to your email. This is where Clean Email's Privacy Monitor feature becomes invaluable—it regularly checks your email address against known data breaches and security incidents, alerting you if your information has been compromised.
Key Takeaways
There's no one-size-fits-all solution when it comes to learning how to download multiple emails from Gmail. Your perfect approach depends entirely on what you value most:
- Google Takeout provides the most secure native method for downloading Gmail emails in bulk, but requires additional software to view the MBOX files.
- Outlook offers a user-friendly way to export Gmail emails to CSV format, which is universally accessible on almost any device.
- Third-party tools like Kernel Gmail Backup provide additional features and format options but may require a paid license for complete backups.
Whichever method you choose, always clean and organize your inbox before creating a backup to save time and storage space. Of course, you should continue maintaining a clean inbox going forward with the help of Clean Email since backups are useful only if they're current, so this shouldn't be your last one.
FAQs
How to export emails from Gmail?
To extract emails from Gmail, your best option is to use Google Takeout. It lets you export all messages—including attachments, metadata, and labels—in the MBOX format. After selecting “Mail” in Google Takeout and customizing your export settings, you’ll receive a downloadable file containing your Gmail data. For better organization, consider cleaning your inbox first with Clean Email so your export doesn’t include outdated or irrelevant messages.
How to backup Gmail emails with attachments?
Google Takeout is ideal for backing up Gmail emails with attachments, as it preserves your messages in full, including files, formatting, and metadata. Alternatively, Kernel Gmail Backup also saves attachments and lets you choose output formats like PDF, EML, or PST. Just be sure your inbox is decluttered beforehand to avoid backing up unnecessary content.
How to download multiple emails from Gmail as PDF?
If you're looking to bulk download Gmail emails as PDFs, third-party tools like Kernel Gmail Backup are your best bet. This software lets you select Gmail folders or labels and export messages in PDF format, with attachments and structure intact. Gmail itself doesn’t offer native PDF exporting, so a dedicated tool is necessary for this task.
How to download the entire Gmail inbox?
To download your entire Gmail inbox, use Google Takeout and select the Mail option. You can choose to export all mail or specific labels. This generates an MBOX file containing your complete inbox, which you can open in email clients like Thunderbird. Before starting, use Clean Email to reduce storage usage and organize your inbox, making the backup more efficient.
How to download the entire email thread from Gmail?
To download a full email thread from Gmail, forward the conversation to another email, print it to PDF, or use third-party tools that support thread-level export. While Gmail doesn’t offer a one-click export for threads, tools like Kernel Gmail Backup allow you to select and export entire threads in formats like PDF or HTML.
How to save all Gmail emails?
Google Takeout is the most secure and comprehensive tool to save all emails from Gmail. It allows you to download your entire inbox in MBOX format, preserving labels, attachments, and metadata. Pair this with Thunderbird for offline access and organization. Cleaning your inbox beforehand using Clean Email ensures your backup only contains useful content.
How to copy emails from Gmail?
To copy emails from Gmail, connect your Gmail account to an email client like Mozilla Thunderbird or Outlook using IMAP. Once connected, you can move or copy emails to local folders or even export them in different formats, such as CSV or MBOX. This method gives you flexibility without modifying your Gmail data.


