


Key Takeaways
- You can create filters from the search bar, Gmail settings, or directly from an existing email — but only on desktop.
- Gmail's native filters don't self-update, require manual maintenance, and can't be created on mobile.
- For users who want automation without manual rule-building, tools like Clean Email can handle inbox organization with minimal setup.

What Are Gmail Filters and How Do They Work?
A Gmail filter is a rule that matches incoming emails against conditions you set — the sender's address, keywords in the subject or body, whether there's an attachment, email size, date, and more.
When a match is found, Gmail automatically takes an action: applying a label, skipping the inbox, marking the email as read, starring it, forwarding it, or deleting it.
Filters run on every new email that meets your criteria. You can also apply them retroactively to existing emails by checking Also apply filter to matching conversations during setup.
How to Create a Gmail Filter: 3 Methods
All three methods lead to the same setup window, so choose whichever fits your starting point.
Method 1: From the search bar (fastest)
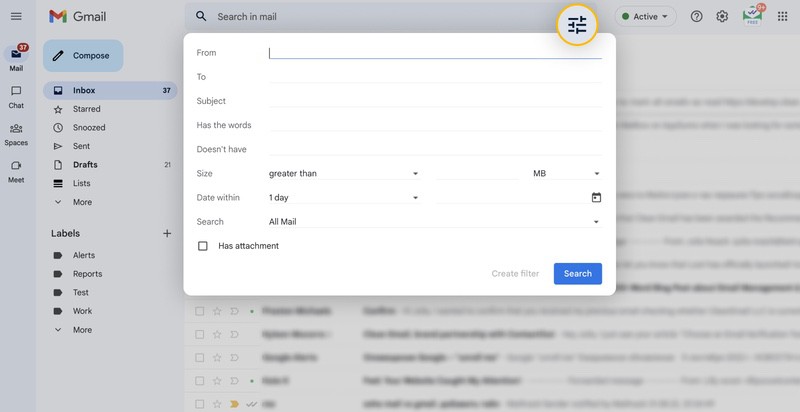
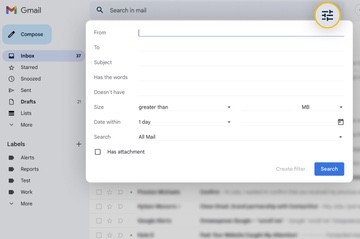
- Click the filter icon at the right end of the Gmail search bar.
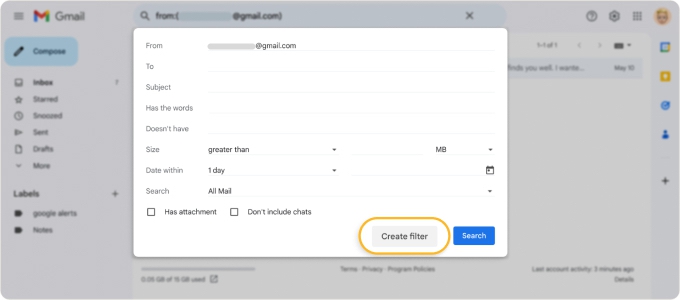
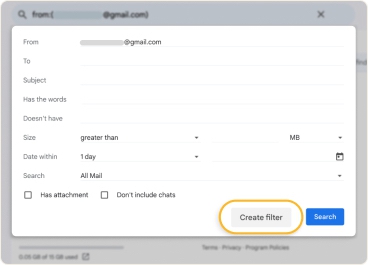
- Enter your criteria — sender, keywords, subject, date range, attachment presence, or size.
- Click Create filter.
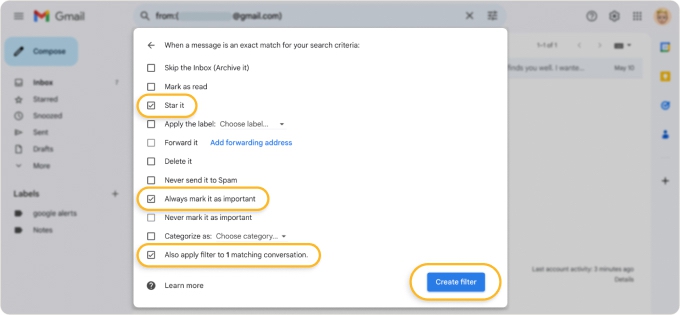
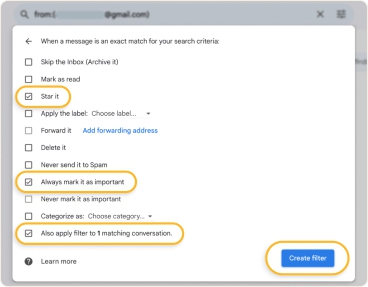
- Select the action(s) Gmail should take on matching emails.
- Optionally check Also apply filter to matching conversations to run it on existing emails too.
- Click Create filter to save.
Method 2: From Gmail settings
- Click the gear icon (top right) → See all settings.
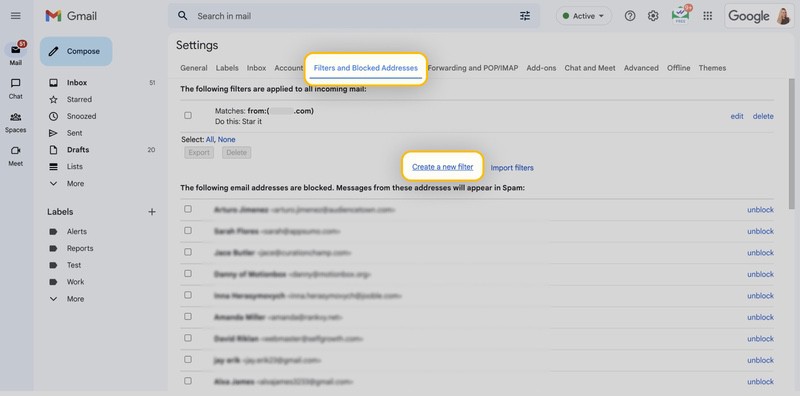
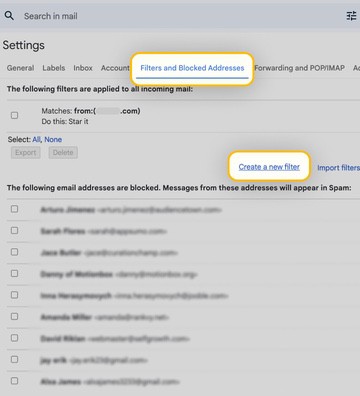
- Go to the Filters and Blocked Addresses tab.
- Click Create a new filter.
- Follow steps 2–6 above.
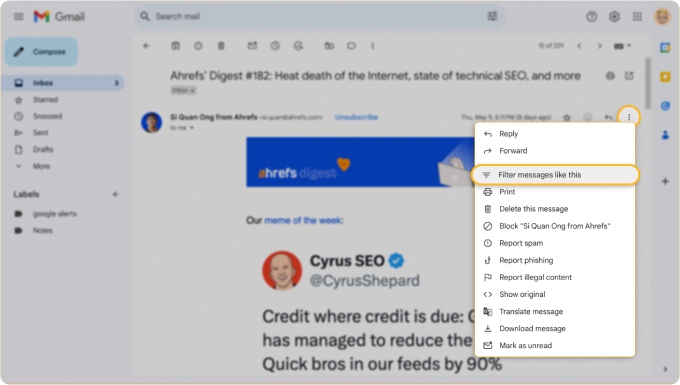
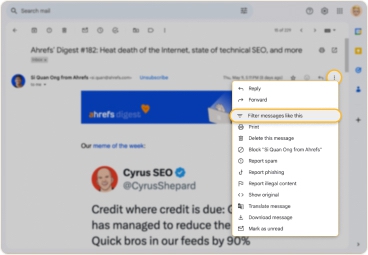
Method 3: From an existing email
- Open the email and click the three-dot menu in the top right corner.
- Select Filter messages like this — the sender's address pre-fills automatically.
- Add extra criteria if needed, define your actions, and save.
💡 Note: Gmail filters can only be created on desktop. The mobile app doesn't support it — not even through a mobile browser. Any filters you create on desktop will still apply to incoming emails on your phone.
Read more: Advanced rules in Gmail and their real use cases.
When Should You Use Gmail Filters?
Filters work best for predictable, recurring email patterns: newsletters from the same sender, automated receipts, weekly reports, software notifications. If you can describe the pattern in a sentence, a filter can handle it automatically.
They're less suited to one-off inbox cleanup or large mixed-content backlogs. If your inbox is already overloaded, cleaning up Gmail first before setting up filters will get you better results — rules work more cleanly on a tidy starting point.
Here's how filters look in practice:
- Newsletters and marketing emails: Filter emails containing "unsubscribe" in the body → Skip inbox → Apply label "Reading List." You'll read them when you choose, not every time they arrive. You can also unsubscribe from emails in Gmail for senders you no longer want at all.
- Receipts and order confirmations: Filter subject lines containing "order confirmation" or "your receipt" → Mark as read → Apply label "Receipts." They're archived, organized, and easy to search when you need them.
- Work project threads: Filter emails with a specific project name in the subject line → Star it → Apply label "Project X." Nothing important gets buried in general clutter.
- Tool notifications (Slack, Jira, GitHub): Filter by sender domain → Skip inbox → Apply label. You can also sort Gmail by sender to review these in batches rather than one ping at a time.
What Are the Limitations of Gmail Filters?
Gmail filters are powerful, but they come with real constraints worth understanding before you build a system around them:
- No mobile creation. You're tied to a desktop browser to set them up.
- Manual setup for every rule. There's no bulk-create option, so building many filters gets time-consuming fast.
- They don't self-update. If a sender changes their email address or subject line format, the filter breaks silently and you won't know until something's missed.
- Maintenance is ongoing. Filters accumulate. Old rules for past senders, expired projects, or previous jobs stay active unless you manually remove them.
- No conflict detection. Multiple overlapping filters can produce unexpected results without any warning.
When Gmail Filters Aren't Enough: Use Clean Email
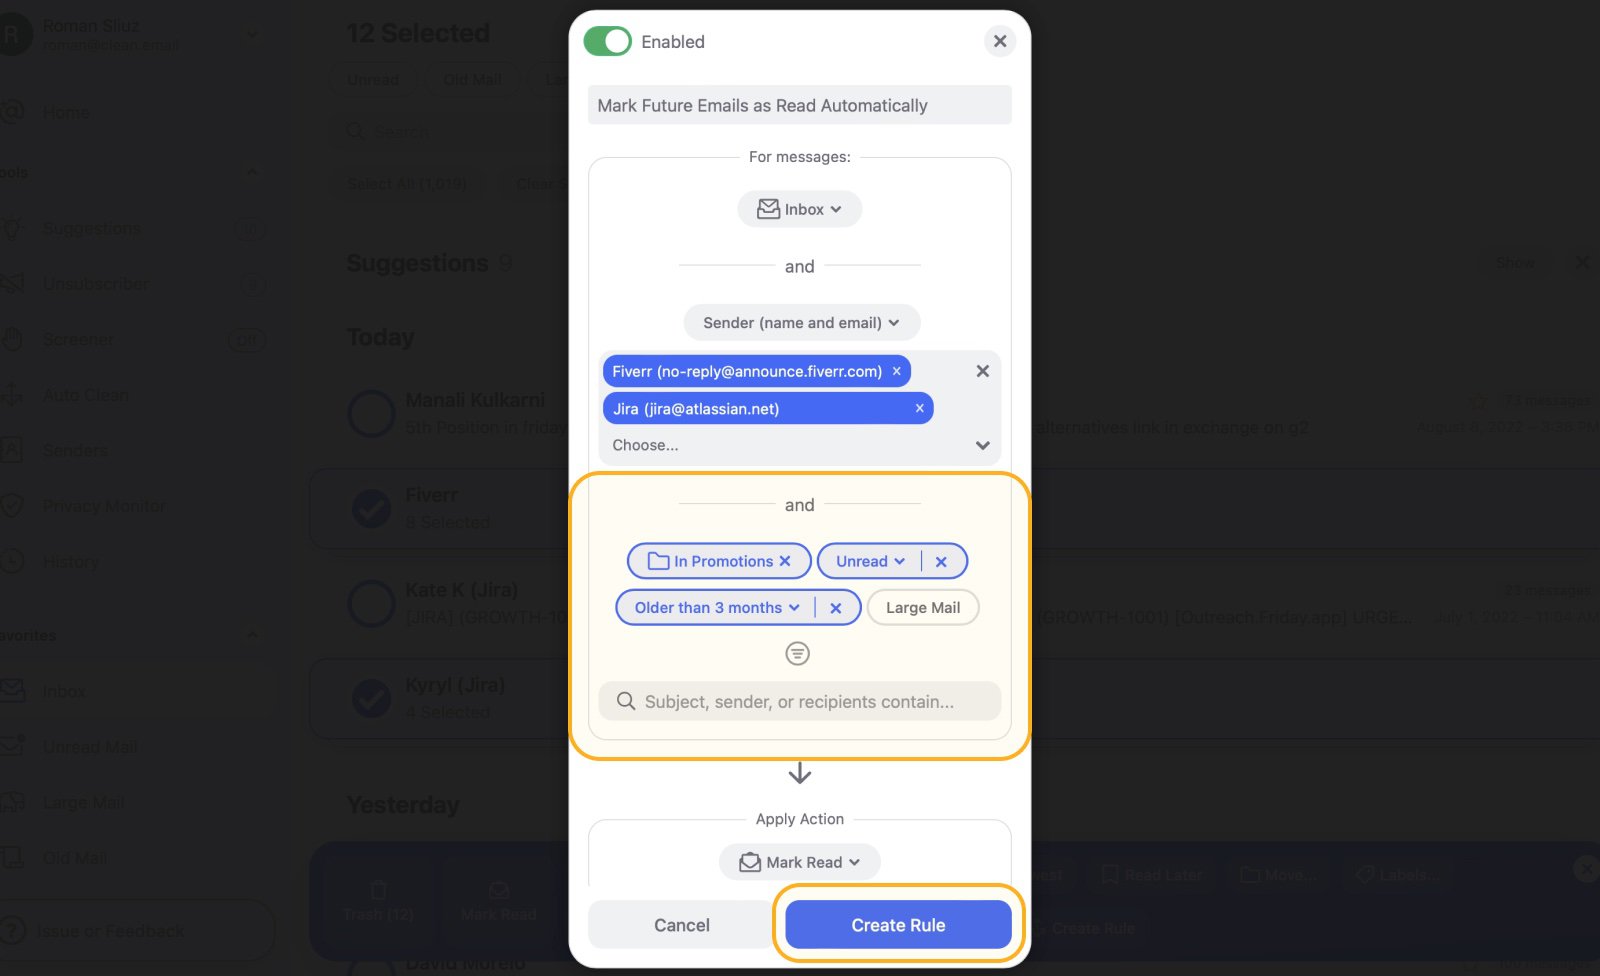
For users dealing with high email volume or who want automation without manual rule-building, Clean Email takes a different approach.
It automatically groups your emails into Smart Folders — newsletters, receipts, social notifications, and more — with no setup required.
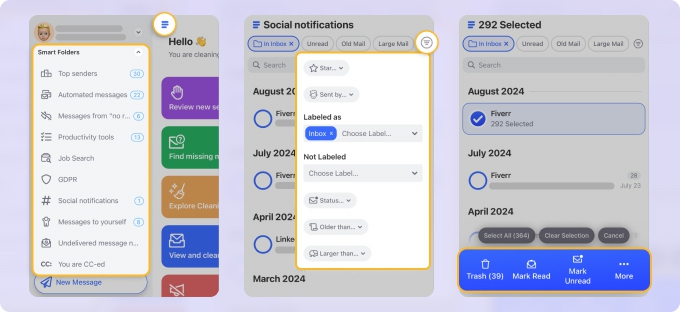
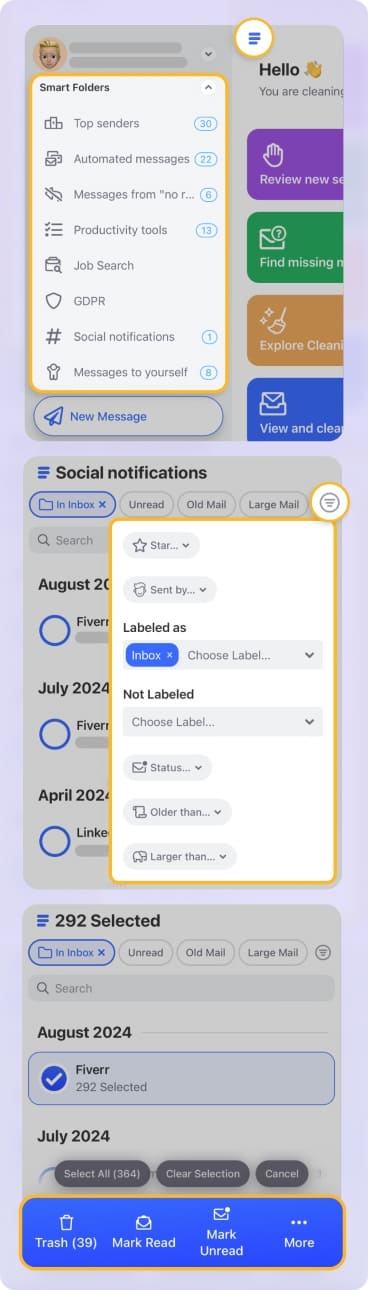
The app’s Auto Clean feature builds ongoing rules based on your actions, and bulk management lets you handle hundreds of emails at once. Unlike Gmail's native filters, everything works fully on mobile. Try Clean Email free with your Gmail account on any device.
How to Manage, Edit, and Delete Gmail Filters
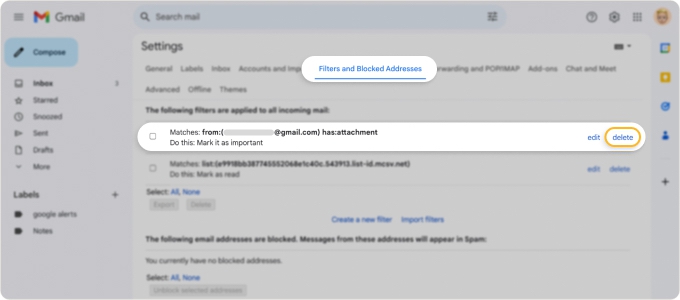
To edit or delete existing filters, go to Settings → Filters and Blocked Addresses. Click edit to adjust criteria or actions, or delete to remove a rule.
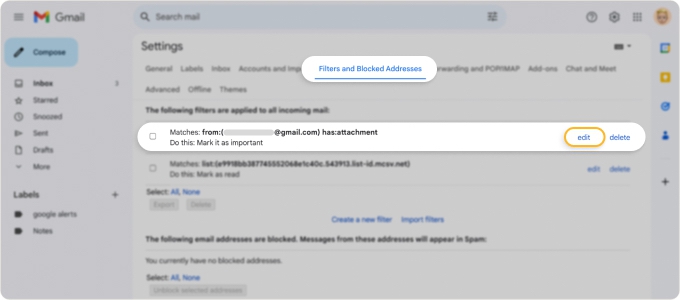
After making your changes, click Update Filter to save.
Reviewing your filters every few months is good practice — stale rules are easy to overlook and can cause unexpected behavior.
You can also export all your filters as an XML file and import them into another Gmail account via the same tab, which saves significant time if you manage multiple accounts with similar inbox habits.
Frequently Asked Questions
How do Gmail filters differ from labels?
Filters are rules that act on emails automatically — archiving, labeling, deleting, or routing them. Gmail labels are organizational tags, similar to folders, that help categorize emails. Filters often apply labels, but they serve different functions.
Can I apply a filter to emails I've already received?
Yes. When creating a filter, check Also apply filter to matching conversations to run it on your existing inbox, not just future messages.
Can I create Gmail filters on my phone?
No. Gmail's filter creation requires a desktop browser. Filters you set up on desktop will still process emails arriving on mobile — you just can't create or edit them from the app.
How do I view all my active Gmail filters?
Go to Settings → Filters and Blocked Addresses. All active filters are listed there, with options to edit or delete each one.
What happens if two Gmail filters conflict?
Gmail applies filters in the order they were created. If two rules target the same email and give conflicting instructions, the earlier rule generally takes precedence — though behavior can be inconsistent. It's best to audit overlapping filters regularly.
How many Gmail filters can I create?
Gmail allows up to 1,000 filters per account. In practice, filter lists become difficult to manage well before that limit — which is another reason to consolidate rules using OR operators wherever possible.


