Key Takeaways
- Outlook’s native tools (folders, rules, flags, and templates) handle most inbox management tasks without any third-party apps.
- Rules are the most powerful native feature: set them up once and Outlook automatically sorts, deletes, or moves messages that match your criteria.
- Some features are desktop-only (Search Folders, notification settings) and others are web-only (Sweep, Like button) – knowing which is which saves time.
- View settings like Conversation View and the To-Do Bar change how you interact with email daily and are worth configuring once.
- When native Outlook tools aren’t enough (particularly for Outlook.com accounts or multi-device management) the Clean Email app extends automation across all your devices.

Best Ways to Organize and Manage Outlook Emails
Microsoft provides a number of features for organizing emails in Outlook and keeping your mailbox clutter-free moving forward.
With the following list of Outlook email organization and management tips, you can use just one or two of them, or opt for a combination of several to organize emails effectively.
1. Perform an Initial Cleanup
Before we show you the best ways to organize your emails, consider an initial cleanup of your inbox to remove subscriptions and spam. You can unsubscribe from newsletters and promotional messages you no longer want and mark emails that are spam to automatically send them to the Junk folder.
You’ll then have a tidy inbox, ready for your Outlook email organization to begin!
Unsubscribe
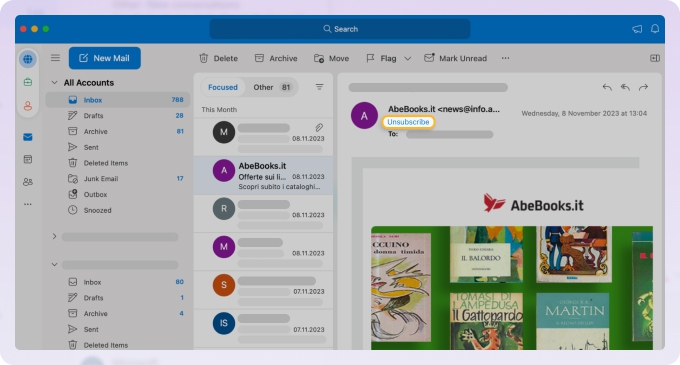
To unsubscribe from emails in Outlook on the web or your desktop:
- Select or open an email you no longer want to receive.
- Click Unsubscribe at the top.
- Choose OK in the pop-up window to confirm.
Mark Spam
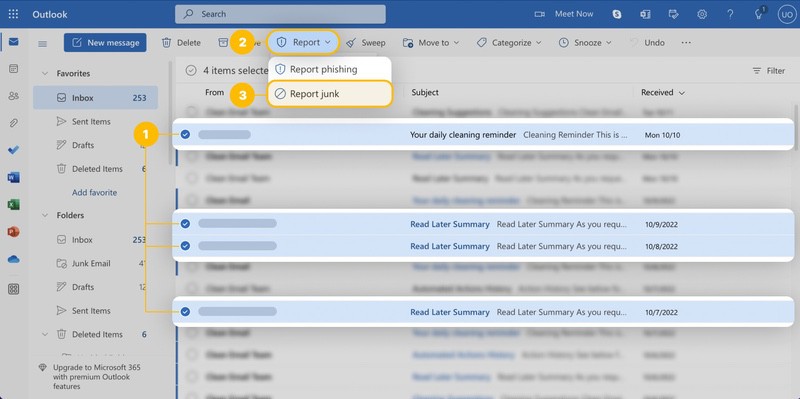
To mark a message as spam in Outlook on the web, select the email and either right-click and move to Report or open the Report menu in the toolbar. Then, choose Report Junk.
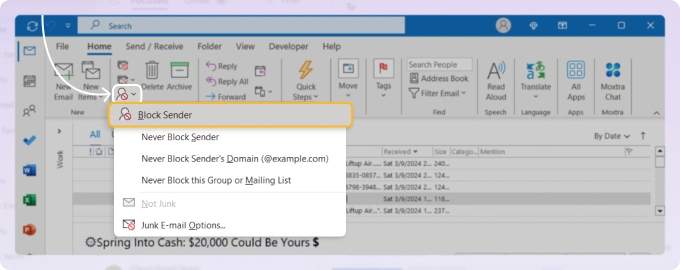
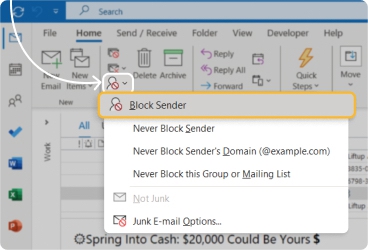
To mark a message as spam in the Outlook desktop version, select the email and either right-click and move to Junk or open the Junk menu on the Home tab. Then, choose Block Sender.
2. Take Advantage of the Focused Inbox
The Focused inbox in Outlook provides you with a simple way to see your most important emails separately. Less significant messages remain out of view but are still easy to access using the Other tab.
To turn on the Focused Inbox on the web: Settings → Mail → Layout → Sort messages into Focused and Other.
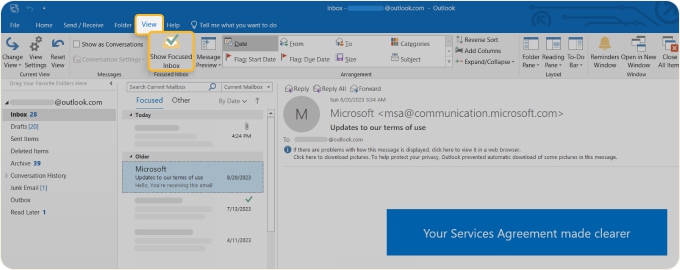
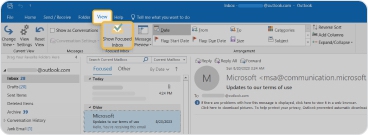
To turn on the Focused Inbox on your desktop, go to the View tab and click Show Focused Inbox.
You can then switch between the tabs for Focused and Other at the top of your inbox.
💡 Tip: If, on the contrary, you want to set up an Outlook Unified Inbox, read our article on how to do it.
3. Use Outlook Folders
To keep messages neat and tidy in Outlook, you can move them into folders. This allows you to simply open a folder to view the emails within it. Plus, if you set up inbox rules, you can automatically move messages into folders, which we’ll walk through in the next section.
While you can name and organize Outlook folders any way you like, you might consider creating them for an email triage scenario.
Consider folders such as:
- Important: Emails requiring an immediate action or response.
- Information: Emails that are informational only, requiring no action or response.
- Investigate: Emails requiring time to review or research before acting or responding.
With this method, you can sort emails into folders as soon as they arrive and then view the folders as needed.
To create a folder in Outlook on the web:
- Expand Folders in the left-hand menu.
- At the bottom of the folder list, choose Create new folder.
- Enter the folder name and click Save.
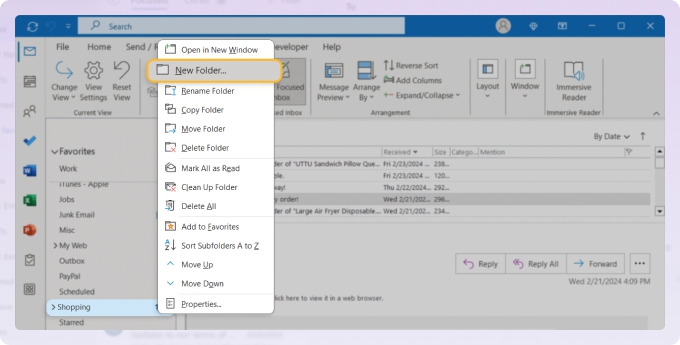
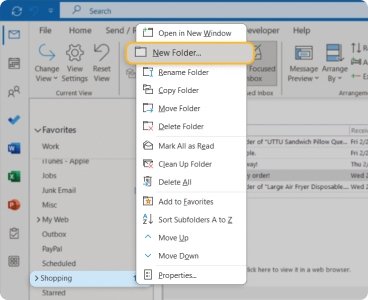
To create a folder in Outlook on your desktop:
- Make sure the navigation pane is open on the left.
- For a main folder, right-click your email account and choose New Folder.
- For a subfolder, right-click a main folder and choose New Folder.
- Enter the folder name and press Enter.
4. Set Up Inbox Rules
You can set up a rule to move an email, flag a message, or assign a category, and let Outlook take care of the messages moving forward. Let’s look at an example.
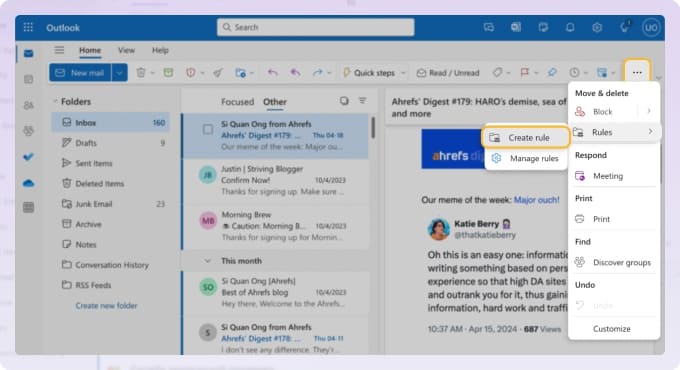
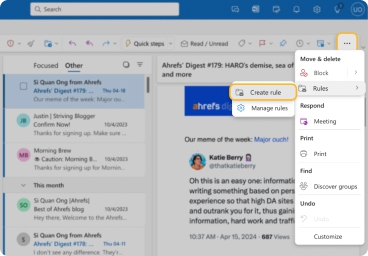
To move an email to a folder based on the sender in Outlook on the web:
- Open the email and click More options (three dots) on the top right of the message.
- Pick Rules → Create rule.
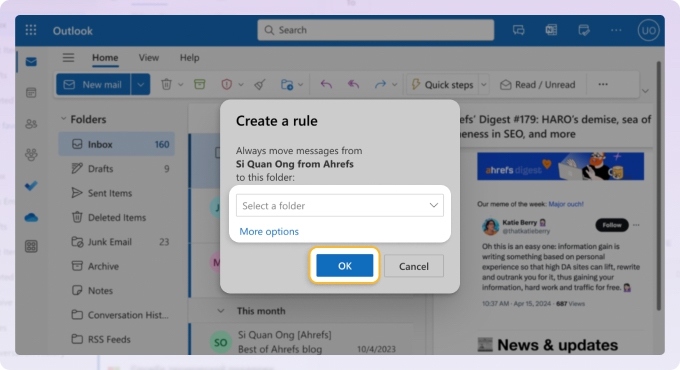
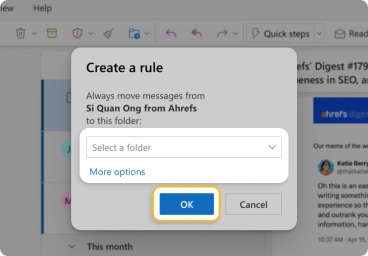
- Choose a folder to move the email to in the drop-down list. For other conditions and actions, select More options instead.
- Click OK to save the rule and optionally run it immediately.
To create that same rule using Outlook on your desktop:
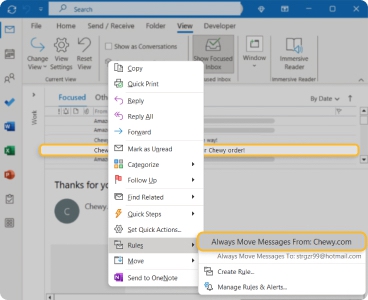
- Right-click the email, move to Rules, and pick Always Move Messages From [sender].
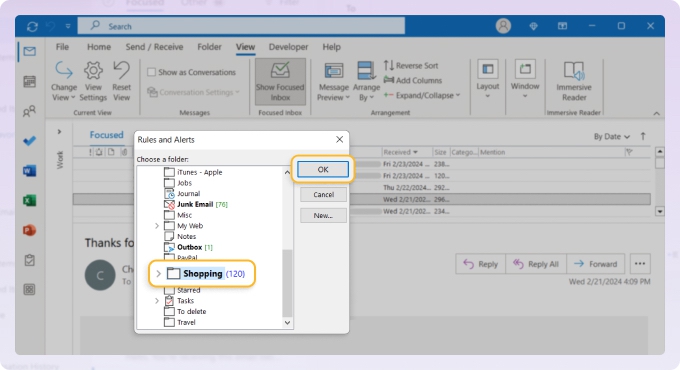
- Choose the folder in the pop-up window and click OK to save the rule.

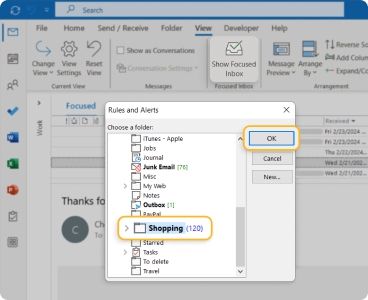
Outlook will immediately run the rule in your inbox and apply it to existing messages.
Power Tip: Create a CC Folder for FYI Emails
If you often get copied on long email chains, create a rule that moves messages where your name is in the CC field into a separate folder, such as CC or FYI. This keeps your main inbox focused on emails sent directly to you, while still letting you review copied messages later.
To create a CC rule in Outlook on the web:
- Create a folder named CC or FYI.
- Select Settings.
- Go to Mail → Rules.
- Select Add new rule.
- Name the rule, such as Move CC emails.
- Under Add a condition, choose I’m on the Cc line.
- Under Add an action, choose Move to and select your CC or FYI folder.
- Select Save.
To create a CC rule in classic Outlook:
- Create a folder named CC or FYI.
- Go to File → Manage Rules & Alerts.
- Select New Rule.
- Choose Apply rule on messages I receive.
- Select the condition where my name is in the Cc box.
- Choose to move it to the specified folder.
- Select your CC or FYI folder.
- Finish and turn on the rule.
This is especially useful if you receive many “just keeping you in the loop” emails that do not require immediate action.
Power Tip: Delay Sending Emails by 1 Minute
A short delay on outgoing emails gives you a small safety window to catch typos, missing attachments, wrong recipients, or replies you may want to soften before they actually leave your mailbox.
In classic Outlook, you can create a rule that delays all outgoing messages:
- Go to File → Manage Rules & Alerts.
- Select New Rule.
- Under Start from a Blank Rule, choose Apply rule on messages I send.
- Select Next without choosing conditions if you want the rule to apply to every email.
- Choose to defer delivery by a number of minutes.
- Set the delay to 1 minute.
- Name the rule, such as 1-minute send delay.
- Turn on the rule and select Finish.
💡 Note: This rule is for classic Outlook on desktop. In new Outlook and Outlook on the web, use Schedule send or the Undo send setting instead, depending on what is available in your version.
5. Create Email Templates
The faster you respond to emails, the easier it is to move them out of your inbox. If you send a lot of fairly repetitive emails, then it may be worth creating email templates as part of your Outlook email management strategy.
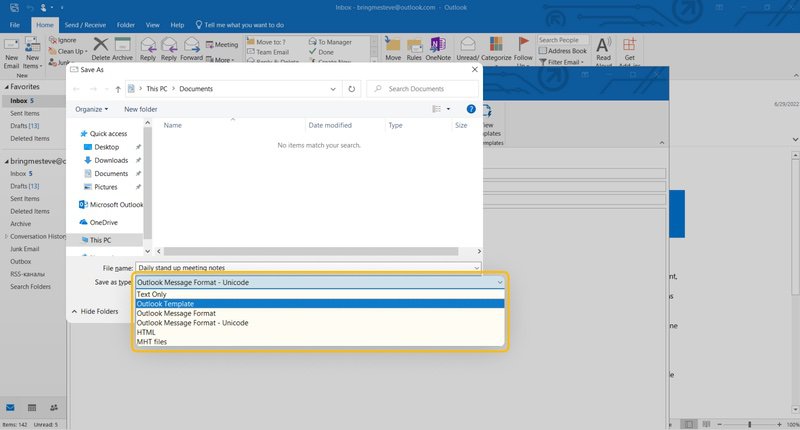
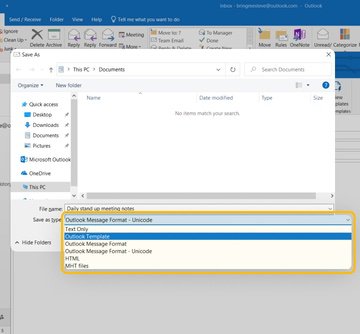
To create an Outlook template, you have to draft up a new message, then save it as a template. You can do this in both Outlook web and the Outlook desktop application.
6. Ignore Unwanted Conversation Threads
Sometimes the quickest way to deal with a long reply-all chain you no longer need is Outlook’s Ignore function. It removes all messages within a specific conversation into your Deleted Items folder, and future replies to that thread go straight to Deleted Items as well without any further action from you.
To ignore a conversation in Outlook on the web, right-click the conversation, then select Ignore → OK to confirm.
7. Assign Outlook Categories
Wondering how to manage emails in Outlook similarly to those in Gmail? Outlook provides Categories that are similar to Labels in Gmail. You can assign color-coded categories to messages that make them easy to spot.
Additionally, you can keep related emails marked until you act on them, such as short-term projects or billing statements. If using folders doesn’t work for you, this is a good alternative.
To quickly assign a category, right-click the email, move to Categorize, and choose a category in the pop-out menu.
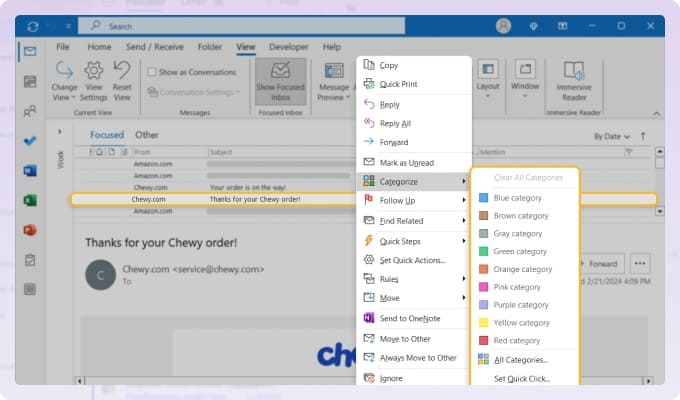
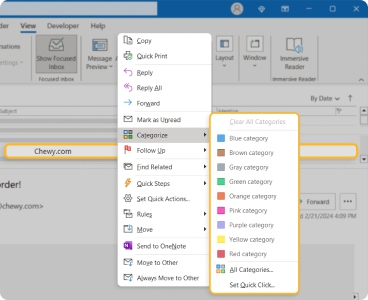
To change the category labels from the default color names:
- Right-click an email, move to Categorize, and choose Manage Categories (web) or All Categories (desktop).
- When the list of Categories displays, do one of the following:
- On the web, select the Edit icon (pencil), enter the new name, and click Save.
- On the desktop, select the category and pick Rename. Enter the new name, press Enter, and click OK when you finish.
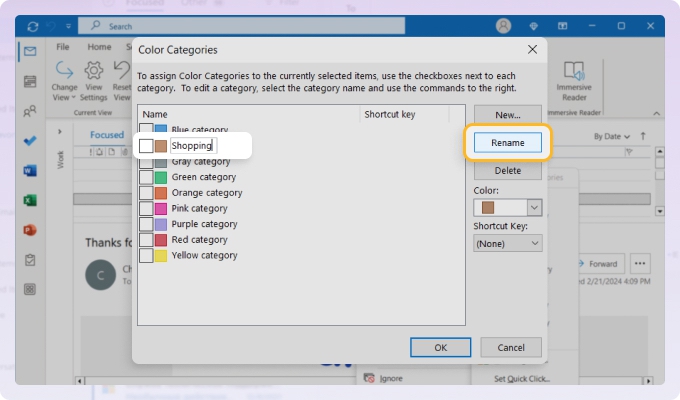
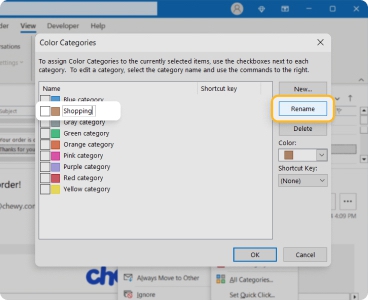
You’ll then see emails with their assigned categories in your inbox and can even sort by category if you like.
8. Use Flags for Follow-Up
If you want to remind yourself of an email that you need to follow up on, act on, or respond to, you can flag it in Outlook. This then allows you to choose a follow-up time and let Outlook remind you.
To flag an email for the current day, select the Flag button to the right of the email in the message list. On the web, you can also right-click and pick Flag.
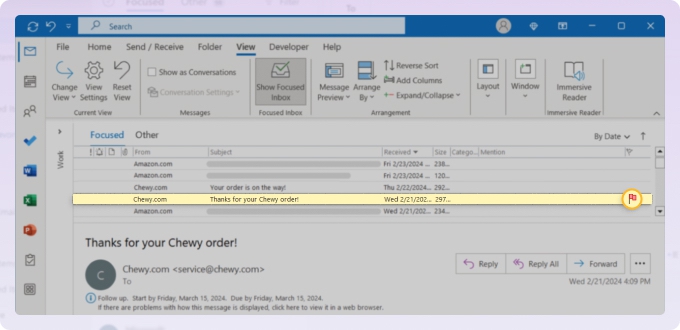
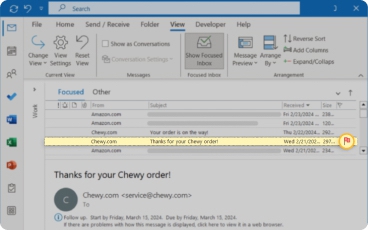
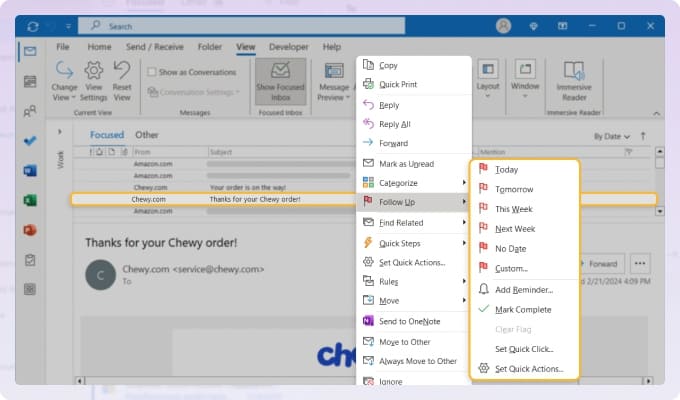
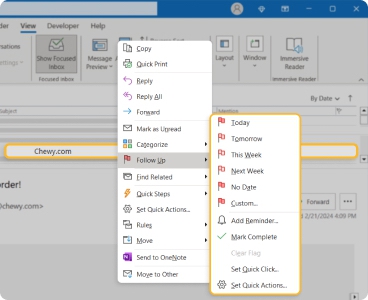
To flag an email for a different day, select the message and do one of the following:
- On the web, open the Flag menu in the top toolbar, and choose the timeframe.
- On the desktop, right-click, move to Follow-Up, and choose the timeframe.
9. Use Keyboard Shortcuts to Process Email Faster
Once your Outlook inbox has folders, categories, and rules, keyboard shortcuts can help you process messages much faster. The most useful shortcuts for inbox management are:
- Ctrl + R : Reply to the selected email.
- Ctrl + Shift + R : Reply all.
- Ctrl + Q : Mark the selected email as read.
- Ctrl + U : Mark the selected email as unread.
- Delete : Delete the selected email.
- Shift + Delete : Permanently delete the selected email.
- Ctrl + Shift + V : Move an email to a folder in classic Outlook.
In Outlook on the web, shortcuts can depend on your selected shortcut mode. To check or change them, open Settings → General → Accessibility → Keyboard shortcuts.
10. Consider an Email Organizer App for Outlook
One more way to take on Outlook email organization is with an app that provides robust features and more flexible tools.
Using Clean Email, you can perform many of the same Outlook email management actions including unsubscribing, marking spam, creating folders, and setting up rules. But you have more control with Clean Email’s features along with additional tools to keep your Outlook inbox organized and clutter-free.
How to Organize Outlook Email with Clean Email
Clean Email is a superb email organizer for Outlook with features that go beyond the basics.
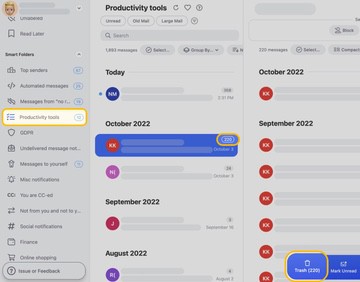
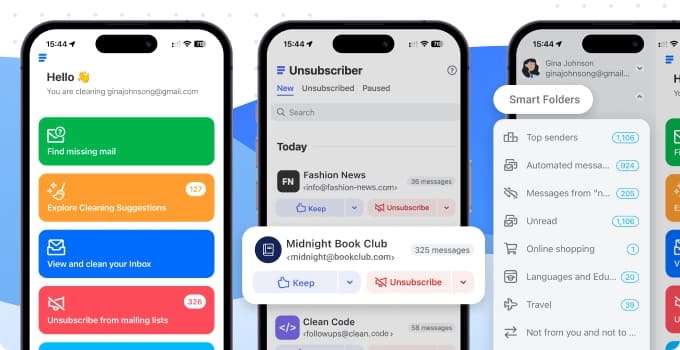
If you like the folder method of organization, then you’ll love Clean Email’s Smart Folders. Using built-in filters, the app sorts messages into premade folders automatically.
You'll find Smart Folders for Online Shopping, Travel, Seasonal Deals, and more. You can then view all related emails in one spot without having to lift a finger to move them yourself.
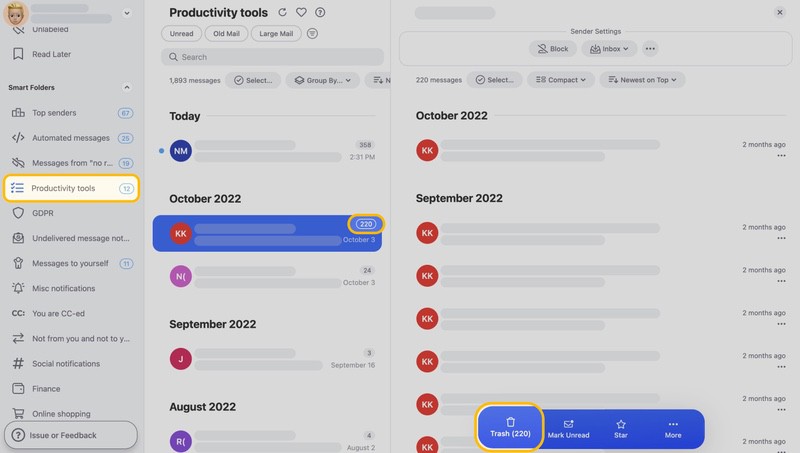
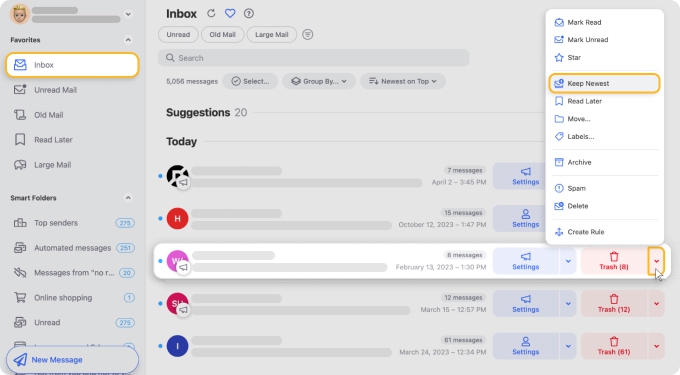
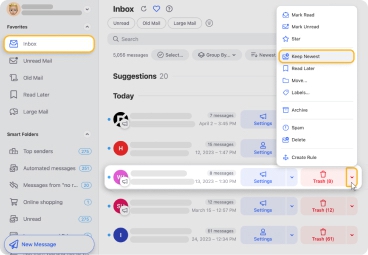
Using the Keep Newest feature, you can get rid of outdated messages by keeping only the newest ones at your fingertips.
Another great way to organize Outlook emails in Clean Email is by using the Favorites menu. With it, you can pin the inbox views you use most, so they’re always one click away instead of making you navigate through the sidebar each time.
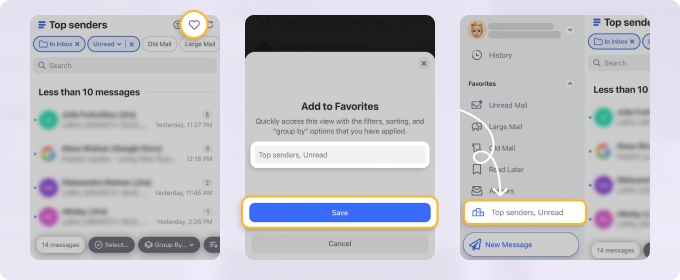
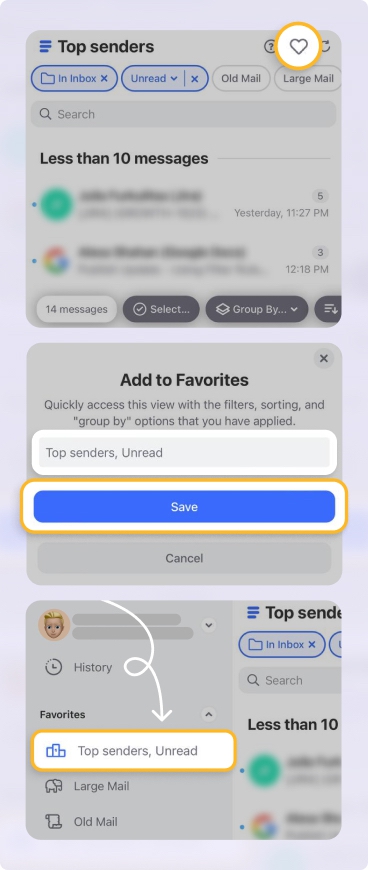
You can then jump straight to the email groups you manage most often, making routine Outlook inbox cleanup much faster.
Manage Outlook Messages On-The-Go
Clean Email offers mobile apps for both Android and iPhone that provide the same features as the web and desktop applications.

Manage Outlook with a Strategy
Outlook tools are useful, but they work best when you also have a simple decision-making system. The Four Ds framework helps you decide what to do with every email instead of letting messages sit in your inbox indefinitely.
- Delete: Remove emails you do not need, such as expired offers, old notifications, and irrelevant updates.
- Do: If a message takes only a few minutes to answer or handle, deal with it immediately.
- Delegate: If someone else is the better person to handle the request, forward or assign it instead of keeping it in your inbox.
- Defer: If the email needs more time, flag it, schedule time to handle it, or move it to a folder where you review pending work.
This method pairs well with Outlook’s folders, flags, rules, and notifications. For example, you can delete newsletters during cleanup, do quick replies during a scheduled email batch, delegate requests with a Quick Step, and defer bigger tasks using flags or the To-Do Bar.
Use Quick Steps to Automate Repetitive Actions
Quick Steps let you apply several actions to an email with one click. Instead of moving a message, marking it as read, categorizing it, and forwarding it manually, you can combine those actions into a single shortcut.
Quick Steps are most useful in classic Outlook desktop, where they appear on the Home tab. Availability and options may vary in new Outlook and Outlook on the web, so check your version before relying on them as part of your workflow.
To create a Quick Step in classic Outlook on desktop:
- Go to the Home tab.
- Find the Quick Steps group.
- Select Create New.
- Name your Quick Step.
- Choose the first action, such as Move to folder.
- Select Add Action if you want to include another action.
- Add any extra actions, such as Mark as read, Categorize, Forward, or Flag.
- Select Finish.
Useful Quick Step examples:
- Project folder: Move the email to a project folder, mark it as read, and assign a category.
- Forward to manager: Forward the email to your manager and mark the original message as handled.
- Archive and mark done: Move the email to Archive, mark it as read, and clear any follow-up flag.
Use Copilot in Outlook for Long Threads and Faster Replies
If your Microsoft 365 plan includes Copilot in Outlook, you can use it to speed up some inbox management tasks. Copilot can summarize long email threads, help draft replies, and assist with creating inbox rules in natural language.
This is useful when a conversation has many replies and you need the key points quickly. Instead of reading every message one by one, you can use the Summary by Copilot option to understand the thread before replying or deciding what to do next.
Copilot should not replace your folder structure, rules, or cleanup routine, but it can make daily email processing faster, especially for long conversations, complex replies, and busy work inboxes.
Outlook Desktop-Only Features
The following features are only available in the Outlook desktop app. If you use Outlook on the web, skip to the next section.
Search Folders
Search Folders help you find messages stored across all your folders without moving anything. This is especially helpful when you need to gather emails related to a specific project or sender from multiple locations at once.
To set up a Search Folder, scroll to Search Folders, right-click it, then select New Search Folder.
Manage Notification Settings
If you receive a lot of messages or find notifications distracting, Outlook desktop lets you turn off all email arrival alerts individually.
To change these settings, go to File → Options → Mail. Then, locate the Message Arrival section and clear the checkboxes for any notification methods you don’t want: pop-up alerts, the envelope icon in the taskbar, cursor animation, and sound can all be disabled separately.
Outlook Web-Only Features
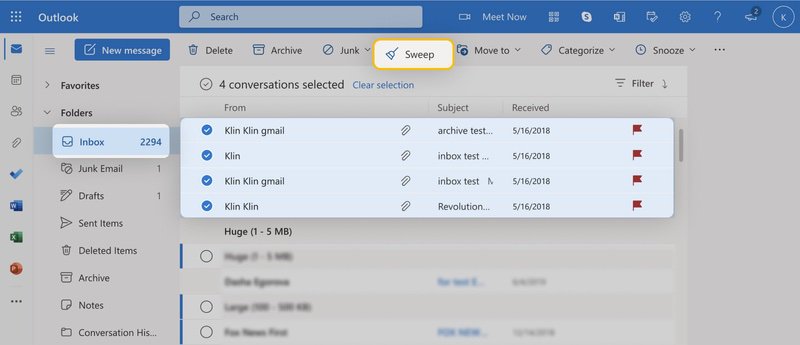
Sweep Feature
The Sweep feature in Outlook lets you quickly manage emails from a specific sender. You can choose to delete all existing messages from that sender, keep only the latest one, or delete anything older than 10 days. You’ll find the Sweep button in the toolbar above your message list.
Like Button
Not every email needs a written reply. When you want to acknowledge a message without composing a response, use the Like button in Outlook web. The sender sees your reaction, and you can move the email out of your inbox without typing anything.
💡 Note: The Like button may not be available for all users in the latest Outlook web version.
Best Outlook View Settings for Productivity
Beyond organizing individual emails, a few view setting changes can make a significant difference in how comfortable and efficient your daily Outlook experience feels.
Show as Conversations
Sometimes it is hard to keep up with messages that are part of the same chain. The Show as Conversation view setting fixes this by grouping all messages with the same subject line into a single thread, regardless of who sent them.
To turn on Conversation view:
- Classic Outlook: View → Show as Conversations
- Outlook web / Outlook.com: Settings → Mail → Layout → Message organization
To-Do Bar
The To-Do Bar is a panel on the right side of the Outlook desktop app that shows your upcoming calendar items and task list. If you regularly flag emails as tasks or want a quick view of what’s coming up, it’s worth enabling.
To turn it on, go to View → Layout, then click To-Do Bar and press Normal.
💡 Note: To-Do Bar is available only in classic Outlook; in new Outlook/Microsoft 365, tasks are handled through My Day / To Do.
Disable the Reading Pane
If you prefer the Gmail layout, you may find Outlook’s Reading Pane more of a distraction than a help. You can adjust or disable it by going to Settings → Reading Pane and choosing your preferred location or turning it off entirely.
Conclusion
With these Outlook email organization and management tips, tricks, and features, you can make sure that important emails don’t get lost and enjoy a well-structured mailbox overall. And definitely consider Clean Email for finding messages faster, seeing related emails in one spot, and managing messages on-the-go.
FAQs
What is the best way to organize emails in Outlook?
The best way to organize Outlook emails is by creating folders for different categories, using the Focused Inbox feature, archiving or deleting old emails, and using an email organizer for Outlook like the Clean Email app.
How do you categorize emails in Outlook?
Select an email, click the “Categorize” button on the Home tab, and choose a color-coded category. You can manage and rename these categories via the “All Categories” option under the same Categorize dropdown.
How do you organize emails by subject in Outlook?
Click on the view tab on the ribbon → select the message folder you want to sort by subject → select subject. In Clean Email, all you need to do is choose the folder (All Mail, Inbox, etc.) and choose “Group by subject” above the emails from this group.
How to organize Outlook inbox by date?
By default, Outlook emails are categorized by date. Newer messages are at the top, and older messages are at the bottom.
How do you prioritize emails in Outlook?
To prioritize emails, we recommend you use folders and subfolders to cart away important messages. This way, you can stay focused on only the emails that matter.
How do I declutter my Outlook email?
Start by unsubscribing from unnecessary newsletters and promotional emails, then use rules to automatically sort incoming messages into designated folders. Additionally, consider using the Clean Email app to manage and remove old or irrelevant emails more efficiently.
Can Outlook automatically organize emails?
Within Outlook, you can do a couple things to automatically organize messages. You can use the Outlook Rules feature to program automatic tasks that happen each time you receive a message that meets the criteria. If you are using the Outlook desktop app, you can also create a Search Folder to automatically sort messages you want into a single location.