Key Takeaways
- Folders are safe places to move emails that you can easily find later.
- Automated rules can move, flag, archive, or delete messages as they arrive.
- Categories filter your inbox for quick viewing of transactional and promotional emails.
- VIPs, flags, and Focus provide additional ways to organize your inbox for important senders, emails for follow up, and messages allowed during Do Not Disturb times.
- Filter, unsubscribe, and block actions handle emails at the source for viewing only certain messages or stopping future unwanted emails.

Organize iCloud Mail With Folders
One of the best ways to organize your iCloud emails is using folders. Whether you create folders for messages related to projects, contacts, or reference, use meaningful folder names to easily find what you need later.
iCloud.com Mail Folders
To create a folder:
- Click Add Folder (plus sign) next to Folders in the left-hand menu.
- Enter the folder name in the box that appears.
- Press Return.
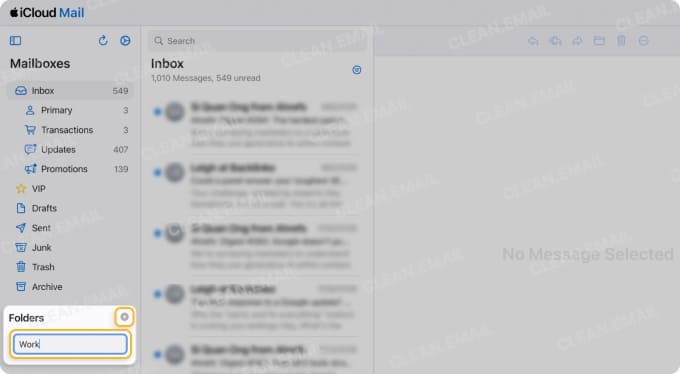
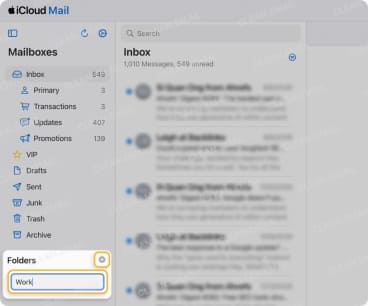
💡 If you want to add a subfolder, first, create the folder. Then, drag the folder onto the desired parent folder in the left-hand menu.
You can also create a folder and move an email to it at the same time.
- Do one of the following:
- Select More Actions (three dots) → Move Message next to an email in your message list.
- Right-click an email in your message list and pick Move Message.
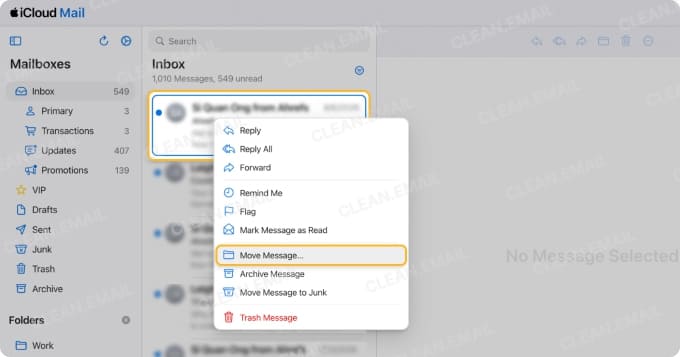
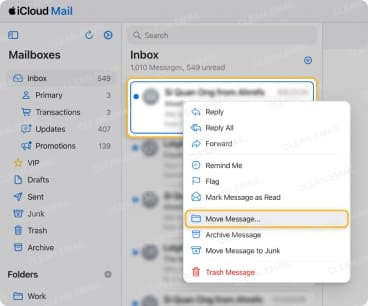
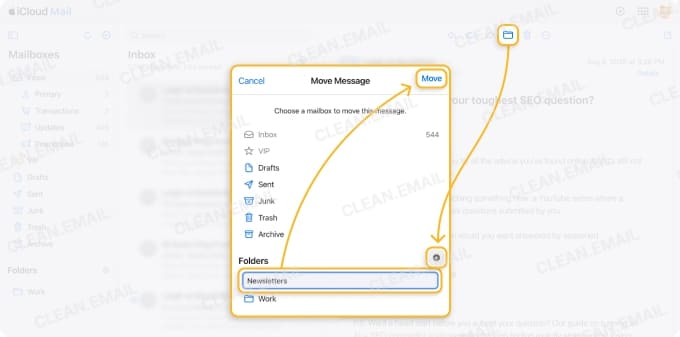
- Open an email and choose the Move Message button (folder) in the toolbar.
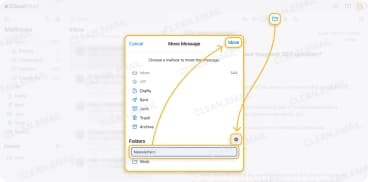
- Click Add Folder next to Folders.
- Enter the folder name and press Return.
- Select Move.
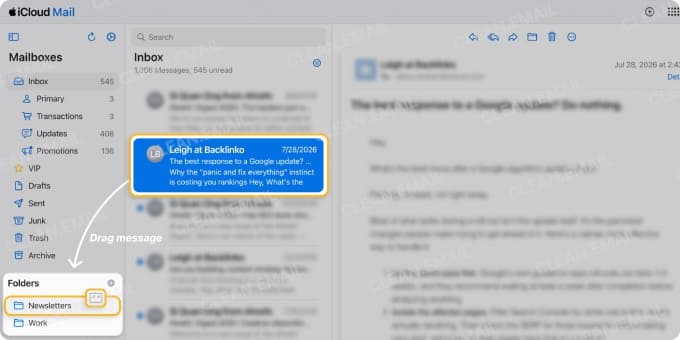
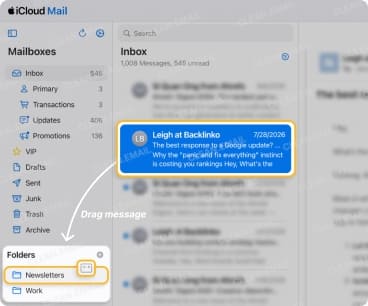
💡 To move additional emails to a folder, use More Actions, right-click, or the Move Message button as described above. You can also drag an email from your message list to the folder in the left-hand menu.
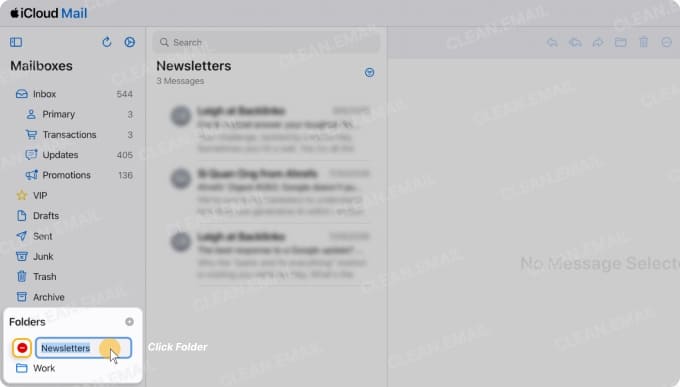
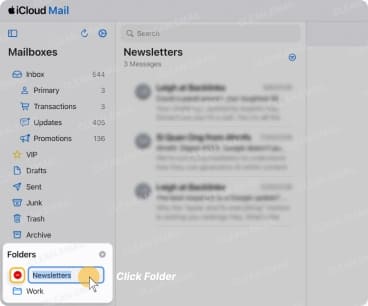
To delete a folder you no longer need:
- Double-click it in the menu.
- Select the minus sign.
- Confirm with Delete.
iPhone Mail Folders
To create a folder:
- Go to the Mailboxes screen.
- Tap Edit on the top right.
- Select New Mailbox at the bottom.
- Enter the folder name.
- Choose the Mailbox Location for either a folder or subfolder.
- Tap Save.
To move emails to a folder, do one of the following:
- Long-press an email in your message list and pick Move Message.
- Open an email and tap Move Message (folder) at the bottom.
To delete a folder you no longer use:
- Go to the Mailboxes screen.
- Tap Edit on the top right.
- Long-press the folder.
- Select Delete Mailbox and confirm with Delete.
Mac Mail Folders
To create a folder:
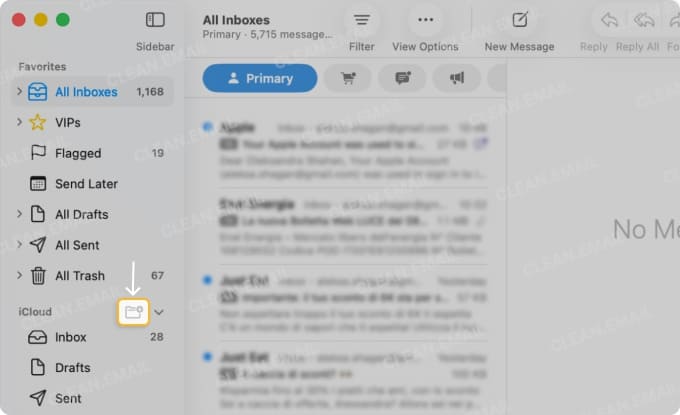
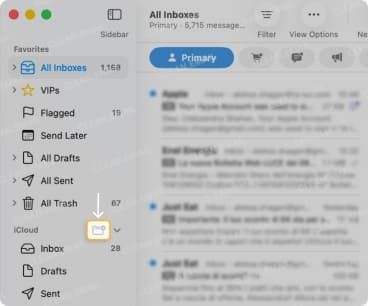
- Hover your cursor over a mailbox at the bottom of the left-hand menu.
- Click the Add Folder button (folder with plus sign).
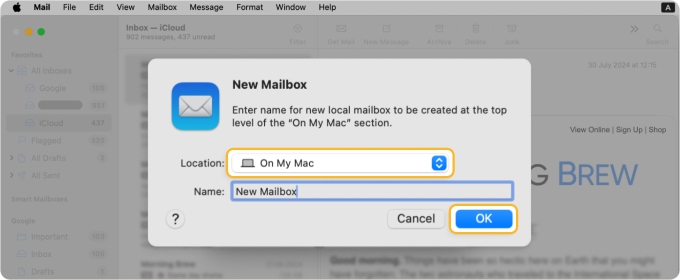
- Enter a name, confirm the location or choose a parent folder, and click OK.
To move emails to a folder, do one of the following:
- Drag the message to the folder in the left-hand menu.
- Open the Move menu in the toolbar and choose the folder.
- Right-click the message, slide down to Move to, and choose the folder.
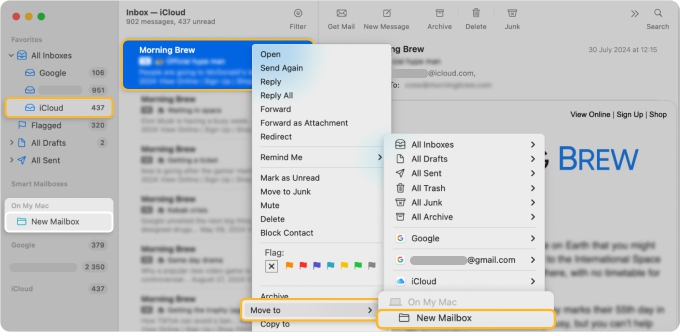
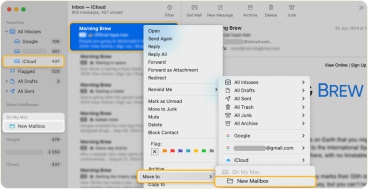
To delete a folder later:
- Right-click it in the menu.
- Select Delete Mailbox.
- Confirm with Delete.
Set Up Rules to Sort Incoming Mail
If you often receive emails that you move to a folder, you can set up rules to automatically route those messages. This saves time from manual work and reduces errors of emails being misdirected.
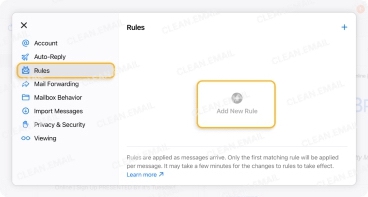
To create an automated rule on iCloud.com, go to Settings → Settings → Rules → Add New Rule. Name the rule, choose the condition and action, and click Add. You should allow up to 15 minutes for a new rule to take effect.
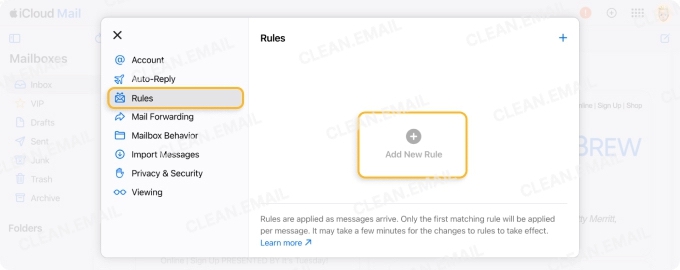
As you continue to set up new rules, you’ll notice them added to the bottom of the list. This is important to keep in mind as rules run in the order they’re listed. To move a rule higher or lower in the list, simply drag it up or down. Note that there is a 500-rule limit.
💡 For creating rules on iPhone and Mac, look at our complete guide to Apple Mail rules.
Use Apple Mail Categories
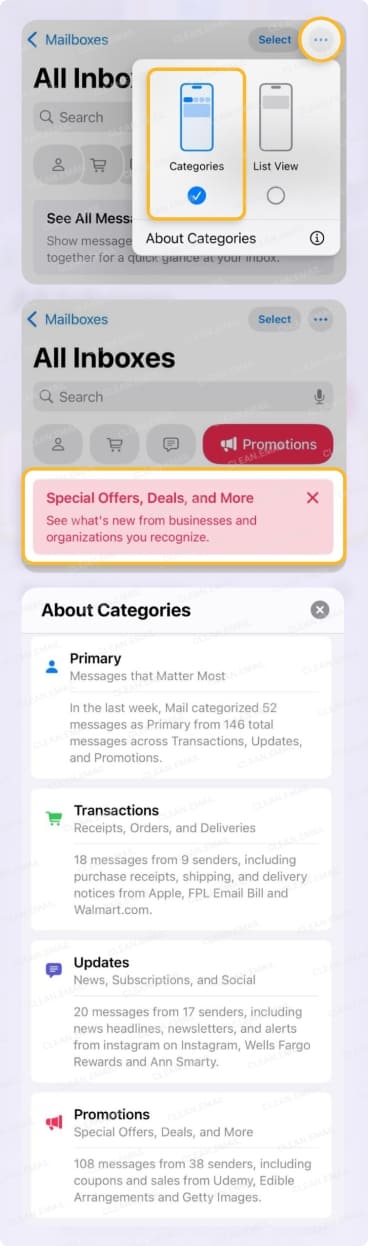
Categories for Apple Mail were introduced for iPhone in December 2024 and later added to iPad and Mac. The feature uses Apple Intelligence in Mail to automatically filter emails into the following four categories:
- Primary: Time-sensitive messages, direct emails, and personal communications
- Transactions: Purchases, receipts, shipping updates, and delivery notifications
- Updates: Subscriptions, newsletters, and social media notifications
- Promotions: Coupons, discounts, sales, and other marketing messages
These Categories provide an effortless way to filter and find emails as they arrive without extra work.
To enable categories:
- On iCloud.com, select Settings → Show Categories.
- On iPhone, tap the three dots and choose Categories.
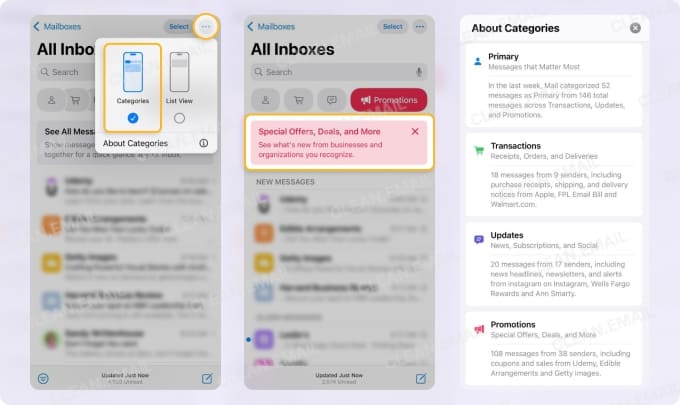
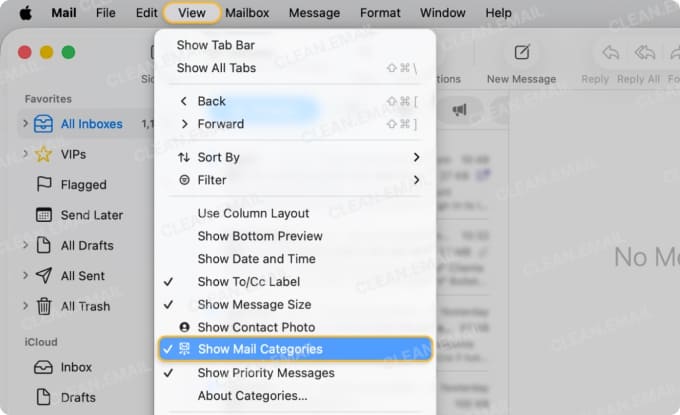
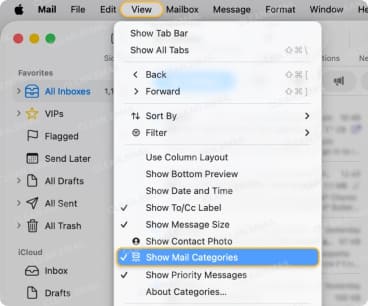
- On Mac, choose an inbox and go to View → Show Mail Categories.
💡 To disable categories, reverse the action above or on mobile, learn how to turn off categories in iPhone Mail.
Organize a Large iCloud Inbox Automatically With Clean Email
If you have an iCloud mailbox filled to the brim, you may need to employ additional tools to help where Apple Mail leaves off.
Clean Email works alongside your email app on the web, macOS, and iOS to automatically sort, clean, and organize your iCloud emails. It offers smart features that help manage large mailboxes and maintain tidy inboxes long-term.
For organizing your inbox at scale, Clean Email provides these useful tools:
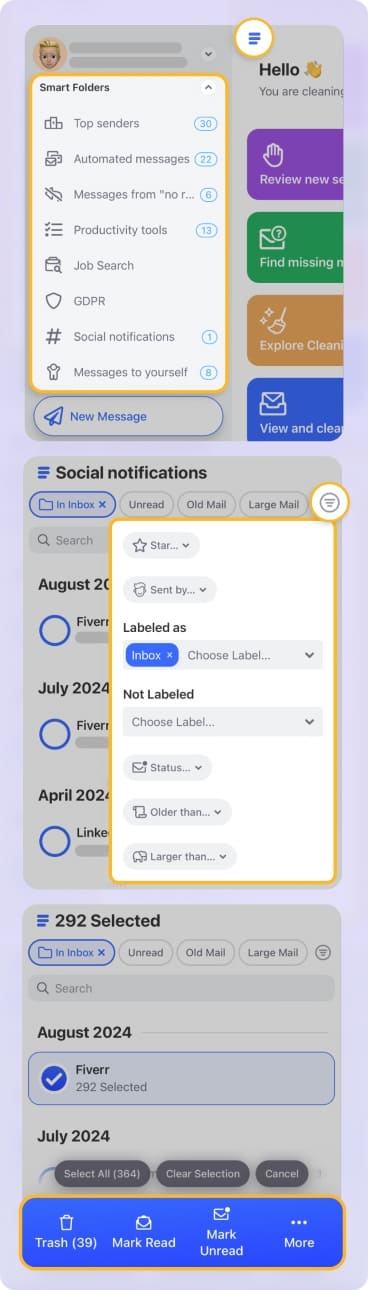
Smart Folders: Pre-made folders that filter emails similar to Mail Categories but with more extensive options. You have folders for Top Senders, Online Shopping, Travel, Job Search, and more with over 30 in all.
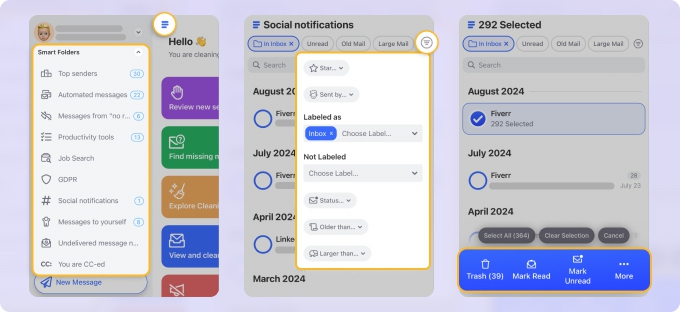
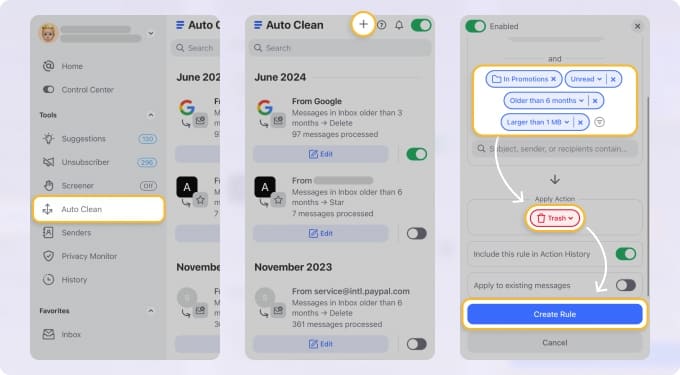
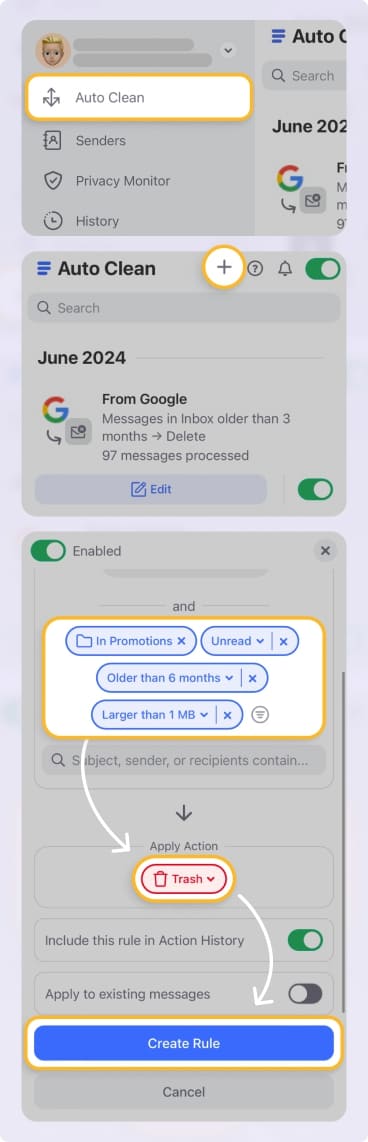
Auto Clean: Create mailbox rules with a large selection of conditions and actions. Unlike iCloud Mail rules, Auto Clean applies to both new and existing emails for any connected email account.
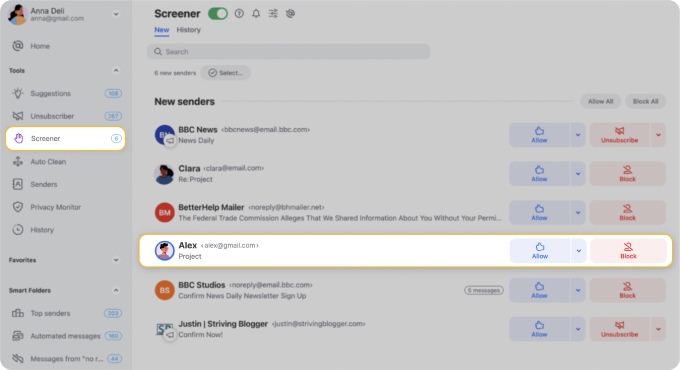
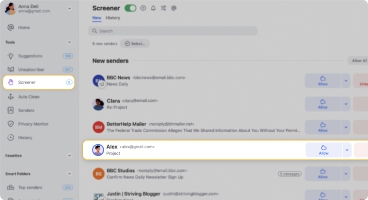
Screener: Like Caller ID for your mailbox, this tool keeps emails from unknown senders from reaching your inbox until you review them. Simply check out the senders and choose Allow or Block for future messages.
Use VIPs, Flags, and Focus
Another way to organize iCloud Mail is by using other built-in tools like VIPs, flags, and Apple Focus.
VIPs
VIP in iCloud Mail stands for just what you’d expect; Very Important People. When you receive emails from someone that you consider important, you can designate them as a VIP and find their messages in the VIP mailbox.
- On iCloud.com, open an email, select the sender, and turn on the VIP toggle.
- On iPhone, open an email, select the sender, choose View Contact Card, and tap Add to VIP.
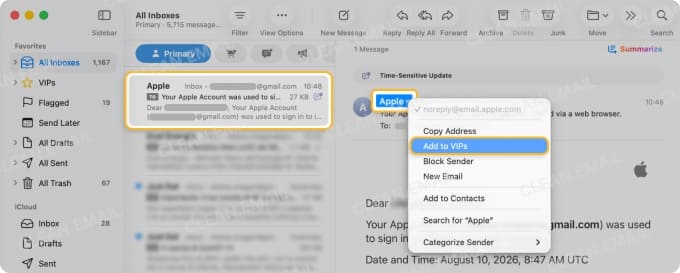
- On Mac, open an email, select the sender, and choose Add to VIPs.
Flags
When you flag emails in iCloud Mail, you can quickly see messages you need later or want to follow-up on. In most cases, you can right-click an email on your desktop or long-press a message on mobile to flag it.
💡 Check out how to flag an email for your options along with how to unflag all emails on iPhone.
Focus
If you’re a fan of Apple’s Focus feature, then you know it can help you concentrate on a task, drive a vehicle, or get some sleep without interruptions. However, you may need to see certain emails during your Focus time, especially if they’re related to your job or the current task.
To add an email account in the Mail app to your Focus, follow these steps:
iPhone Focus
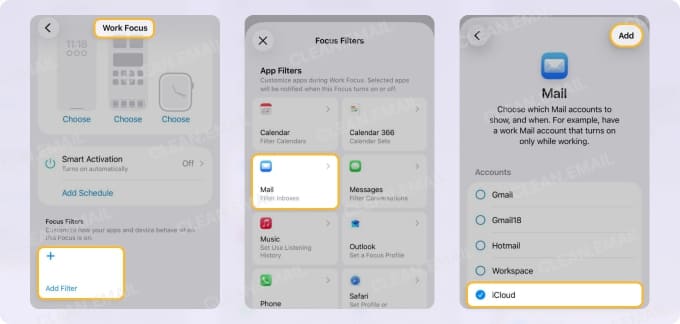
- Open Settings and choose Focus.
- Select a Focus or add a new one.
- Tap Add Filter below Focus Filters.
- Pick Mail and mark the circles for the desired email accounts.
- Tap Add.
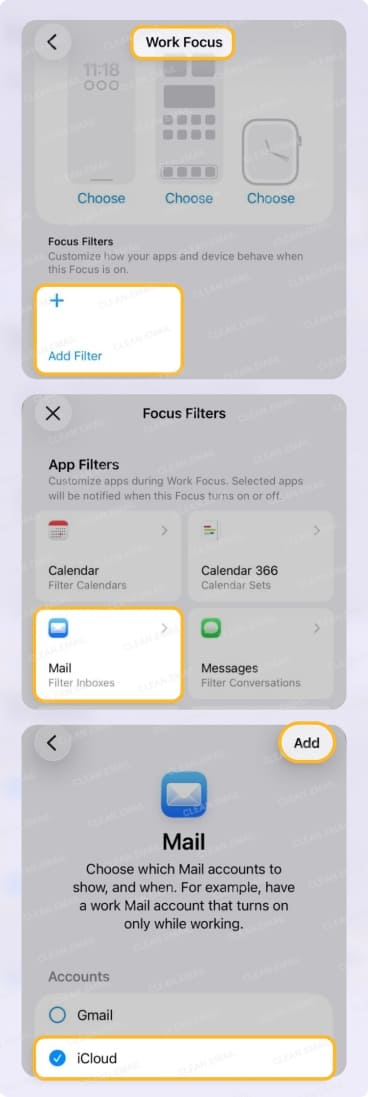
Repeat these steps to add Mail filters to an additional Focus.
Mac Focus
- Open System Settings and choose Focus.
- Select a Focus or add a new one.
- Click Add Filter below Focus Filters.
- Pick Mail and click Choose next to Accounts.
- Check the boxes for the desired email accounts.
- Click Add.
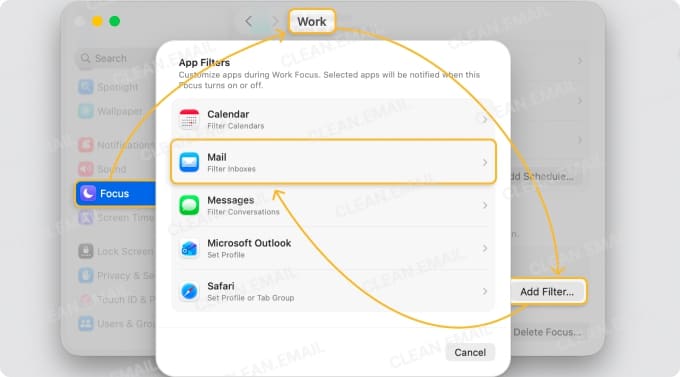
Repeat these steps to add Mail filters to an additional Focus.
Tackle Clutter at the Source
To further organize iCloud emails, you can use the filtering, unsubscribing, and blocking. These actions handle email clutter at the source.
Filtering
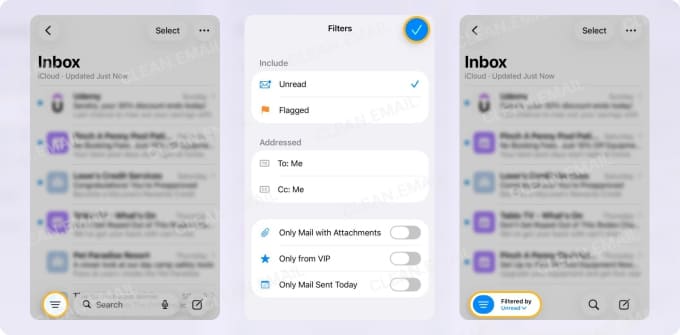
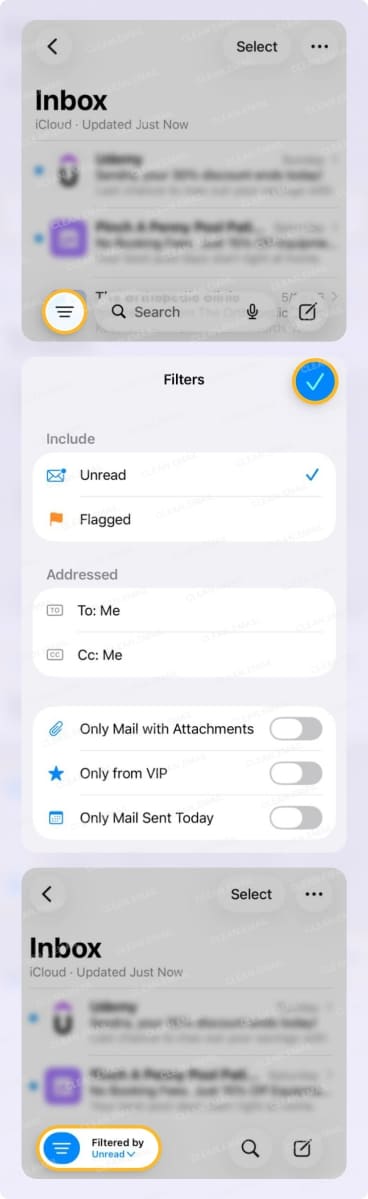
Filtering is ideal for narrowing down your inbox by unread, flagged, or emails with attachments. This can help you perform bulk actions like marking all unread messages as read or finding large emails consuming space.
On iCloud.com and Mac, click the Filter button and choose the filter you want to use. For mobile, see how to filter iCloud emails on iPhone for using the Filter button along with other options.
Unsubscribing
Unsubscribing from newsletters, marketing messages, or promotional emails you no longer want to receive can help you better manage your mailbox by reducing unnecessary clutter.
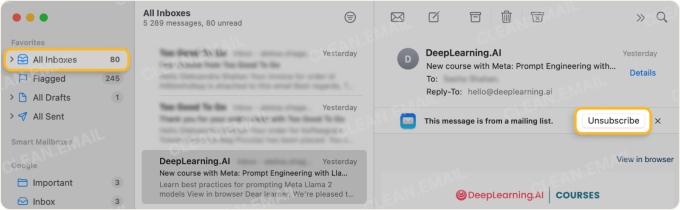
Apple Mail provides an easy one-click Unsubscribe option on any device. Just click or tap the Unsubscribe option at the top or using the three dots on the email.
Blocking
Blocking is the preferred action to take if you want to stop a sender’s emails from reaching your inbox. Different from simply deleting emails, when you block a sender, future messages from them go directly to the Trash. This is useful for harassing or potentially harmful senders.
💡 Learn how to block emails on iCloud including automatic blocking, unblocking, and troubleshooting.
Declutter to Free Storage
Organizing your emails provides a simpler way to find the messages you need along with a decluttered inbox for spotting new emails quickly. But, in most cases, organizing does not free up storage space. For example, messages that you move to folders still count your storage limit.
💡 If you’re interested in ways to regain iCloud storage space, look at how to clean your mailbox on iPhone as well as how to delete mail storage on Mac.
Also, be sure to learn how to get emails when iCloud storage is full.