


Moving to a Folder vs. Applying a Label in Gmail
Because most email services use traditional folders to organize messages, it can feel a bit confusing that Gmail uses labels. One main difference between folders and labels is that an email can only live in one folder, but it can have multiple labels.
| Feature | Gmail labels | Traditional folders |
|---|---|---|
| Can an email belong to multiple categories? | Yes (multiple labels) (Google Help) | No (usually one folder) |
| Does “moving” remove it from Inbox automatically? | Not always (needs “Skip Inbox”/archive) | Often yes |
| Best for | Flexible organization and search (Google Help) | Single-location filing |
| Common pitfall | Users think labels = folders and “lose” email | Over-filing and rigid structure |
With this in mind, in Gmail:
- “Move to” means applying a label and removing the email from the Inbox.
- “Label as” means applying a label and leaving the email in the Inbox.
This is important to remember as you create filters to automatically move new messages as you’ll learn below. We’ll also use the term “move” for clarity throughout this tutorial.

How to Automatically Move Emails in Gmail
Automatically moving emails in Gmail means less clutter in your Inbox, faster focus on the messages you need, and fewer interruptions for incoming emails. With a filter, you can set it and forget it–automate once and reduce noise continuously.
Let’s take a look at the setup process!
Set Up Gmail Filters
To automatically move emails to folders, you’ll set up a filter in Gmail for incoming messages. Keep in mind that this option is only available in the web app.
Here’s how to filter emails to a folder in Gmail:
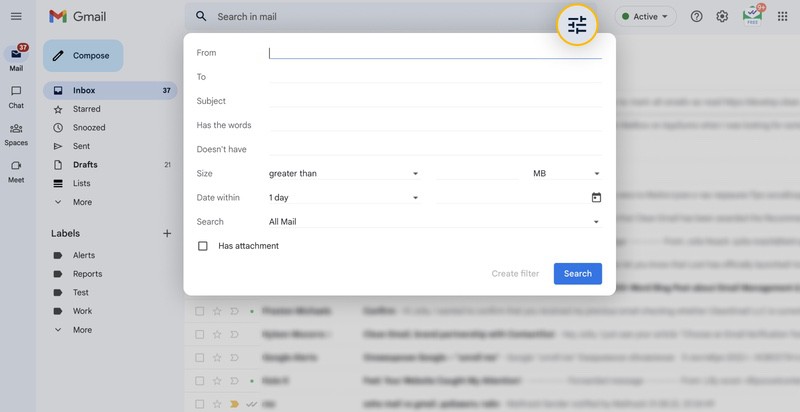
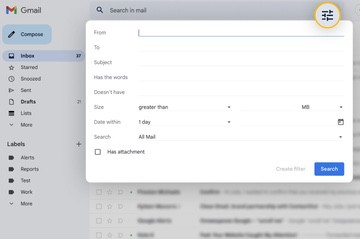
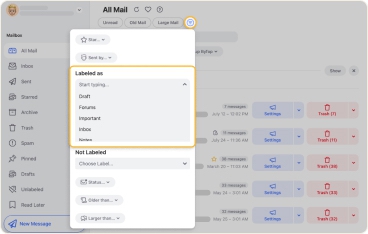
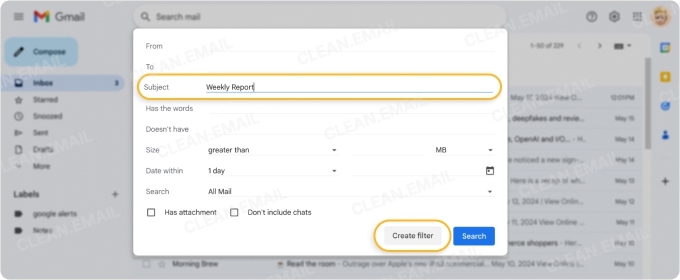
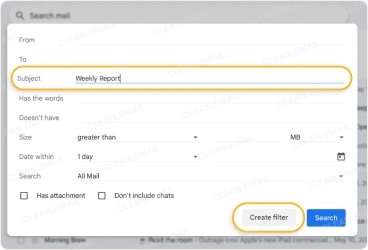
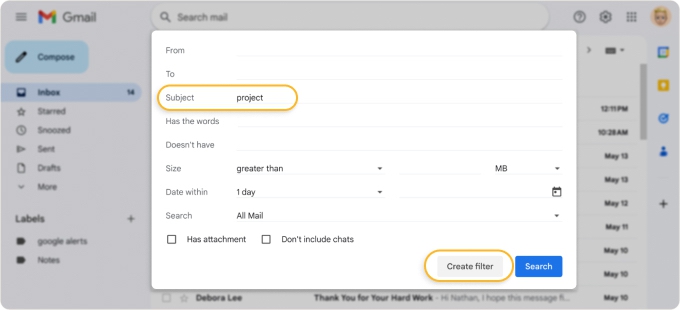
- Select the Show search options button in the Search box.
- Enter or pick the criteria for the emails you want to match.
- Choose Create filter.
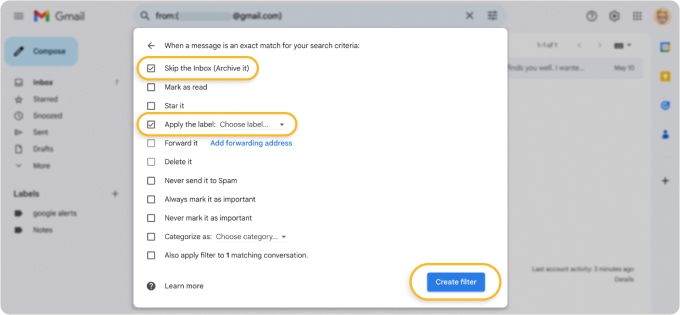
- To “move” the email, do both of the following:
- Check the box for Skip the inbox (Archive it).
- Check the box for Apply the label and select the label or create a new one.
- Optionally, mark any other actions you want to apply (see the table below).
- Choose Create filter.

Your filter is then saved and will start processing incoming emails immediately.
| Action | What happens | Use it when |
|---|---|---|
| Apply label | Adds a label (email can still stay in Inbox) | You want organization without hiding emails |
| Skip the Inbox (Archive it) | Keeps email out of Inbox view; still searchable | You want “folder-like” behavior |
| Also apply to matching conversations | Applies rule to existing emails too | You’re cleaning up backlog, not just future mail |
| Mark as read | Reduces visual clutter | Low-priority notifications/newsletters |
Create Gmail Rules with Clean Email
Although Gmail doesn’t provide a way to set up filters in the mobile app, this doesn’t mean that it can’t be done. Using Clean Email, you can not only create automated rules in the mobile app, but do so in the web app too. This also lets you set up more precise rules for both new and existing messages.
Here’s how to send emails to a folder in Gmail with Clean Email:
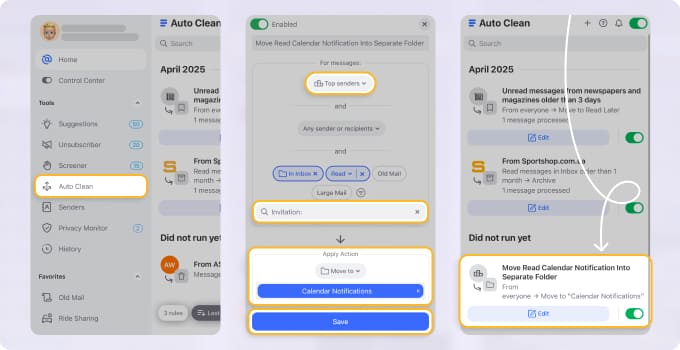
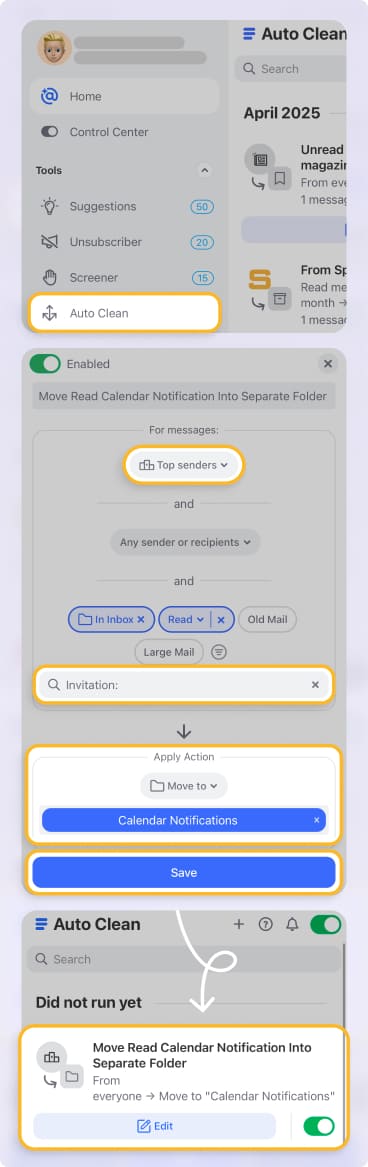
- Open Clean Email and choose Auto Clean in the menu.
- Select the plus sign or Create rule.
- Enter or pick the criteria for the emails you want to match.
- Open the Apply Action box and pick Move to.
- Select the folder (label) or create a new one.
- Optionally, toggle on the additional options.
- Choose Create Rule.
Once you create a rule in Gmail to move to a folder with Auto Clean, you have the option to temporarily pause the rule if you like. This is a handy feature that’s unavailable in Gmail.
| Need | Gmail filters | Clean Email |
|---|---|---|
| Route very specific messages | Great (precise rules) | Works, but may be overkill |
| Reduce inbox noise fast | Limited (you must build rules) | Strong (bulk grouping + bulk actions) |
| Keep key senders consistent | Works if you maintain rules | Strong (rules + group handling) |
| Ongoing subscription hygiene | Manual + scattered | Centralized unsubscribe + cleanup flow |
Use a Label Filter or Rule Alternative
If the number of labels you have is getting out of hand, you do have another option for mailbox organization with Clean Email. You can use Smart Folders to see related messages automatically filtered for you.
Clean Email provides 30+ pre-made Smart Folders with grouping based on options like sender, domain, or date and sorting by age, number of messages, or size.
You’ll find Smart Folders in the Clean Email menu on the web and mobile for things like Social Notifications, Finance and Insurance, Online Shopping, Real Estate, Travel, and more.
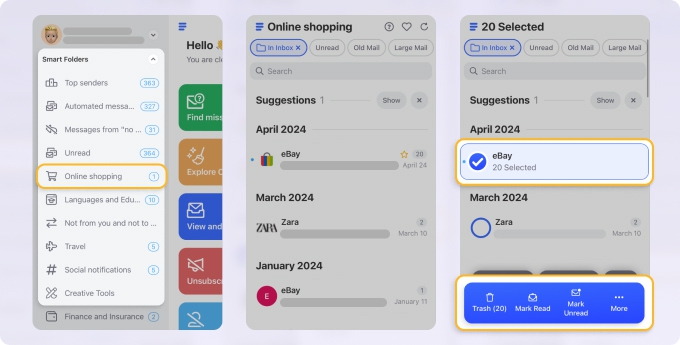
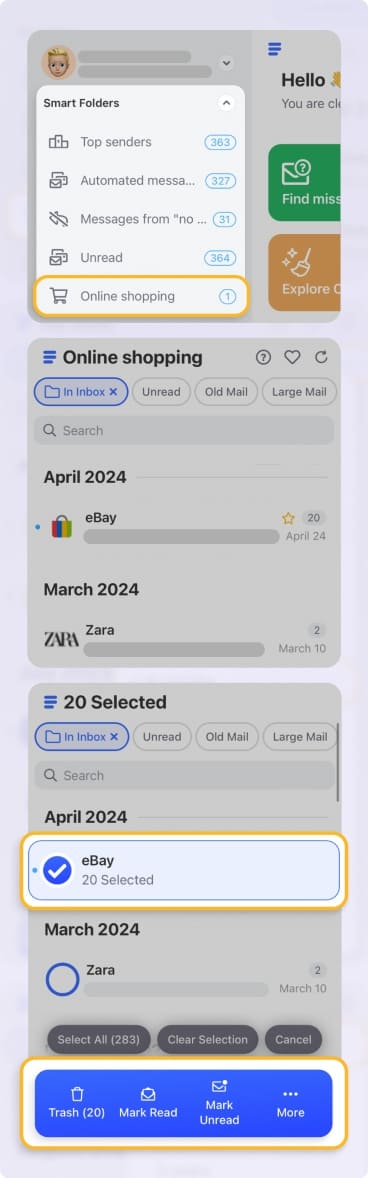
Using these folders, you can cut down on the number of Gmail labels you use, see filtered emails without any setup, and easily manage messages in bulk.
5 Common Filter Examples for Moving Emails
Maybe you’re trying to better organize your Gmail inbox by automatically moving messages, but aren’t quite sure of the best setups to use. Here are some common examples of how to send certain emails to a folder in Gmail.
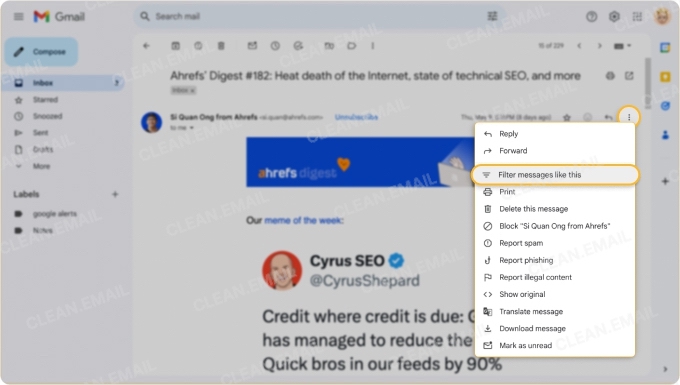
1. Move emails from a certain sender: Move emails you receive from a particular family member or friend, boss or supervisor, or client or customer using the From criterion or Filter option directly on the email.
2. Move emails based on topic: Move messages for work versus personal or topics such as health, finance, or education to designated folders using the From, Subject, or Keyword criteria.
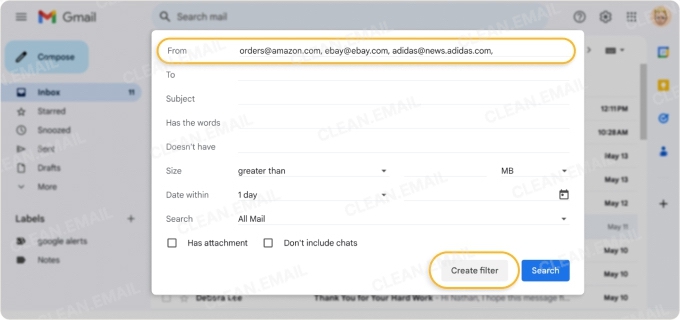
3. Move emails from multiple addresses: Move emails that arrive from multiple addresses for things like shopping, business, alerts, or senders in the same organization using commas between the email addresses in the From field.
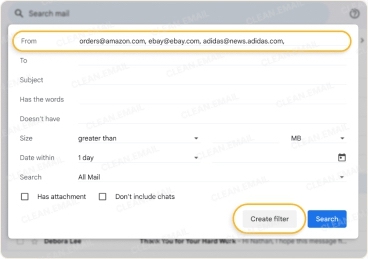
4. Move emails based on size: Move large messages to a specific folder to allow for easy cleaning when your Gmail storage begins filling up using the Size criterion.
5. Move emails with the same subject: Move emails that have keywords in the subject line for messages related to updates, reports, sales, or discounts using the Subject criterion.
For additional examples with the criteria to use, check out the table below.
| Goal | Criteria to use | Example |
|---|---|---|
| Route a person/company | From | From: specific sender/domain |
| Route newsletters | Subject / keywords | “newsletter”, “digest”, “unsubscribe” |
| Route receipts | Subject / keywords | “receipt”, “invoice”, “order” |
| Route attachments | Has attachment / keywords | “attachment”, “PDF”, “statement” |
| Route internal threads | To / keywords | team alias, project name |
Gmail Filter Maintenance and Mistakes
Automatically moving emails in Gmail is only part of keeping your mailbox organized. It’s good to perform an occasional maintenance of your filters and know what to do when things go awry.
Audit Filters Occasionally
Once you start creating filters to move emails in Gmail, it gets easier to set up more. But if you’re not careful, you can wind up with more filters than you need or even notice redundancy.
For example, if you set up a filter to move messages from a certain sender and then set up another filter to mark emails as important from that same sender, this is redundant. You can use a single filter for both actions.
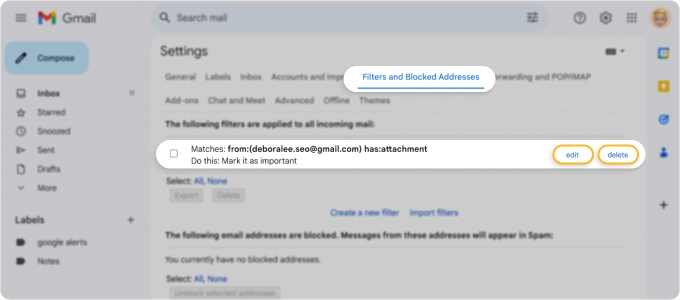
Occasionally review your filters in Settings >See all settings >Filters and Blocked Addresses. You can then edit or delete a filter.

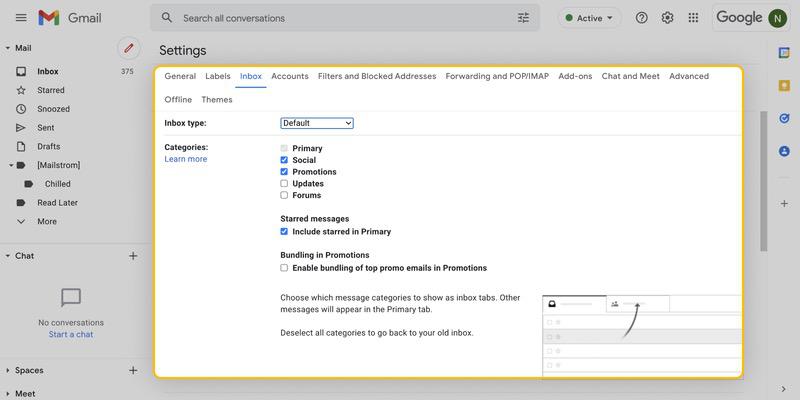
When to Use Inbox Categories vs. Filters
If you’re considering automated filters for emails related to social, promotions, updates, or forums, try using Gmail’s Categories instead. Messages related to these topics are automatically filtered into corresponding Inbox tabs.
Change your inbox view to Default in Settings >See all settings >Inbox. You can then pick the Categories you want to see.
Fix Filters That “Eat” Important Emails
If you discover that you’re missing important emails–you simply don’t see them in your Inbox–it could be that your automated filters are skewed. In a nutshell, those messages are misclassified.
For example, if you created a filter to move emails based on keywords in the subject line such as “Project,” you probably expect matching messages to come from your project team. But you might receive a new email matching that same criterion from your boss or even a family member.
Select the filter in your settings, carefully review the criteria, and edit the filter to be more specific.
When “Moved” Emails Still Display in Your Inbox
At the beginning of this guide, we explained the difference between “move to” and “label as” in Gmail. To move emails automatically, it’s crucial to set up your filter to use both the Skip The Inbox and Apply The Label actions.
If you only use Apply The Label, this is the same as “label as,” so the message will be labeled but also remain in your Inbox.
Select Edit for the filter in the Settings, make sure both actions are marked, and click to update the filter.
Conclusion
Now that you know how to direct emails to a folder in Gmail automatically, you’re on your way to a more organized Inbox using a valuable time-saving feature.
And while the Gmail auto move to folder setup isn’t a difficult one, it’s not foolproof. Be sure to review your filters frequently and double-check them if you’re missing emails.


